Hello there!
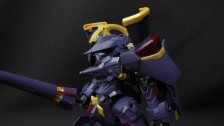
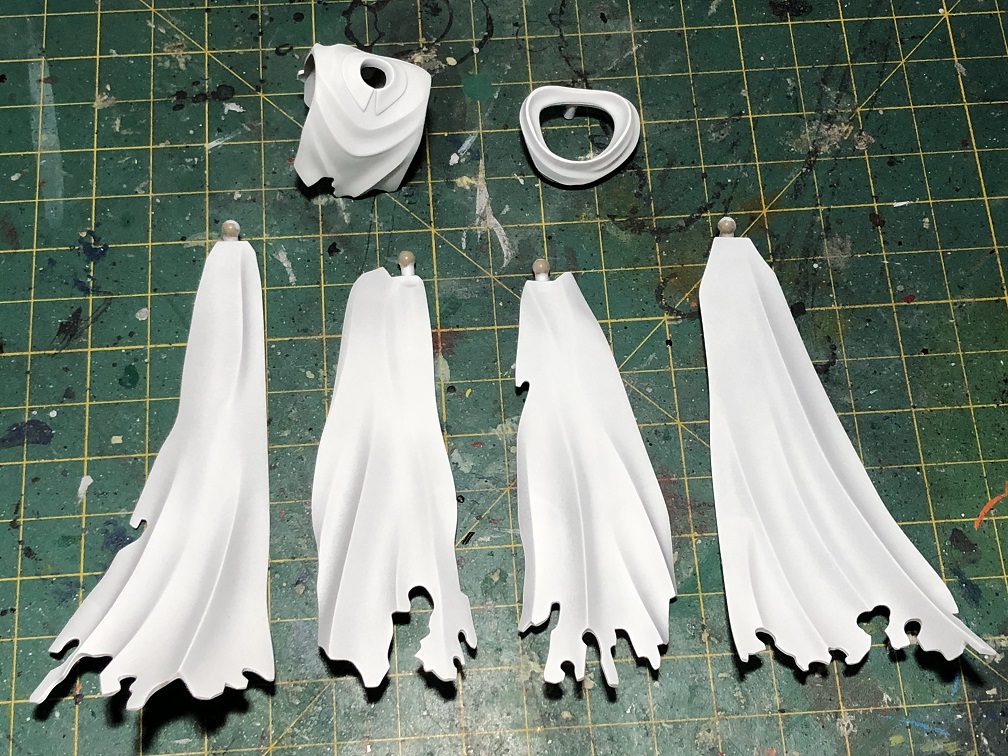
Welcome to a new tutorial! Today, we’ll be working with the Dress Up Parts Crash Mantle by Kotobukiya. I found it on the hlj.com site while searching for some cool accessories for my action figures. And I think this will be an awesome add-on for the Megami Device Asra Archer we painted in the last tutorial.
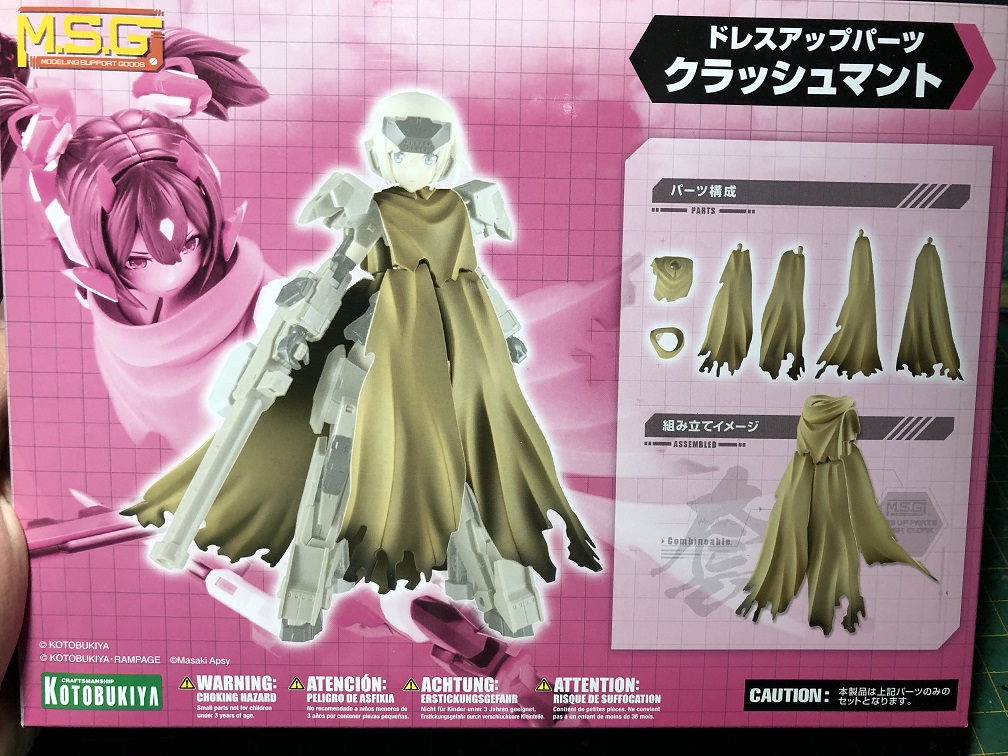
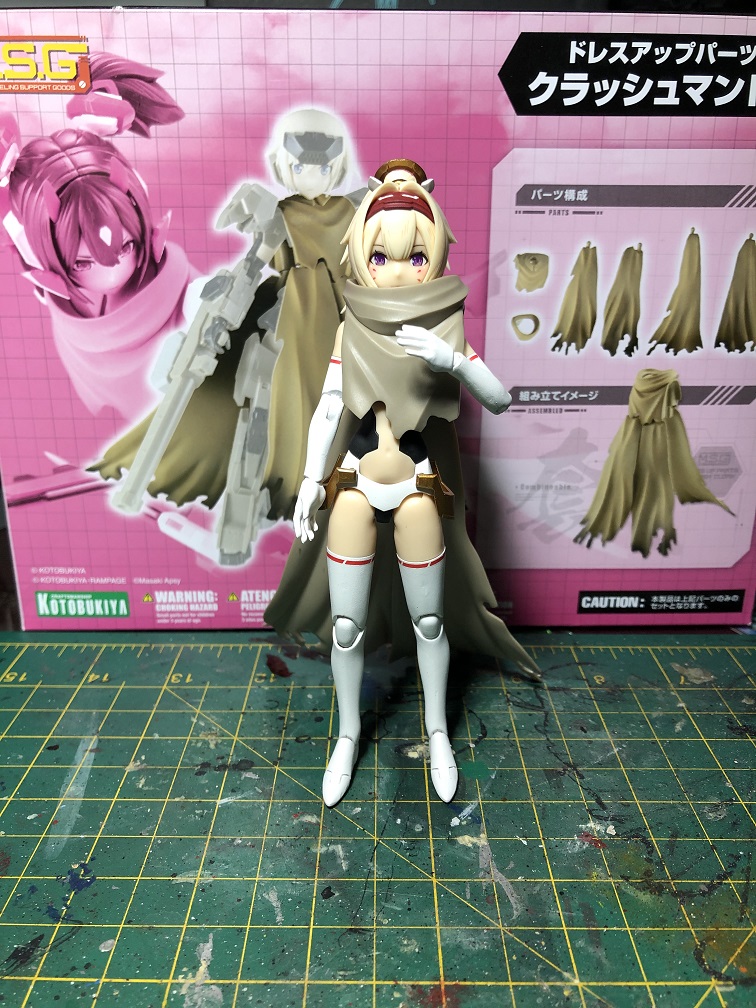
What I love about this item is that it’s also a model kit, and just like the Megami Device Archer, it came molded in color and ready to be displayed just after assembly.
But just like with the Archer, I think that this model needs a new paint job. I liked the beige color of the cloak, but I think that it will look better in white. So, let’s paint it.
This is going to be a quick tutorial. I’ll show you how, with a few shadows and highlights in the right places, we can make the cloak stand out.
Primer
The first thing we are going to do is to apply a primer. This coat will help the rest of the paint to stick correctly.
This primer will be also our base coat; since we want the coat to be white, let’s apply a white primer. The base color will help us to determine the overall tone of our paint job. For example, a black base coat would result in a dark paint job, and it would be a lot harder to cover it in white.
For this, I used a spray tin acrylic white paint. This can be done also with a hand brush or an airbrush.
Base coating
For this tutorial we are going to use only 3 different paints: Citadel’s White Scar, Citadel’s Corax White, and Vallejo’s Dark Sea Gray. In other words, the 3 paints you need are: a light color, your base color, and a dark color. For example, if you want your cloak to be red I’d suggest you to use the red as a base color. Then, use yellow or pink for highlights and brown for shadows.

First, we are going to paint our cloak with our base color. In the last step we primed the coat in white to be our base color. The issue with white is that you can’t use a lighter color for highlights. Therefore, I decided to paint the cloak entirely with Corax White, which is a greyish-white.
Don’t forget to thin your paints. Remember, two thin coats are always better than one thick coat.
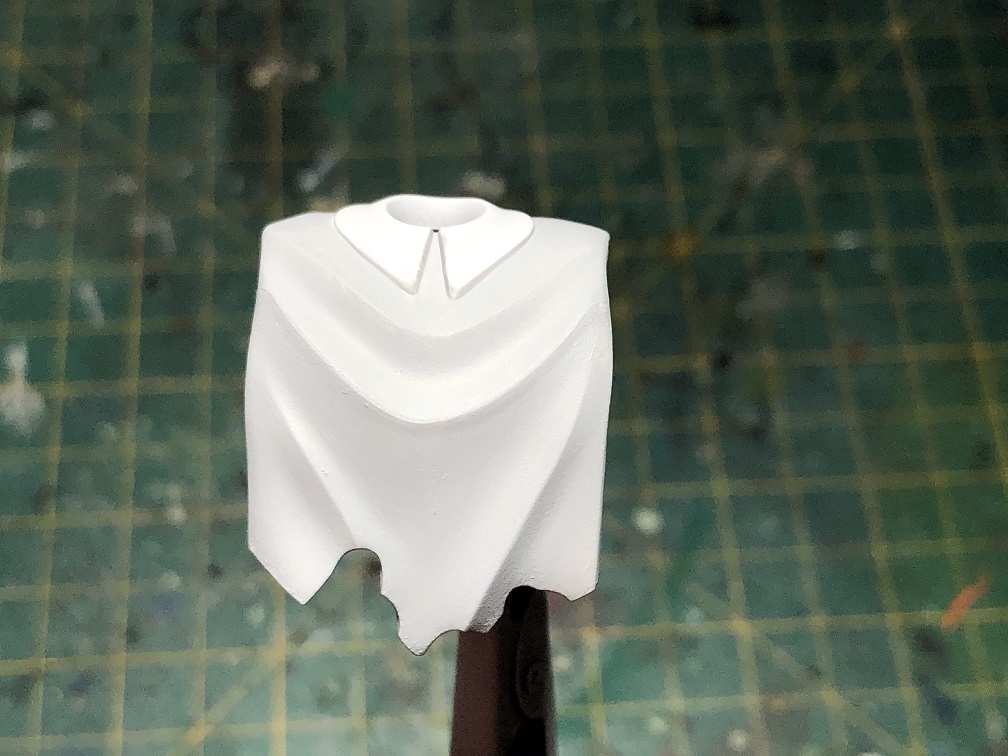
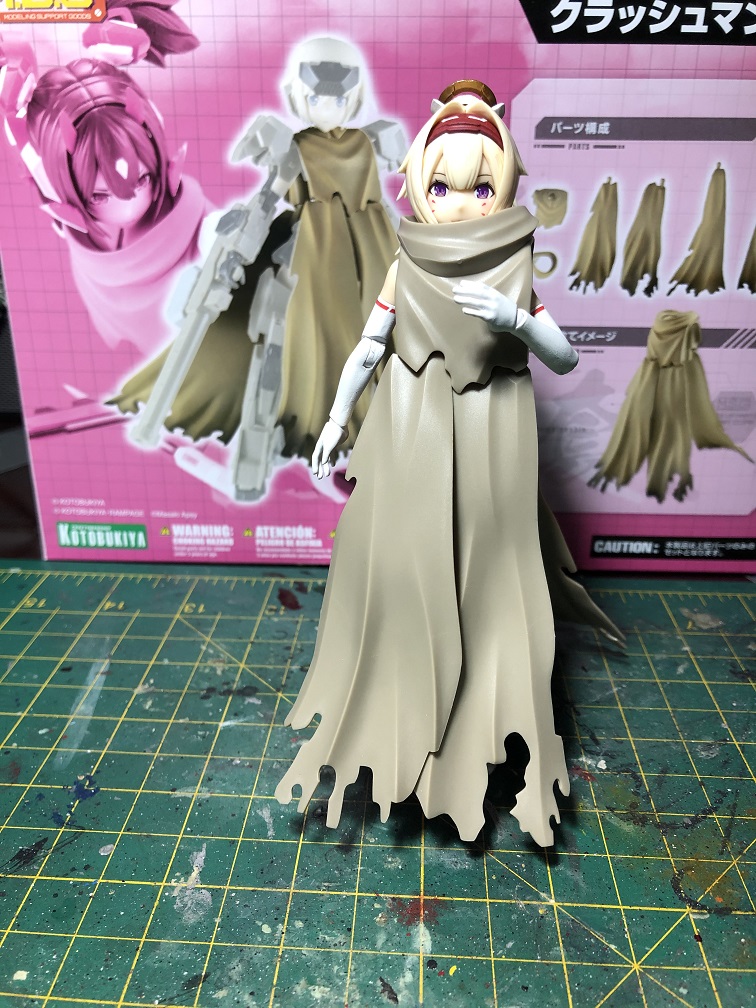
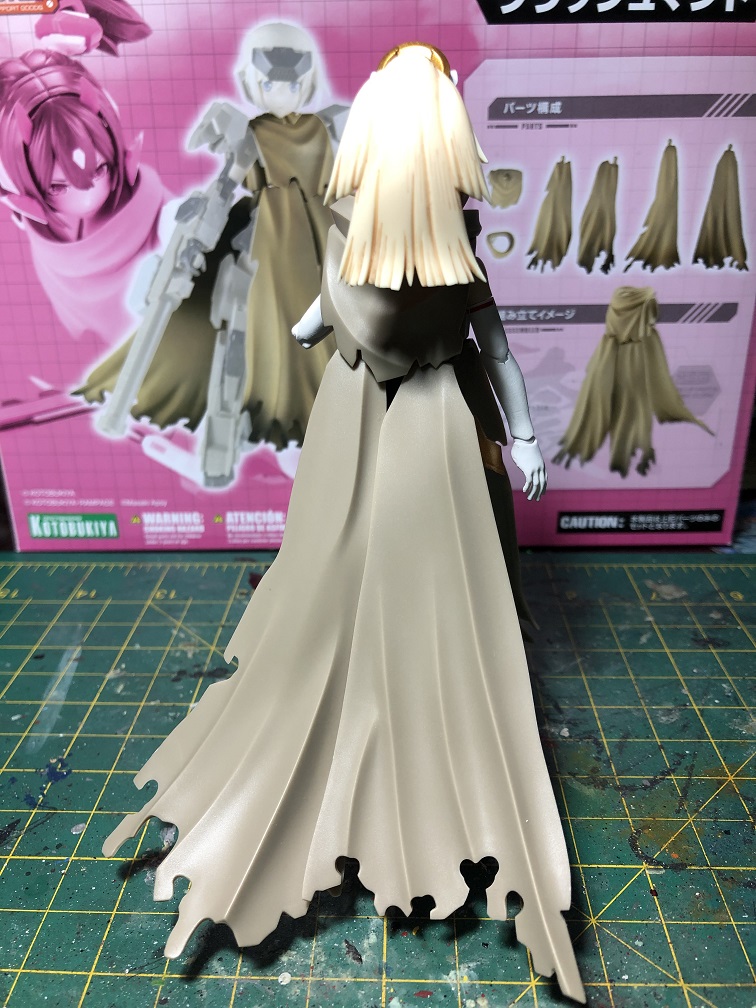
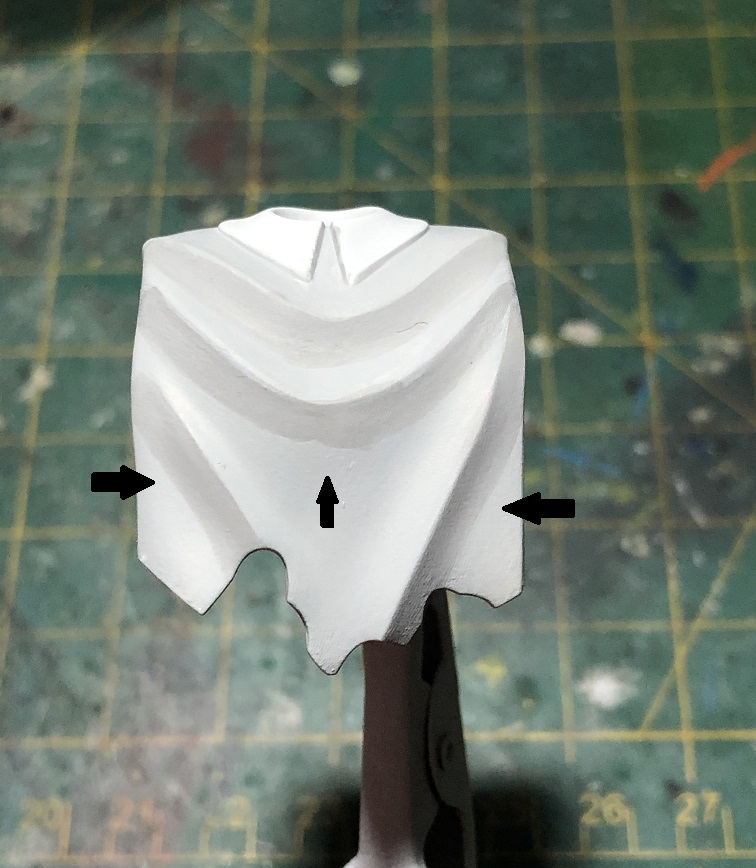
In the picture you can se how the shapes of the cloak create darker and lighter areas, despite of been painted entirely with just one color.
With this in mind, we are going to accentuate the shadows and lights to make them stand out. If you are not sure on where the lights and shadows should go, I recommend to put the piece you wish to paint under a good light and take a picture of it. This will be your “reference model”.
To accomplish this, we’ll follow 3 steps. First, we are going to exaggerate the lights and shadows. Then, we’ll create smooth transitions between tones. And last, we’ll add some highlights.
Light and Shadow
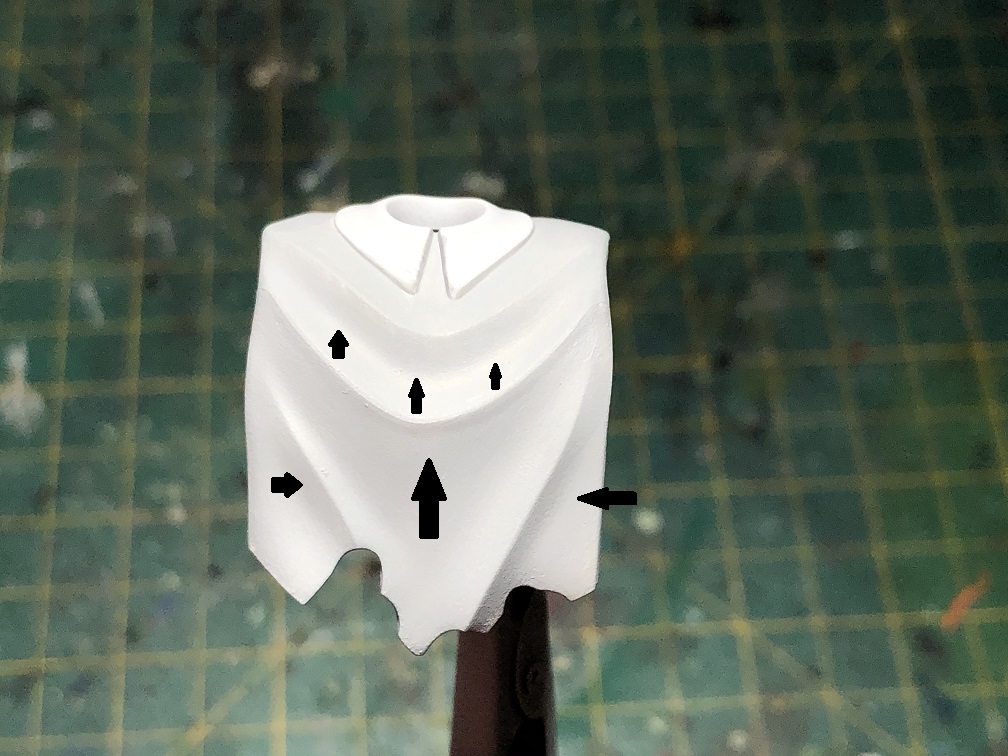
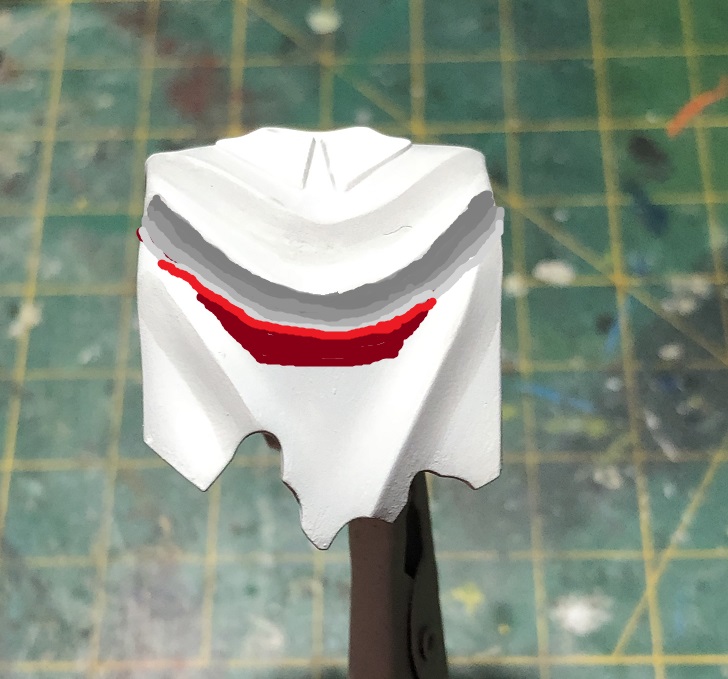
Let’s start by painting the shadows. Here, we are going to mix our base color with the darker color. In my case, White scar and Dark Sea Grey respectively.
As you can see, I applied the shadows according to the reference photo. Here, we need to make sure to paint the shadows in the right places. A misplaced shadow will make the paint job look a bit odd — not bad, just strange.
You will notice, as we paint the biggest shadows, that they may look rough or even bad. This is ok, we’ll fix this later.
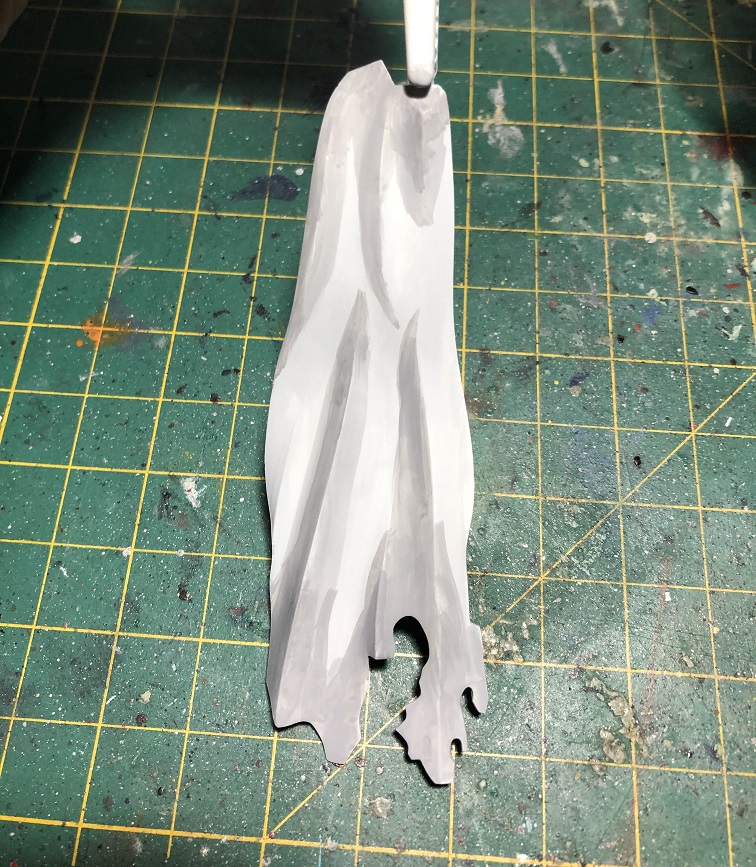
Now, let’s paint the lights. In general, this will be placed on the opposite side of the folds were we painted the shadows. But always use the reference photo as a guide.
For the lights we’ll mix our base color with the lighter color. In my case Corax white and White scar.

But be aware, these paint mix ratios are just an estimate of what I used. You may obtain a different result even if you nailed the same ratio I used. This ratios will also depend on what tone you are looking for. So don’t be afraid and mix those paints!
Smooth transitions
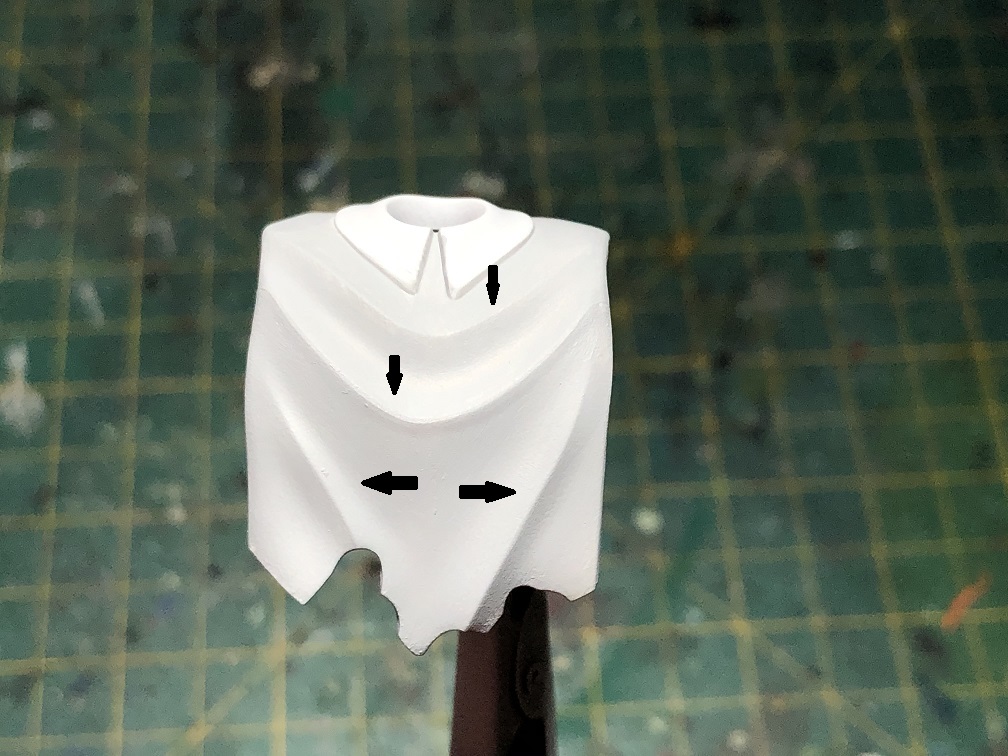
This step could be quite tricky and it surely requires some patience. What we are going to do is to smooth the transition between the shadows, or lights, with the base color of the cloak.
To accomplish this, we’ll be changing the mix ratio we used for the shadows and lights. For example, if the shadows were a 7:3 ratio, we’ll start by adding a thin coat of a mix at a radio of 8:2, then a 9:1 ratio and finally a coat of 100% of the base color.
We want to accomplish something like this:
I don’t have photos of the transition because the camera does not pick up the difference which, at the end of the day, is the main goal. But I’ll try to explain it with this images:

Let’s pretend that the grey color is a 50:50 mix for the shadow, while the red is our base color. First we’ll change our mix to a 60:40, for example, and apply a thin coat over the shadow. We need to make sure that we left some of the original color visible, don’t cover it completely. Then, well change to a 70:30 mix, and repeat the process. Remember to left visible a small amount of the last coat. Then, we repeat with a 80:20 mix. And finally with a 90:10 mix. Its ok if some of this coates also cover the base coat, this will make the color transition smoother.


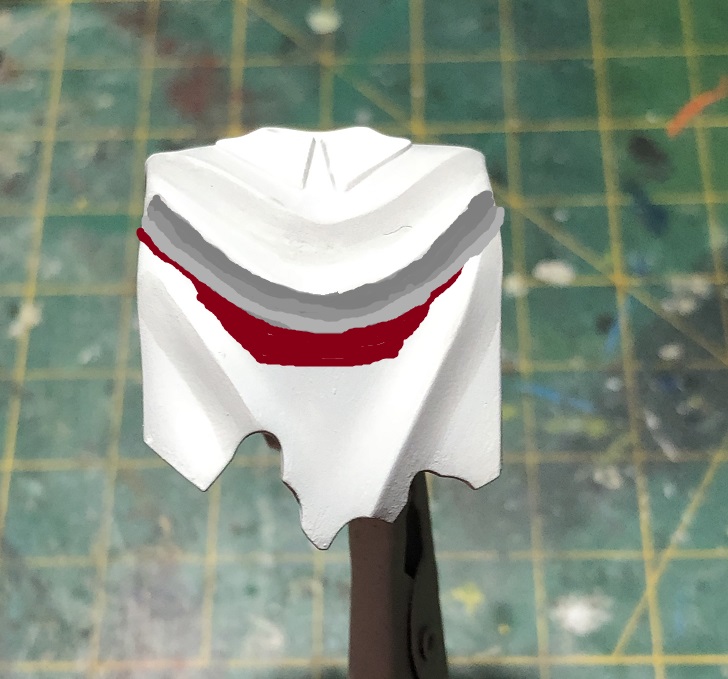

The subtle difference between tones will make possible a smooth transition. Therefore, if you add more layers with different mixes you will get a smoother result. This is why I said it requires patience. For this technique, you could let each layer dry before applying the next one. Or you could paint one over the other while they are still wet, this is called “wet blending”. Just remember to apply very thin coats.
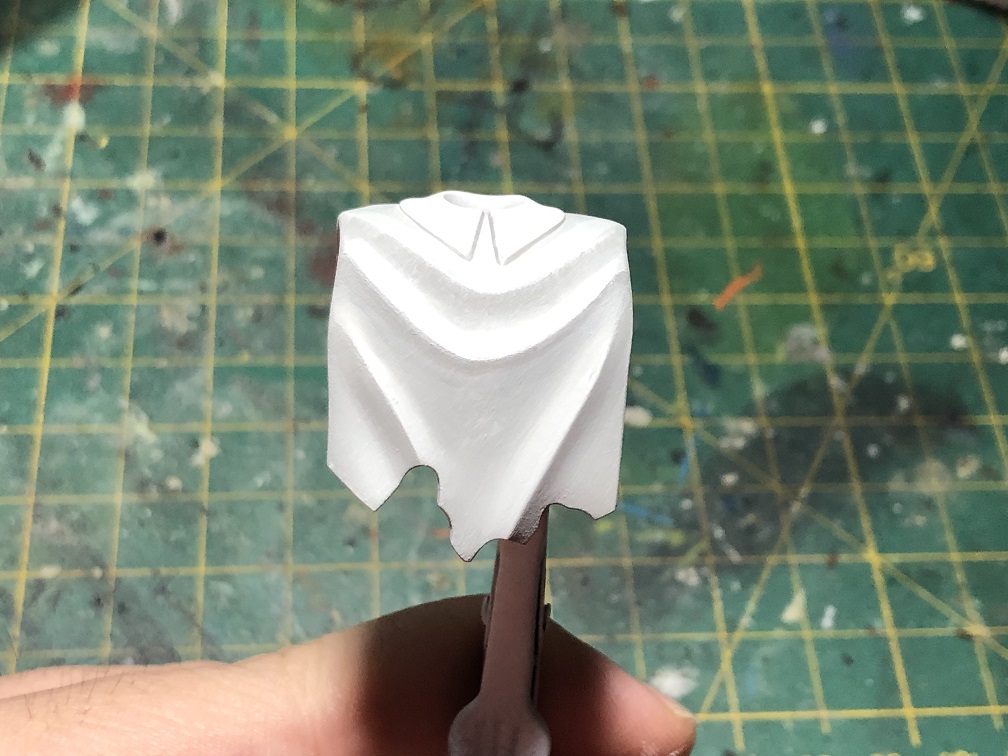
Highlights
Now, to finish the paint job we’ll add some highlights. For this, we are going to use our lighter color. In my case, that’s White Scar.
What we are going to do is to paint the edges, or crests, of the folds. We need to make sure to paint only the edges. I recommend to use the side of your brush.
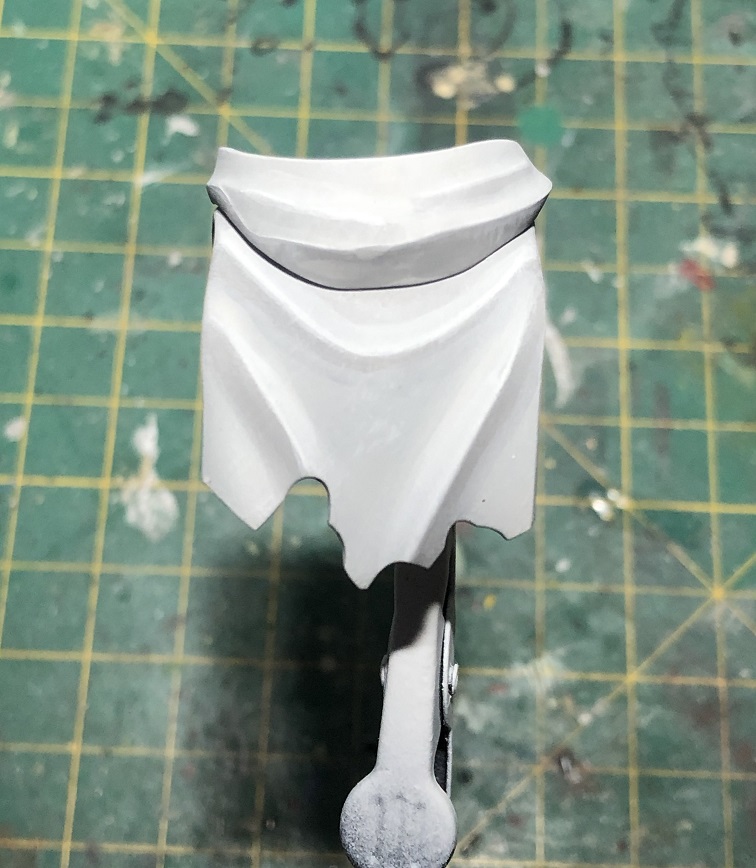
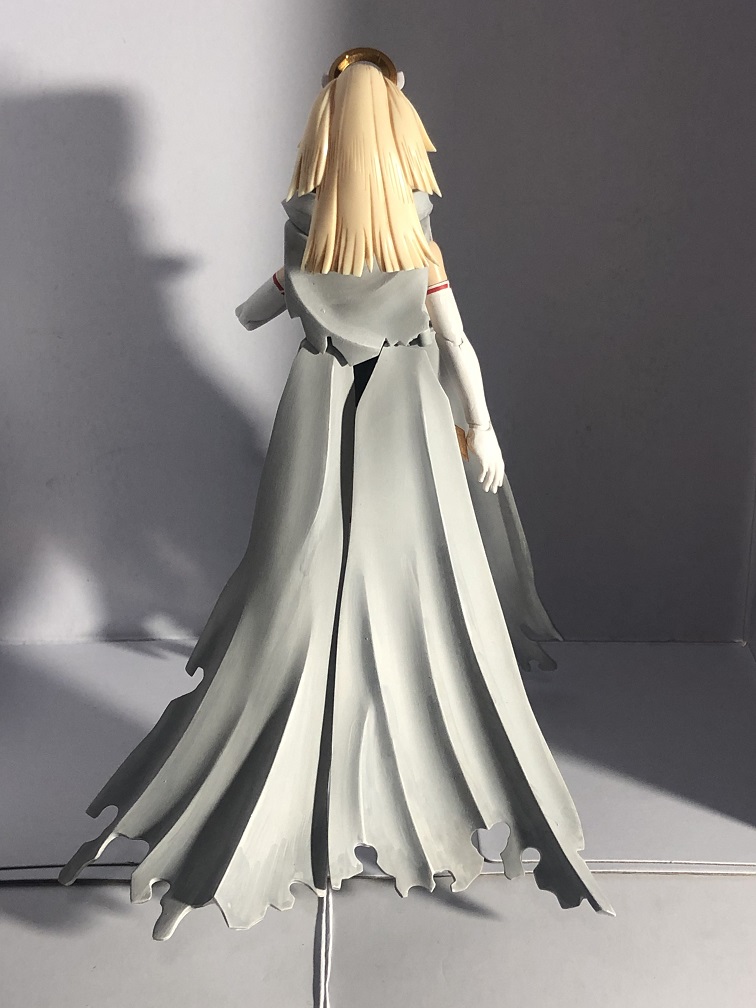
This will make the folds of the cloth stand out.
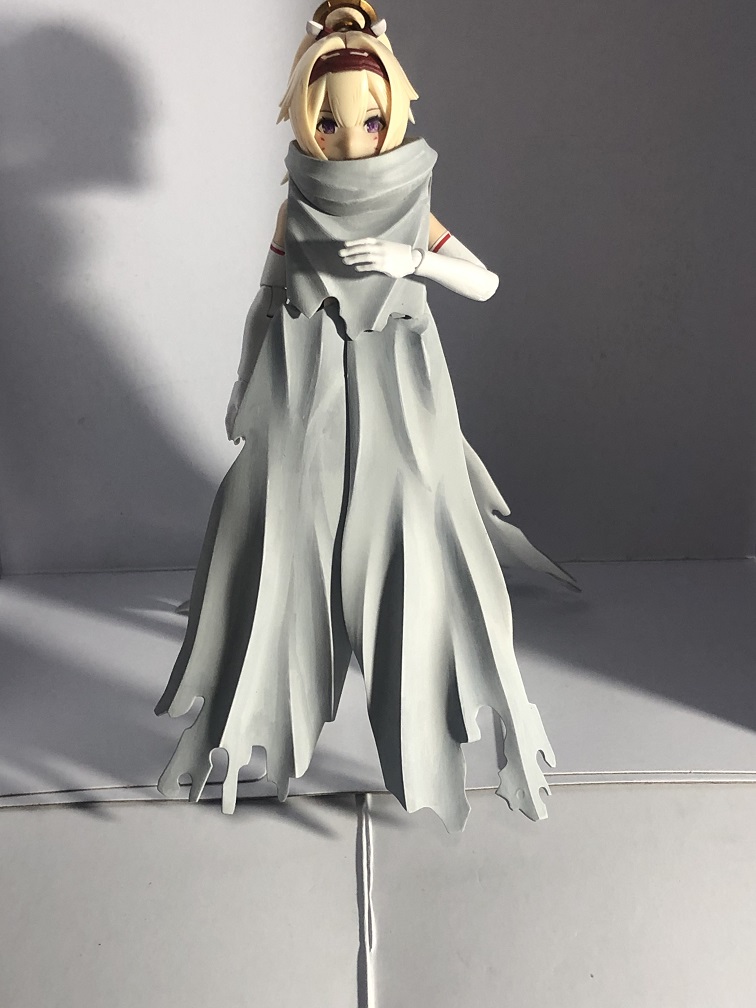
To the photo shoot
And with that, we are done! All these techniques and effects can also be applied to any type of model kit. Specially if you are going to build a diorama.
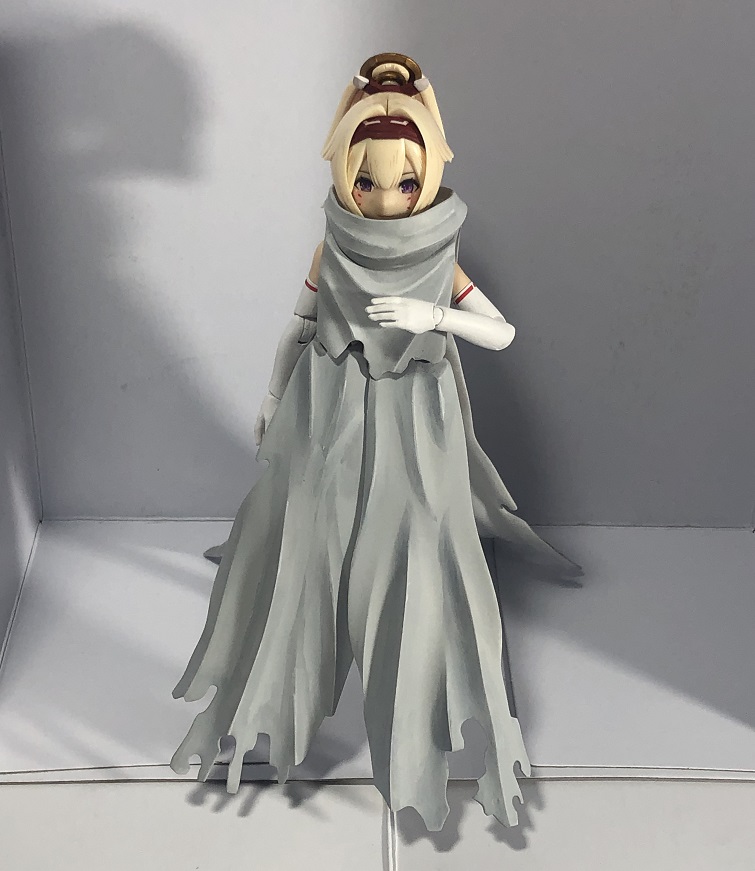

Up close, it may look quite rough but I asure you that it will look awesome whet you take some pictures or when you look at it up on your shelf!
I hope you liked this quick tutorial and find it useful. This effects are quite simple but can make your model kits stand out!
If you wish to grab your own cloak or any other MSG accessories you can do so at hlj.com!
See you all on the next one! Happy modeling!