@whitedevil30th
Active 2 years, 6 months ago-

Legacy40k posted a new activity comment 5 years, 10 months ago
Looks awesome… I would have entered in the advanced category if I had time to do that good of a job.
-
Legacy40k posted an update in the group
Intermediate Modeler – Modeling Competition 2017 5 years, 10 months ago -
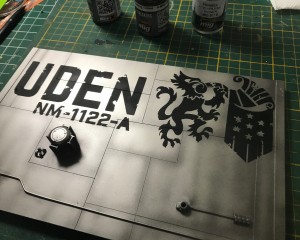
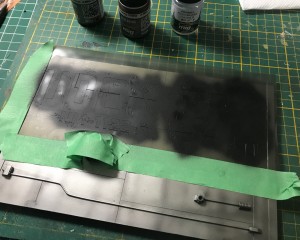
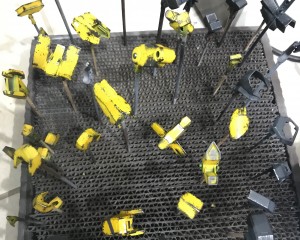
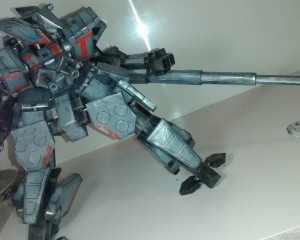
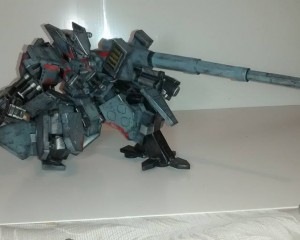
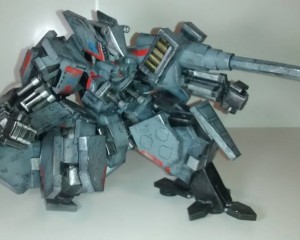
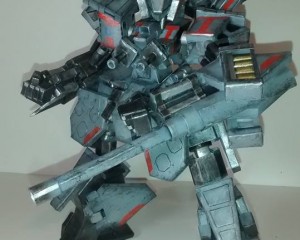
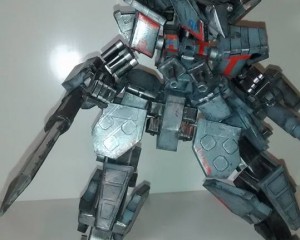
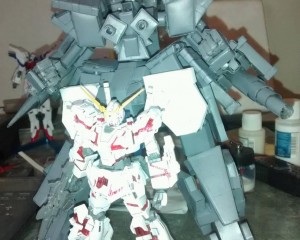
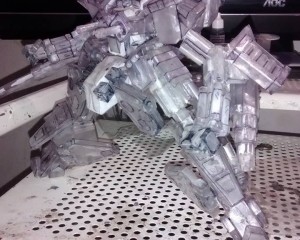
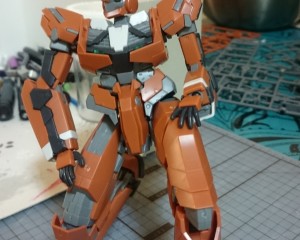
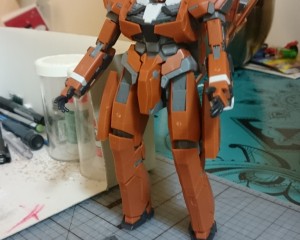
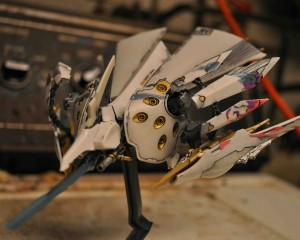
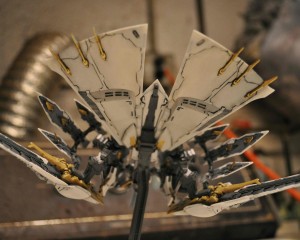
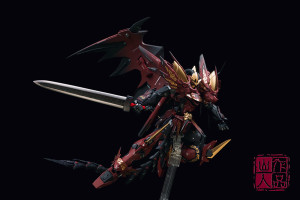
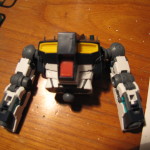
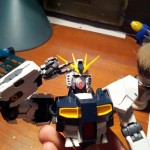
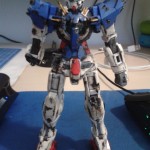
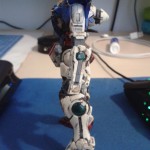
tentgon posted an update in the group
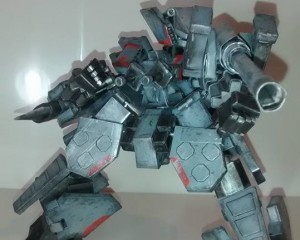
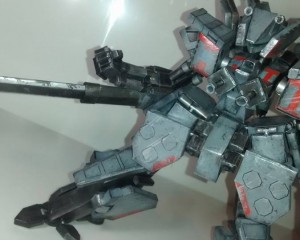
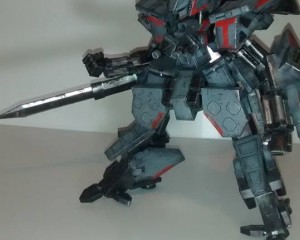
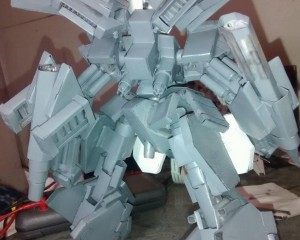
Epic Sci.Fi Scratchbuilding 6 years, 1 month ago-
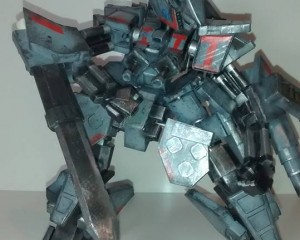
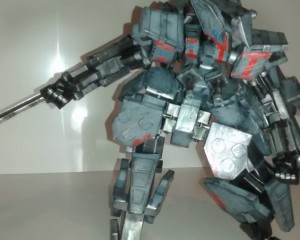
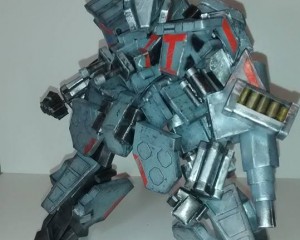
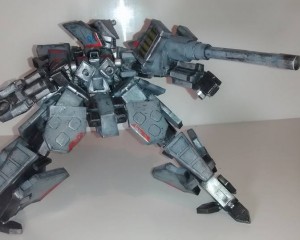
Armored Core?
-
The inspiration comes from many references but yes I am very fan of armored core, games and models
-
-
AllDaLazurs posted an update in the group
Kotobukiya Fanclub 7 years, 3 months agoSnapped together my KG-6 Sleipnir kit! Was a lot of fun to do something other than Gundam. Ends up being about as tall as an average MG kit, and while there is great molded…-
Not bad. A quick way to finish a model without painting is to take good care of the nub marks (sanding) & a clear coat of your choice.
I would buy this kit if the shipping isn’t expensive. Why must it be EMS? I could wait.
-
Yeah, will definitely be doing some sanding, but I’m wanting to do some paint/weathering too. Maybe make it look a but battle scarred, as this mech seemed to get pretty well used and abused on the show.
-
Does Koto still produce this kit?
-
Yes.
-
-
aerodynamike posted an update in the group
Kotobukiya Fanclub 7 years, 3 months agoI completed these two kits a bit ago. The ikaruga kit was my first time adding a bit of paint and using waterslides. I feel like the kotobukiya kits pushed me into trying out…-
Good work.
Koto makes some very interesting models.
-
You might wanna try Armored Core & Frame Arms.
-
I have one in Black and I customized that one for the It’s a Gundam Annual Contest last year.
-
I guess its pretty much the same kit. I like how the wings turned out on yours.
-
They really do I have two kits from the Koto company and they have great features.
-
Thank you for sharing, and you did a wonderful job on the paintwork. I have these kits myself too, but I haven’t had the courage to start painting. Did you paint this with airbrush or paintbrushes? The kit is excruciatingly small, and I obviously had to glue some of the parts. Dunno if it’s possible to pre-shade.
-
All I did with them was hand paint the details with enamels, gloss clear coat krylon acrylic, panel line wash enamel, matte coat with krylon acrylic. Take the plunge. Even if it doesn’t turn out the way you want its a learning experience. I’m buying an airbrush set this week, so I expect some failures on the way! Thanks for the encouragement.
-
-
Big Rich posted an update in the group
Gundam Build Fighters Try 8 years, 10 months agoGUNDAM BUILD FIGHTERS SEASON 2 ANNOUNCED!
http://www.gundamkitscollection.com/2014/05/gundam-build-fighter-season-2.html
-
YEAH!
-
I’m so excited 😀
-
-
Hurricane.force posted an update in the group
Mobile suits that need HG/MG 8 years, 10 months agoLooks like we are in for a treat with the new 1/100 Reborn one-hundred grade , the first kit will be Nightingale ! Cant wait for the show report to get more details.
-
Maybe we’ll see 1/100 kshatriya from this line.
-
=D
-
ther tried a master grade prototype but it was too heavy.
-
-
-
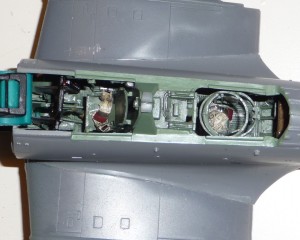
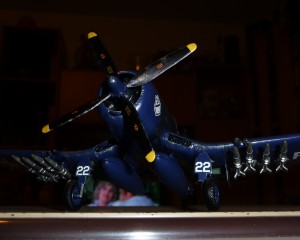
Ratatarse posted an update in the group
Aircraft Modelling 8 years, 10 months agoa very old F4U4 from Academy, built almost 15 years ago, had a light cure to train me to new techniques… still missing the gun sight, too lazy to make it by now…
and goodies for future tarmac scenes, and the beginning of a build on SBD4 from Accurate Miniatures…-
Very nice job on a gorgeous WWII bird. Always had a soft spot for the Corsair!
-
Thank you Aaron.Mai !
This one is an old Academy mold, not accurate… it was for training me to aero and dry pigments essentially…
Got others Tamiya Corsairs to build, I want them to be far better than this one… work to do with CMK’s ultra detail parts for some of them ^^
-
-
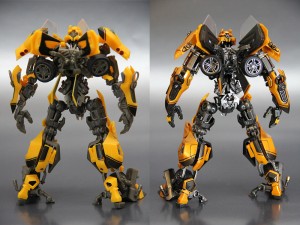
Hero posted an update in the group
Advanced Modeler – Modeling Competition 2013 9 years, 2 months ago-
I like how you worked on Bumblebee. Like how you painted the some of the parts with metal.
-
-
xamel1975 posted an update in the group
Aircraft Modelling 9 years, 3 months agoThe build that almost “killed me” :), Testor’s 1/48 SR-71 Blackbird – gears up.
I’ve added True Detail’s cockpit – which I regret later since not much can be seen with closed canopy.
Initially, I wanted to build a hi-vis version but the decals deteriorated once it touches the water. I gave the decal sheet a layer of clear coat and switch to…[Read more]
-
I like the work that your showing with this Blackbird. I don’t know if you build any Gundam kits, but another modeler built a Blackbird plane with a Zeta Plus C1 into one model kit, and it also transforms into a plane too.
-
Thank you! I originally started out as Gundam modeller :). Now I have expand my interest into other genres, mainly aircraft. I’d love to see the said Zetaplus C1. Do you have any links of the work?
-
-
Derringer posted an update in the group
GBWC 9 years, 4 months agoN. American Representative: Legendary Mobile Suit PWS-02
by Kevin Yi Zhang (Connecticut USA)http://www.bluefincorp.com/catalog/2013Winners
http://www.plamocon.com/index.php?/page/articles.html/_/news/announcing-gbwc-2013-winners-r75 -
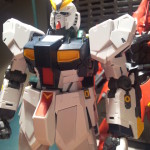
Midnightshootingstar posted an update in the group
Intermediate Modeler – Modeling Competition 2013 9 years, 5 months agoHere is a WIP update.
Like I said in my previous WIP, I’m a very slow builder.
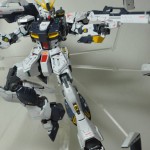
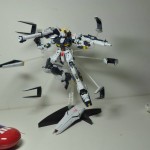
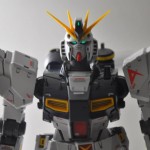
After almost a month, I finally finished the build on my Nu Gundam Ver. Ka.
I still need to build the weapons and the funnels.This kit is bigger then the average MG that I have.
Super awesome 🙂-
I’m gonna have a rival here 😉
-
Haha, thanks for considering me a worthy opponent 😀
But I noticed there are a lot of people building this kid. so we will be having a lot of rivals here 🙂
-
-
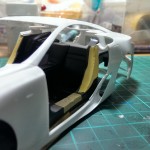
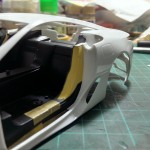
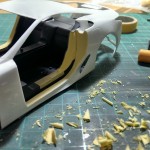
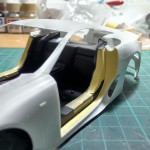
Eric posted an update in the group
Advanced Modeler – Modeling Competition 2013 9 years, 6 months agoHello, some update on my entry. Just done the basic shape of the door jamb. More work to go.
-
nishinbo posted an update in the group
Beginner Modeler – Modeling Competition 2013. 9 years, 6 months agosorry, im not a great photographer but please… bare with it. =p
-
Nice weathering
-
Welp, this is in the wrong class. But regardless, this is very nicely done. Two thumbs up.
-
Like the battle damage on this kit.
-
thanks guys! all done with a real touch markers. true.. this is not really related to the competition. getting ready for my entry soon…
-
very nice detail man.
-
Sazabi04 posted an update in the group
Intermediate Modeler – Modeling Competition 2013 9 years, 6 months agoWork in progress of my nu Gundam rx93, so far i have finished custom painting my kits waist and shoulders with Flat grey, Flat metal grey, with some Chrome silver part, and i added a picture of a drawing of my rx93 i made a while back ago, and also a picture of my home made spray booth i made out of a shoe box since im kinda tight on money at…[Read more]
-
The drawing is real nice, the Nu is looking good….one question, your “spray booth”, how does it extract? Does it extract?
-
The thing is I wear a spray mask to keep from breathing the spray fumes. Some times I have a fan to blow out the fumes. For now I have to use this untill I can buy a real good pro spray booth ;/
-
I got a really fold up portable one like this http://www.youtube.com/watch?v=sUTy824G3mo for about $120 NZ ($60 US) and it’s awesome….really good machine.
-
The problem is, you can burn your hair right off if something goes wrong, and it could pretty easy. Burning your hair and eyebrows would be the least of your problems to be honest. 😀 Burning down everything else would. I have a window open right over my head while working but still I’m not al that comfortable while cleaning and flushing my air…[Read more]
-
-
-
-
Oli8all posted an update in the group
Beginner Modeler – Modeling Competition 2013. 9 years, 6 months agoW.I.P 2# I have put together the torso, with the beginning of the back pack, because I just thought it was looking empty… I have also, done a clear gloss core on the inner frame to make it shine more, I have then put on the decals that I wanted and then flat coated the armour parts and re-built it…. I then using a gold marker( Uni Paint…[Read more]
-
Sorry about the doubling up on the pics… I don’t know why it did that!?
-
Looks solid from my view. I can’t tell if it’s just smudges on my comptuer screen or not but maybe touch up the numb mark on the gold V on the head and the panel lines on the fore arms. I can’t tell if its numb marks or panel line issue but it looks like 3 squares on it? I’m just nit picking to help ya out, on the whole it looks amazing.
-
If they are supposed to be there on the fore arm then my bad, I’ve never done this kit lol.
-
thanks for the tips, the three squares on the right fore arm…. are nub marks i’ve tried and tried to get rid of them as much as i can and the flat coat as helped a lot as when i was panel lining the grey it kind of rubbed off on them and made them stand out:/ but its as good as i can get it, without ruining it. but i appreciate your help. I…[Read more]
-
-
-
Those miniatures. HOWWWW. They look SO good.
-
Thansk man!
-
-
Well thanks for the shout out mate. I can see that that paint worked for you, and your figures are super, very nice work my friend.
-
No Prob mate, and thanks a lot @STUFAS
-
-
-
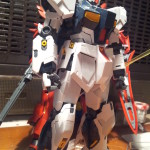
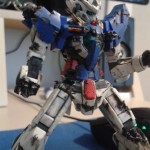
Omaikane posted an update in the group
Beginner Modeler – Modeling Competition 2013. 9 years, 6 months agoWIP 1 MG Aile Strike RM: Post 3
Ok so in my last post, I decided I was going to paint the inner frame on the runner. In preparation for it I’ve been doing some research and watching various vids and reading some other’s peoples experiences. I’ve learned that in the areas where movement is needed, paint can make the joints extremely stiff and…[Read more]
-
Nice! I can’t wait to see what you do with it!
-
I have this one too. RG are really new to the Gunpla world. That’s the first RG kit I bought.
-
-
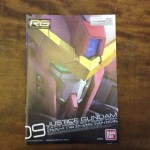
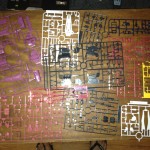
MeatBuns posted an update in the group
Beginner Modeler – Modeling Competition 2013. 9 years, 6 months agoHello!
Recently got into the hobby.. I hope we can be friends. 🙂So uhh.. this is the kit I will build for the Modeling Competition.
THE RG JUSTICE <3
-
This is a nice kit. Best of luck!
-
Thank You!
-
-
Welcome to the community. I enjoyed building that kit. Hope u have fun too.
-
saleem posted an update in the group
Intermediate Modeler – Modeling Competition 2013 9 years, 6 months agoAll the lighting is installed in my hunter killer, I used the kits clear parts on the stabiliser and sanded flat a blue and red led to fit in the stabiliser, they make the clear parts glow enough for it to be noticed.i have wored up yhe stand with the power wires.
I fitted 2 small pieces of metal in the hunter killer where the stand is inserted…[Read more]
-
Man, that is so cool. Respect.
-
Amazing bro. Would love to see a ‘low light’ shot to see her really light up….
-
-
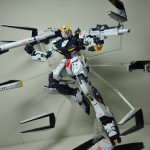
NinjaJoe posted an update in the group
Beginner Modeler – Modeling Competition 2013. 9 years, 6 months agoFinish the Nu ver Ka my first mg. I am quite happy how it turn out, still abit more touching up to do but it’s almost there enjoy.
-
for your first MG thats a great job mate, well done 🙂
-
That looks so good. You did a great job with the decals, I built one myself and really enjoyed it too. Nice!
-
Thanks guys. It was a really amazing kit never regret getting him. I am planning to top coat it but I am not really sure what top coat should I use. :0
-
-
Dude, that is sick.
-
Very well done. Not much i can see wrong with it.
- Load More


I need to look at some of those contest entries myself. Some good artworks.