Hello there! Welcome to a new series!
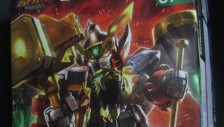
My name is Anthony and today I want to share with you some tips I used while converting a “generic” model kit mech into a custom mech from a movie, anime, or game. In this case, I’ll convert a Kotobukiya 1/72 scale Gun Sniper with Wild Weasel unit into Naomi’s Red Gun Sniper Special from the popular 2001 anime Zoids: New Century/Zero.

Sometimes, the manufacturers of these kits release these “customs mechs” as special editions and they could be hard to find. In the specific case of Zoids, it’s been years since a “character special version” was released. Except for the 2 mechs from Zoids Wild, the rest of the kits are based on de original Zoids Battle Story. I actually love this because it opens the possibility to get awesome Zoids like the Black Shield Liger DCS-J or the Death Stinger ZS.
But sometimes I just wish that Kotobukiya re-release some of its old models, like Bang’s Shield Liger or Hiltz Death Stinger. In the meantime, we can choose any of the new models and customize them to recreate one of these special machines!
Planning
References and Notes
Before we start this custom build, I encourage you to create a “Reference Folder*”. I also encourage you to take notes of every find, technique, and modification you made during your build. All of this will be useful in the future, and not only for this build but for future builds as well.
*Not sure if that’s the real name but that’s how I usually refer to it.
The “Reference Folder”
The idea is to gather as much visual material as possible to be used as a reference and inspiration for our build. This folder will be useful along the way. Especially if we’ve lost our way or don’t know how something could look.
This can be a “digital” folder, or you can even print these images to create a physical one. Having all this material gathered in one place will save us a lot of research time in the future.

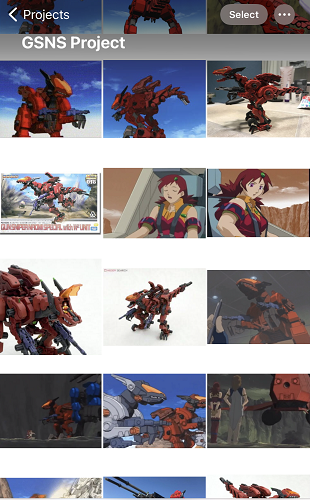
This is my “reference folder” for this project. I gathered some images from the internet of the anime and Kotobukiya’s Gun Sniper N.S.
Taking notes
I suggest you take some notes during your customizing and building process. This can be done on a physical notebook, on your phone, or PC. Here you will write down any problem you encountered along the way as well as how you fixed it and how or why it happened. Write down your paint recipes and where do you use them as well. This will come in handy in future builds. Especially when you face similar problems or just wish to replicate one specific color you have already made.
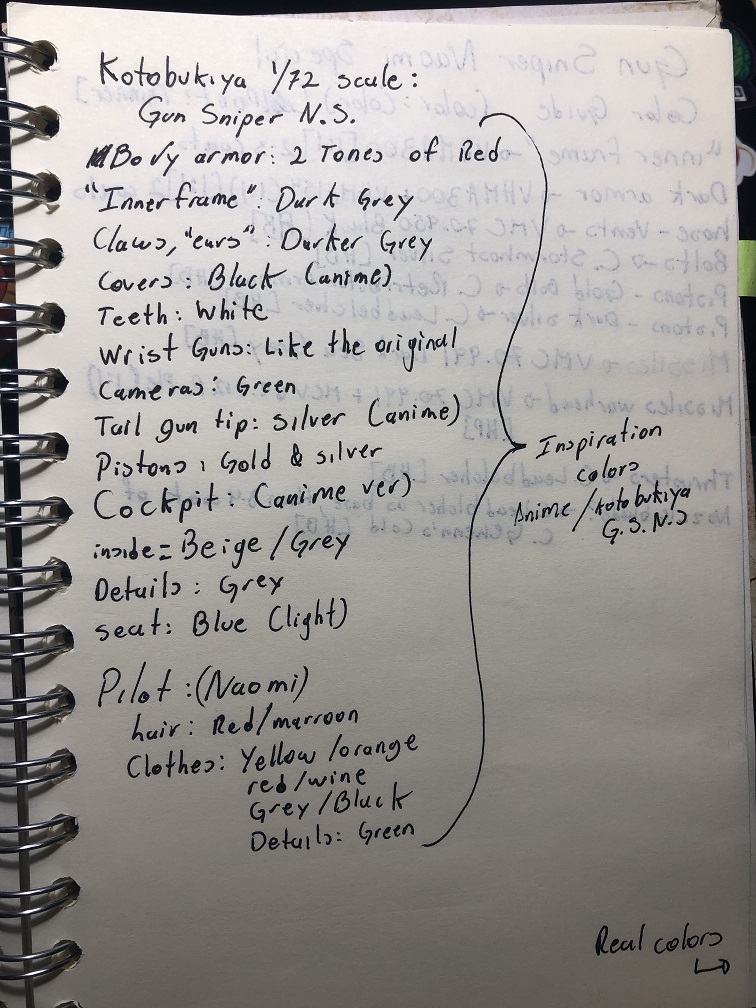
As you can see from my notes, I write down the color palette for this build. I took different aspects from each source. For example, the two shades of red for the body are inspired by the anime version, as well as the silver tip of the tail. From Kotobukiya’s original model I took the dark grey details of the armor.
With all this in mind, it is time to begin the actual build.
First Build
We’ll start by cutting off the pieces from the sprues. Then we’ll remove any numb marks with a hobby knife. And finally, we’ll smooth the surfaces with some sanding paper. As usual.
Now, this time there is something different I want to show you.
After building a few Zoids and Gunpla kits I notice that taking them apart can be quite tricky. Model kits like these are meant to be built without any glue. Therefore, their pieces are designed to fit almost perfectly and to be hard to disassemble. If we are not careful it’s more likely that we break some pieces here and there, trust me, it has happened to me several times in the past.
But fear not! There is a nice trick we can use to get around this issue! Just be aware, it’s more likely that we’ll need to use some glue for the final assembly.
Could disassembling be easier?
Pieces for these kits are designed to have several pegs or some large ones.
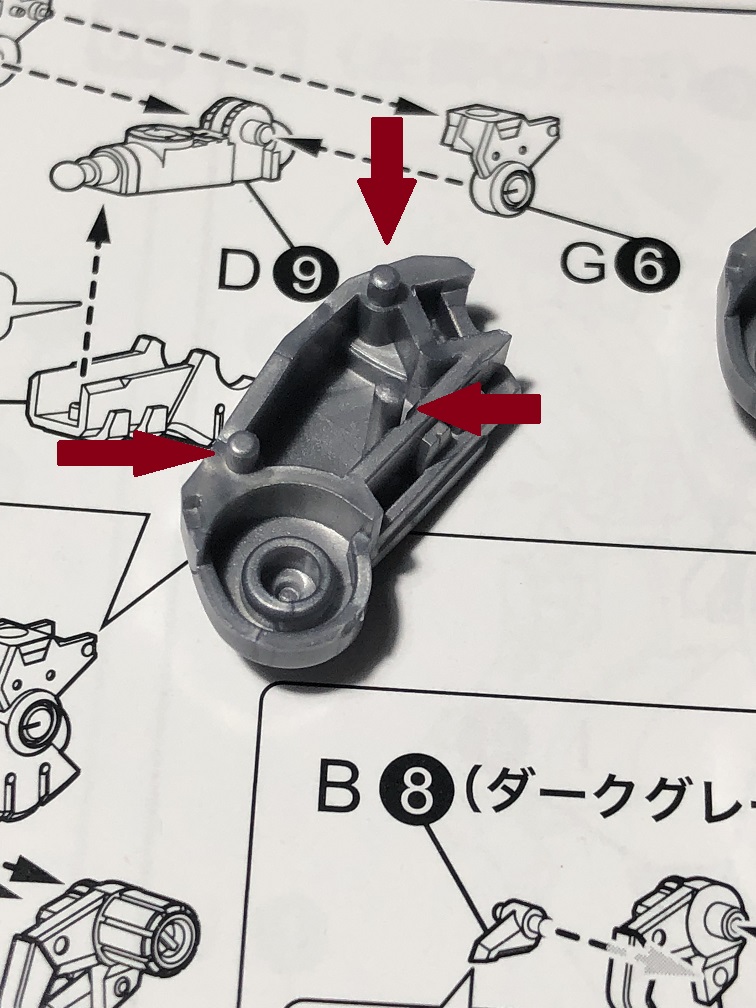
All these pegs secure the pieces in place but make the kit harder to take apart. What we are going to do is to trim them down or cut off some of them.

Pegs removed Pegs left

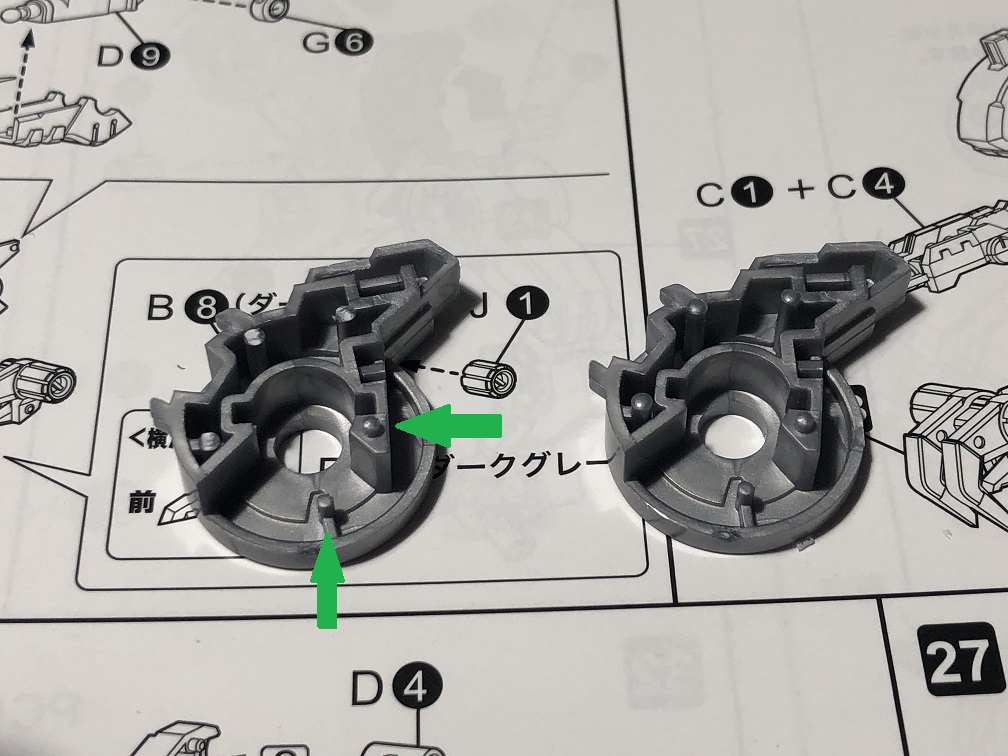
Removing some pegs will make the model a lot easier to disassemble, while those pegs left will help to keep it assembled without glue.
Another good alternative could be this awesome tool reviewed last month!
Sniper Upgrade
If you look carefully at the design of Naimi’s Gun Sniper you may notice that it’s almost the same as any other Gun Sniper, except for one thing. This Zoids has a custom muzzle brake at the tip of the tail. I’ll be honest with you… I didn’t notice until I was done painting all the grey parts of the inner frame, including the tail gun. That is why planning is very important.

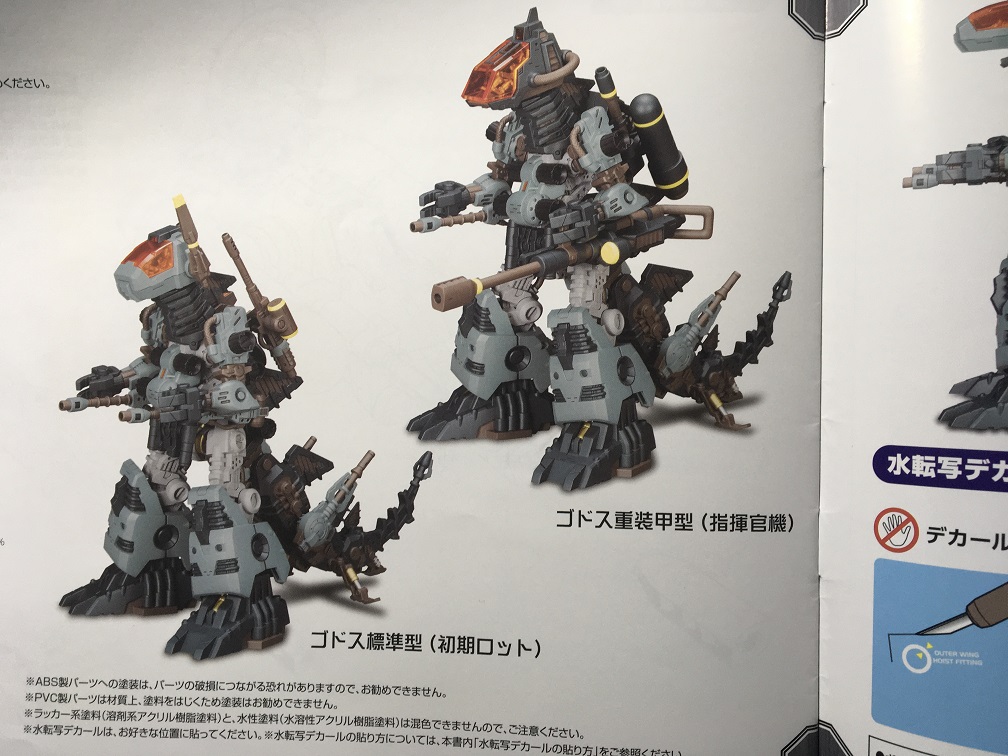
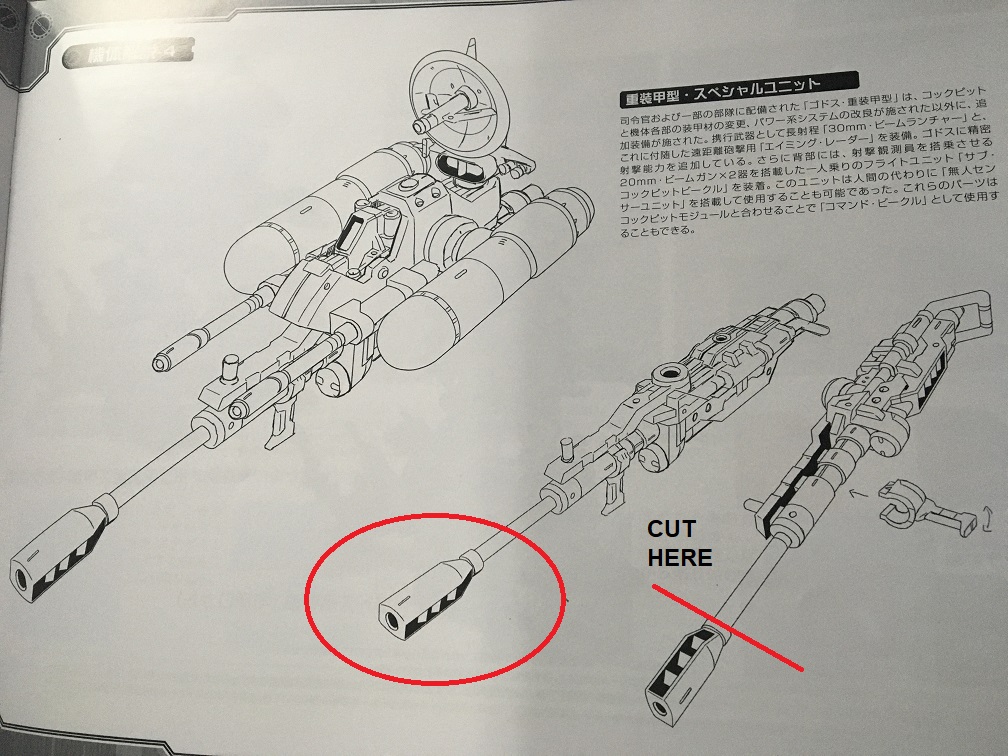
This should be a quick modification. At first, I thought about sculpting the muzzle brake with some epoxy putty. Then, I consider building it from scratch using some styrene. But then I realized that there’s another Kotobukiya Zoids model that came with a big gun with a similar muzzle brake. That’s the Godos Former Republic Ver.
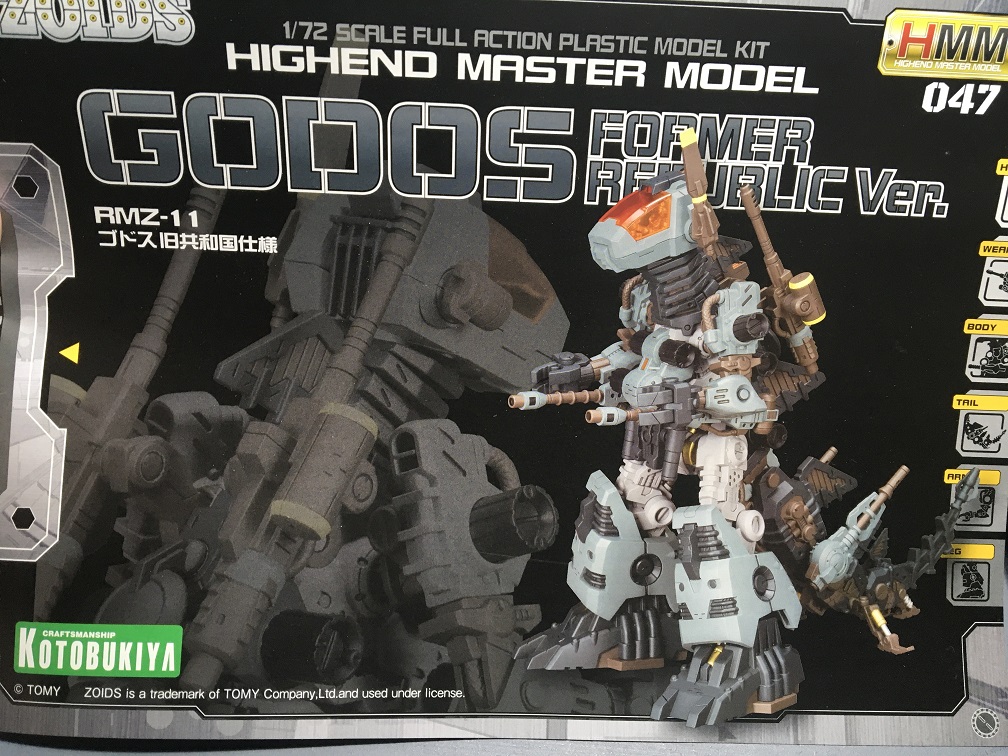
When I built that Zoids for another series I never used the cannon that came with it and toss it into my bits box. Now, it’s time to use it.
And here is when my next tip comes in: Always keep all the spare parts! Don´t throw away anything! You never know when you are going to need some extra bits.
The magic of kitbashing.
Kitbashing is the process or technique of modifying or creating a new model kit using parts from a different kit. For this project, we’ll do a simple kitbash. The tools we need for this are our nippers, hobby knife, and sanding tools.
First, let’s use our nippers to cut off the muzzle brake from the cannon.
Make sure to cut as close as you can to the muzzle brake. Let’s do this for both guns.
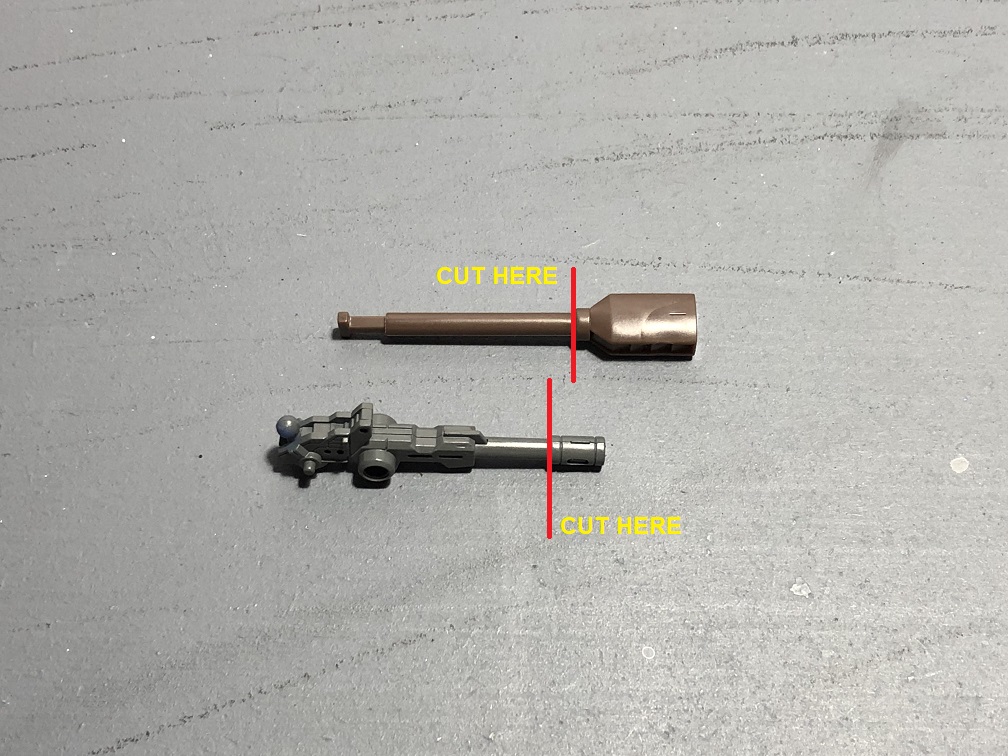
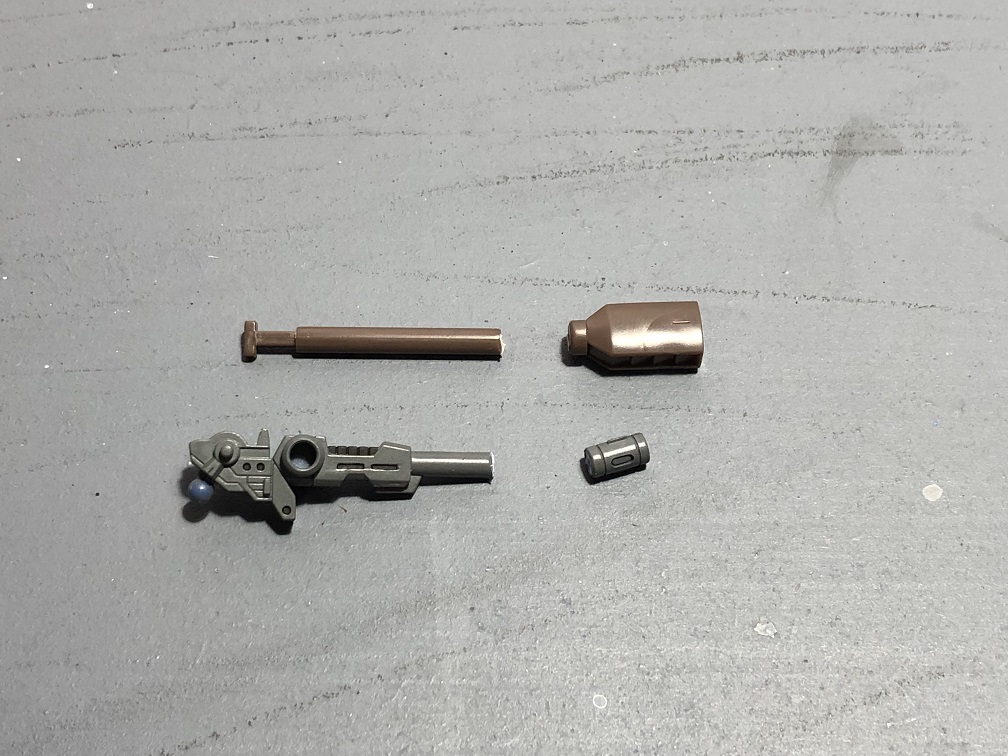
After that, we need to remove any burr left where we cut into our pieces. For this, we’ll use our hobby knife.
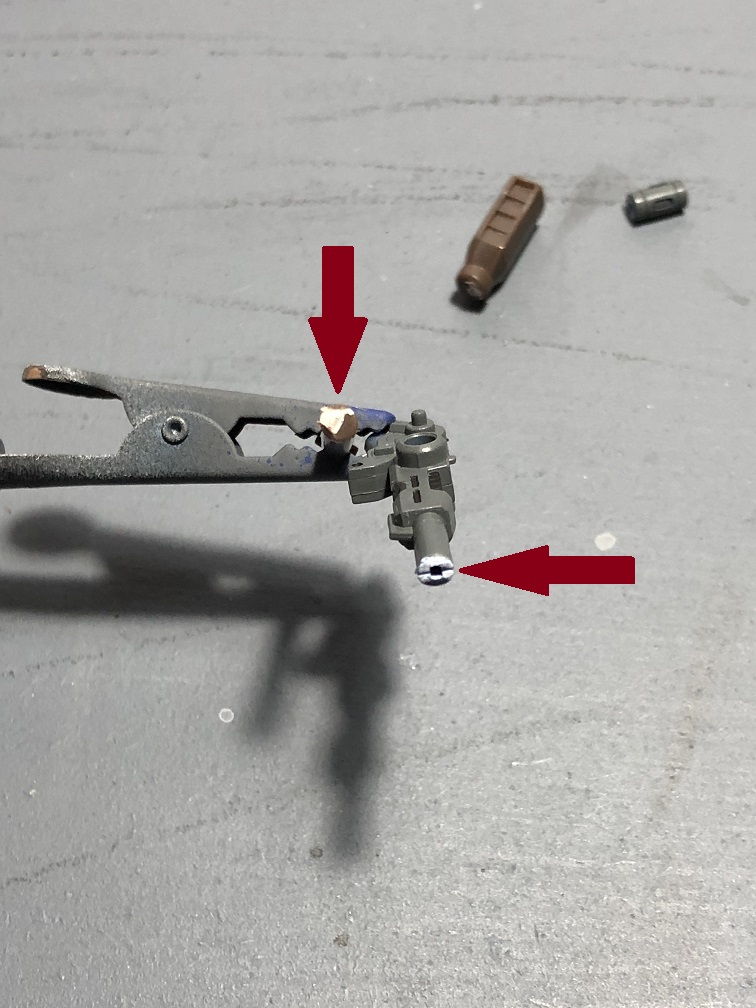
Finally, we need to flatten the surface where the pieces will be glued to. This can be easily achieved using some sanding tools. To get a strong bond between our pieces we need to make sure that the surface where both pieces will be glued on is completely flat.
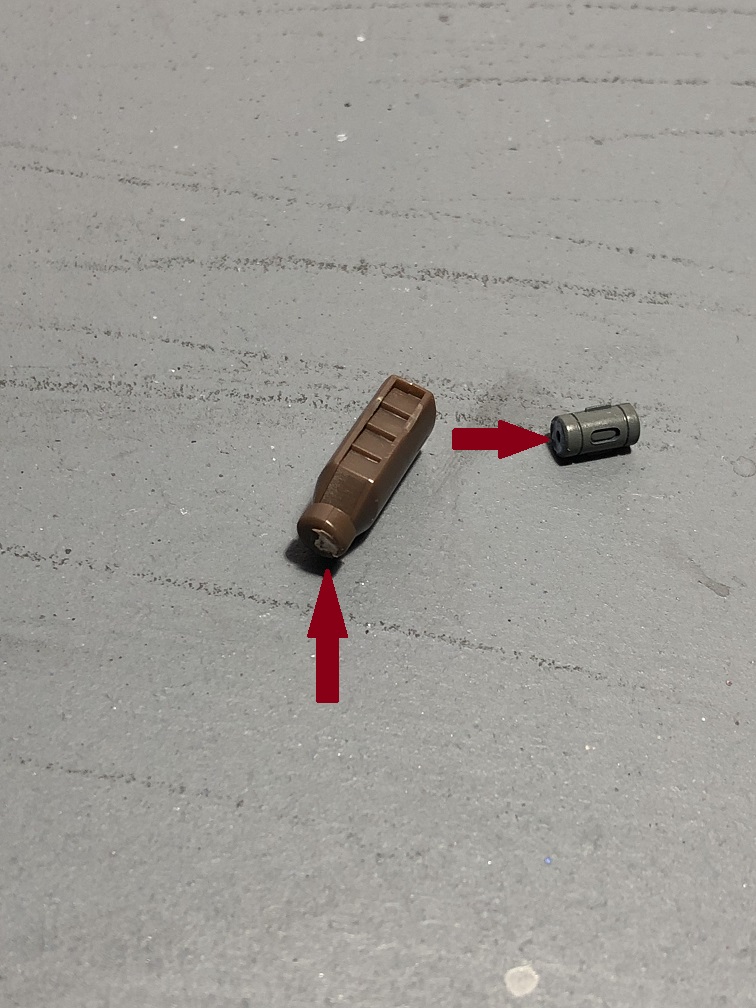
Then we glue both pieces with some plastic cement. And with that, our new sniper cannon is ready!

And now, we are almost ready to start painting. But first, we need to wash our model. Usually, some oils remain on the plastic from the manufacturing process. These oils can ruin our paint job. This cleanup can be done with dish soap and warm water.

Wait… this is the end?
Well, I don’t want this article to be very long so yes, for now…
I hope that you find these tricks and recommendations useful! If you already do some of these or have a different way to do it, please let me know! I’ll be more than happy to read about it!
Stay tuned for part 2! Don’t forget to check out hobbylink.tv for more awesome articles!
And if you wish to get some tools or a new cool Zoids, you can do it at hlj.com!
See you at the next one! Happy modeling!