In my last guide, I covered how to pose your models. So now you’ve got the knowledge to make your models look like they’re a little more active, but why do we go through the process of posing them?

It’s great for when you’re entertaining guests and you want to show off. However, unless you’re taking photos, how else are you going to flaunt your model making prowess to the internet?
Life is fleeting, but internet kudos are forever.
This guide will be focused around the basics of model and miniature photography, and what you’ll need to get started (it’s not much).
Getting Started
Firstly, you’ll need to make some space so that you can work effectively. Either clear your normal work space, or if it’s too cluttered, then the floor works fine, too.
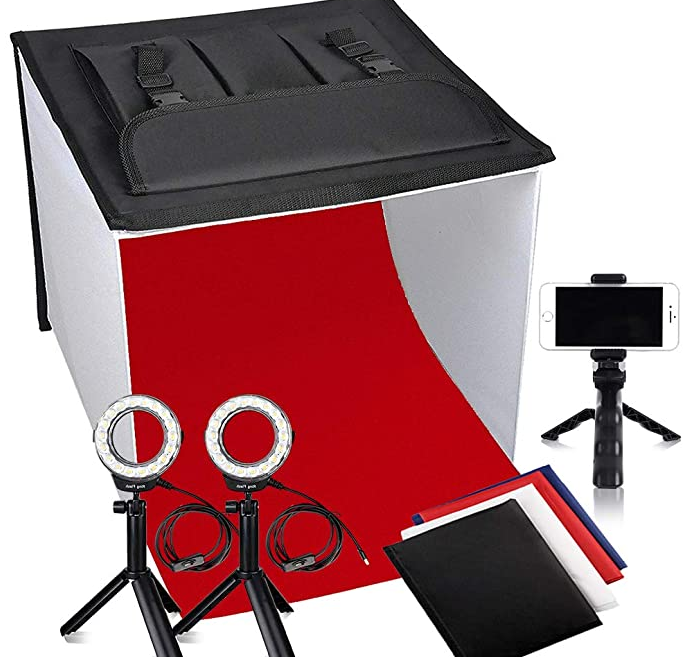
Miniature photobooths are great helps for getting started; they’ll have everything you want to take crisp photos of your models. The sides of the booth balance the light on the model and the solid color backgrounds focus your attention on your creation.
The one pictured here, I found on Amazon for £37 (roughly $45), however, there are plenty of cheaper alternatives.
You can even make your own, simply by propping up sheets of paper against the inside of a cardboard box.
Finally you’ll need a device that can take photos (yeah maybe this one is a little obvious). I’m sure that some people use nice DSLR cameras, however I’ve been working with the camera on my phone and that’s been going pretty well so far.
Unless you’re familiar with all of your camera’s functions then I would recommend leaving it on automatic (except for focus).
I could go deeper into photography but I want this to be a beginners guide, so all I’ll say is that is that there are some great guides on the specifics of shooting that can be found elsewhere online.
Initial Setup
If possible, block out any outside light from the area in which you’re taking your pictures. This makes it easier when you want to light your model, as there wont be any other light sources bleeding into your image. I prefer to take pictures at night as it makes this easier but blinds work just as well.
Get Posing
Choose the pose and position that you’d like your model to be in. Remember that it’s always easier to move the model than to adjust your lighting. Try to center it within the area you’re taking photos. Keep in mind that whatever angle you plan on taking the photo, you want your backdrop to be the only thing that’s in frame.
Light your creation
To begin, set up your light sources so that the lighting is evenly spread across your model. A light on either side and one above should help give an even balance over your Gunpla. I try not to shine the lights directly at the model as it can end up looking like it’s just been caught by the tabloids due to its latest scandal. For the exact same reason: DO NOT USE FLASH!
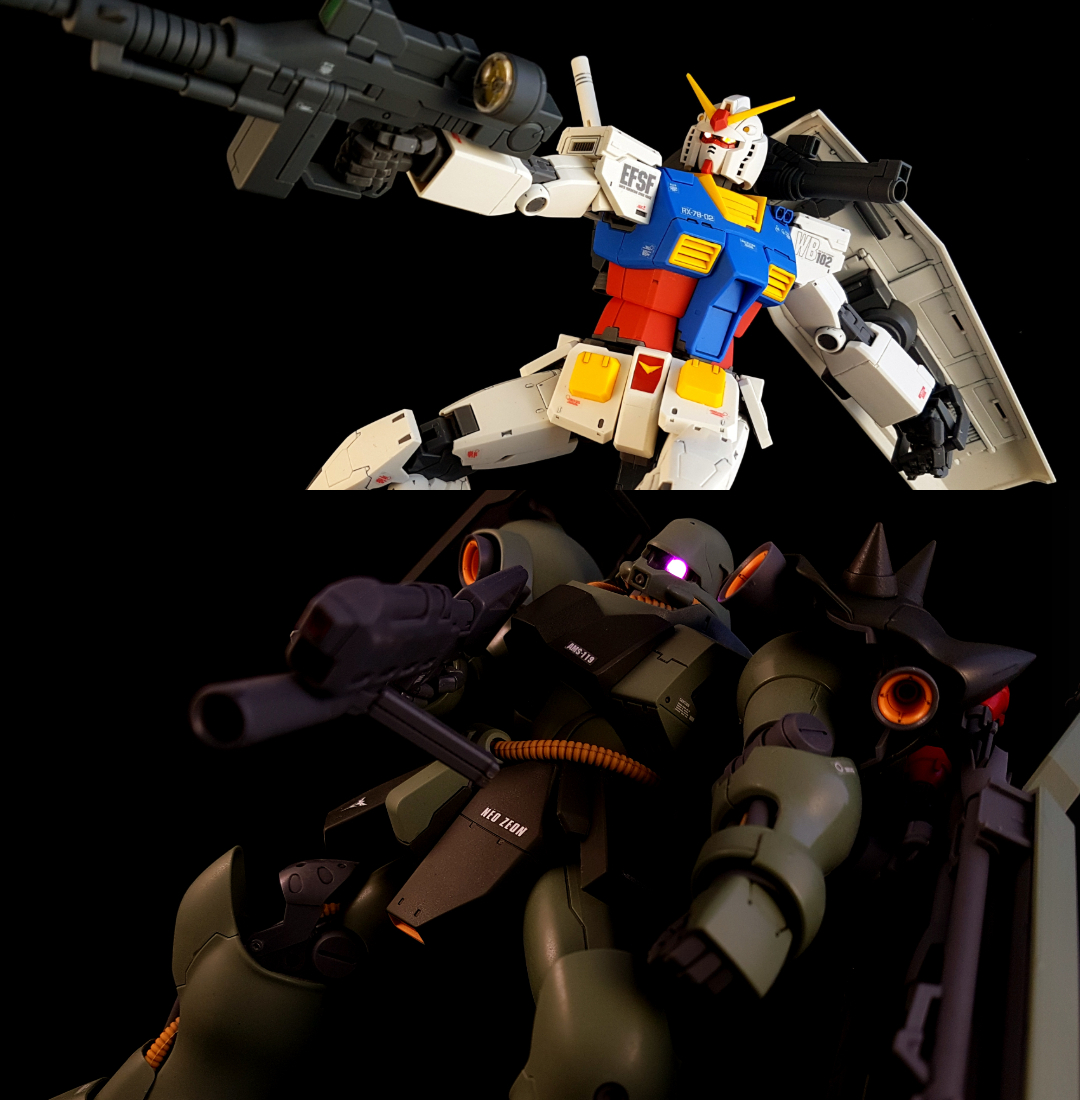
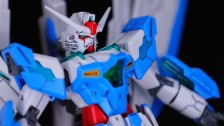
You can set the tone of your picture with how you light your model. Once you’ve worked out a balanced light setup, you can start making tweaks to emphasise different parts. You can see from these photos that both have a different feel to them. The first image is a hero shot with the RX-78 being lit from all sides. For the Geara Doga, I’ve raised more of my lights so that the areas underneath are darker. This gives the mech a more villainous feel.
Don’t expect to set everything up and get the desired results immediately. Sometimes it takes me a good 20 minutes of fiddling to get the light just how I want it. Be happy you’re not working in film and your subjects can’t complain about how long you’re taking.
Focus
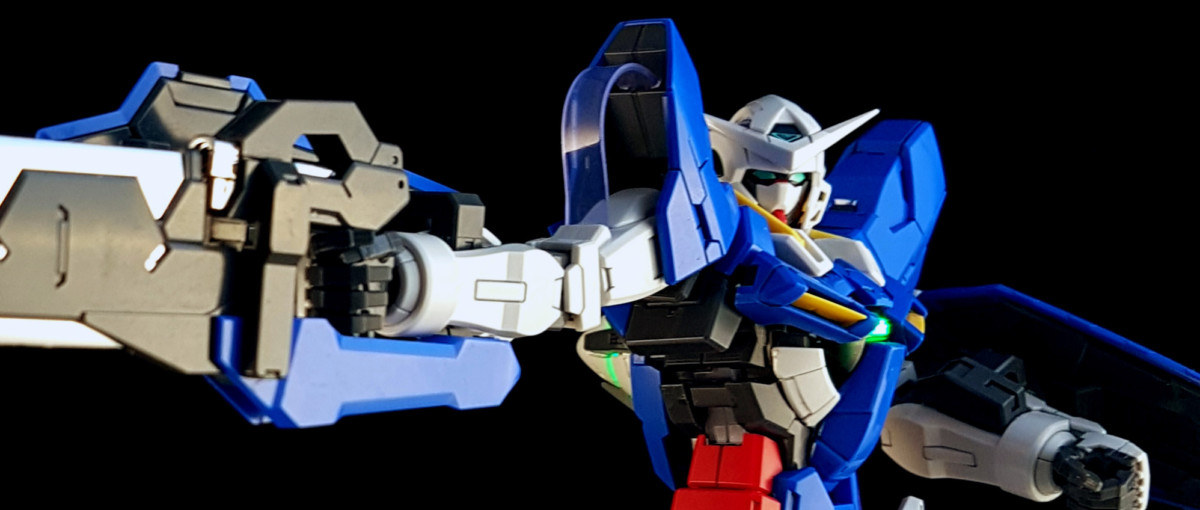
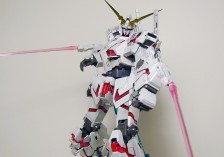
Your focus isn’t just a way of making sure the image is clear. With a smaller depth of field, you can ensure that some parts of your model are in focus while others aren’t. Not only does this direct your attention to these areas, it also gives a sense of depth. This makes your masterpiece look closer to the mecha it’s modelled after. While subtle, you can see this with the differences between the two images below. One draws your eyes first to the shield while the other to the model.
(Bonus) Editing
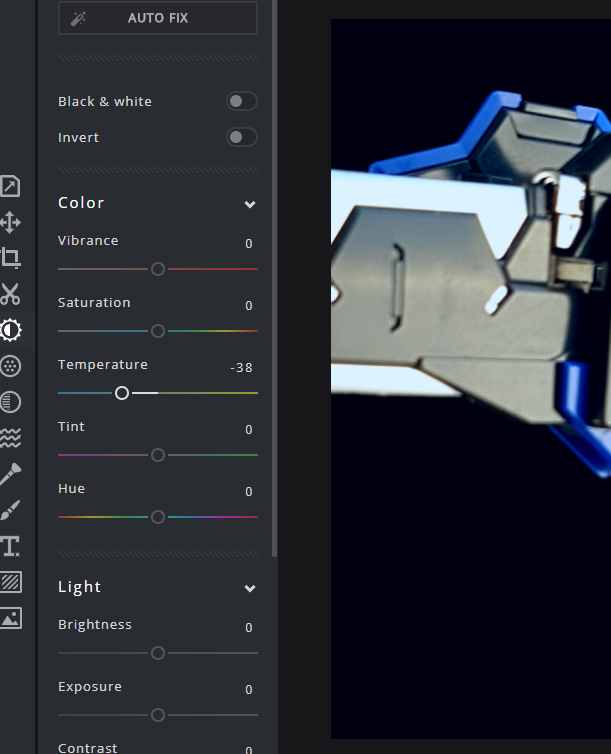
I also edit my images after taking them. I use Pixlr regularly as it’s simple, but has all the tools I need to get the job done. This is where I’ll make sure to correct the colors of the image. You’ll notice that artificial light can give the photos a yellow tinge. Tools like this allow you to balance out the colors a little more.
Also, a lot of modern phones allow you to do this in-app anyway.
I hope you have found the above useful. If you have any requests on what you would like me to cover next, then stick it in the comments.


Pedro
Thanks for the tutorial 😀
I always have problems with taking good photos D: