Available from HobbyLink Japan here.
“Ma.K” is more than models, more than a narrative — it is a community built over the decades around designs which wear their cobbled and kitbashed nature on their sleeves and hold hard to the ethos established by Master Yokoyama, perfectly exemplified by the kit being built here, as well as the kits displayed with it.
The Japanese SF3D/Ma.K community quickly developed in the early 1980s and took the initial stories to heart, striving to outdo each other with increasingly outrageous – even impractical – designs as a way of expressing the most important thing which the idea brought to the market: that you did not have to be a genius illustrator or modeler in order to create something incredible.
When I asked Yokoyama Sensei about this, specifically about what he thought about the aesthetic choices he made in those early days, he was either stumped, or preferred that I polled the fans themselves.
This is a fair point, of course. The Master has never provided absolute answers to those sort of questions, and – perhaps just as he has never tried to tidy up the convoluted Ma.K continuity – prefers to allow his fans to come to their own conclusions and interpretations of his work.
It’s a bit cheeky, and it saved him writing a few lines of text for me, but it is also very true.
The fans who communicated with me, and showed me their work on the Master’s Facebook page, certainly had a great deal to say, and a wealth of ‘uses’ to which they had put their kits.
Breaking Boundaries
One of the questions which also caused Master Yokoyama some pause was this: “Can you tell me something unusual about the world of Ma.K that inspires you most?”
Once again, like a boss, he bailed out and pointed me at the fans (cheeky blighter), but as it turned out, that was just what was needed…
This one was most profoundly addressed by the FB regular Garry Stewart: “I remember first seeing the SF3D Original kits years ago and thinking ‘Whoa!!! What are THESE???’ When I was finally able to buy my first couple of kits (I believe it was the ‘SAFS: Prowler’ and ‘Neuspotter’) and began studying the parts in each box, I started to notice components from other kits (some Xabungle ‘Trad 11 Type’ parts in the ‘Neuspotter’ kit, battleship and helicopter parts in the ‘Prowler’ kit) and my mind was filled with an immediate possibility: maybe I could scratchbuild my own creations from the parts of other kits, sitting in my collection, using these amazing models as inspiration? What transpired from that first encounter with these kits was a passion for building ‘outside of the box’ and seeing things in an entirely new way. The SF3D/Ma.K kits continue to inspire me with their artistic beauty and ‘open and accessible’ format, which enables one to build without fear of ‘getting it wrong’…and to expand and add details to each model in a very personal way. This also fuels my creativity in all my scratchbuilding efforts…and gives me ideas to produce my own ‘Ma.K-like’ models. Thank you, Kow Yokoyama…because of you, I’m forever that kid building models in my Dad’s shed. :-)”
There might have been a Krote in there once, but whatever is in there gives me the screaming willies!
Garry makes a profound point, though: ‘open and accessible’. There are few boundaries to the Ma.K modeler (not to say there are none, as defined by the books and kits), but this is a broad church, built as much on imagination and emotion as on design and structure.
Whether you are building a Nitto or Wave kit out of the box, or going Full Yokoyama and kitbashing like a boss, you are one of the gang. We are all Ma.Kers and joined by the diversity of our membership – united in love for that crazy old coot who inspires us even today.
Adding to that notion was another regular, José Luis Flores Cota, who recalled the love he had for the unconventionality of Master Yokoyama’s designs. “…I discovered the wonderful world of master sensei Kow Yokoyama Ma.K through the Snowman! This kit was the trigger the impulse to follow and collect more kits! The first one I did was the Kröte and discovered that it was the best of 2 worlds!! Sci-fi and military modelling with total freedom with no limits of creativity building! Long live Ma.K!”
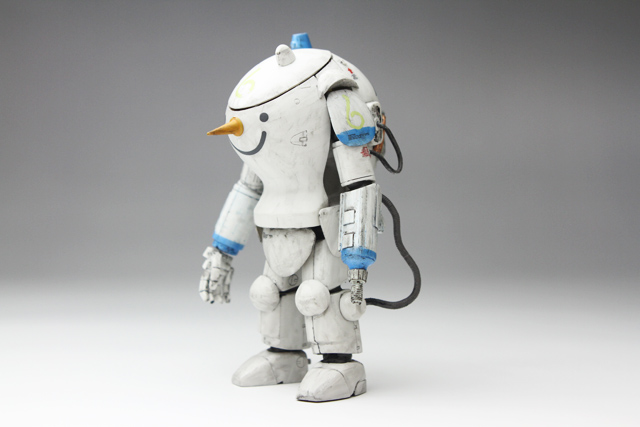
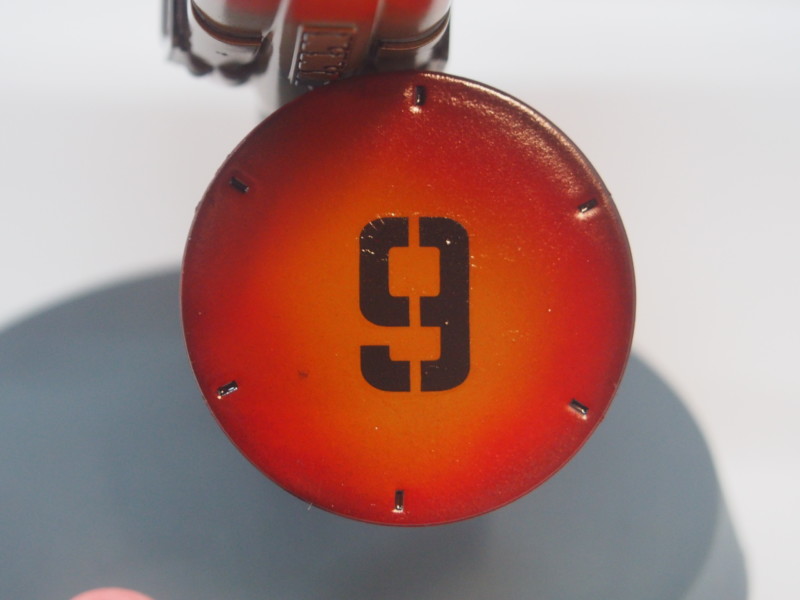
One of the most unusual little SAFS, simply because of the nose and the smile…
I can well imagine how this took the mind of the fans when it first hit… I wish I still had the image of a squad of these, in 1/20 scale, advancing through a snowy scene, misted down with vapor from dry ice (I think it was from an old Model Graphix).
Like Calvin and Hobbes’ Snowman House of Horrors…
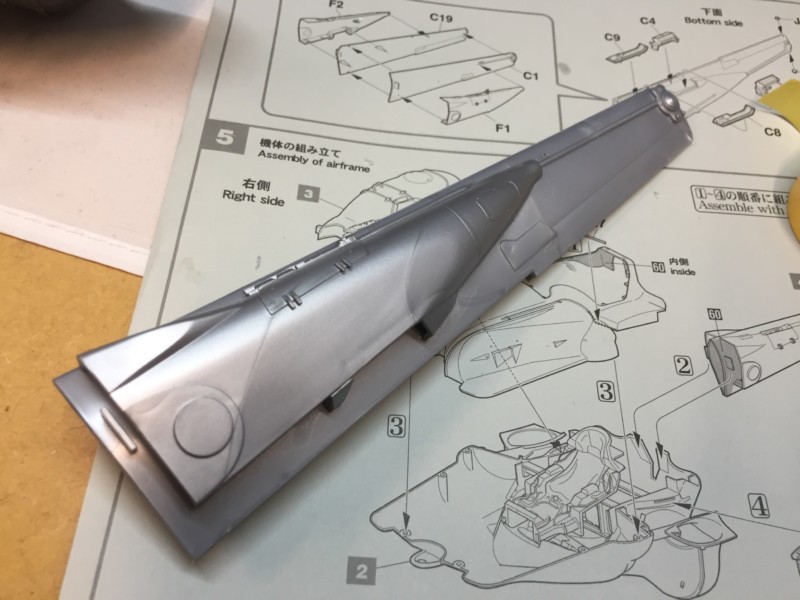
Though Master Yokoyama has often stated that the world of “SF3D/Ma.K” is not simply WWII in the distant future, it cannot be denied that the technology and the aesthetic lends that feel to it. Possibly, as I suggested in the unboxing, this is to do with much of the inspirational imagery for the “SF3D” world being initially taken from WWII photos – of technology, people, and the damage wrought in war. However, I think it also has something to do with the sort of kits which were available at the time of creation. After all, the early kit bashes were in 1/35, rather than 1/20, and one can see how Master Yokoyama made great use of Tamiya infantry.
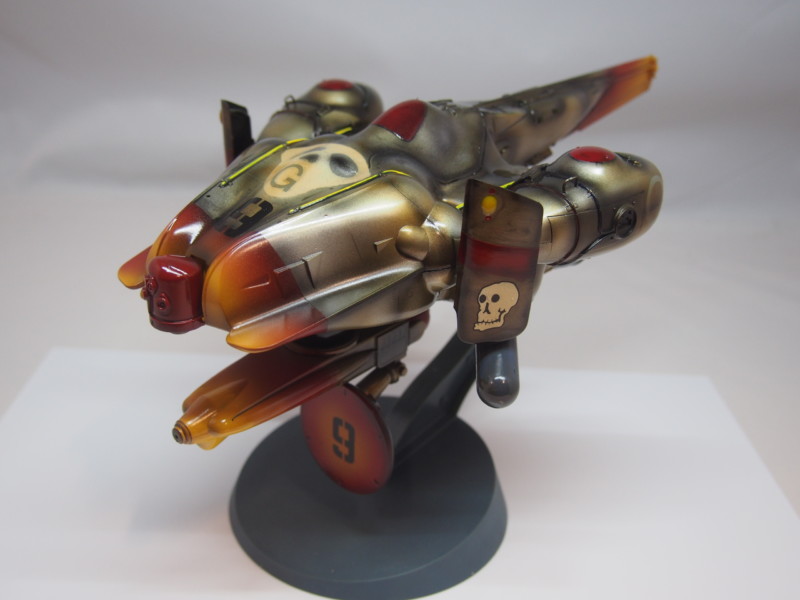
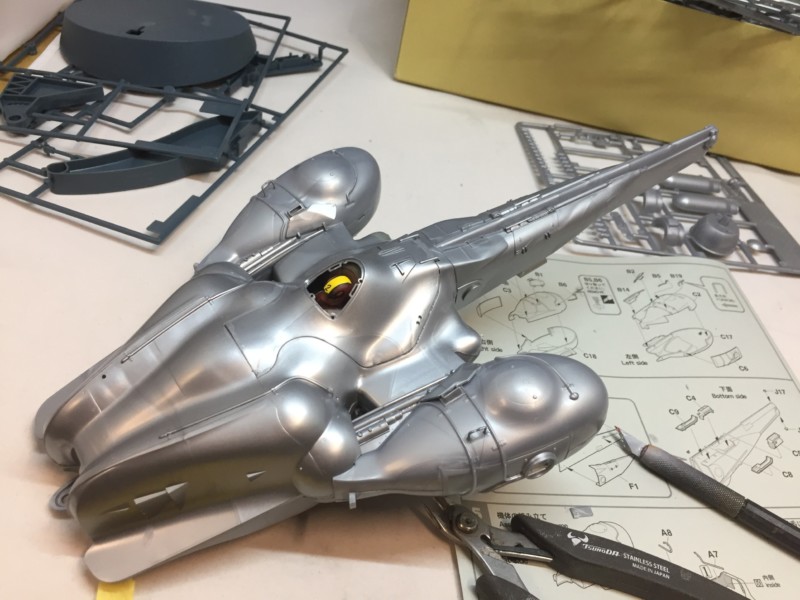
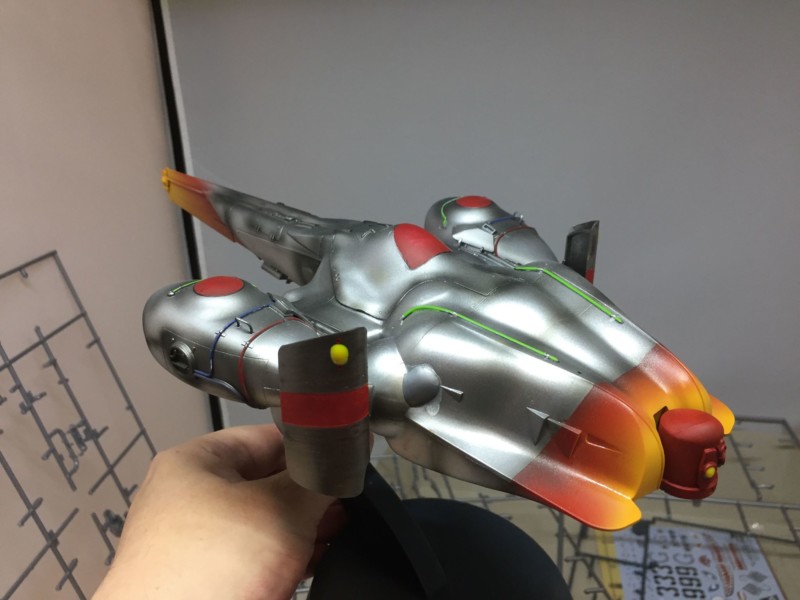
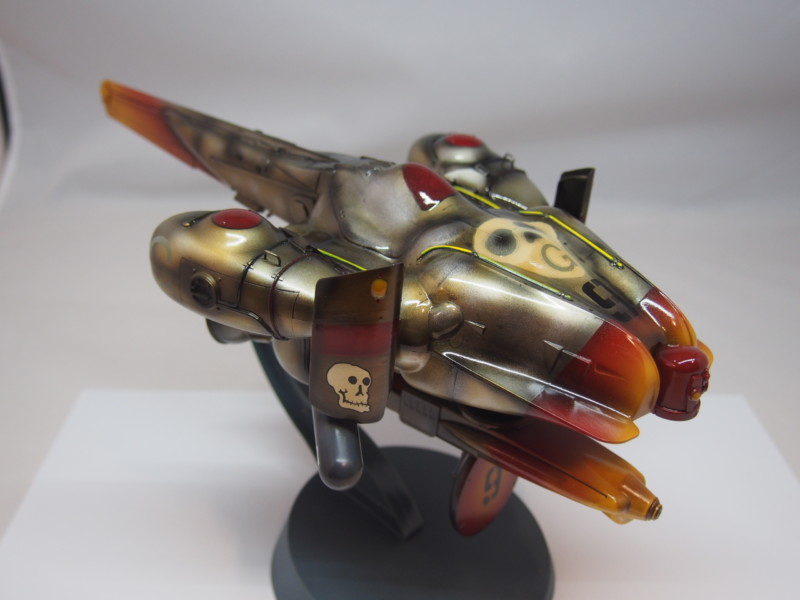
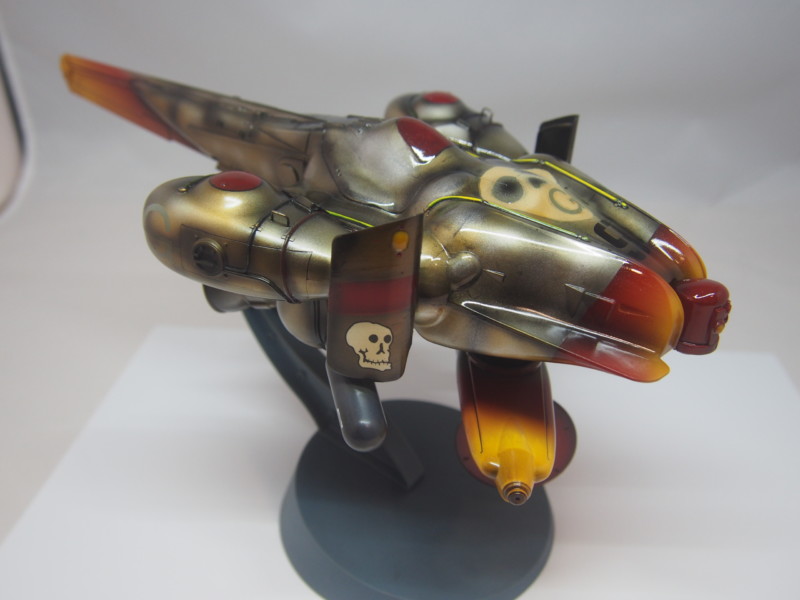
Anything Can Happen in the Next Half Hour: 1/35 Luna Diver Stingray “Operation Dynamo”
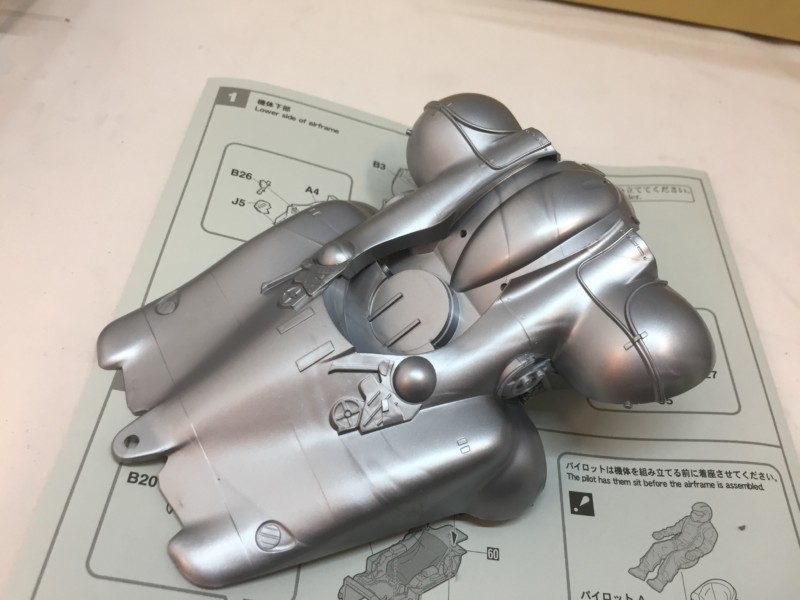
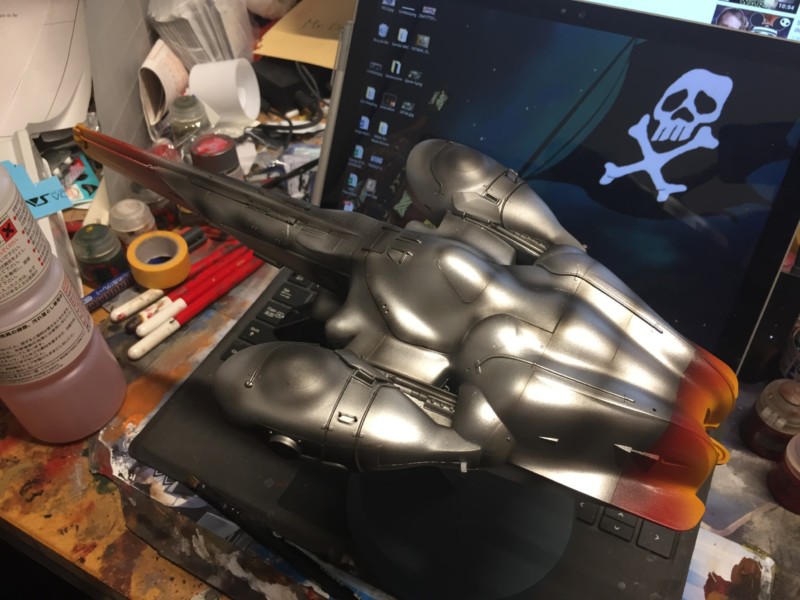
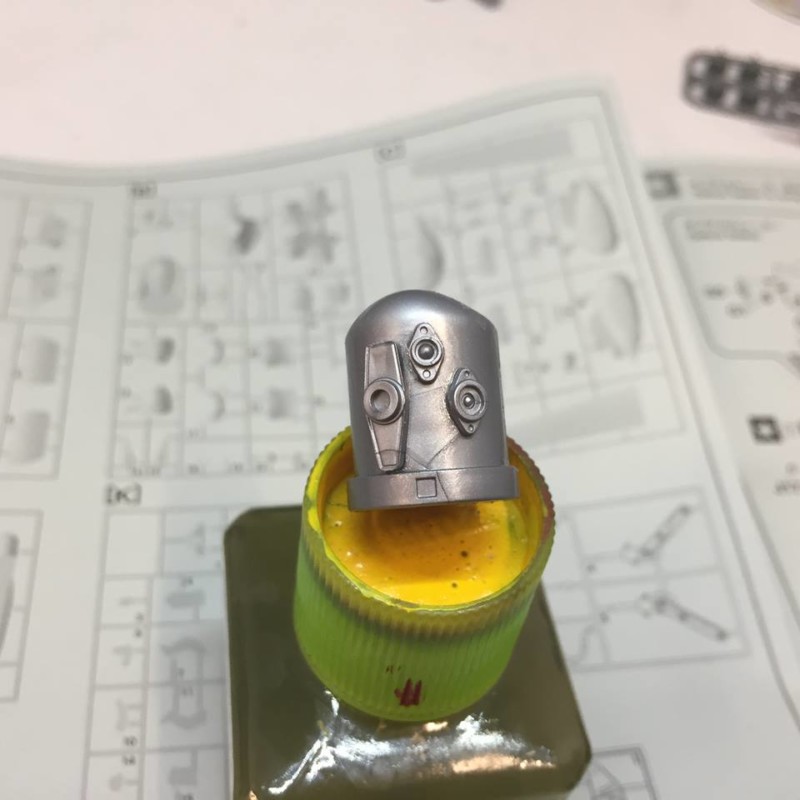
I thought it was interesting that this kit came molded in a semi-metallic styrene. It is always hard to get even pigment spread in such mold shots, as you can see in the variations on each piece. However, I like that, as it lends to the interest if you plan, as I did here, to use a clear undercoat, then go back in with washes and weathering effects.
I was initially going to do the usual Grey Ghost version, but as this is listed as a Space Interceptor in the Ma.K Wiki, my fondness for early NASA gave way to practical reality. So grimy metal it would be. Somewhere between a P-51, a Gemini capsule and a Stingray.
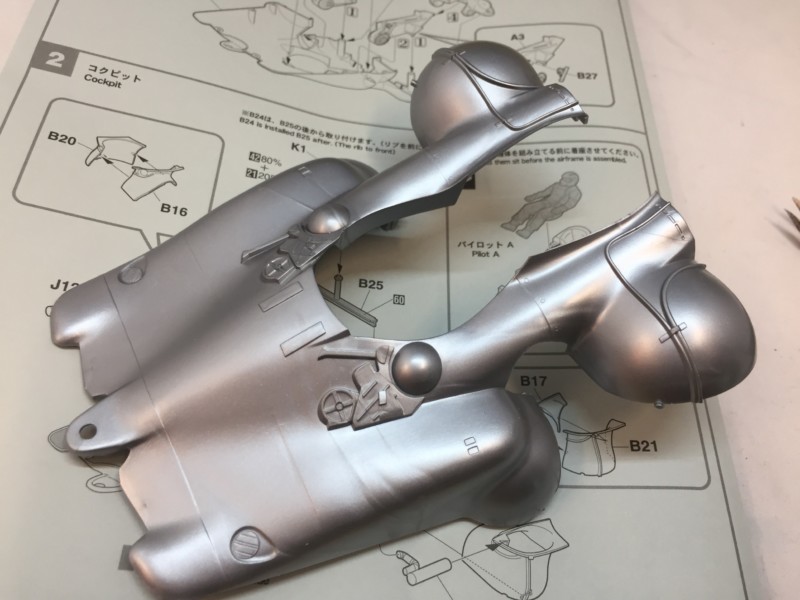
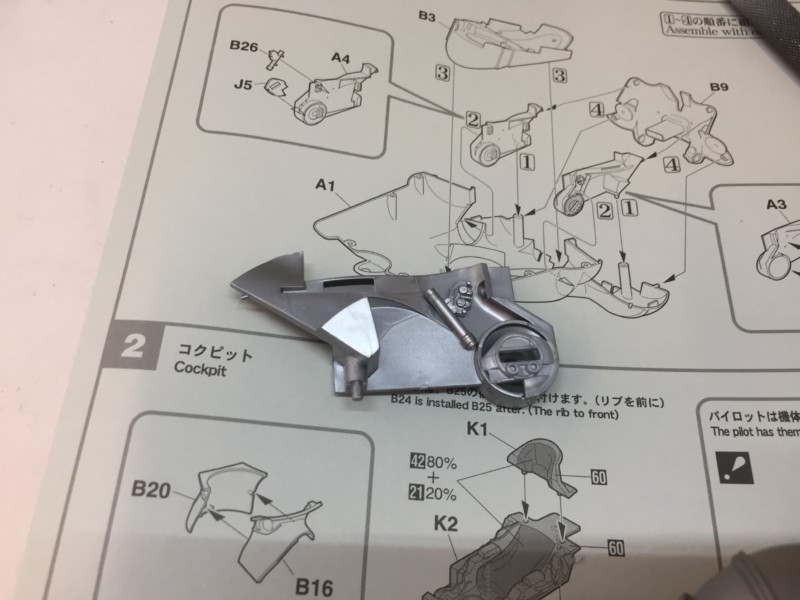

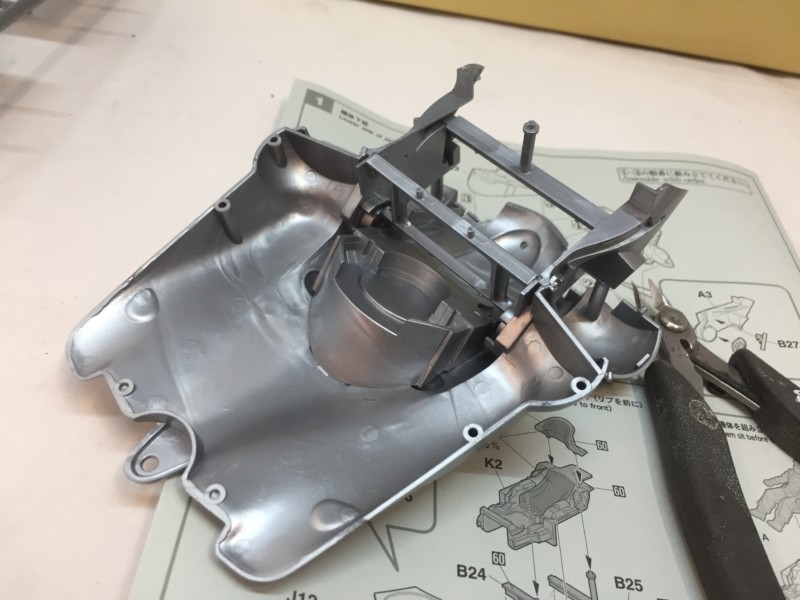
I can’t tell if this is a new or old mold, or if I just got (yet another) lemon. The base plate was warped – almost as if it has come of the mold tool still soft. It can be a bugger to get styrene back into shape without damage, but *carefully* using VERY hot and cold water and patience, I was able to reshape the plate to the point where it was passable. Use caution, though. Each company uses different styrene formulae, and they will have very different glass transition temperatures (the point at which a polymer begins to loosen up). Different colours also affect this point of transition, as does the age of the kit. So be seriously careful when attempting to reshape injection moldings, and use scrap to find the Goldilocks zone for each kit.
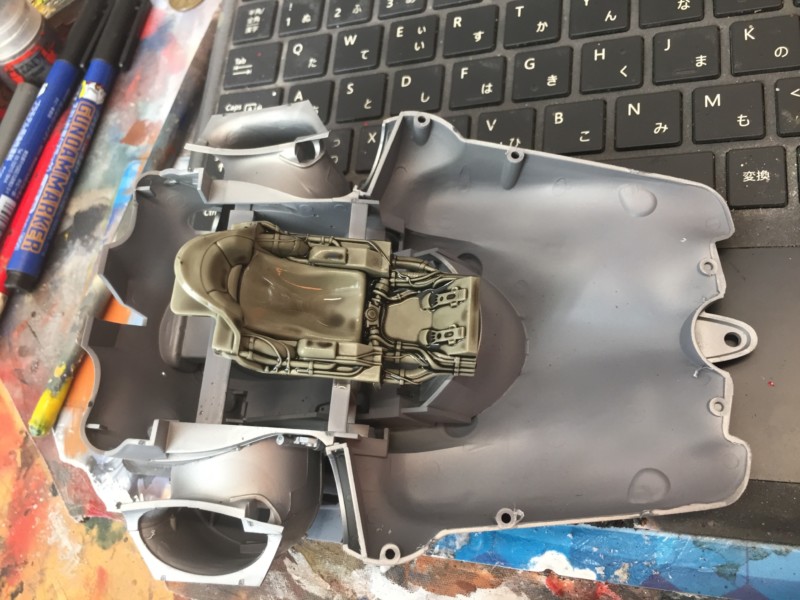
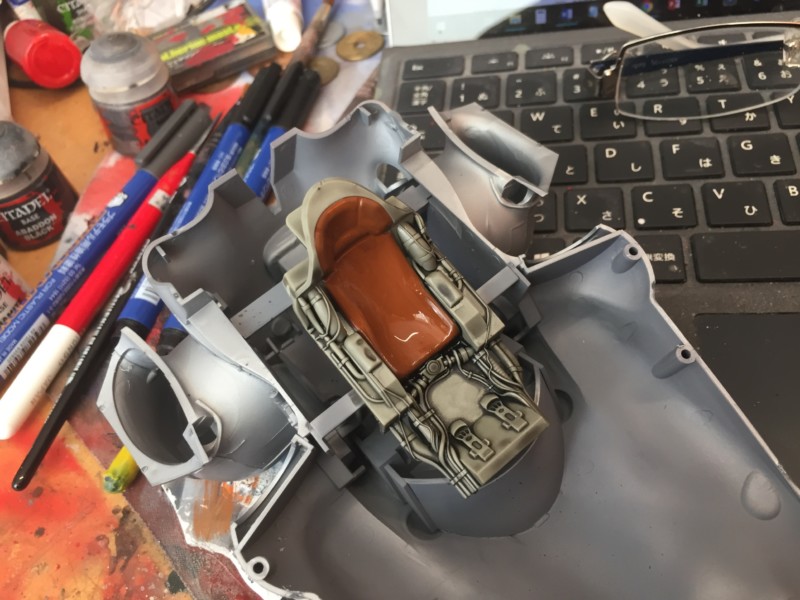

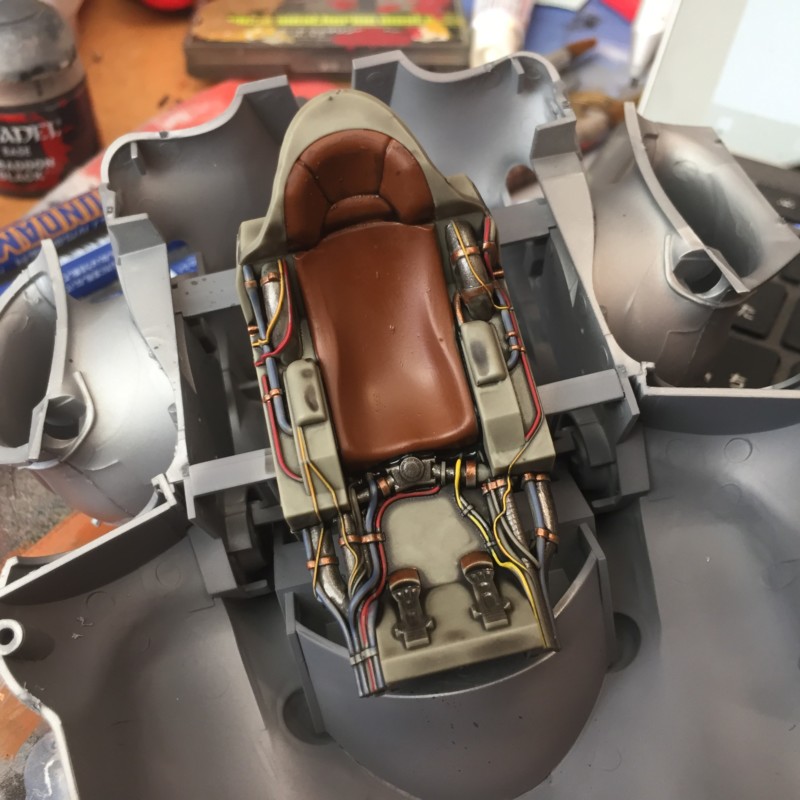
Once it was back into shape, I was a little deflated by the lack of interior detail here, for the price. The seat is nice enough, but I had hoped for a few bulkheads, or interior engine details. Cest la guerre…. 🙁
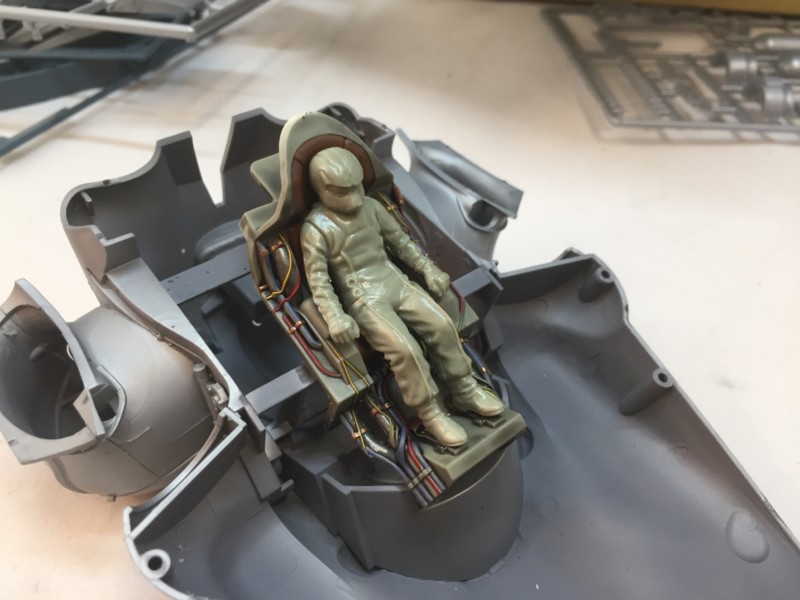

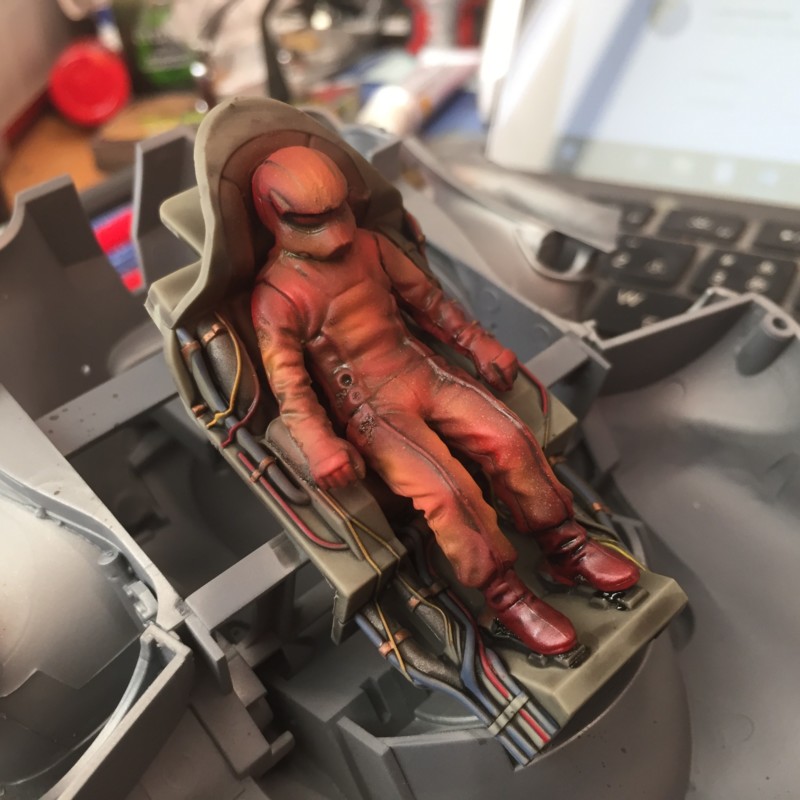
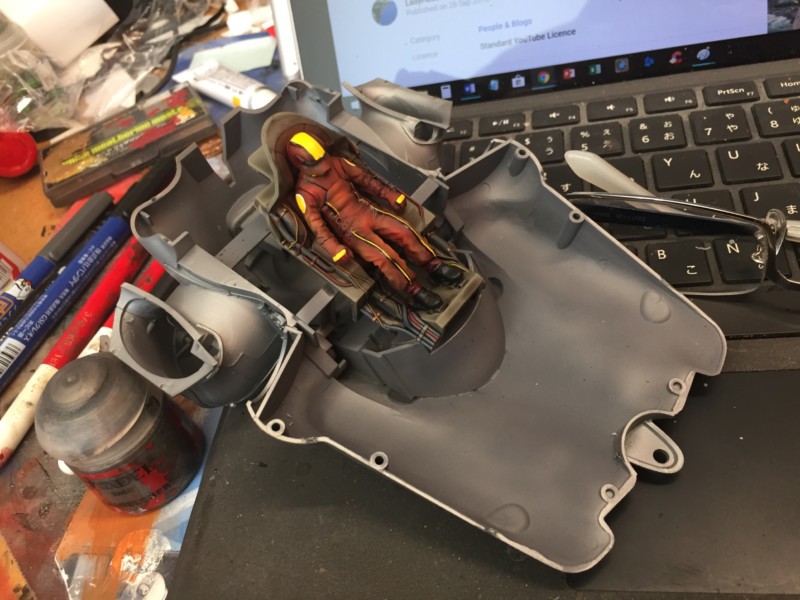
The Pilot (and as yet unbuilt) ground crew figure did make up for that some. Sitting in a fantastic recumbent pose, or leaning out of his open cockpit as desired, depending on how you build him.


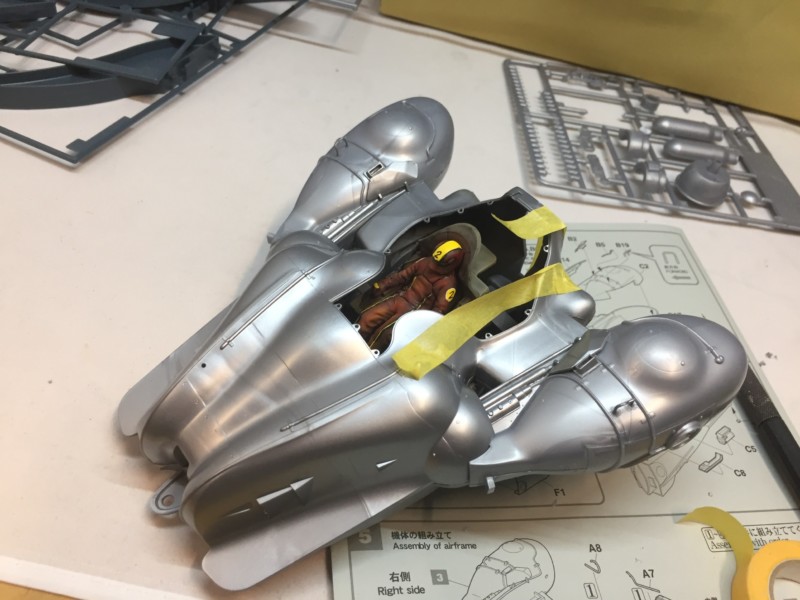

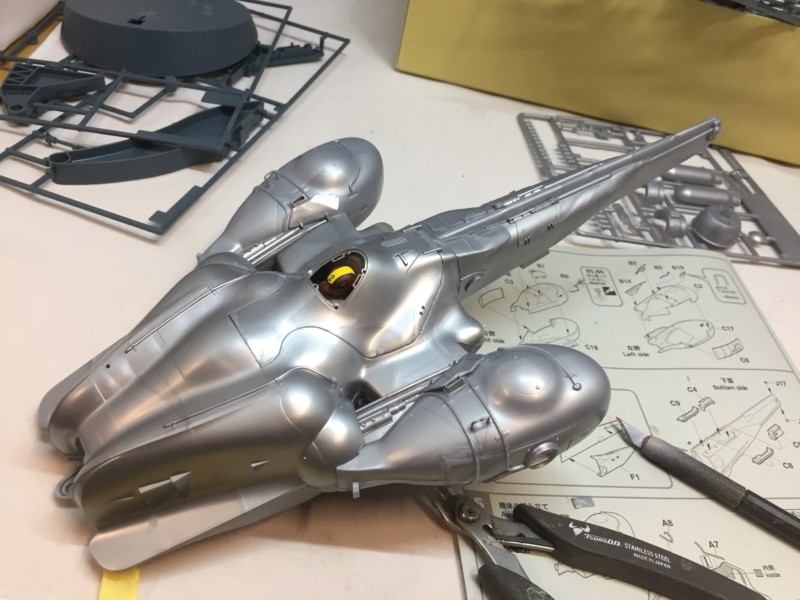
You can see the issue with the lack of detail when the main canopy (not just the cap) is removed. All the detail of the seat is wasted, as the eye is drawn to the huge gaping holes (yes, yes…. I know, a Ma.Ker should not be complaining about lack of detail. I should just have reached for the clippers and built the interior. I accept that reproof). Moreover, with just the top canopy off, only the pilot’s head can be seen….
However, all this is moot when you are so insanely stupid as to cement all the canopies in place, and forget you’ve done it for a day.
I *ALWAYS* manage at least one Picard Facepalm moment on every build.
OK, looking to the positive.
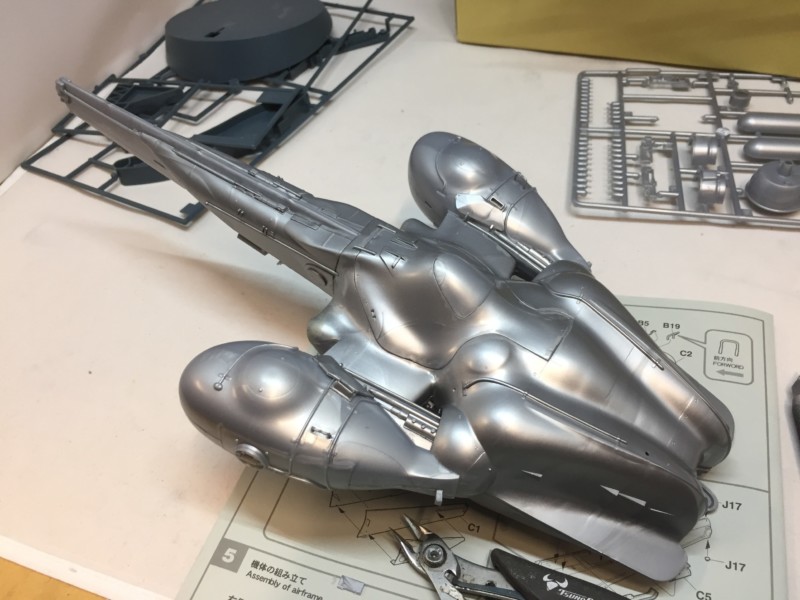
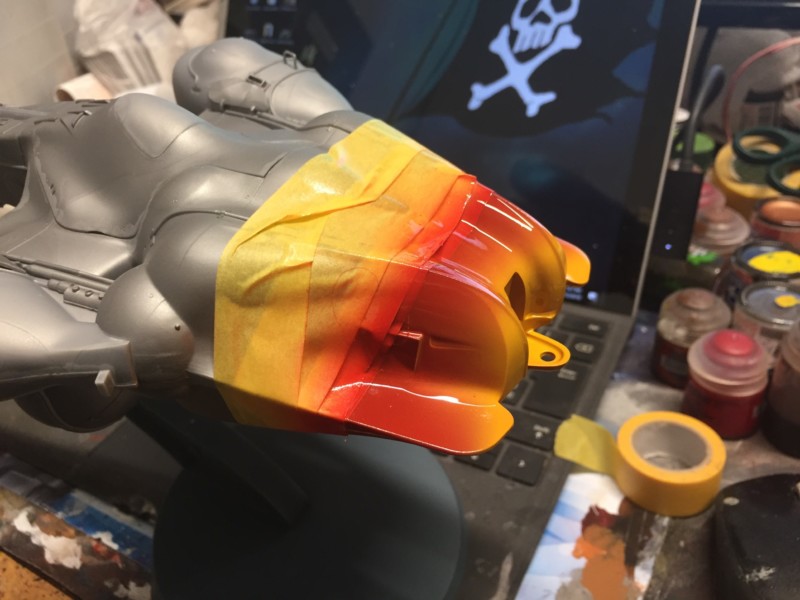
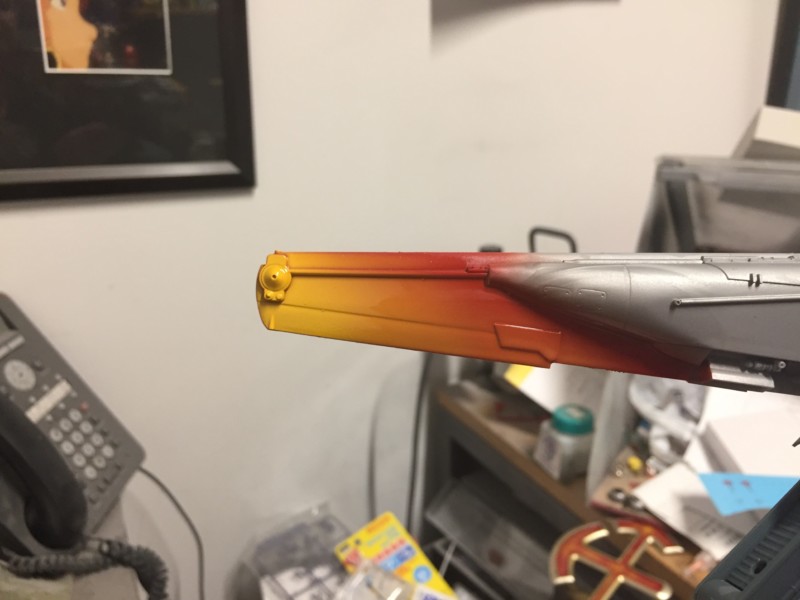
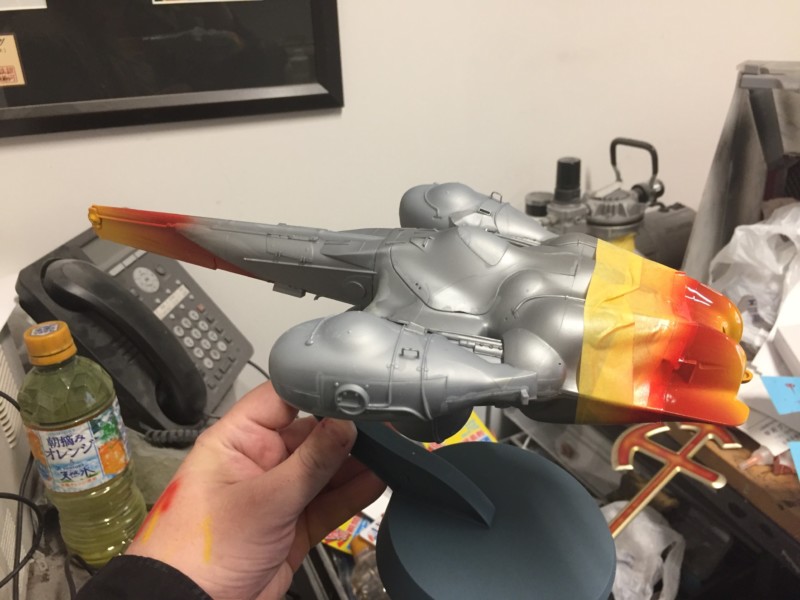
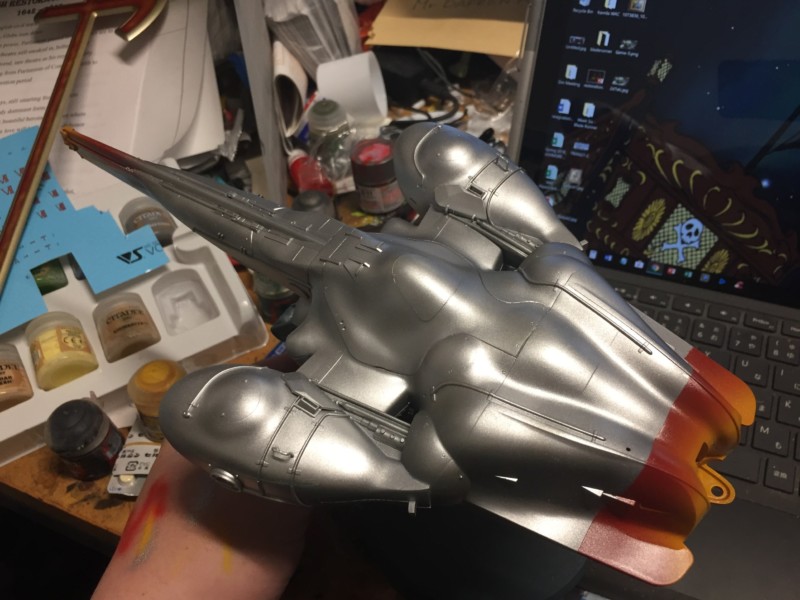
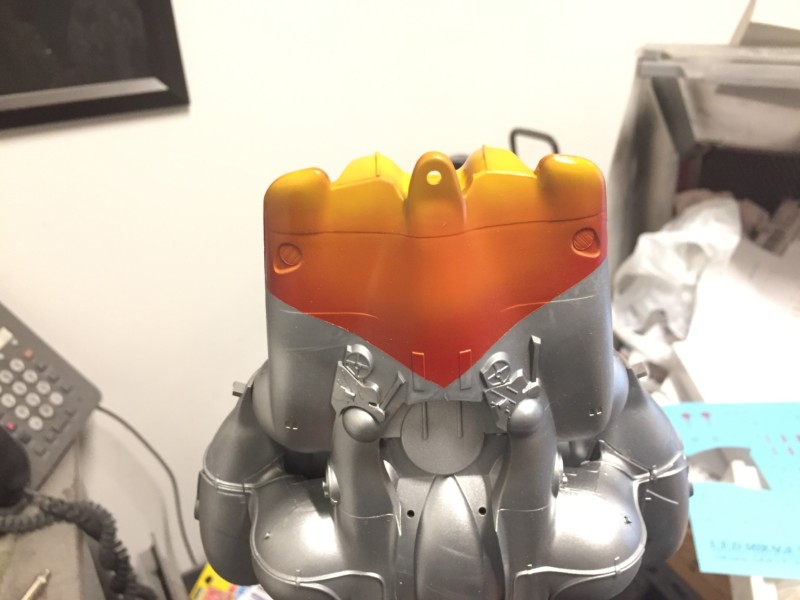
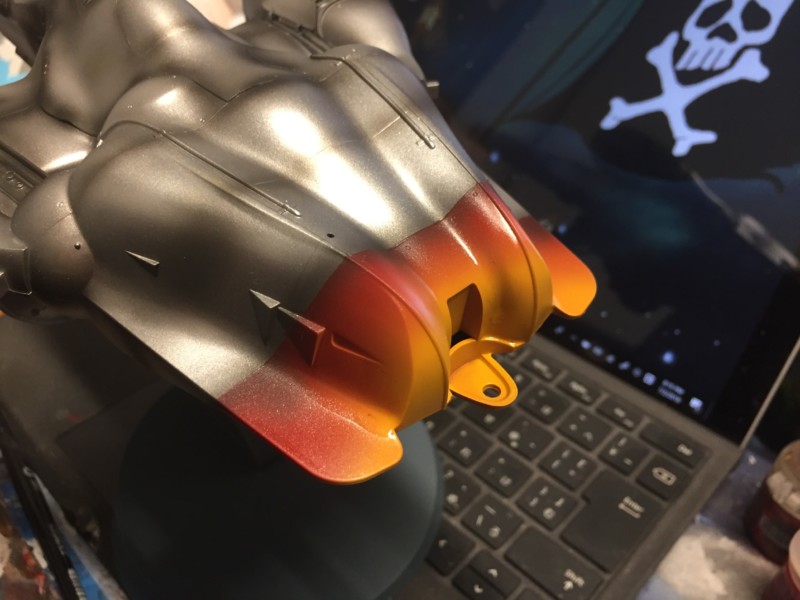
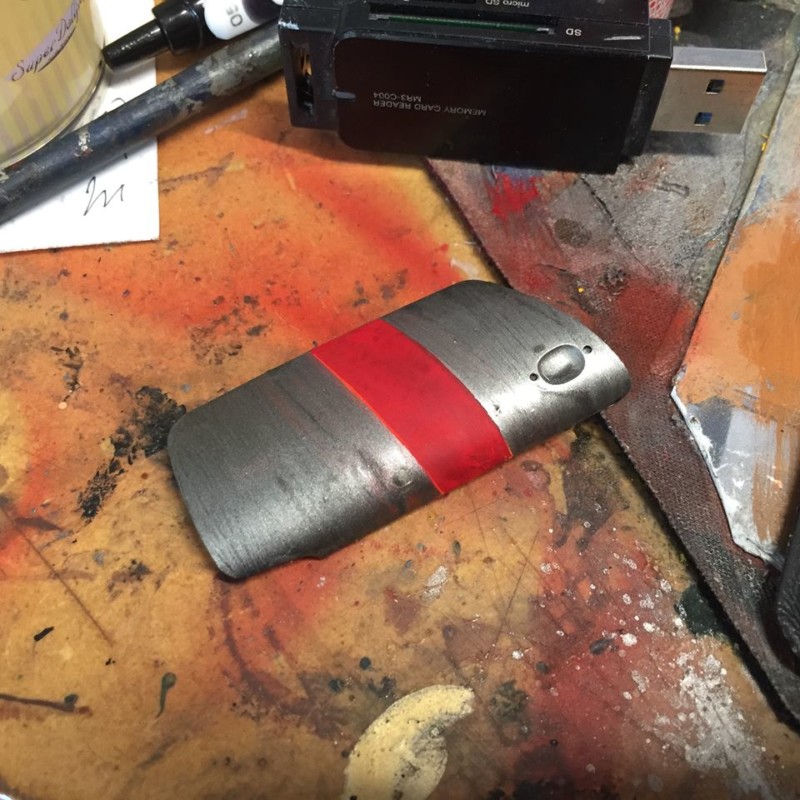
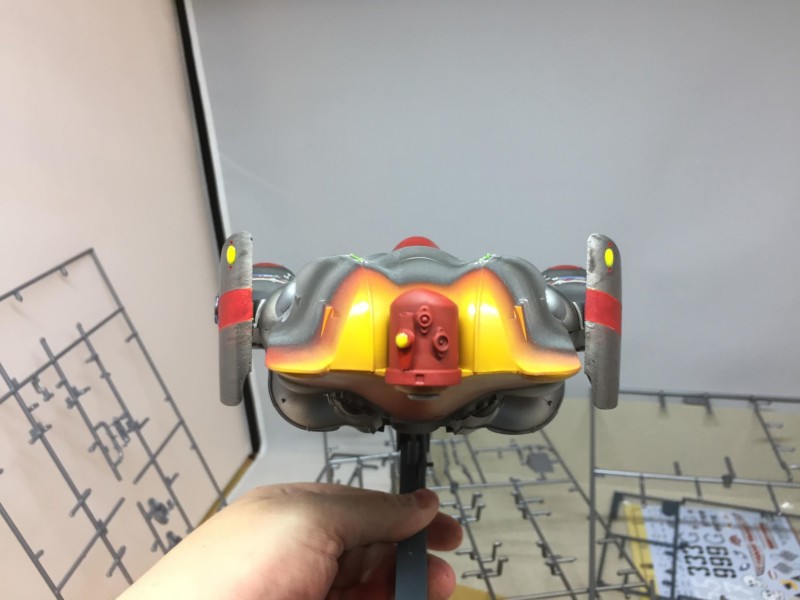
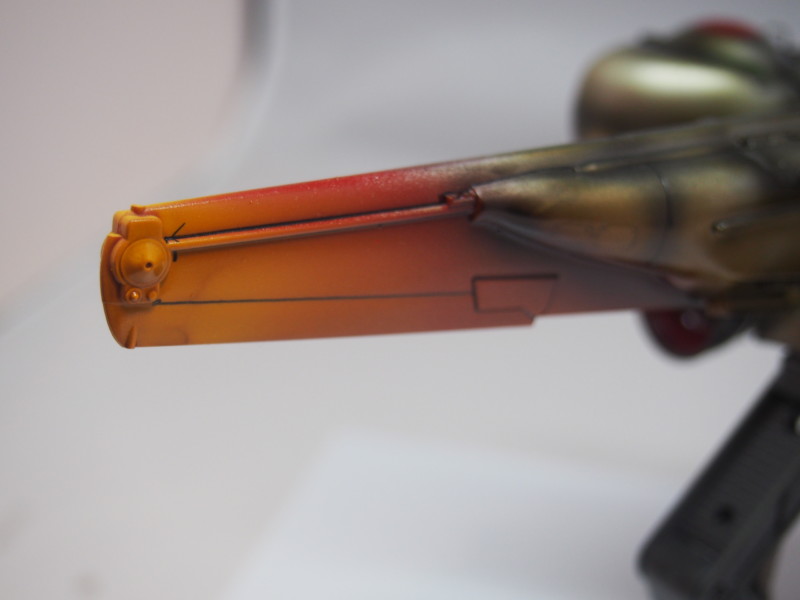
Having decided to go metallic, I found myself looking at a series of Ally polished P-51s and P-38s, and decided to get some colourful nose/tail/gun/sensor elements, to set off the weathered, battered metal. Could not decide on yellow or red, so did a bit of a blend, which I think worked out well. Starting with a little red, I added yellow to the mix three times to get increasingly lighter orange tones. Finally I cleaned out the brush completely and capped off with straight yellow.
I think I should have done the plate stripes in the same way, in hindsight.
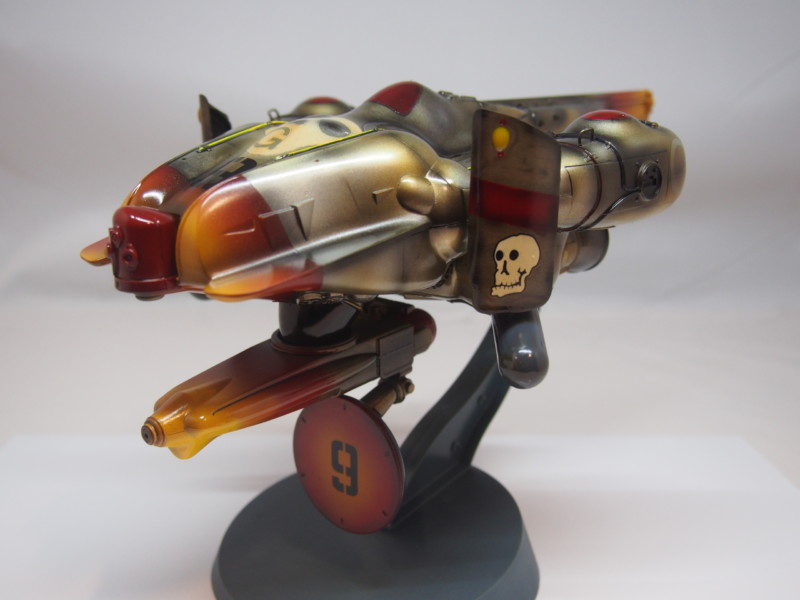
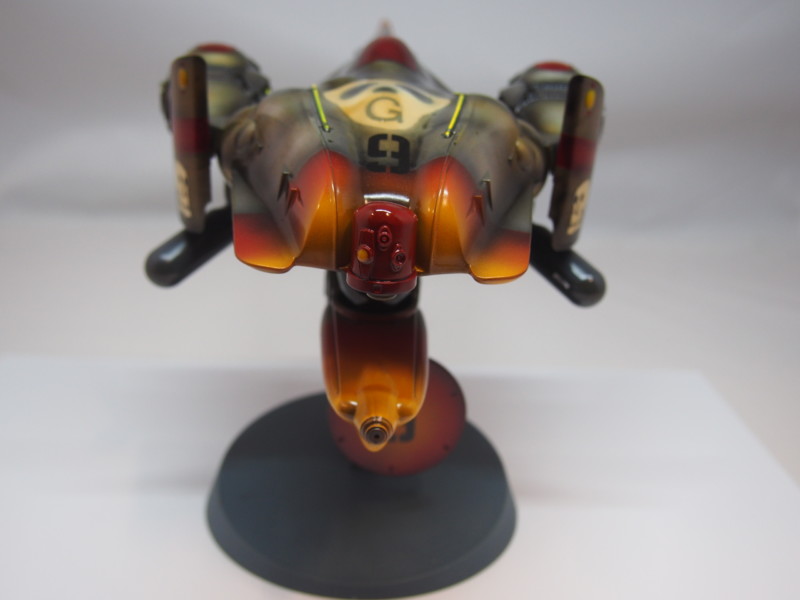
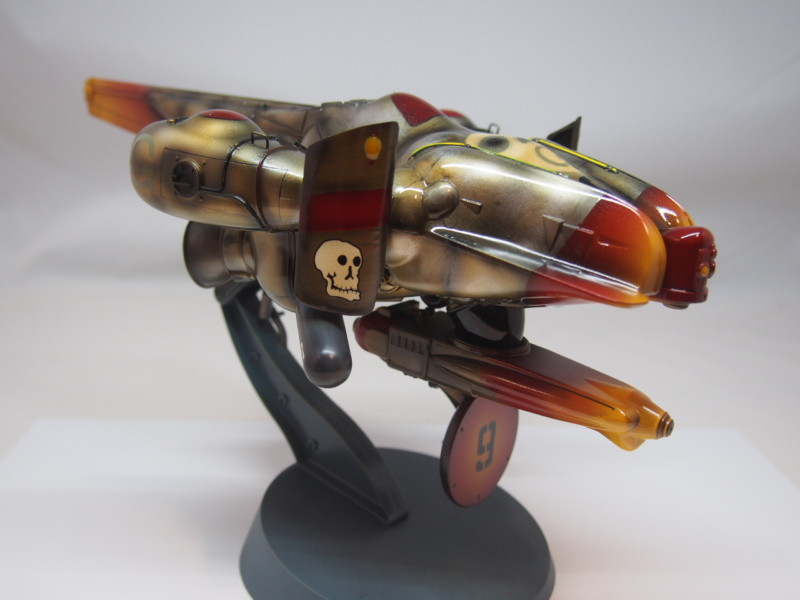
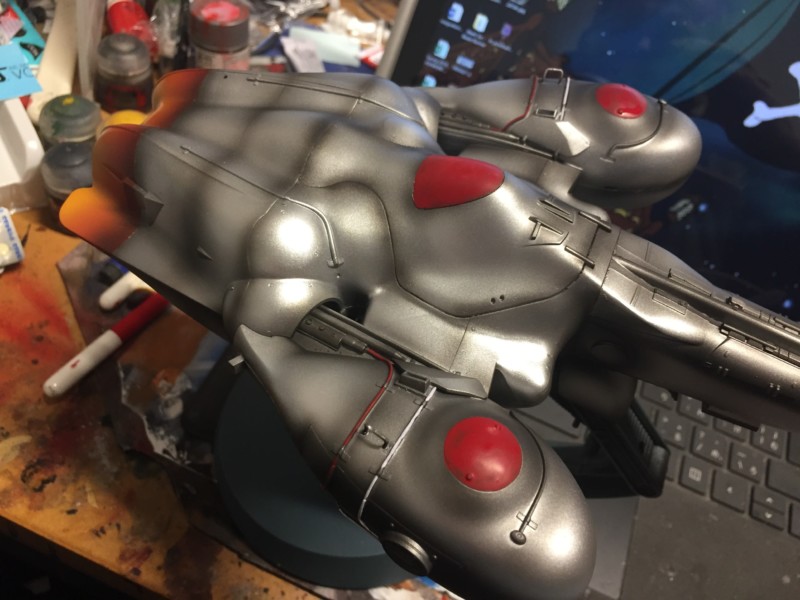
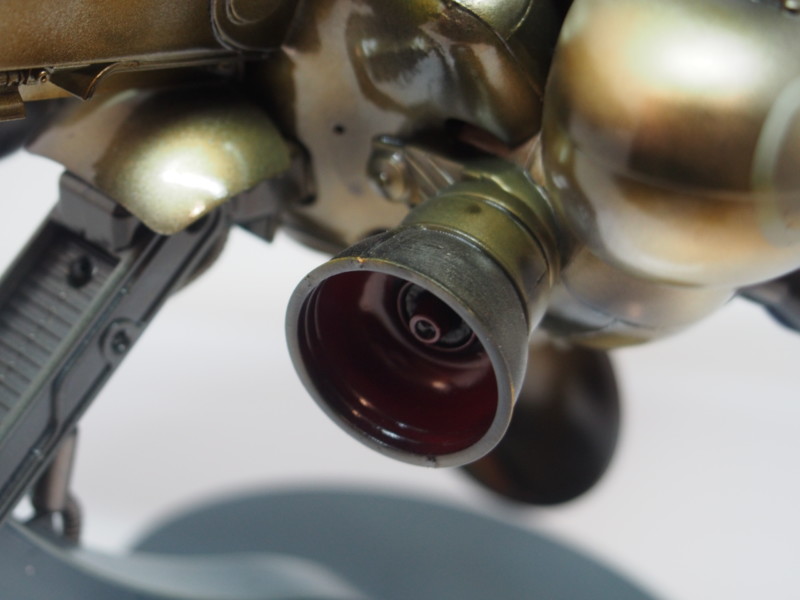
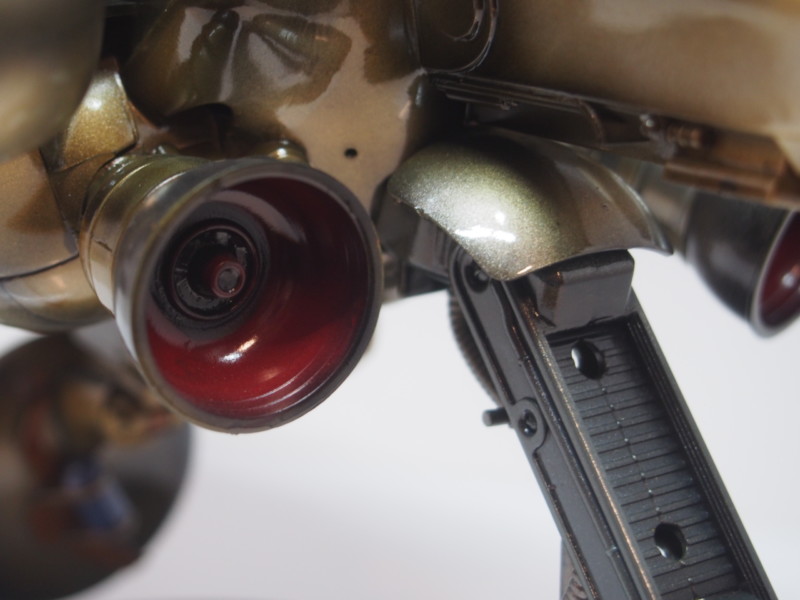
For that bronzed look, I used Tamiya Flat Aluminum to selectively bring up high points and heavily thinned black to mark out the panel lines. I then used Games Workshop Gryphonne Sepia Wash to cover the whole model, except the coloured parts. Finally, going back in with some more Ally, to pick out some clean areas. For weathering, mainly around engine nozzles and seams, I used Tamiya FX Master soot.
Oh, and I still cannot resist panel pens, even though here I do not think they really worked.


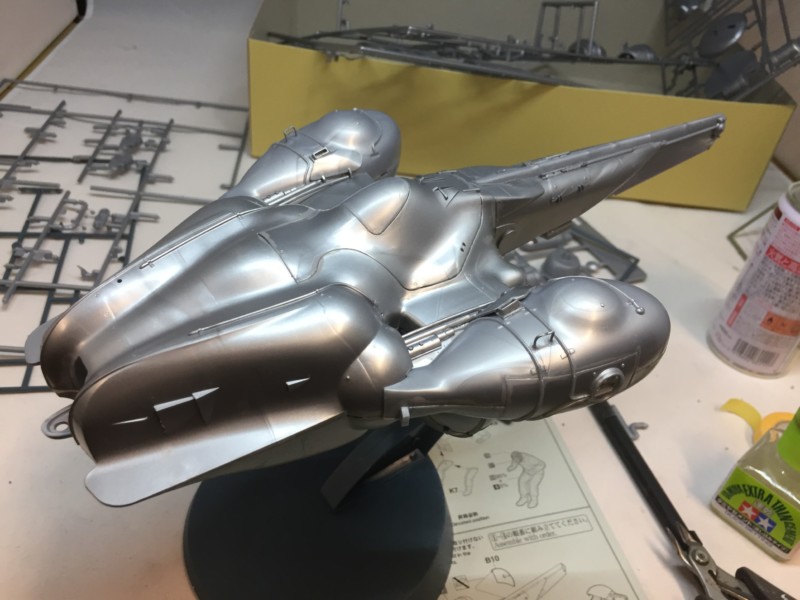
Conclusions
Apart from the warped base plate, I found no other issues with the kit — at least not that I did not cause myself.
Perhaps Kow Yokoyama’s designs are something you love, or loath. I rarely hear anything middling when discussing his style, which continues to evolve even to this day.
I certainly cannot get enough “Ma.K,” and this kit really stands out. All his fliers have a form of almost contradictory ‘utilitarian beauty’ to them.
This one is certainly one for The Hunt, as it were…. Quality!
Dr. Robodaz.


Michael Lee Smith
I LOVE this and I don’t even build this type of model…YET!
Is there any way you could tell how you painted all those wires/hoses/lines inside the cockpit, they are fantastic!
Thank you and thanks for a great article.
Robodaz
Thank you!
All the cockpit wires I just dry-brushed in, carefully with a mid range brush. Took a few layers to get the right depth of colour.
Then it was just a bit of covering with a wash of Nuln Oil (Citadel Paints) and it was job done. Quick n dirty, I know, but I love speed builds. 🙂
Michael Lee Smith
ahhh thank you sir! I gotta try that layered drybrushing, what paints did you use? Acrylics, enamels, oils?
Robodaz
I use Mr. Hobby lacquer, Tamiya Acrylics, and Alclad metals for airbrushing. However, I use Citadel Acrylics for hand painting (if only out of nostalgic attachment). For the pipes, it was all Citadel both in the cockpit and on the ship surface.
Michael Lee Smith
Thanks for the tips and for your time, really enjoy your work
wim
thats one shiny stingray 🙂
can i ask what kind of gloos varnish you used?
greets