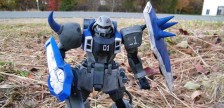
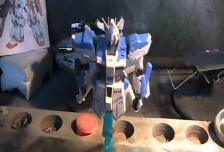
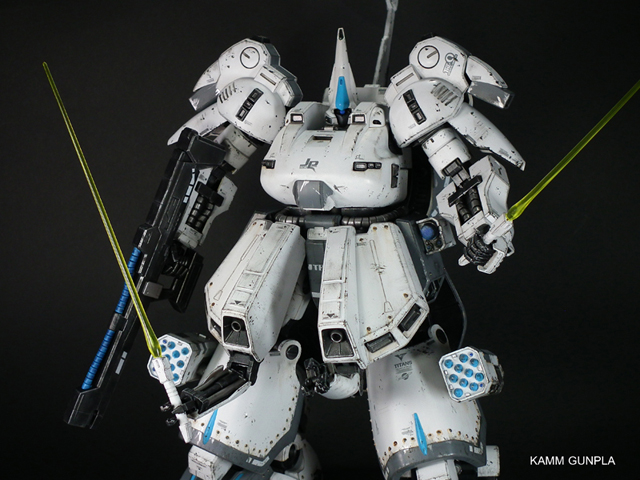
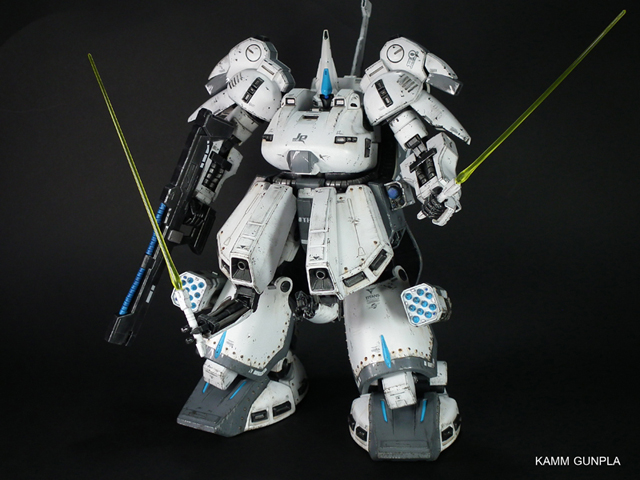
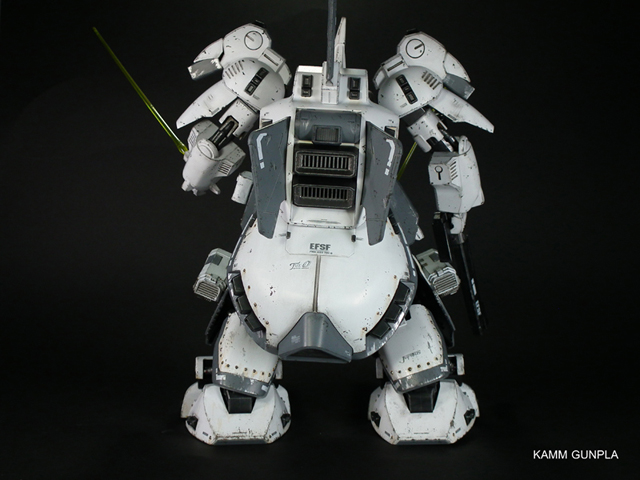
The-O: Frost Bite Custom
Submitted By: Kamm
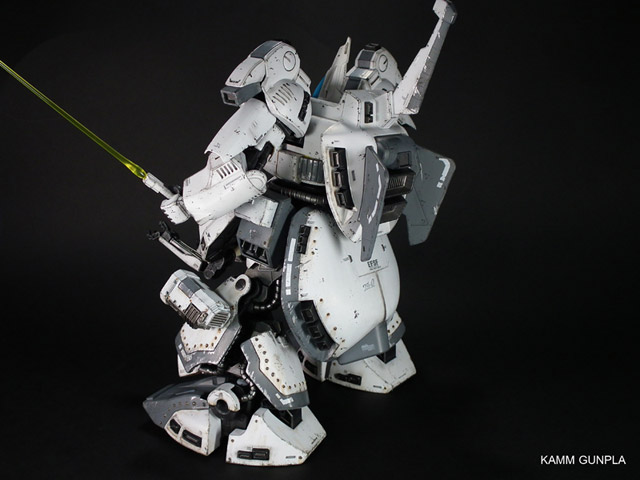
Hey guys, just finished this kit yesterday and thought id share it here on HLJ. Again like my strike this kit was 100% hand painted by myself and overall took me about 2 and a half months. I didn’t realise how big this model really was until I started painting it and realised it be dedicating a lot of time to multiple coats. ><
The inspiration for this kit was an Arctic feel, I did want to make a diorama for this but I am still new to the hobby and didn’t want to run before I could walk! Modfications to the kit were as follows:
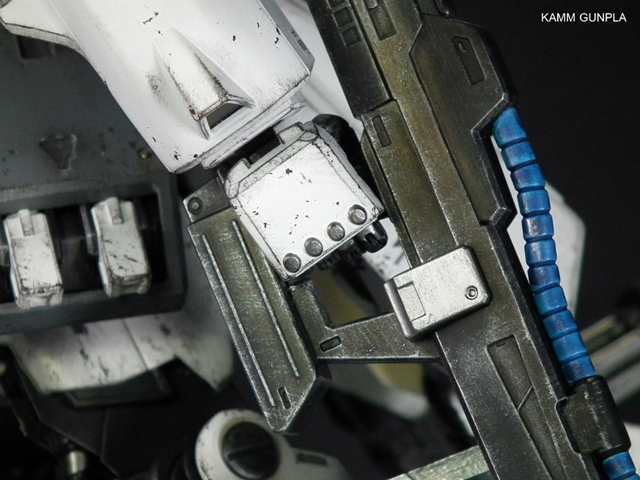
- Scribed some new panel lines
- Added little bits of pla plate
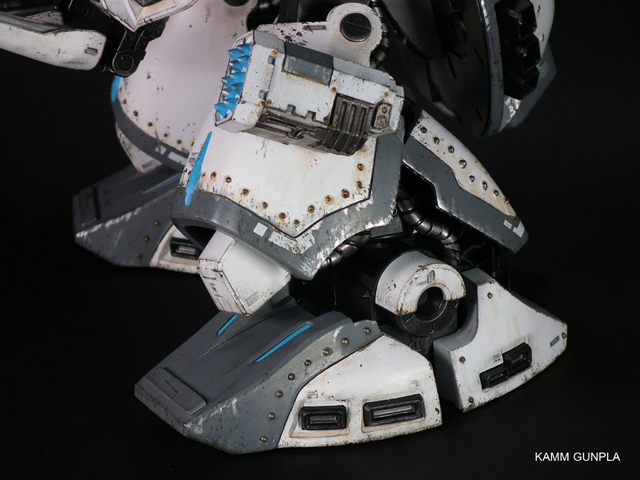
- Added Rivets into the armour
- Added Resin Missile Launchers to the lower legs (also tracking device on left skirt)
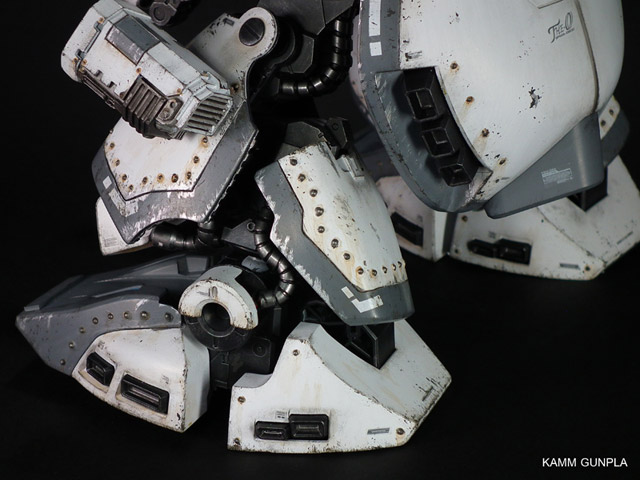
Aside from that I weathered the kit with very basic techniques. I dry brushed black and silver on most of the model and hand painted scratches also. I used a sponge to get the paint chip effect around the model (this is really basic just requires some patience!)
Overall I’m happy with the build, I know my main let down on this was using the Stickers, as they do show up a lot but genuinely I thought they would fit the kit nicely. I just want to say a big thank you to the guys at Gundam-Eclipse and the M.A.C forums for supporting me with encouragement and help, and also a big thank you to HLJ for allowing me to show off my work.
A video of this model is available here :


Traviss
Amazing work! I can’t help but to wonder what the Kshatriya would look like with the “frostbite”.
Sunny
Nice, me like it :P. Very nice weathering effects, nothing over the top and it looks very cool in this frostbite coloring scheme, I have to agree with Travis tough can’t stop wondering now over that Kshatriya……….
Gianni
First of all: A few photographs are very blurry…where can I find better photographs?
Second: How do you do the brown dirt? You say that you use a sponge. What kind of sponge? How do you proceed? It’s very realistic. Expecially the dirt on the grey parts on the foot.
Why don’t you do a step by step series of photographs about weathering.,
HLJ : Luke
@ Gianni i have updated the image so they are no longer blurry, i don’t understand how they became blurry but they have been fixed.
I will contact Kamm so he can answer your questions!
Matt
Very impressive!!
kriz
REMARKABLE JOB, I love every aspet of it.
Gianni
TIA
Corky
The weathering and paint chipping is amazing! To my mind, that’s exactly what a battle-scarred Gundam would look like. Fantastic job!
Kamm
@ Everyone – Thank you so much for the kind words and encouragment. You guys rock!
@ Gianni – The brown “dirt” is actually supposed to be paint chips, on the feet it does look more or less like mud though as I used a brown paint. The Sponge I used was a “Scouring Pad” used for washing plates and stuff. I have been asked to put together a tutorial for the various steps I use to weather a gundam by HLJ. So hopefully soon I will be able to show you step by step with video and pictures how I work.
Thanks everyone!
Kamm
John
Amazing! To think that it was hand painted. I could hardly tell the difference with an airbrushed kit. What did you use for painting? Is it acrylics? I’ve always want to learn how to hand paint to save costs but can’t seem to remove those pesky brush stroke marks. How did you achieve such even coating? Sorry if I ask too many questions. Thanks again and an excellent job!
Gianni
Awesome! I will wait for the tutorial! I spent the day weathering a Z-gok using oil paints. I cannot get that realistic dirt drops…with the brush the brown paint look “brushed”. Instead your is more random. Like if the MS really walked on mud, with very little drops and streaks of mud.
Carlos Arroyo
congratulations for this job!
Kamm
@Gianni – I will hopefully be able to outline a few methods for you about the random “mud” / “chips” 🙂
@John – I hand paint with Games Workshop paints which are water based acrylic. To be honest I mixed a White, with 2 subtle grey/blue shades to make the “White” for this model. Overall that didnt cost me much. I mainly thin down the paint enough so that is has a watery texture so that when the water evaporates the paint sits flush and smooth. It usually takes a good number of coats (for this model it took about 6-7 coats on some peices) So obviously you save cost on paint and other things but you loose time. I would love to be able to explain more but il try to make a video with how I personally paint.
Thanks again for all the kind words guys!
Lex
I haven’t commented on this since I was still admiring the amazing handiwork done to this kit!
Great job on putting this together. I’m kinda jealous that I wish I could do the same to my kits… but this… this has inspired me!
Keep it up and hope to see more!
James Clowes
That’s amazing!
Brian
kingdom hearts music?
Cdidle
WOW that is awesome work