-

crzydrunknmunky posted a new activity comment 10 years, 7 months ago
I thought I was an intermediate modeler when I saw the stuff people were posting in that group I just demoted myself….well They’re going to move us to the catagory we belong anyways so fret not! We all still have a chance 🙂
-
crzydrunknmunky posted a new activity comment 10 years, 7 months ago
The thing about older kits is that they take a lot of work to look just as good as the new kits that come out
-
I agree. That’s why it was one of my choices. Plus this would be a good start for me since this will be my first time doing painting on a kit.
I might start off on the Zaku and see how it turns out then go to my second choice once I’ve gain some experience on painting with this zaku.-
Ah, in that case I highly recommend the Zaku. You’re going to work your butt off to get it looking good but when you move on to newer and better kits you’ll have less of a problem at sealing seam lines and stuff. I did the same with my MG GP01 FB (my profile picture) and it certainly helped in my MG S-gundam build.
-
-
-
crzydrunknmunky posted a new activity comment 10 years, 7 months ago
The picture on the left had the reverse wash done. The gunmetal parts were raise and the silver were in the valley. I did it to a couple other parts with success I just didn’t take a picture haha
-
crzydrunknmunky posted a new activity comment 10 years, 7 months ago
Hey thanks for all the help! I puttied and sanded it a couple times but the lines were still there so I ended up spraying a really thick layer of primer onto the part and softly sanded it and the seam line disappeared!! I may be using that technique from now on. Thanks for your great help!
-
crzydrunknmunky posted a new activity comment 10 years, 7 months ago
Wow! You seem to love your astrays! Are you planning on getting the MG?
-
i already have MG astray red frame but its too space consuming so i have planning on getting every HG astray gundams 😀 my next target is Astray Gold Frame AmatsuMina
-
-
crzydrunknmunky posted an update in the group
Beginner Modeler – Modeling Competition 2013. 10 years, 7 months agoSo I’ve finished painting my kit! My reversal wash came out much better than I expected! All I did was follow this guide http://majorwilliams.blogspot.com/2011/04/gundam-building-101-reverse-wash-and.html
Now i’m off to decaling and panel lining. Almost done!
-
What parts did you do the revers wash on? I may have to play around with this some time and see how it turns out.
-
The picture on the left had the reverse wash done. The gunmetal parts were raise and the silver were in the valley. I did it to a couple other parts with success I just didn’t take a picture haha
-
-
crzydrunknmunky posted an update in the group
Beginner Modeler – Modeling Competition 2013. 10 years, 7 months ago -
crzydrunknmunky posted an update in the group
Beginner Modeler – Modeling Competition 2013. 10 years, 7 months ago -
crzydrunknmunky posted a new activity comment 10 years, 7 months ago
are you sure they’re waterslides? If they are you need to use Mr. Mark Softer or something like it to help film edges become clear. I’m about to update with my own decaled parts so you can see there
-
I can’t read Japanese, but I’m pretty sure I got the right one. It’s the GD-39 Zeon Decals. I do not have the Softer, but the Bandai logo seems to be fine with just water. Perhaps it’s the size of the decal itself?
-
hmm i leave this fórum for days and look the mess it turns lol.
what happen to your decals is normal, the wáter slide that are “supposed” letters and need to be seen on a painted model in almost all the type come with a light grey background, this is to make a layer for the eyes to see the letters of the decal, imagine you put a black letter d…[Read more]
-
So you’re saying it’ll be fine if I just clear coat it? It won’t come off?
-
Ok water decals are not a paper that separate from the decal when it’s mixed with water, when you put the decal on water it trigger it’s little amount of glue it has, glue that needs water to work, and air to dry, so at the end is glued to the model, but scrathes will take of. Then you can add barnish but:
Mat barnish gives a +1 coat of…[Read more]
-
-
-
-
-
crzydrunknmunky posted an update in the group
Q/A & Help Group 10 years, 7 months agoDoes Mr. Mark Setter dissolve Tamiya Acrylic and Future Varnish? I used it today and it completely messed up the paint on that part. Can I used Tamiya’s Enamel clear then?
Also, I hear I can mix flat base with clear in order to get a flat varnish is there a ratio I should be aware of?
Thank you for your answers!
-
crzydrunknmunky posted an update in the group
Beginner Modeler – Modeling Competition 2013. 10 years, 7 months agoI started painting on my MG S Gundam kit! I wanted to try something new, so I painted the gunmetal parts with enamel so I can do a wash with acrylic. I hope it comes out nice! Also along the way, I decided to switch out the old outdated MG hands for the Bandai HD hands
-
Looking good! 😀
-
crzydrunknmunky posted an update in the group
Beginner Modeler – Modeling Competition 2013. 10 years, 7 months ago -
crzydrunknmunky posted an update in the group
Beginner Modeler – Modeling Competition 2013. 10 years, 7 months ago -
crzydrunknmunky posted an update in the group
Beginner Modeler – Modeling Competition 2013. 10 years, 7 months ago -
crzydrunknmunky posted an update in the group
Beginner Modeler – Modeling Competition 2013. 10 years, 7 months ago -
crzydrunknmunky posted an update in the group
Beginner Modeler – Modeling Competition 2013. 10 years, 7 months ago -
crzydrunknmunky posted a new activity comment 10 years, 7 months ago
Its actually very easy! Its like plastering up a hole in the wall, apply putty to messed up area, wait for it to completely dry, and the sand until smooth! Sanding until smooth might take a little experimentation, I found that 300, 600, 1000 works really well for me!
-
crzydrunknmunky posted a new activity comment 10 years, 7 months ago
I do, but it doesnt fix the molding flaws where the 2 pieces dont line up correctly. So I just use both!
-
just sand the piece a bit if they are not straight. that’s usually the case of earlier kits. I don’t like to repaint the kits, so cement works better for me.
-
-
crzydrunknmunky posted an update in the group
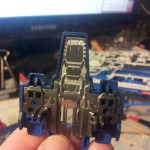
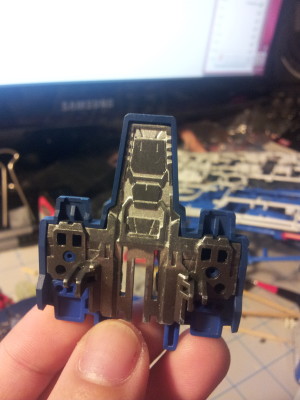
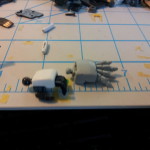
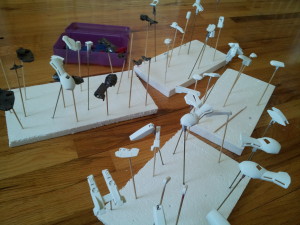
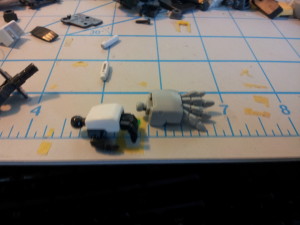
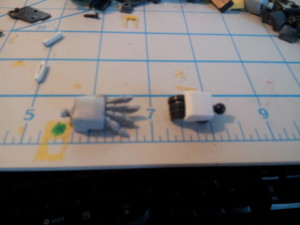
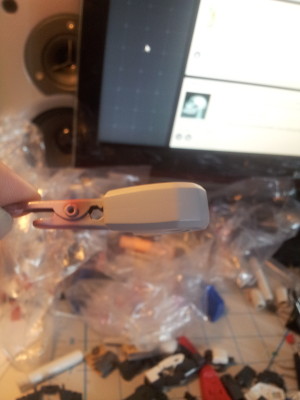
Beginner Modeler – Modeling Competition 2013. 10 years, 7 months agoWIP for S-Gundam MG, SAND SAND SAND, AND KEEP SANDING. This is currently my work space, it looks like a mess. But its an organized mess. you can pick up any piece from my table and I can tell you what part its from. The picture below is just a WIP of my work in getting rid of seam lines. Other than that I’ve been getting rid of mold lines and some…[Read more]
-
i m scare to use putty on a model i dont know how to use it
-
Its actually very easy! Its like plastering up a hole in the wall, apply putty to messed up area, wait for it to completely dry, and the sand until smooth! Sanding until smooth might take a little experimentation, I found that 300, 600, 1000 works really well for me!
-
-
I suggest you use plastic cement instead, much cleaner and easier to clean up.
-
I do, but it doesnt fix the molding flaws where the 2 pieces dont line up correctly. So I just use both!
-
just sand the piece a bit if they are not straight. that’s usually the case of earlier kits. I don’t like to repaint the kits, so cement works better for me.
-
-
-
-
crzydrunknmunky posted an update in the group
Beginner Modeler – Modeling Competition 2013. 10 years, 7 months ago - Load More


Maybe they should add a sub-beginner category… 😉
lol +1