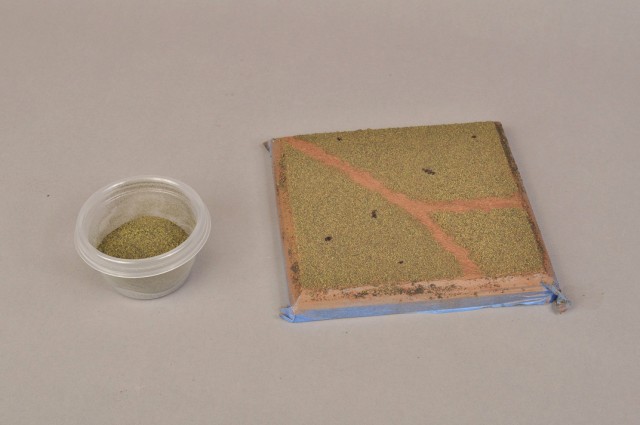
The wait is finally over, this is the third and final part of the Rx-79(G) diorama. This time we will be finishing up the scene by adding the foliage and the Gundam itself. To start off with we need to lay down a layer of fine turf. I will be using a mixture of various fine turf colors by Woodland Scenics. To fix the layer of turf to the base i use scenic cement by Woodland Scenics but essentially it’s just a mixture of white glue (dries clear) and water. If you want to lay down a solid coat of turf to the base you can simply coat the entire base with the watered down glue mixture ( i spray it on with an old spray bottle), or you can do like I have done here and paint on the glue mixture over areas i only want the turf to stick to so I can create a nice path effect. After you have the glue mix applied simply shake the fine turf over the area until it is evenly covered. If the layer is not as thick as you would like the first time, simply spray another light coat of glue over it and apply more turf. When it is dry gently blow any excess turf off of the base.
At this point start figuring out where you want elements of the scene to go and where you want to place your figure. Play around with different layouts until you find one that leaves enough space for everything and looks natural. Once I figure out where I want things to go I mark the areas where I will be placing trees and the Gundam’s feet so that i don’t place too much foliage over these areas. Then I drill the holes for the trees in the areas I indicated with black sharpie. Some scale trees come with bases so if you would like to leave them on and simply cover them with foliage instead that is also an option. However i want things to look more seamless and natural so i am removing the trees from their bases and drilling holes to place the trunks of the trees in. After the holes are drilled I go ahead and add the first layer of shrubbery or underbrush with various colors of clump foliage again from Woodland Scenics. This layer can be scattered and shouldn’t be put on too heavy, you can always go back and more later as needed. Once you have the first layer where you want it a few drops of the same watery glue mix over the top will soak in and fix the layer to the base.
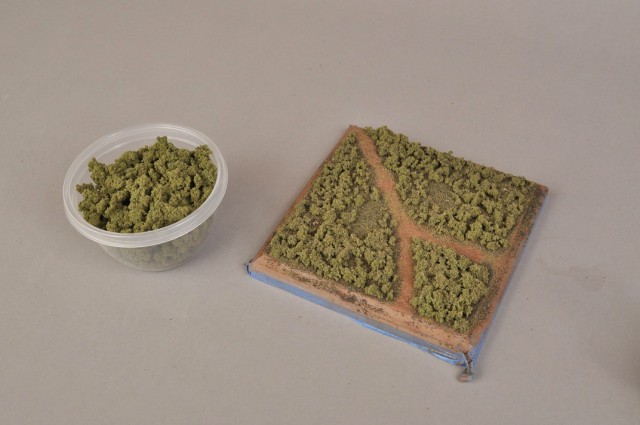
So I don’t lose track of the holes i made for the trees i place toothpicks in them so i can see where they are through the next layer of foliage. In the next layer I add more underbrush with fine leaf foliage from Woodland Scenics which resembles smaller branched foliage. Again for this layer don’t add too much at first, scatter it around so it looks natural. The idea is to build up the layers just like in a real forest area with thick bushes underneath and tangled brush on top. When you are satisfied fix it to the base with a few drops of the glue mix over each area.
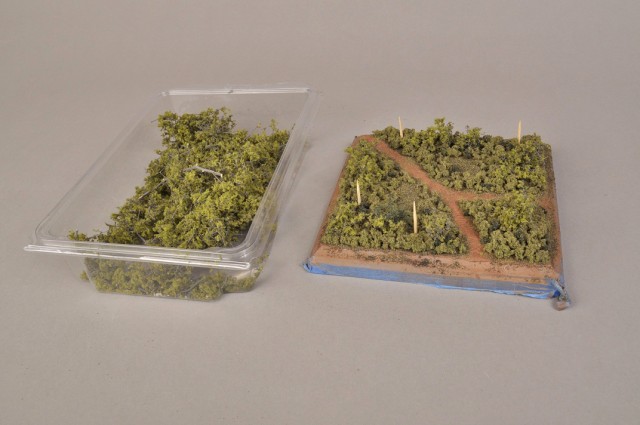
Now I add the trees to the scene. To fix them into the holes I made for them I find hot glue works just fine and dries sturdy. Here are a few views of the scene up to this point. The masking tape ahs also been removed from the base because I will no longer be spraying anything over it.

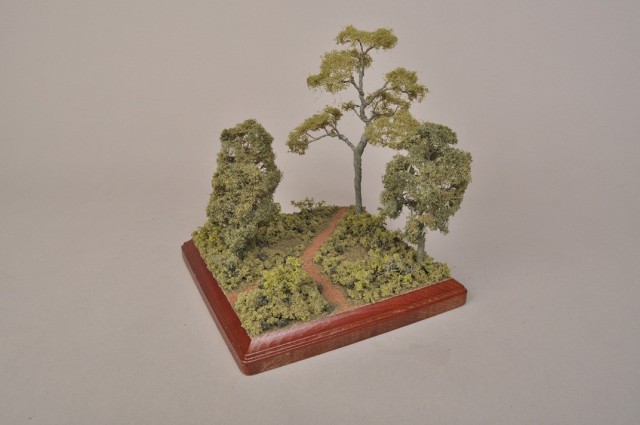
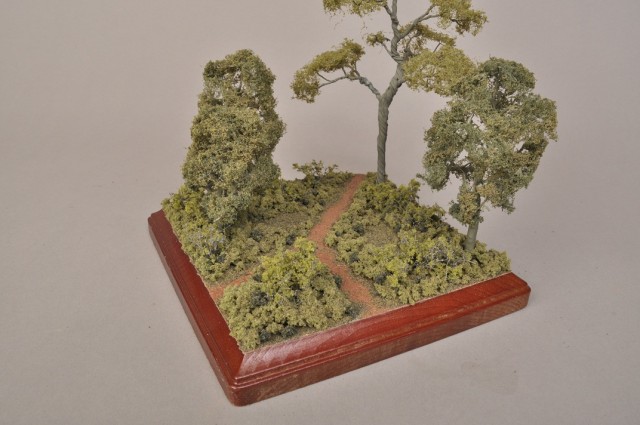
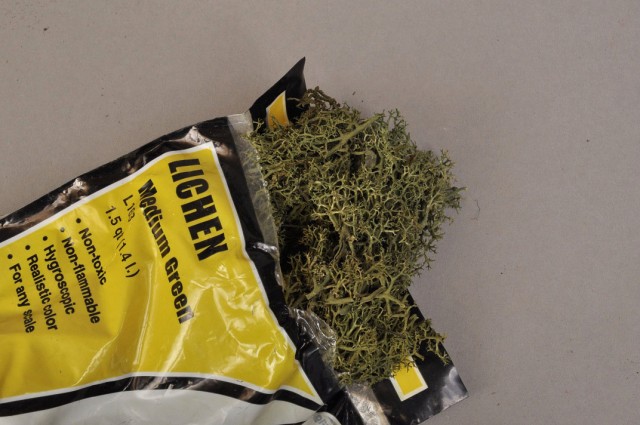
Now we can introduce the Gundam into the scene and start building up more elements around it to make the foliage seem thicker and more realistic. I have left areas for the Gundams feet in the scene uncovered so it can stand flat against the base. At this point the Gundam is not fixed to the base so that i may remove it and a final layer of glue to scene. Around it I add more layers of clump foliage, fine leaf foliage, and introduce another element called lichen which is an organic moss material used to simulate more natural looking bushes. After I feel satisfied with the arrangement of foliage in the final layer i fix it to the base with a final coat of glue mix.
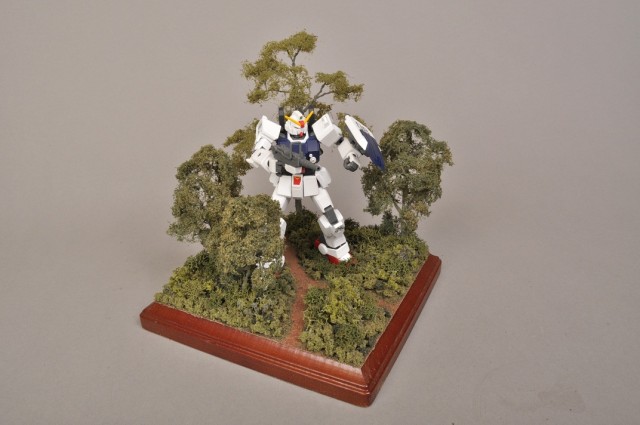
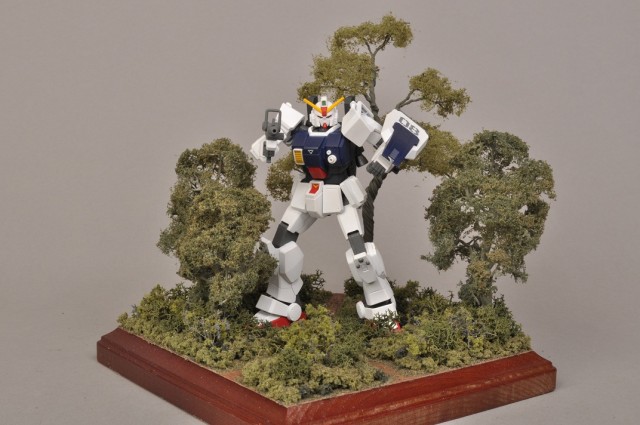
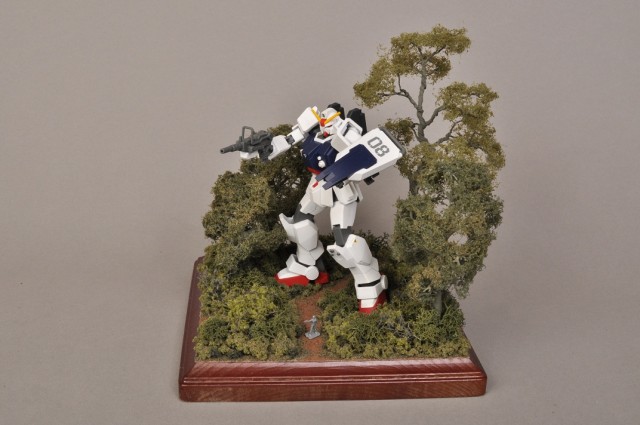
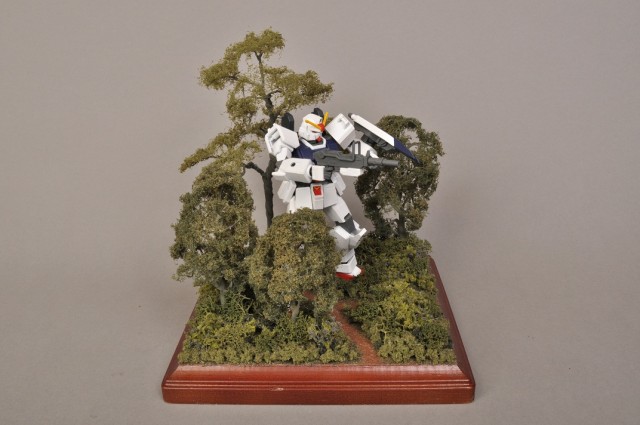
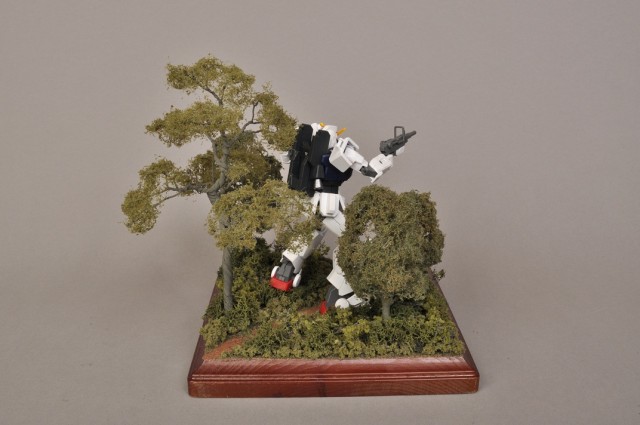
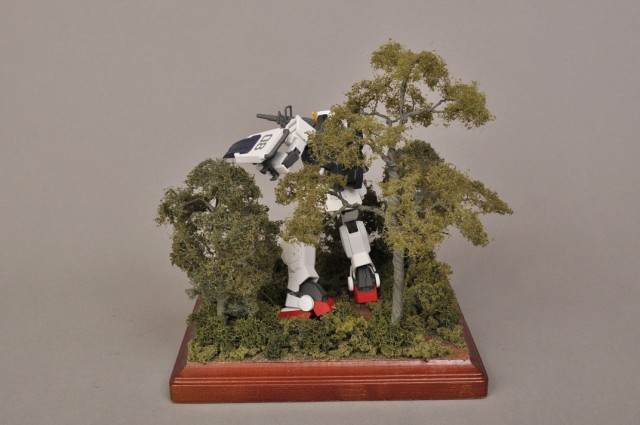
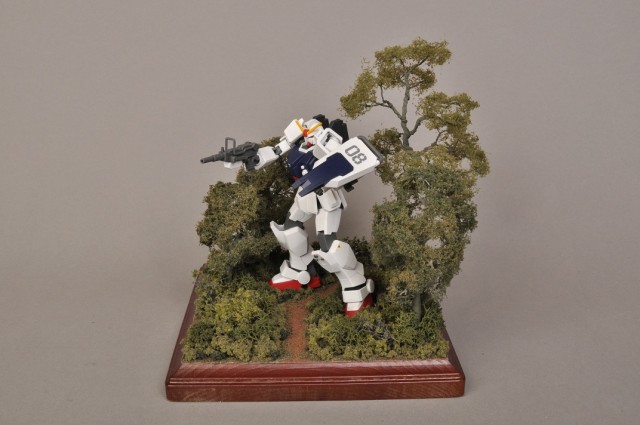
And that’s it ! The diorama is complete. The Gundams feet have been glued to the base to hold it in place and all foliage has been fixed to the base with scenic cement. Here are the images of the final product. I have also included a small 1/144 scale figure in one of the photos for a size comparison (not included in the kit).
Thanks for watching !


Spikesagitta
Cool, that’s pretty awesome 🙂 Thanks for the simple explanation, look easy enough (look easy, but not in execution :P), might try it for myself.
But, this cover forest and such, but what about other terrain? Space? Desert?
Yuri Barbosa Ordeste
Looks amazing! I always was fascinated by dioramas, and wanted to try myself, this sure is a lot helpful!
Spirtspear
Nice work it looks very nice.
john
i like the diarama idea do u have one showing us how to do a dessert one and space
Joe
The diorama is pretty good for something that is rather simple. I learned a lot from this set of tutorials. I’d say the Gundam needs to be dirtied up if it’s been in the forest, but this was about the dio, not weathering. Well done! And thank you for the lessons!