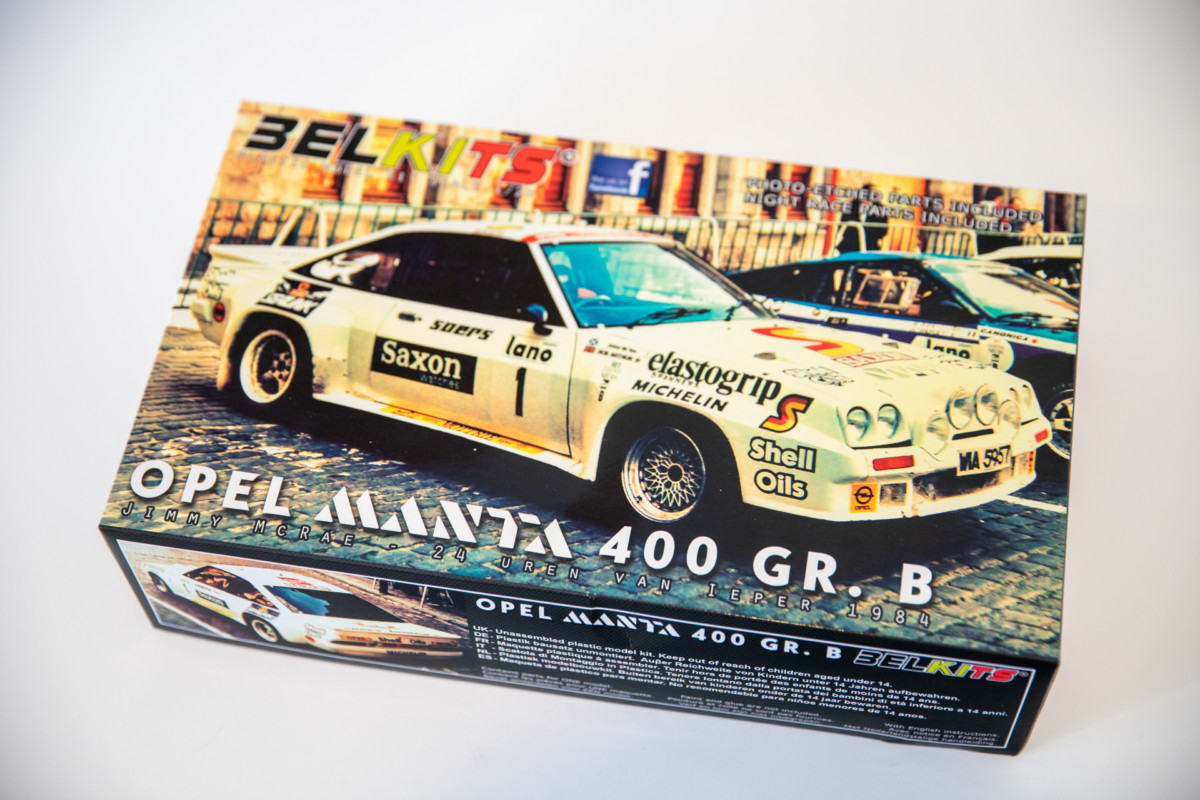
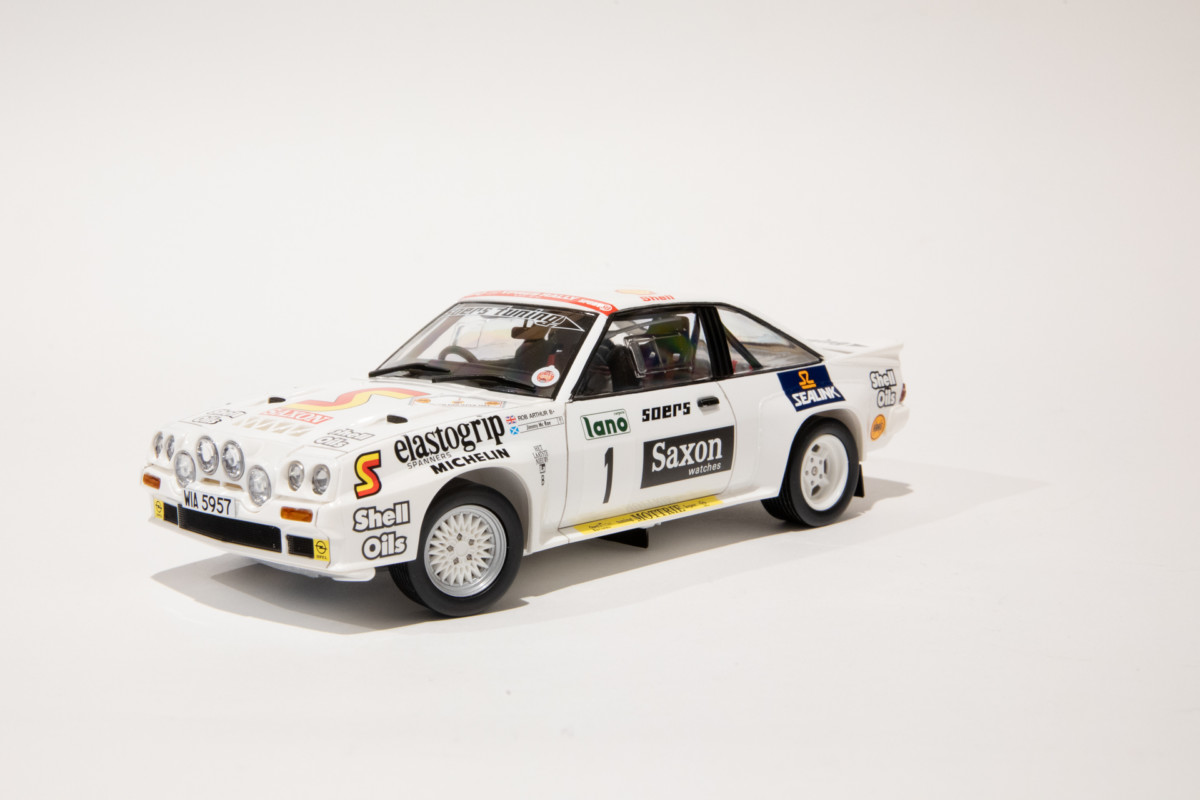
In 1984, the world of rallying was on a steep increase in both popularity and performance. The German manufacturer Opel had just debuted a new rally platform – the Manta 400. Powered by a 2.4l engine making 275hp @ 7200RPM, the rear-wheel drive Manta was finding it tricky chasing down the 4WD Audis in the WRC. It did, however, find great success in national championships across the UK and Europe at the hands of both works and privateer teams.
This example by Belkits is the 1984 car driven by Jimmy McRae (father of late WRC hero Colin McRae) in the Ypres Rally – a staple and very famous rally held in Belgium. Anyone who is anyone has competed here, and the names adorning the trophy read like a who’s who of rallying.
Kitset
This is the first Belkits kitset that I have attempted, and when opening the box I was pleasantly surprised. Inside is an entire kit that includes high-quality Cartograf decals, optional parts for left-hand or right-hand drive variants, two wheel combinations, and also two trees of photo-etched parts (usually sold separately by everyone else).
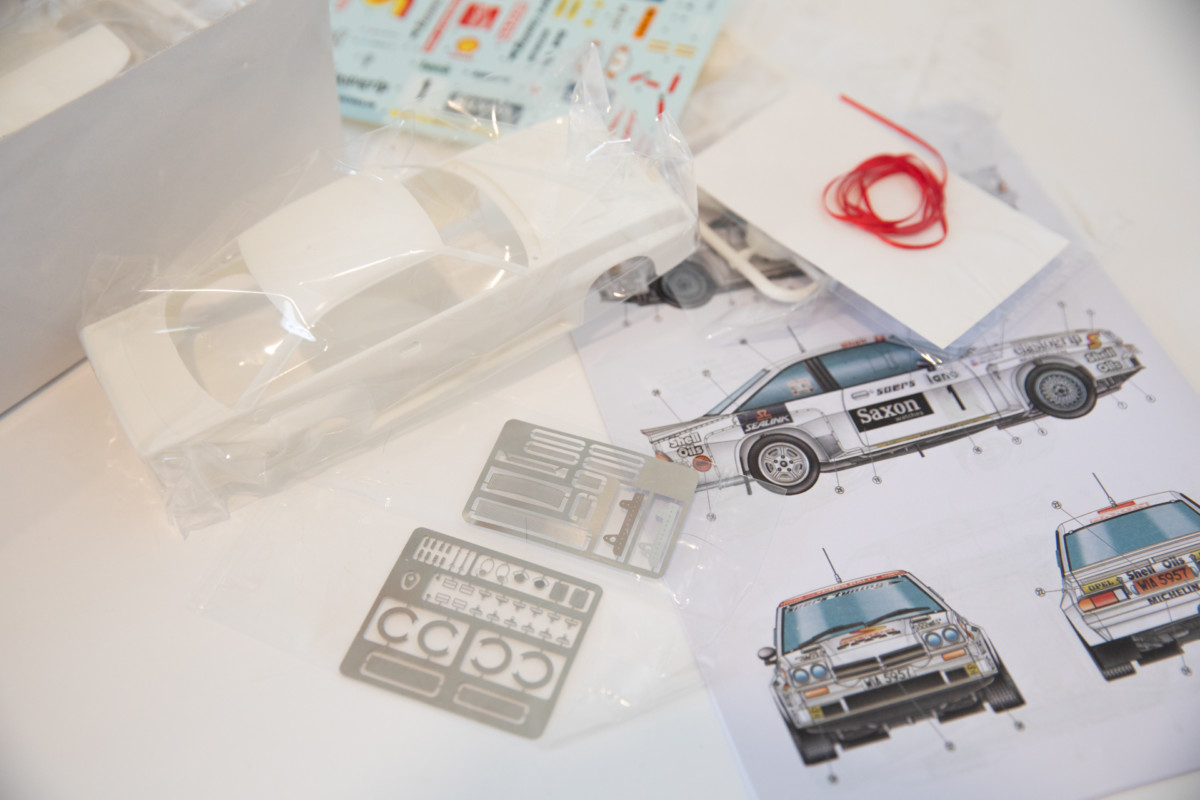
The model comes molded in white, black, and chrome along with clear windows and lenses, and a nice set of rubber tarmac tires. The kit has a wee bit of flash, but that is nothing that any seasoned model builder can’t handle.
After a look through the kit it became apparent that Belkits has some tricks up their sleeve that the larger companies don’t. The first being that the kit is produced by 3D CAD, and this allows for perfect seamless fitment between the large portions of the model such as the chassis and body. No big open gaps in the wheel arches like other manufacturers — this for me was a big plus.


Chassis and suspension
Upon starting assembly, the kit is quite simplistic in form. However, don’t let this put you off buying it. What it doesn’t have in high detail, it makes up for in great fitment, tooling, and ease of building.

My favorite part of the chassis is that everything is molded in white plastic. Super easy to paint, no need for heavy primer over black castings.
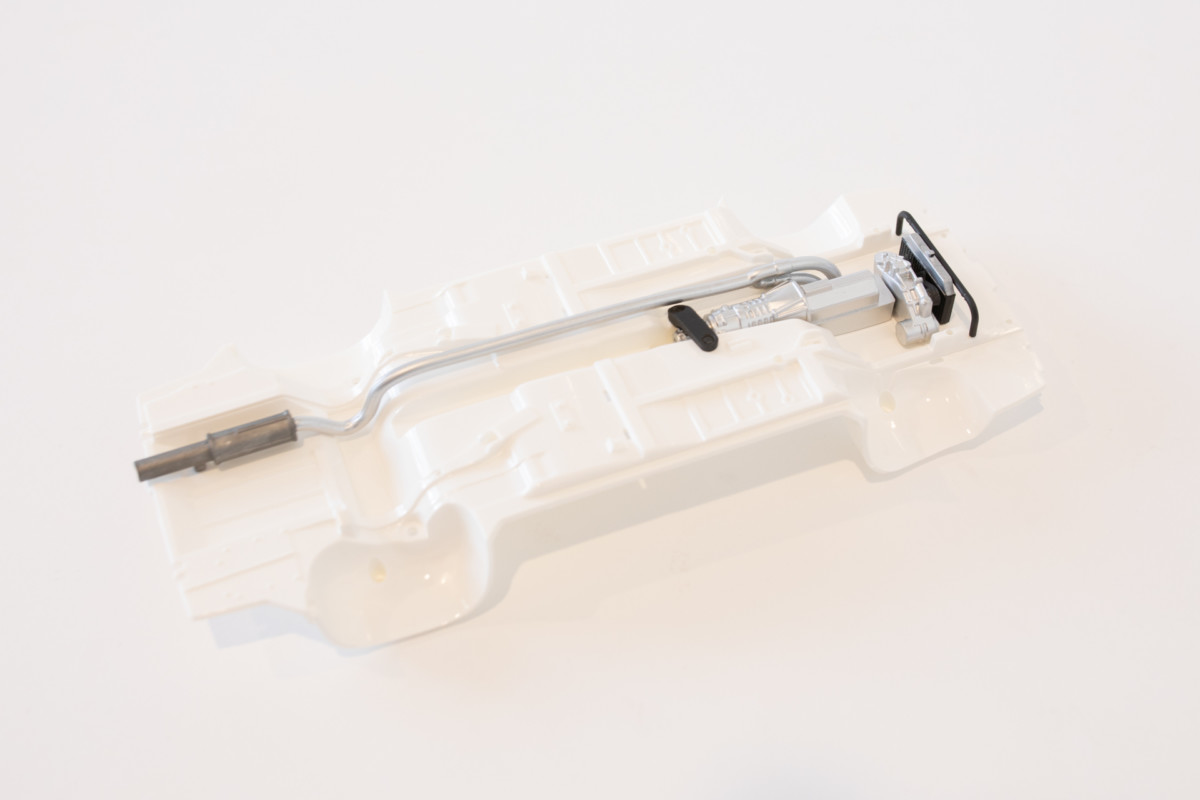
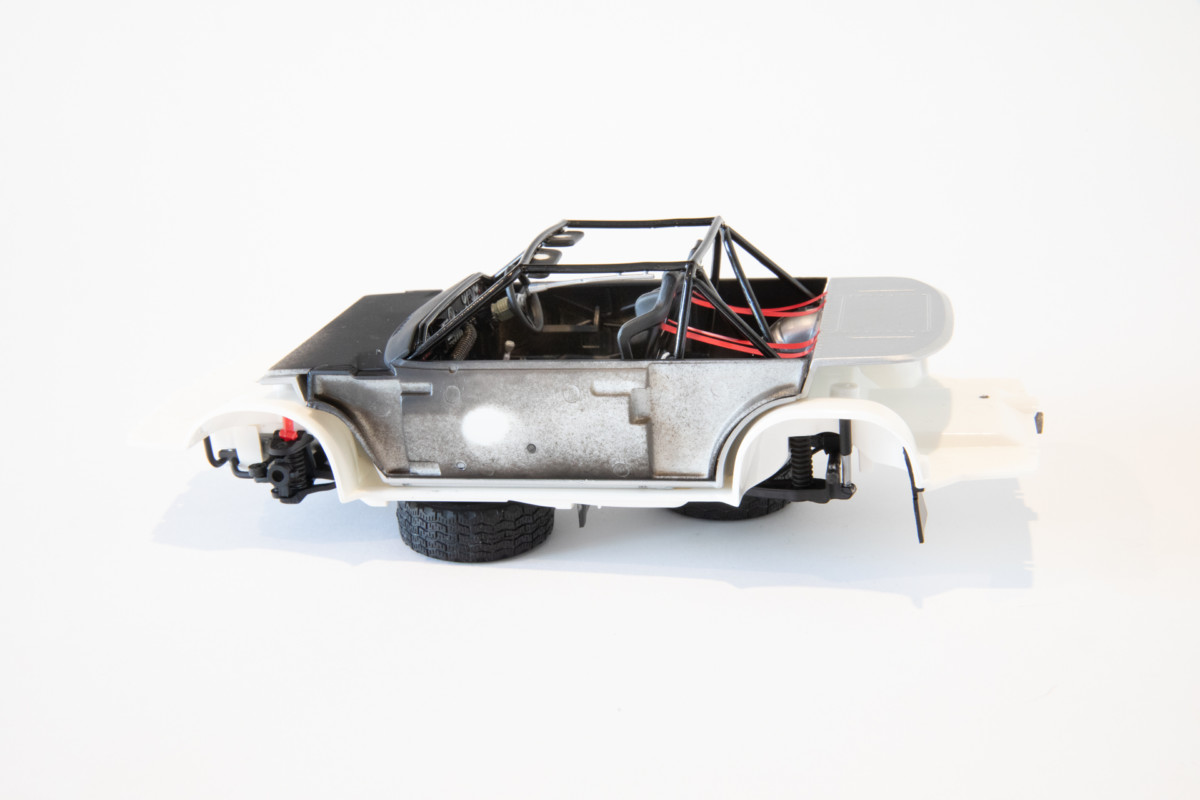
As this was my first attempt at a Belkits model, I purposely left the suspension out of the car until the very end. The reason for this was simple: it gave me the chance to adjust ride height and ensure all 4 wheels touched the ground once the body was fitted to the kitset.
As it turned out there was no adjustment needed, and everything fit superbly in the end. This is due to the suspension being simple, and consisting of large parts making a good solid underbelly on the Manta.
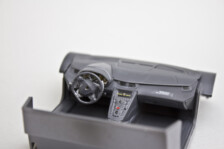
Cockpit
For a simplistic kit, Belkits has really come to the party on the interior. In many ways for me it surpassed a lot of the bigger brands and looks superb once assembled. Included are small things that other companies overlook such as co-drivers light, tools to change wheels, and the jacking device. Nice touches for the kit and all these things bring the interior to life.


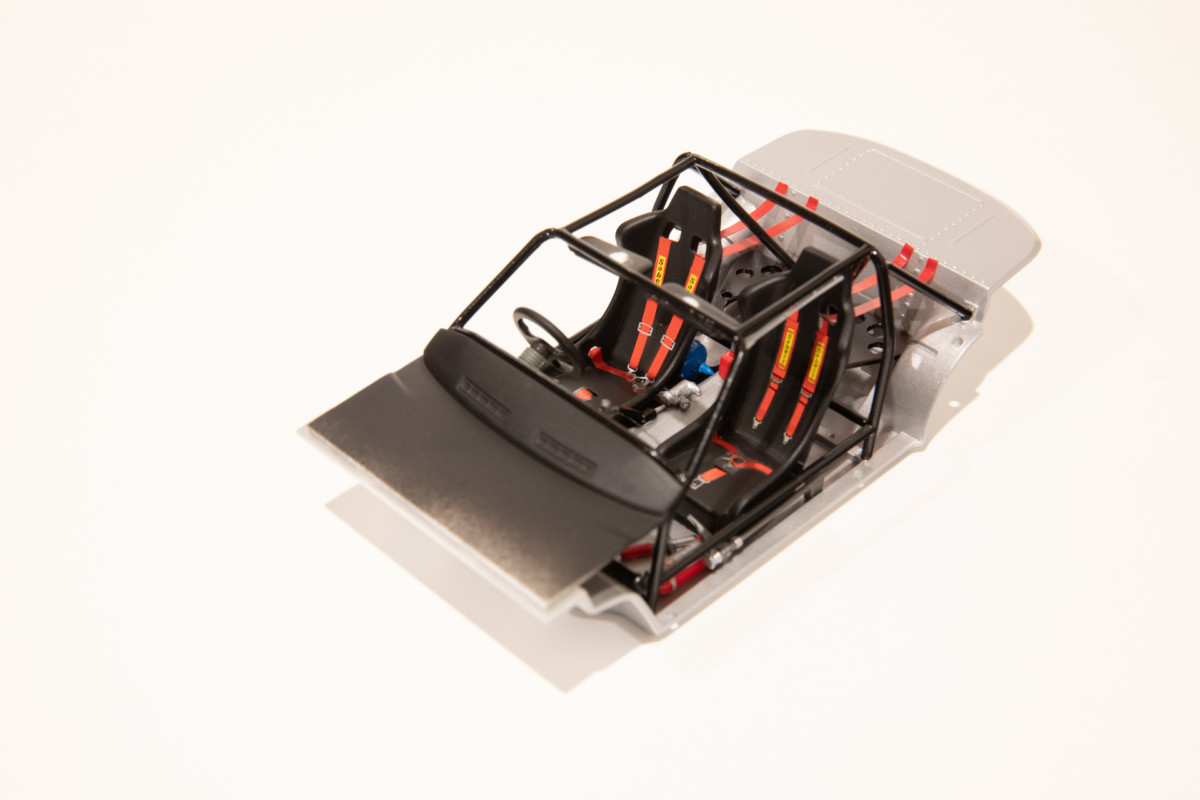
One other nice aspect of this kit is that you can choose to build a left-hand drive version or a right-hand drive version. This leaves the kitset open to 3rd party decals, and differing variants of the car to be built. Belkits has really thought about making this kit diverse, so there is no need to scratch build anything if you happen to want a Rothmans, Opel dealer team entry along with all the other privateer versions that existed.

Upon completion of the cockpit the doorcards are added to the sides to cocoon the interior. For an added touch of realism, I added the harness extensions that run from the rear of the bucket seats to the rear of the cockpit. I simply used 2mm wide strips of red electrical tape sliced using a hobby knife. A simple touch but certainly adds to the interior in a colourful way.
Chassis and cockpit assembly
It is now time to mate the chassis and cockpit together. This was a typical way traditional kits were produced before the interior detail was cast into the chassis. Two large alignment pins allow you to simply glue the cockpit right onto the chassis with no worries about lining anything up wrong. It was also at this stage that I installed the suspension.
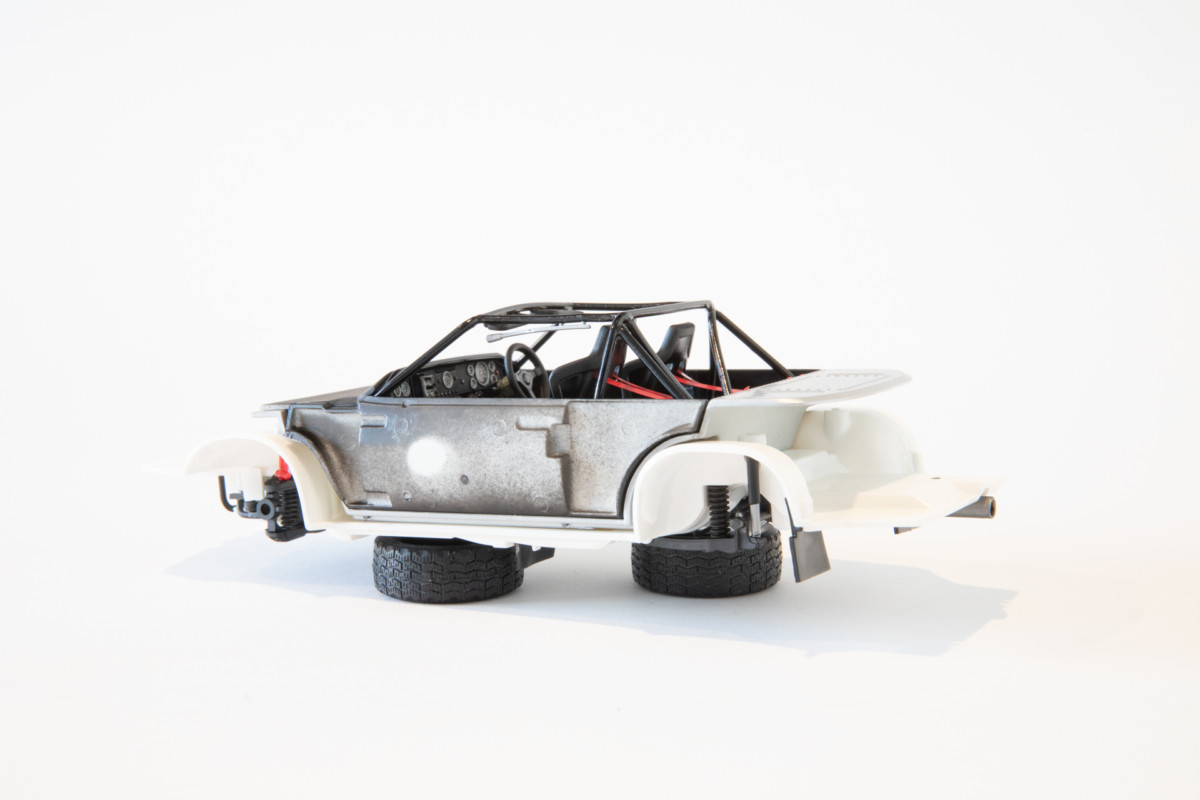
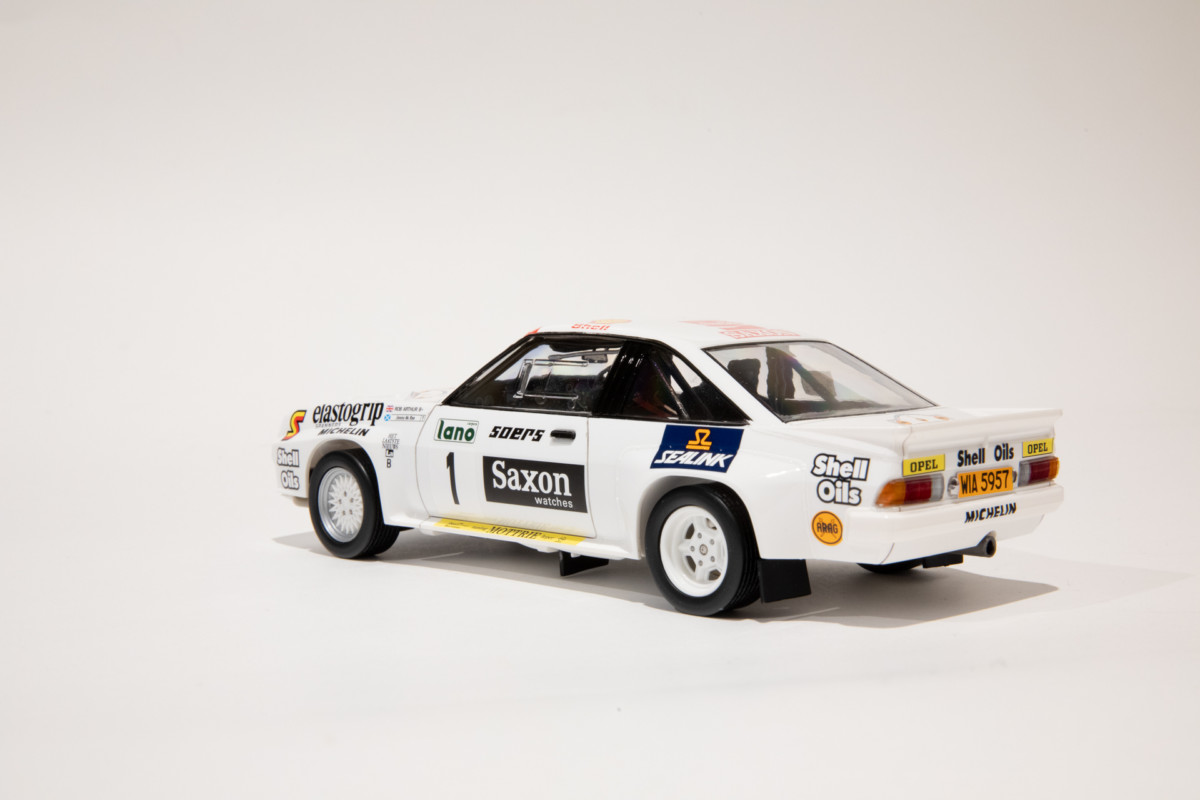
The kitset also includes rubber mudflaps: one set is located half way between the front and rear wheels, and the other is set directly behind the rear wheels. Usually these are simply glued onto a flat surface but Belkits has special tabs that lock into place with glue, making them incredibly easy to install and line up. Another simple yet effective feature on the kitset.
Body and windows
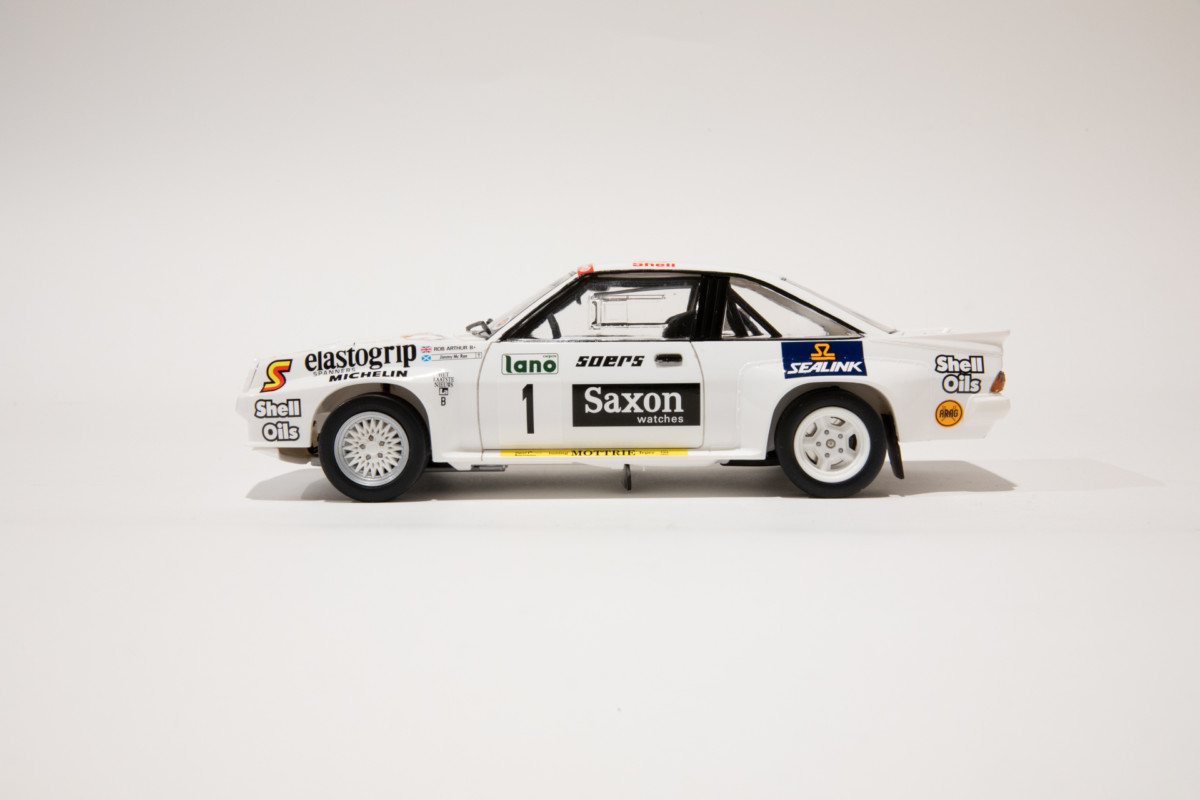
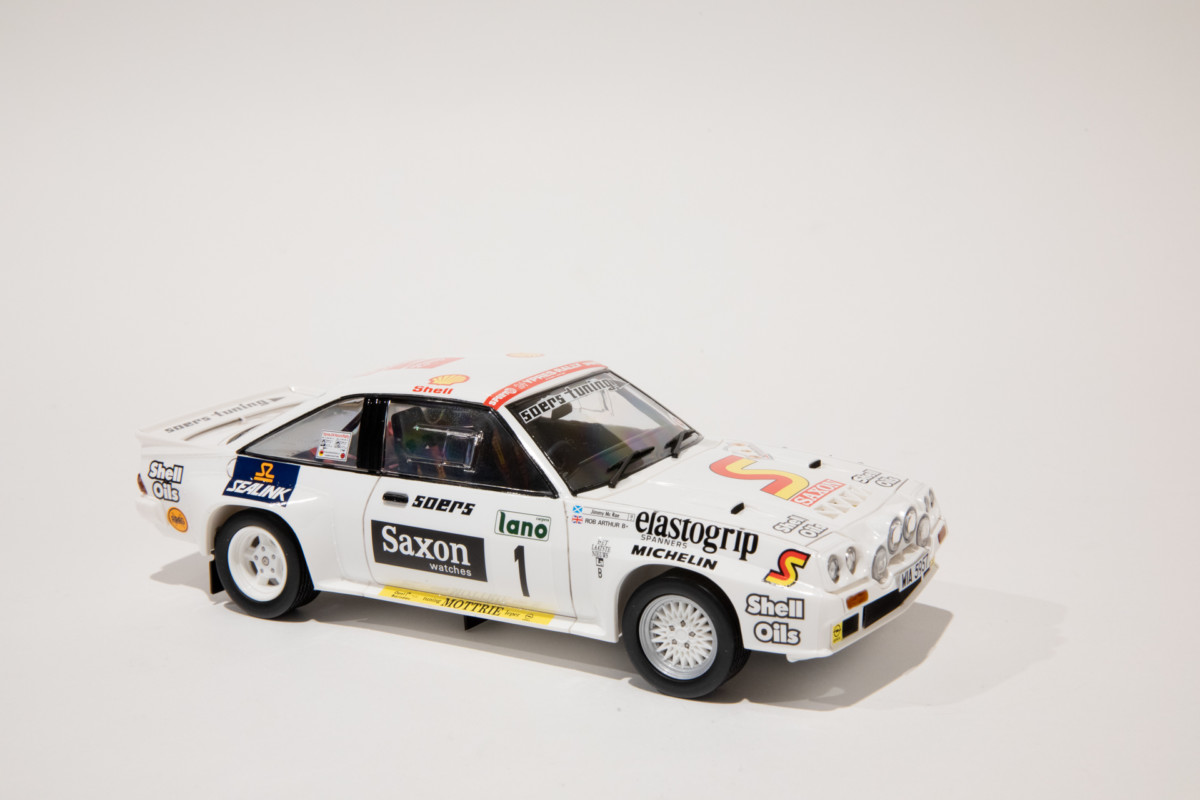
The timeless lines of the Manta are well replicated by Belkits, and it is a nice clean, sharp casting. The kit comes with an optional front end to run light pods or a simple daytime front bonnet/hood setup. The choice to build the kit up exactly as you please is a nice, subtle, but important touch.
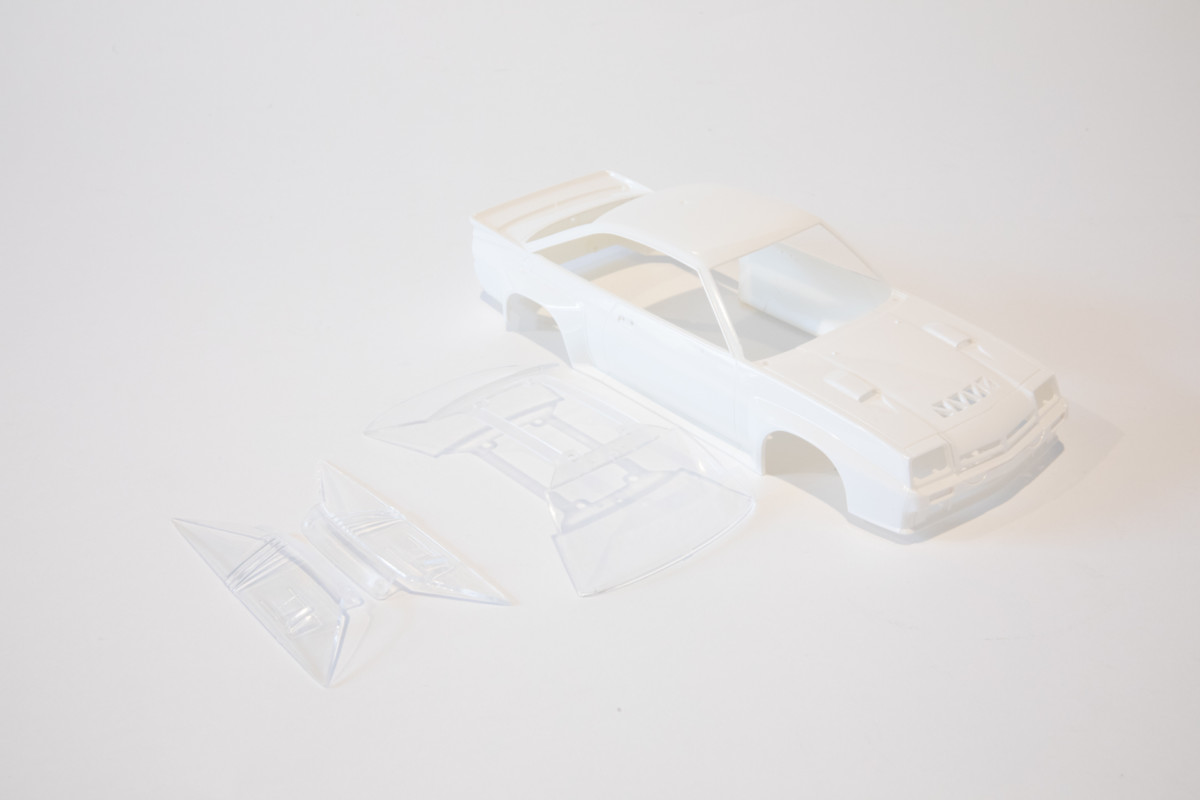
In the above photo I added the smooth daytime hood to the car for reference, but ultimately went with the light pod setup as I feel it makes the car look more aggressive, and who doesn’t like a set of light pods hanging off the front of a rally car?
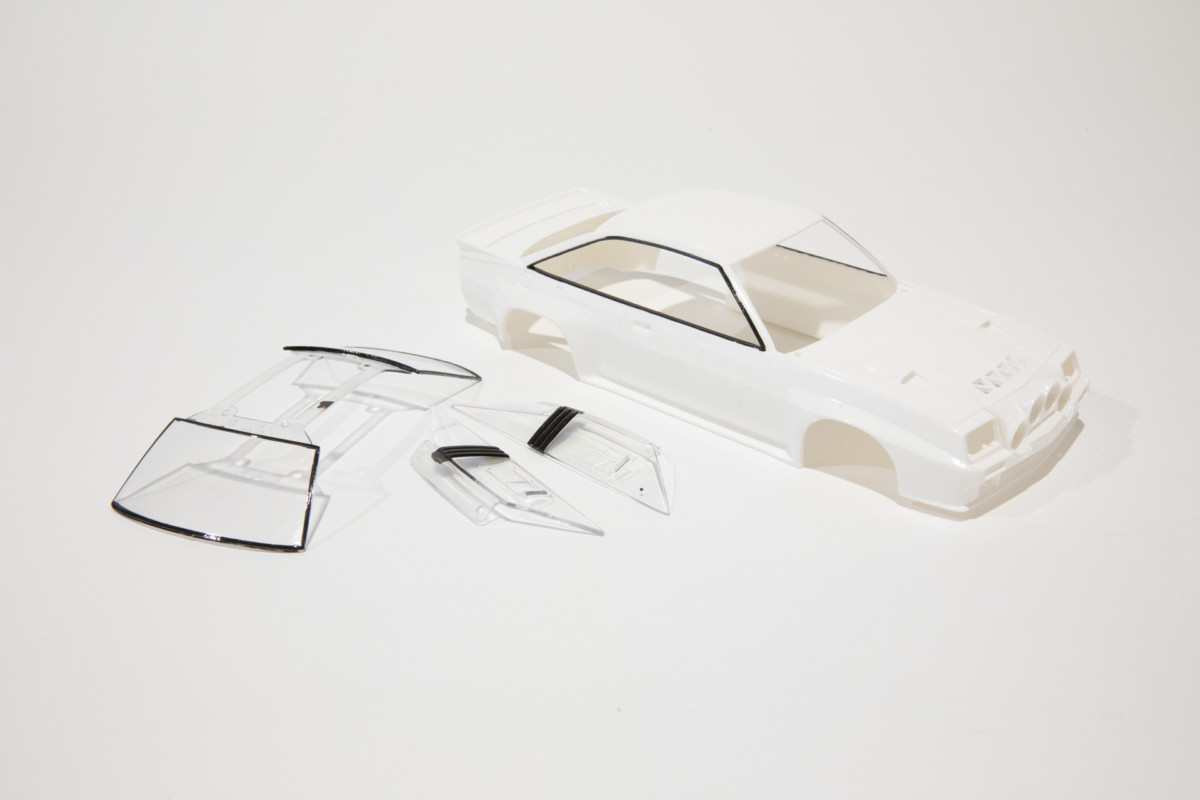
After masking and painting the windows with Tamiya masking tape, the glass was ready for installation. Another excellent thing Belkits has done with this kit is they made the interior glass 3 separate pieces, rather than one large piece as Tamiya traditionally does. Guiding pins molded into the interior mean you simply ‘click’ them in and they are installed.
The side windows are exactly the same: click them into place, and then you have the windows all seamlessly installed. I added a small spot of glue on the pins to ensure they don’t move. This has to be one of the top 3 best-fitting window installations I have ever had encountered on any kitset. Well done, Belkits!
Final assembly

The final assembly step was to add windscreen wipers, front and rear lights, and the door handles. Wheels are now on and the stance of the car is perfect. As you can see the front and rear right side wheel arches are seamless; no gaps, which is a big plus for me. The car looks great in white and could easily be left like this to replicate a pre-season test car as well if you wish.
Decals
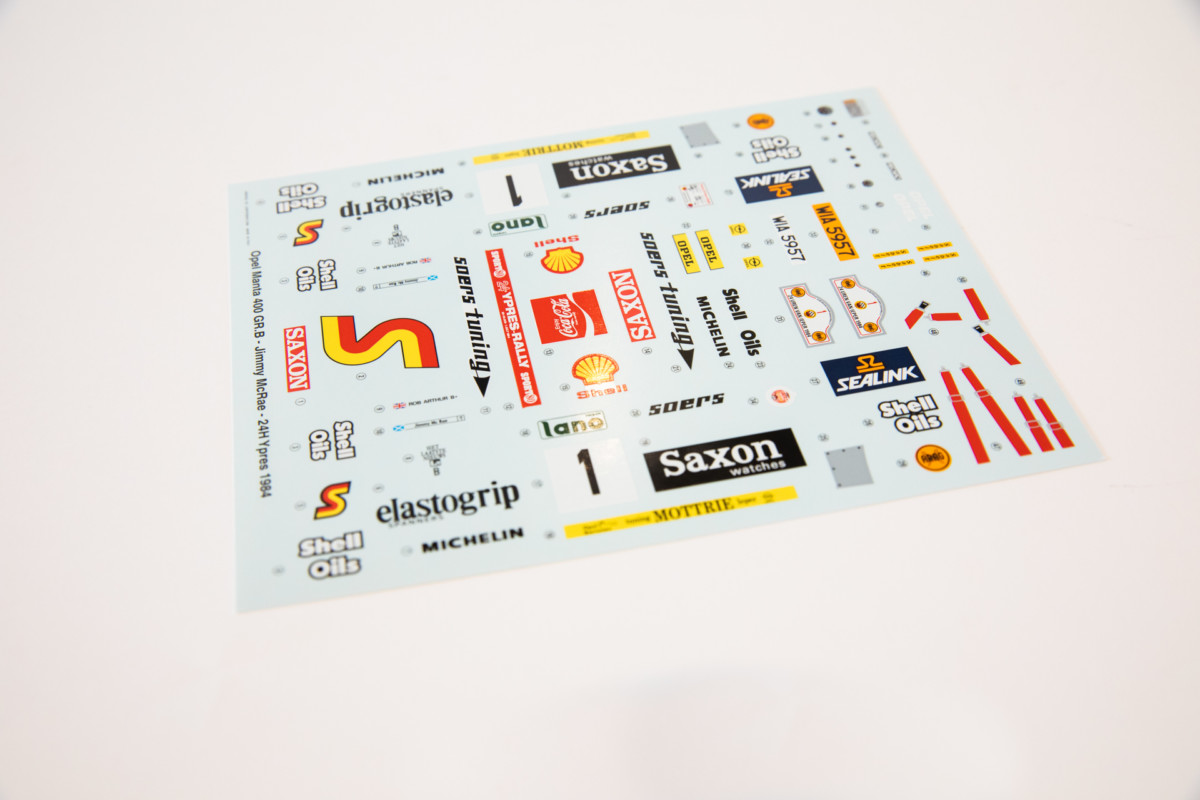
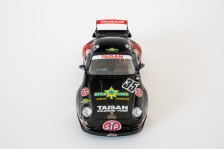
As mentioned previously, the decals are manufactured by Cartograf, Italy and are superb. No borders, and very soft which means they adhere to the small curves around the rear end of the car. I didn’t need any decal solution, and they were a pleasure to work with.
The finished product
I went into this build open-minded. The kit was simplistic, but I liked the small details that other companies overlook. As I got more and more into the build the fitment started great and continued in the same way. I loved the thought that went into the tooling on the car with the body and chassis fitment, window glass, and options throughout the build. The Manta is a timeless classic, and very deserving of its own 1/24 scale kitset.

I was drawn to the kit simply because it is a machine from the Group B era of rallying, and if you are a bit of a classic rally fan like I am, then you will enjoy adding this kit to the collection. Belkits has a few more Group B cars in the works as well which makes me more excited than ever to see what they come up with in the future. The Manta 400 has just whet my appetite for more, this will certainly not be the last kit of theirs I build, that is for sure!