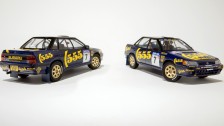
Team TAISAN is a legend that many Japanese race fans are familiar with, especially due to their dominance throughout the early years of SuperGT. When the series was known as the Japanese Grand Touring Car championship or ‘JGTC’ for short, the Team TAISAN Porsches were to be found at the pointy end of the field, mixing it with the bigger Toyota Supra machines. Tamiya immortalized the 911 in 1/24 scale in 1996 and it has been a staple kitset ever since.
The kitset
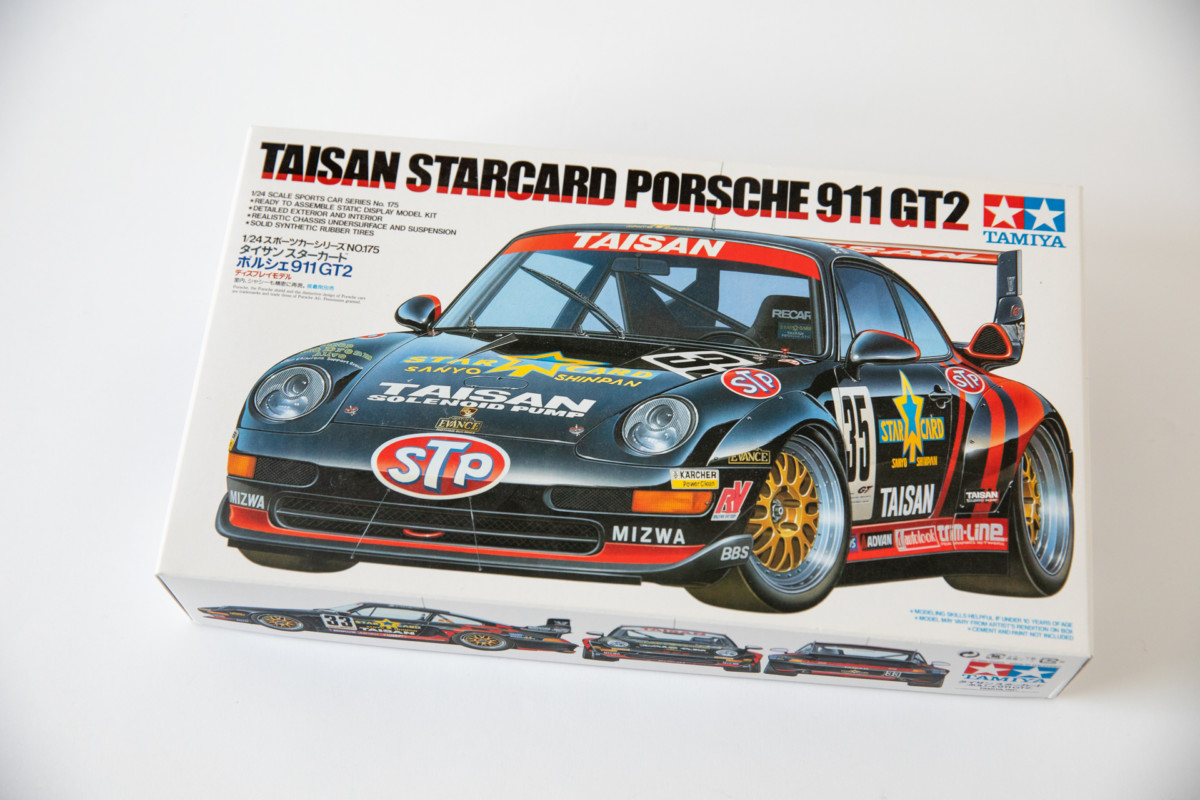
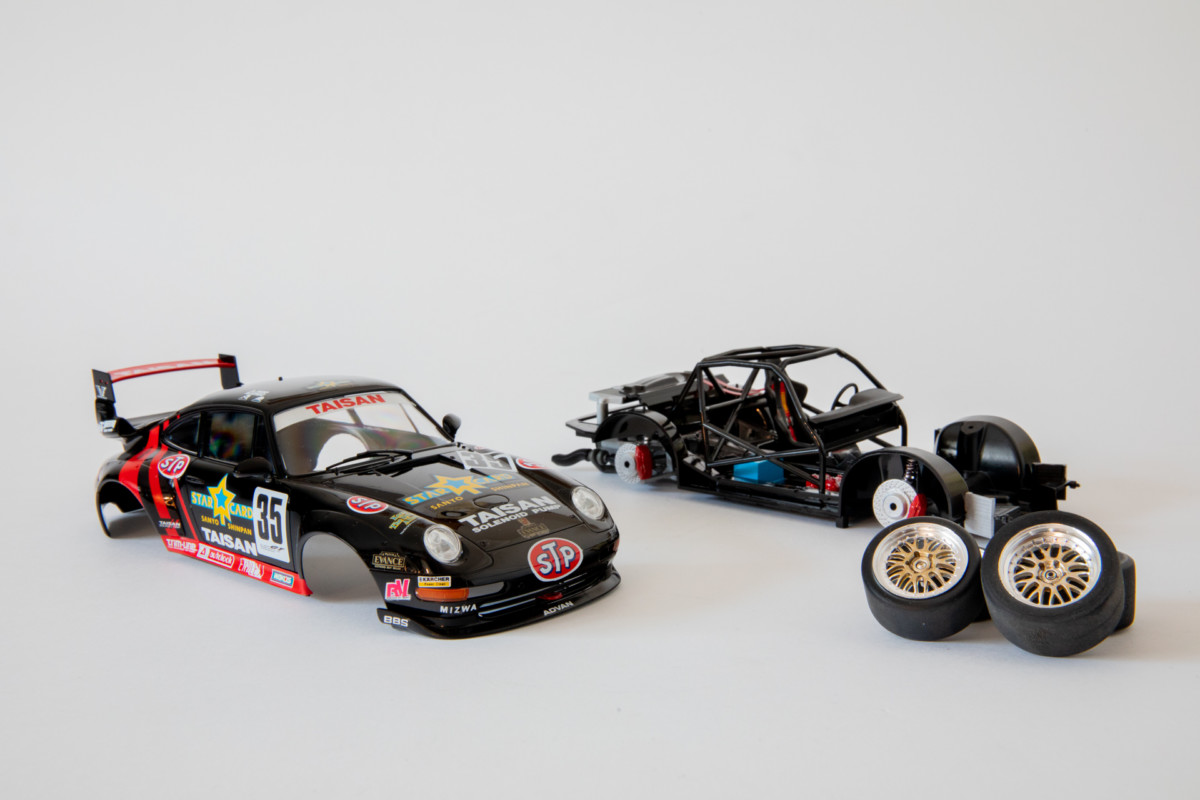
Upon opening the box one thing strikes you, where are all the parts? Don’t be fooled, this is a more simplistic casting compared to modern Tamiya kitsets, however the final product looks just as good. It is predominantly cast in black, although does come with nicely chromed wheels, as well as a clear sprue for lights and window glass.

The kitset is curbside with no full engine, although the block is cast into the chassis, and a nice set of headers and exhausts protrude from under the rear bumper so don’t worry about a lack of engine detail.
Chassis and suspension
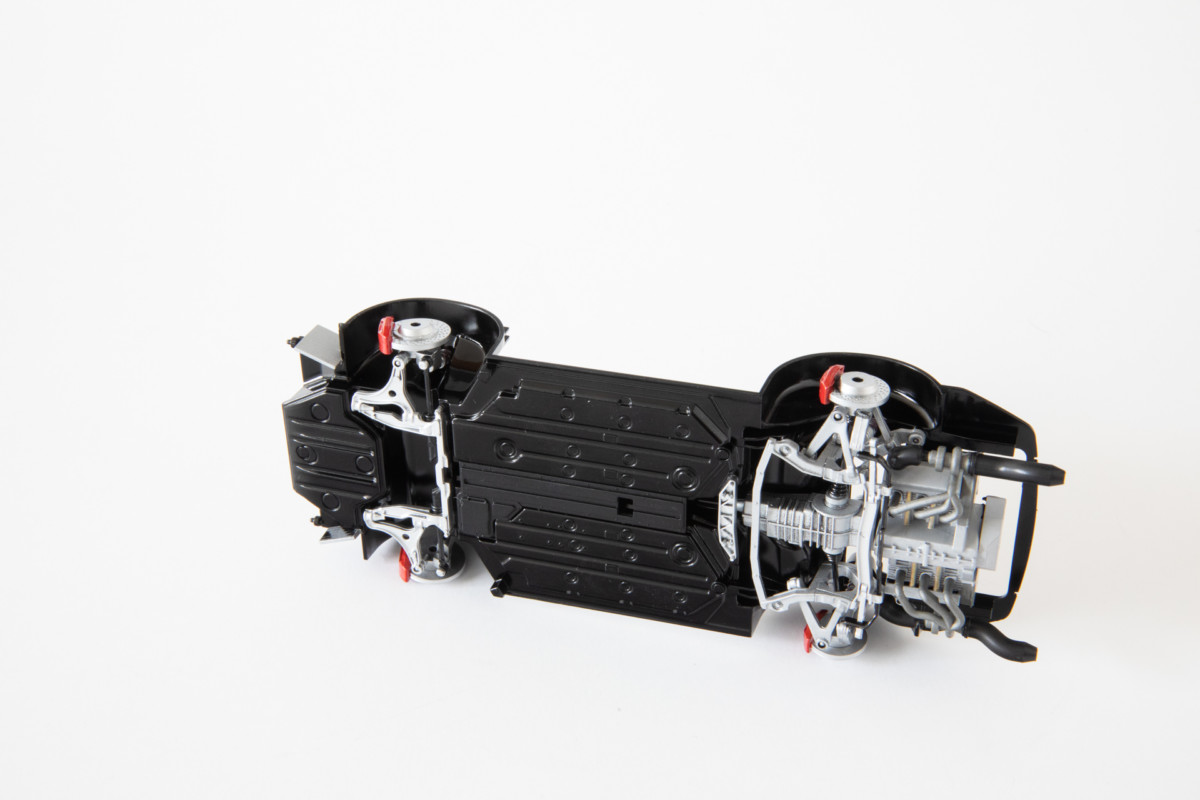
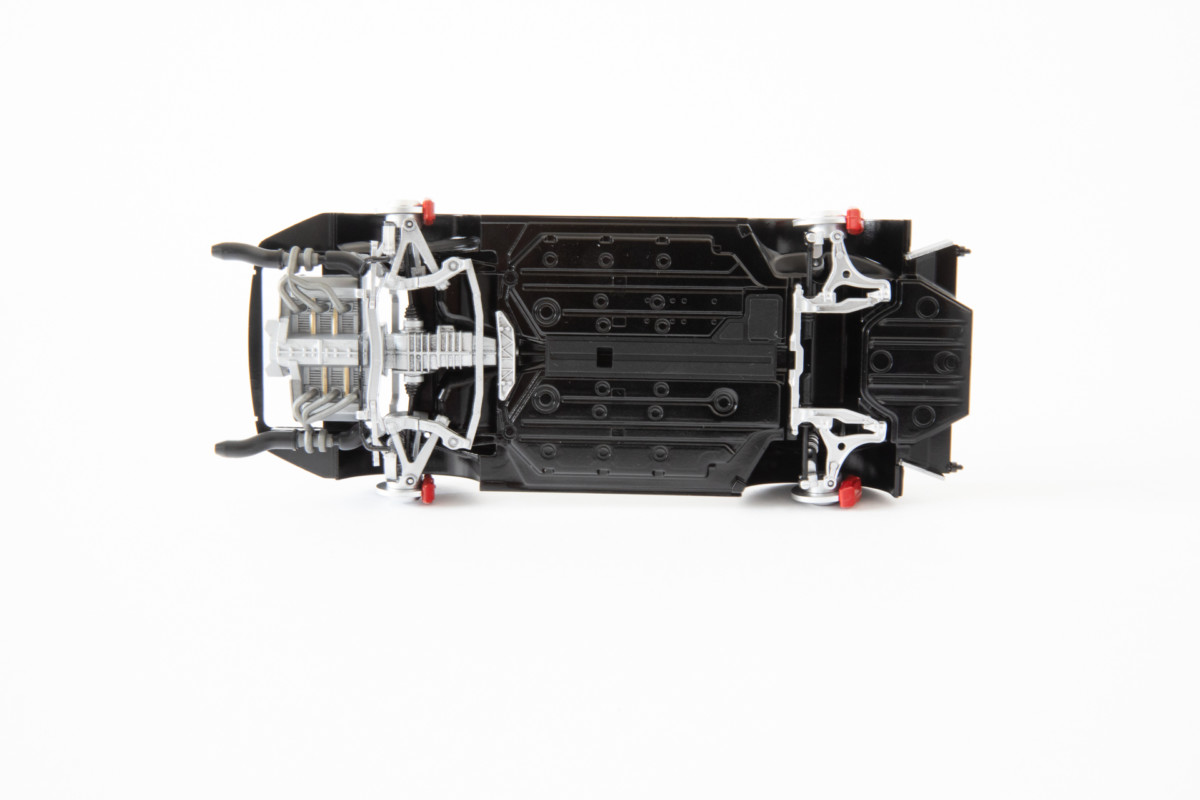
The 911 has a very aggressive cambered stance to the suspension in order to fit the large rubber under the guards. The suspension fits superbly in place, and is relatively out of sight once wheels are attached to the kit.
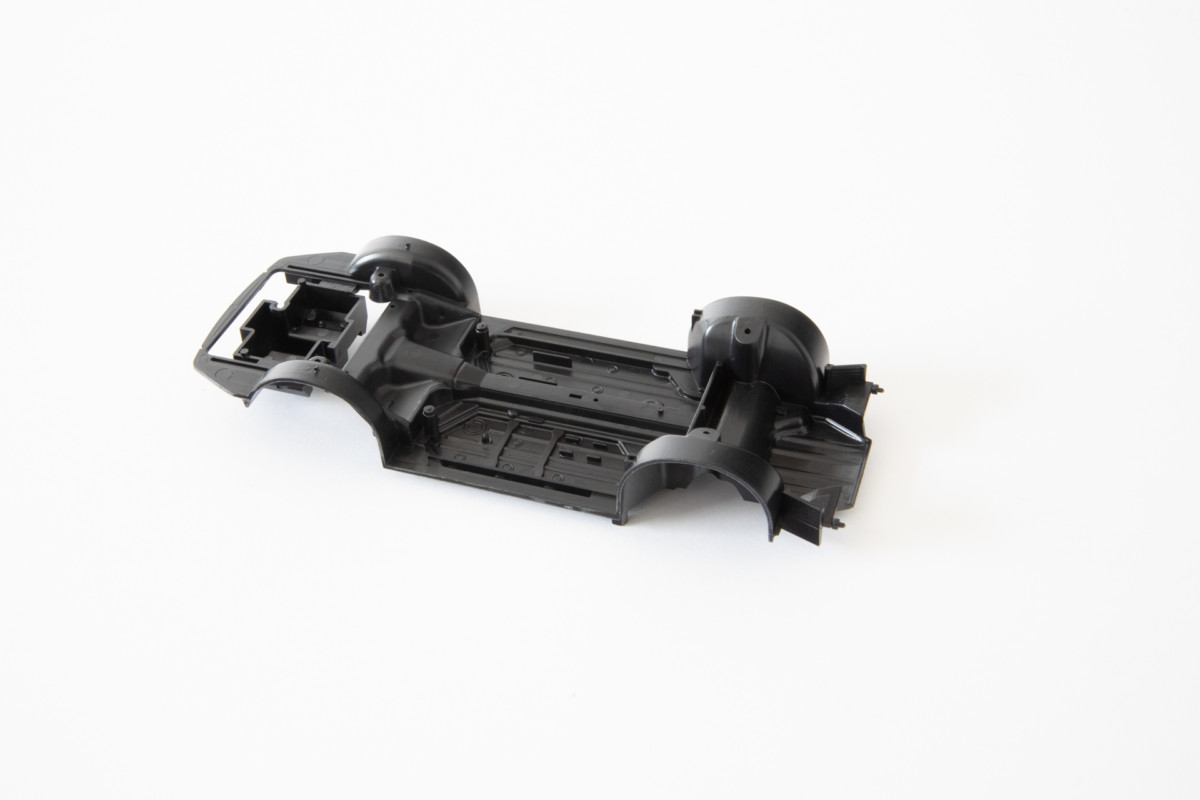
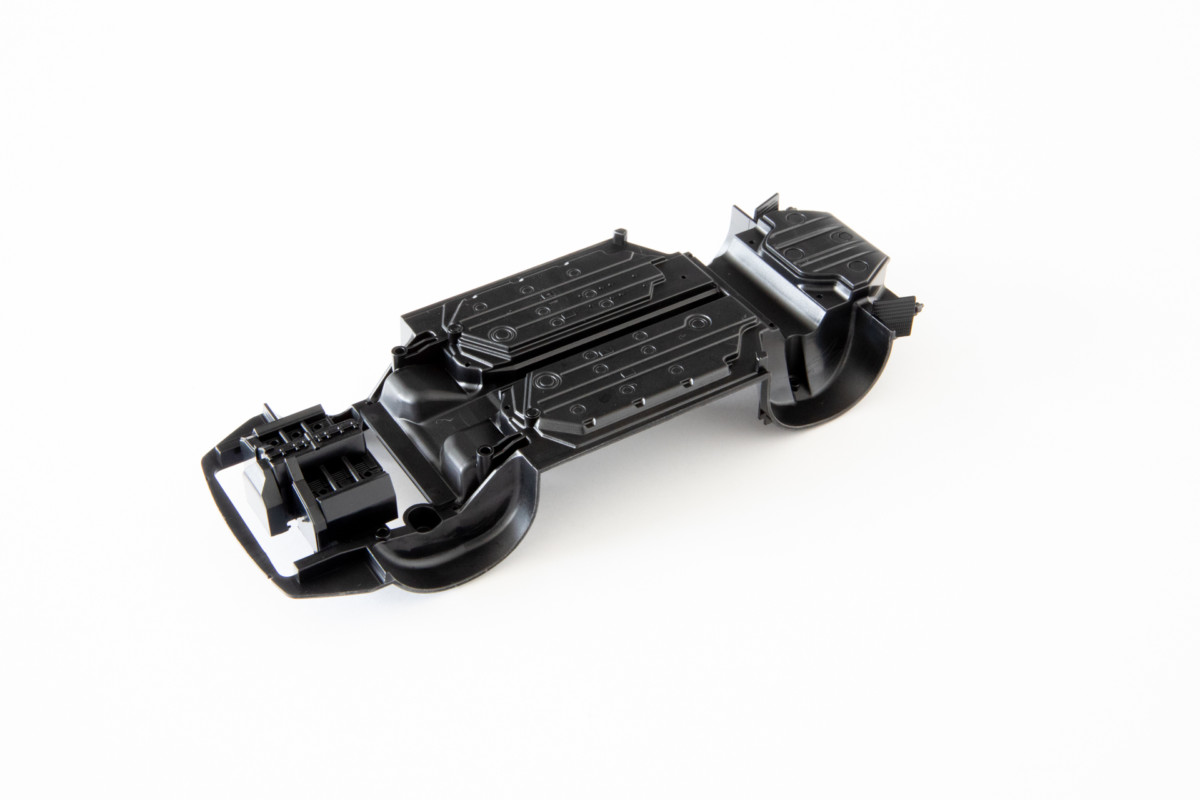
The chassis has the interior floor detail cast into it, the traditional Tamiya style of assembly being that the cockpit is part of the chassis. The initial assembly calls for a lot of the kit to be painted in gloss black, but don’t worry, the detailed pieces laid onto the black chassis make for a nice contrast.
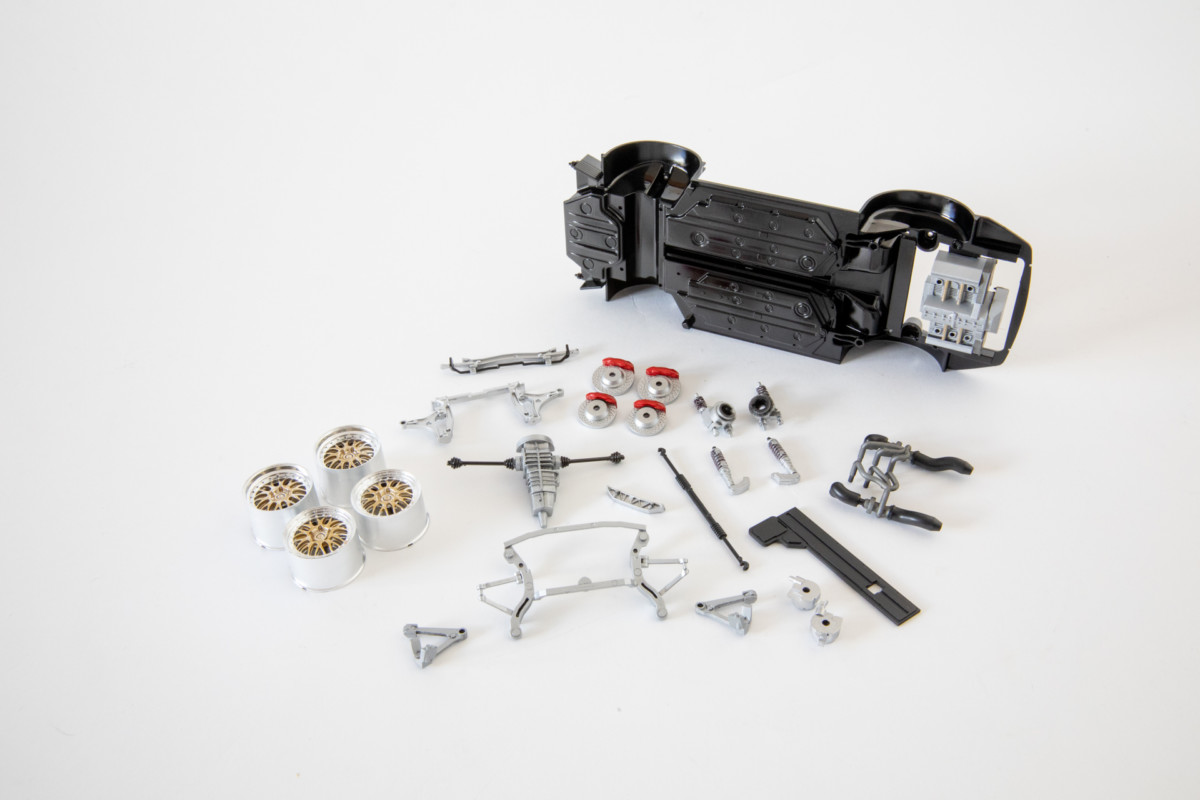
The entire suspension setup prior to assembly. About 35% of the kit alone is in the photo above.
Wheels & tires
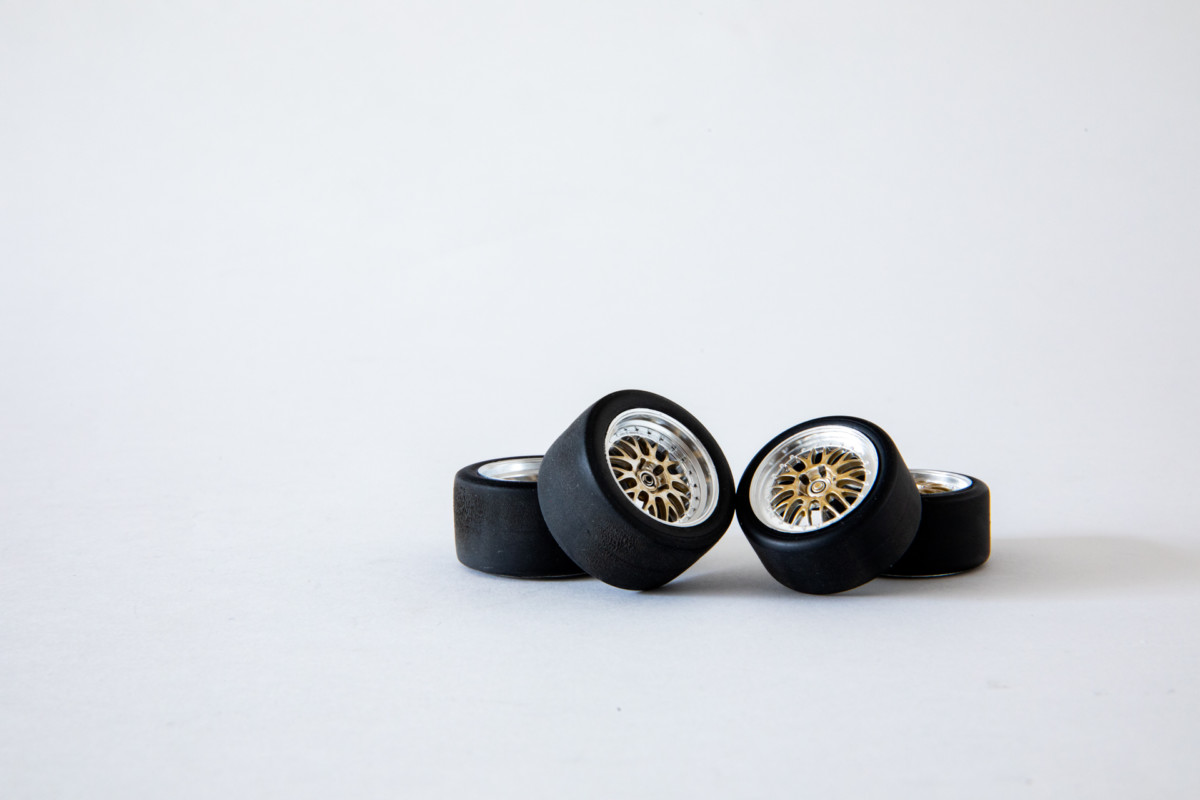
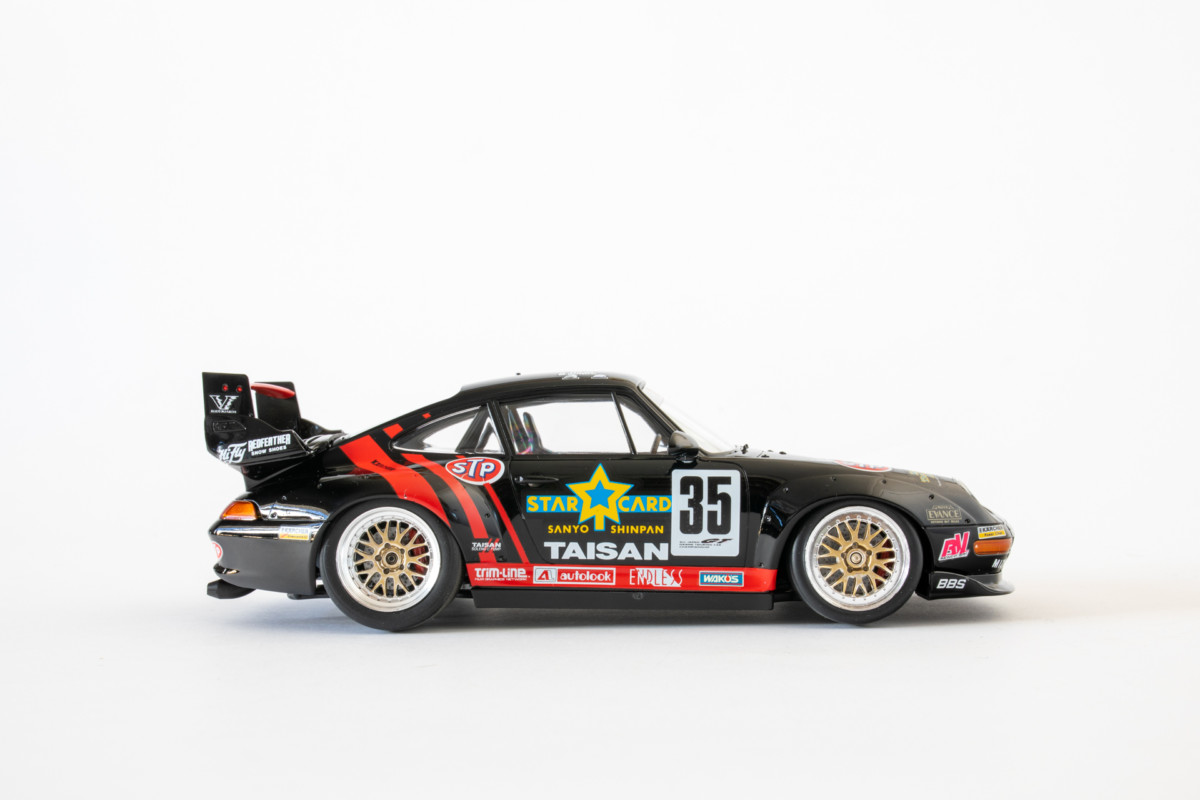
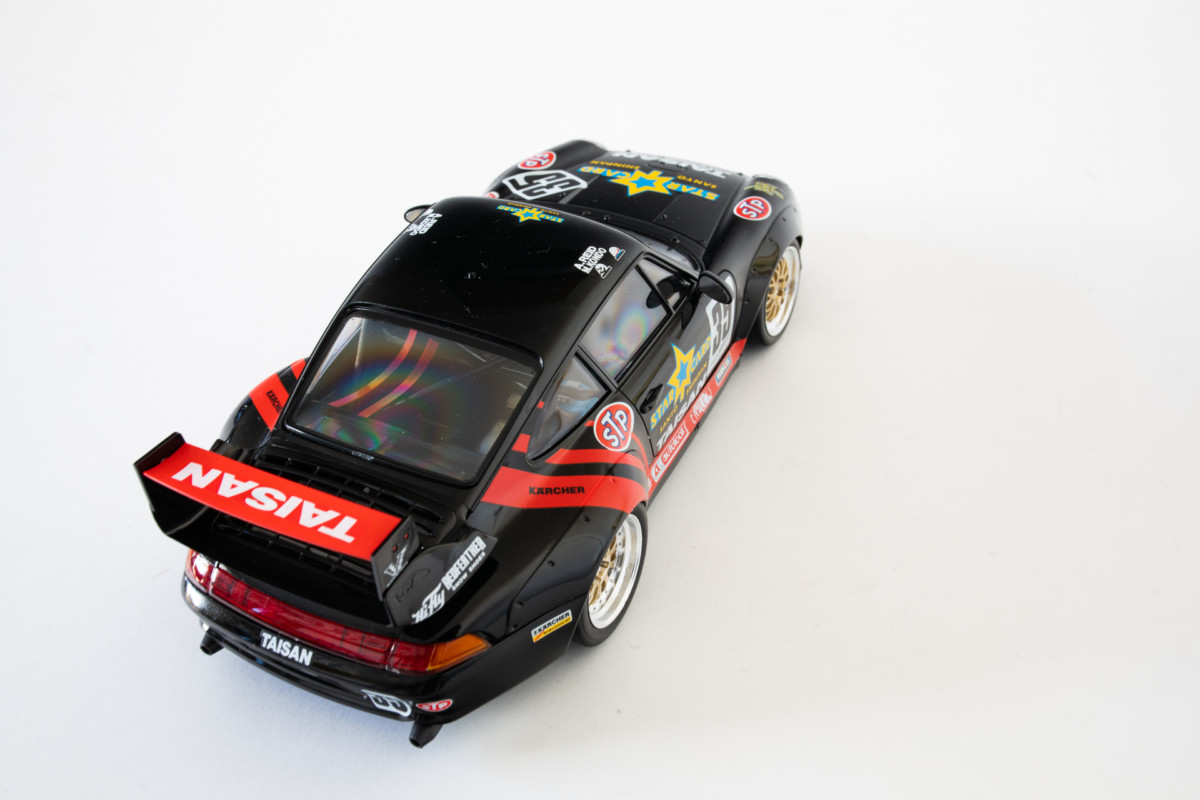
The Team TAISAN car carried the Yokohama Advan livery as a major sponsor, and unlike many of the other JGTC kits this one carries no tire decals as per how the car ran in 1995. The BBS wheels are superbly cast and chrome-plated requiring only the center area to be painted gold. I merely did this via brush using a Tamiya enamel in 3 coats to attain a nice covering.
To add a little bit of realism into the tires I gently scuffed them on some concrete outside to give the ‘worn’ effect that race tires have after some laps on track. This removes the casting lines down the center of the tires, and the overall shine they have out of the box.
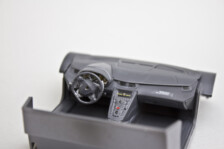
Cockpit
The cockpit is a great chance to throw a little color at the black backdrop; the extinguishers, computers, and belts make the sparse interior pop just the right amount. Don’t be fooled, the office of a race car is minimalistic; weight makes everything slower so what you see here is all that was in the 1:1 scale racecar.


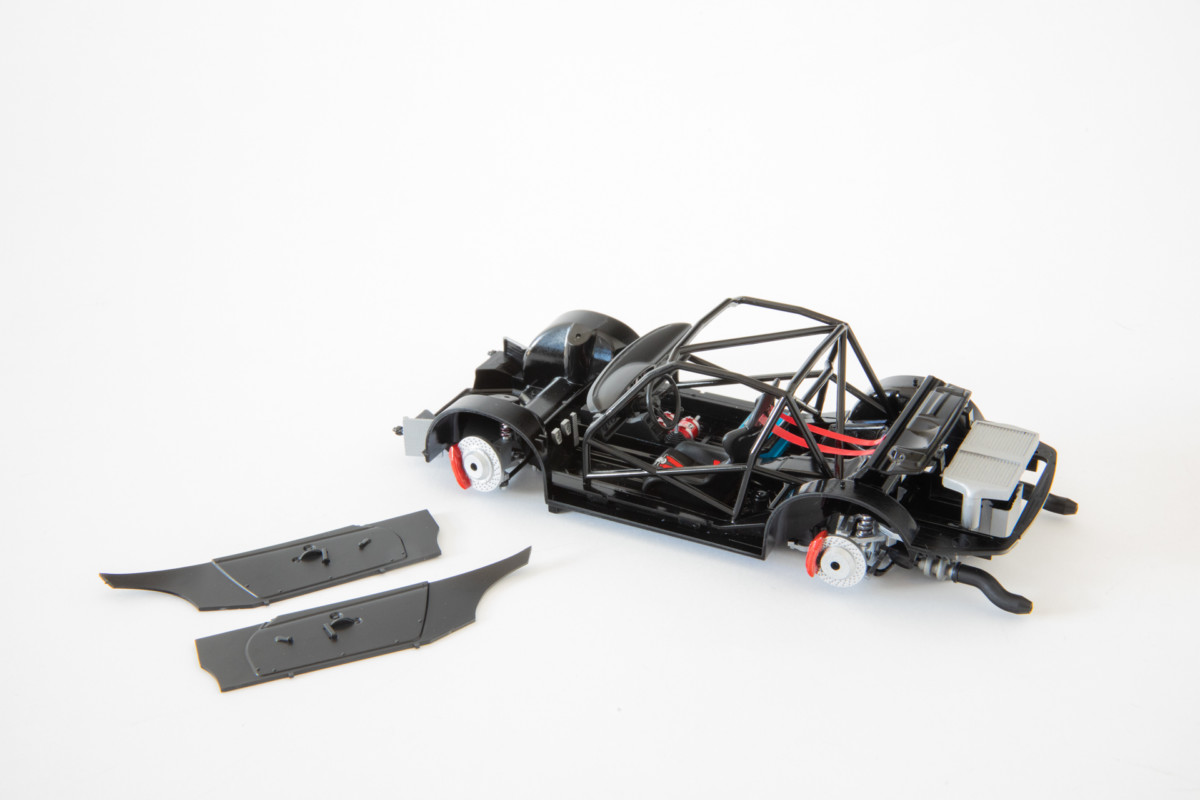
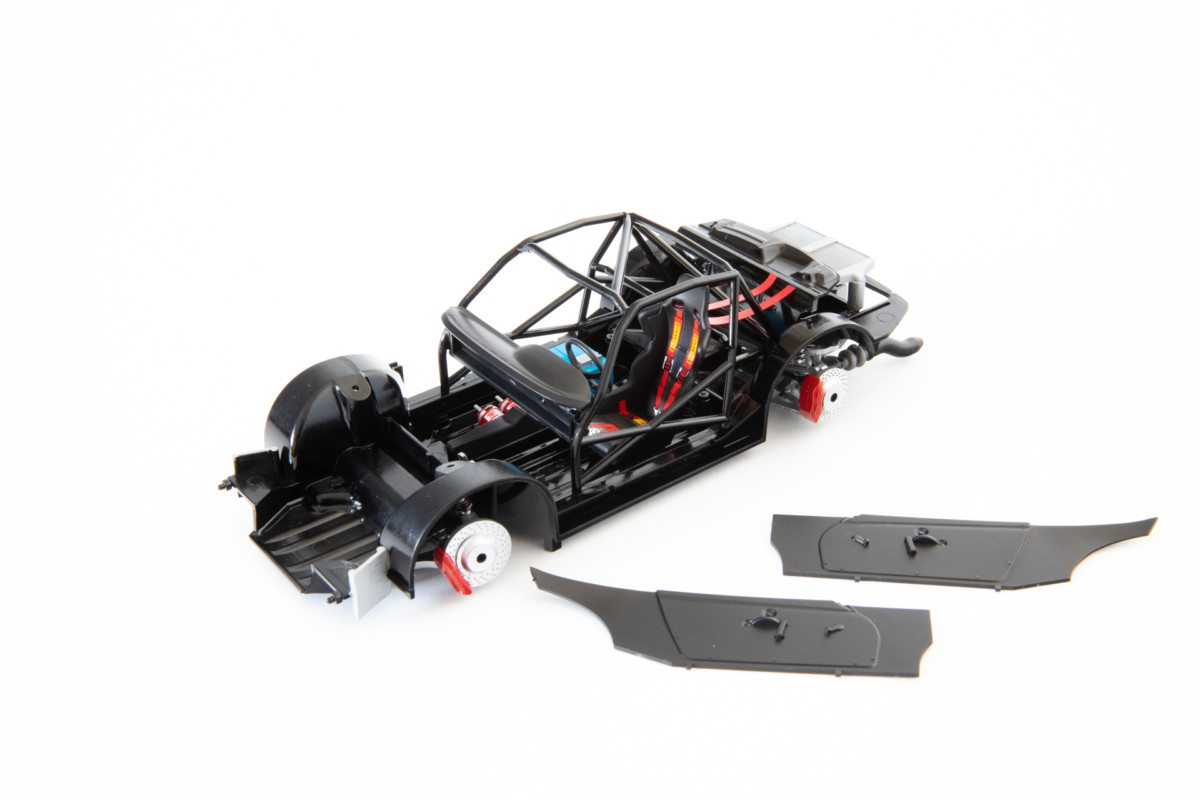
I used the decals from the kit on the bucket seat as they look superb from the front. To finish the harness off I added 2mm wide strips of red electrical tape to replicate the belts mounting to the rear of the cockpit. Simple yet effective.
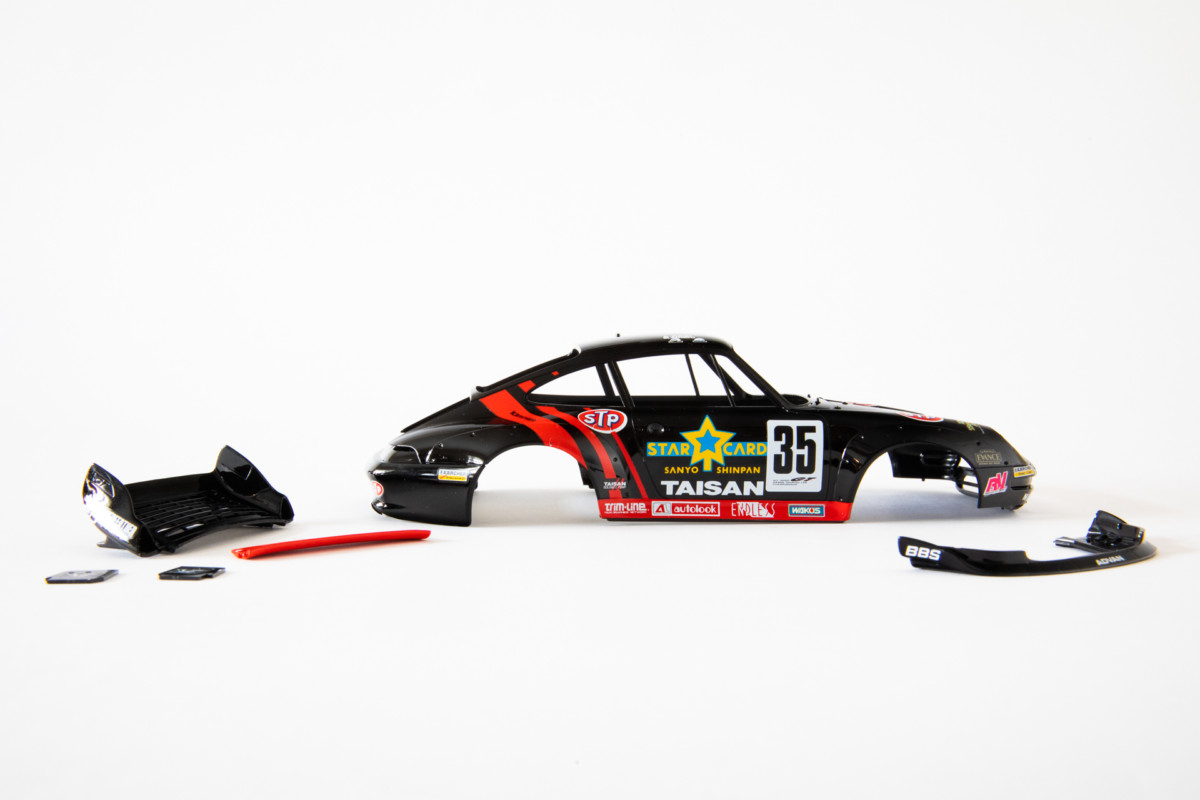
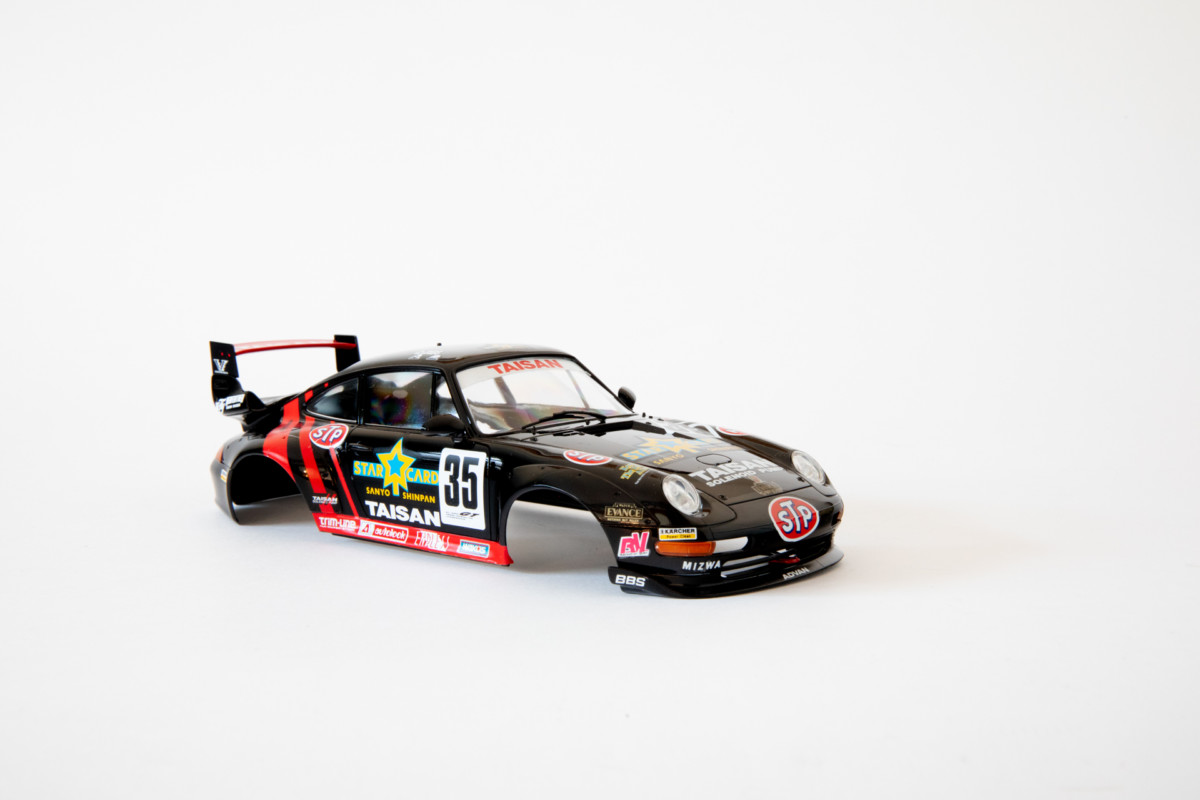
Body
One thing I like about the early Tamiya kits is that the body is predomonantly one piece. No awkward joining of bumpers, and other bits and pieces. Everything is there, just wash the body in soapy water and then spray it with Tamiya Spray cans. I heat my cans up to warm/hot temperature prior to spraying which gives a nice smooth glossy finish.
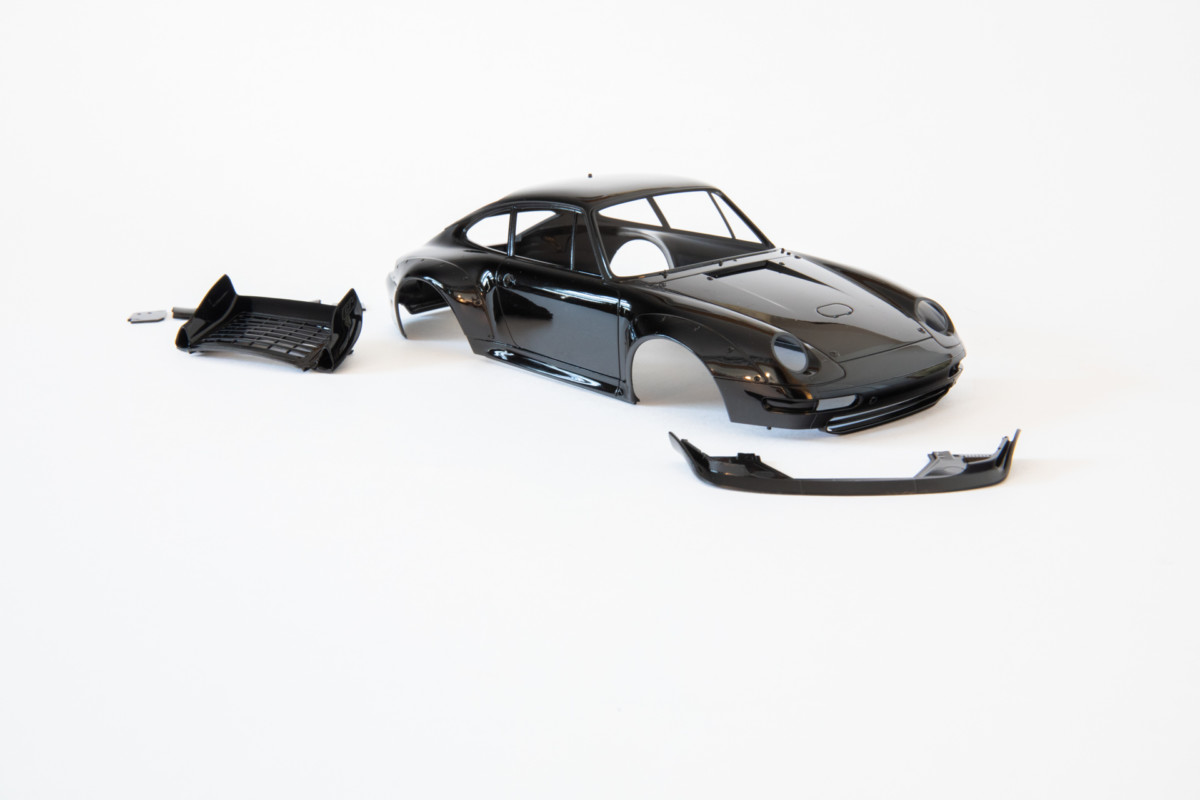
The rear engine cowling has the wing mounted on top of it for a more aggressive line to the body, with the front splitter finishing off the front. These parts are to be added after the chassis is fitted to the body.
Decals
The decals on this kit are of an older generation and technology than we are used to in modern kits. A bit of time is required to cut the clear borders from the edge of the decals for a cleaner look, and while time consuming, it is totally worth it for both ease of application, and overall look.
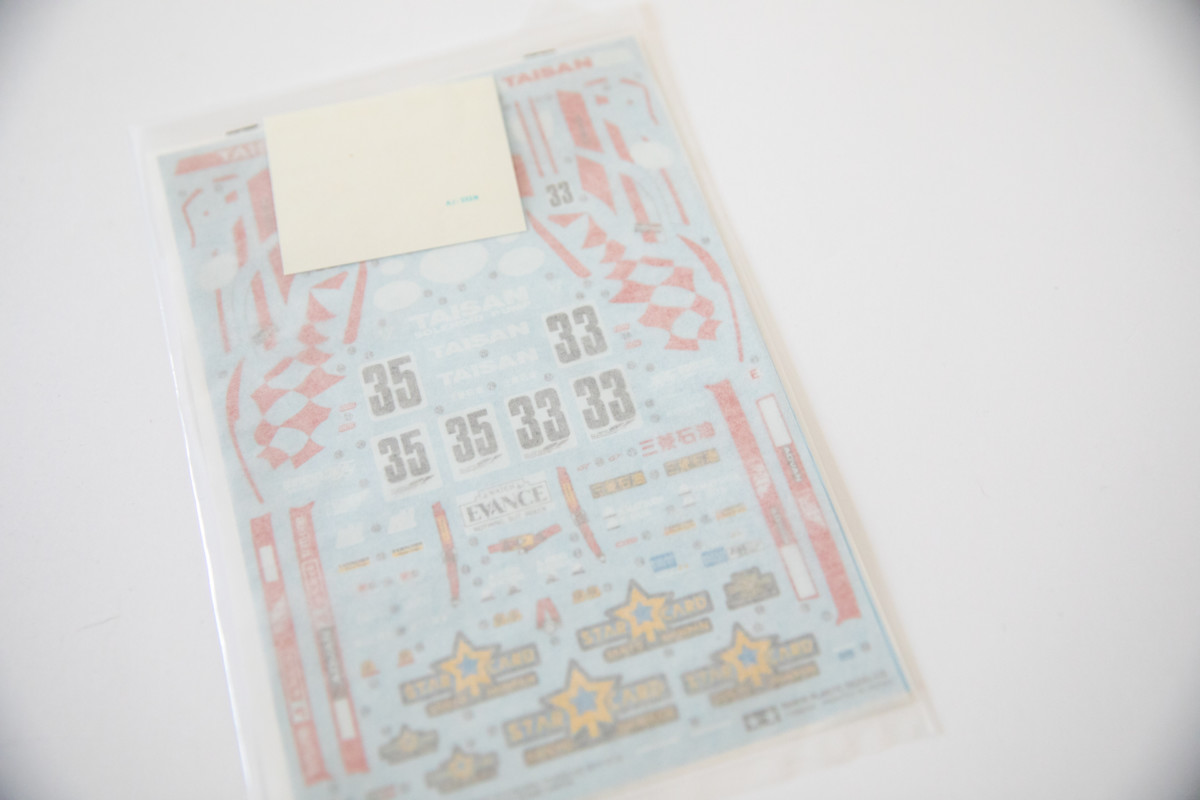
You are presented with two options: car #33 which ran the checkered flag design on the rear fenders, and car #35 that ran the stripes. I chose to go with car #35 as depicted on the box.
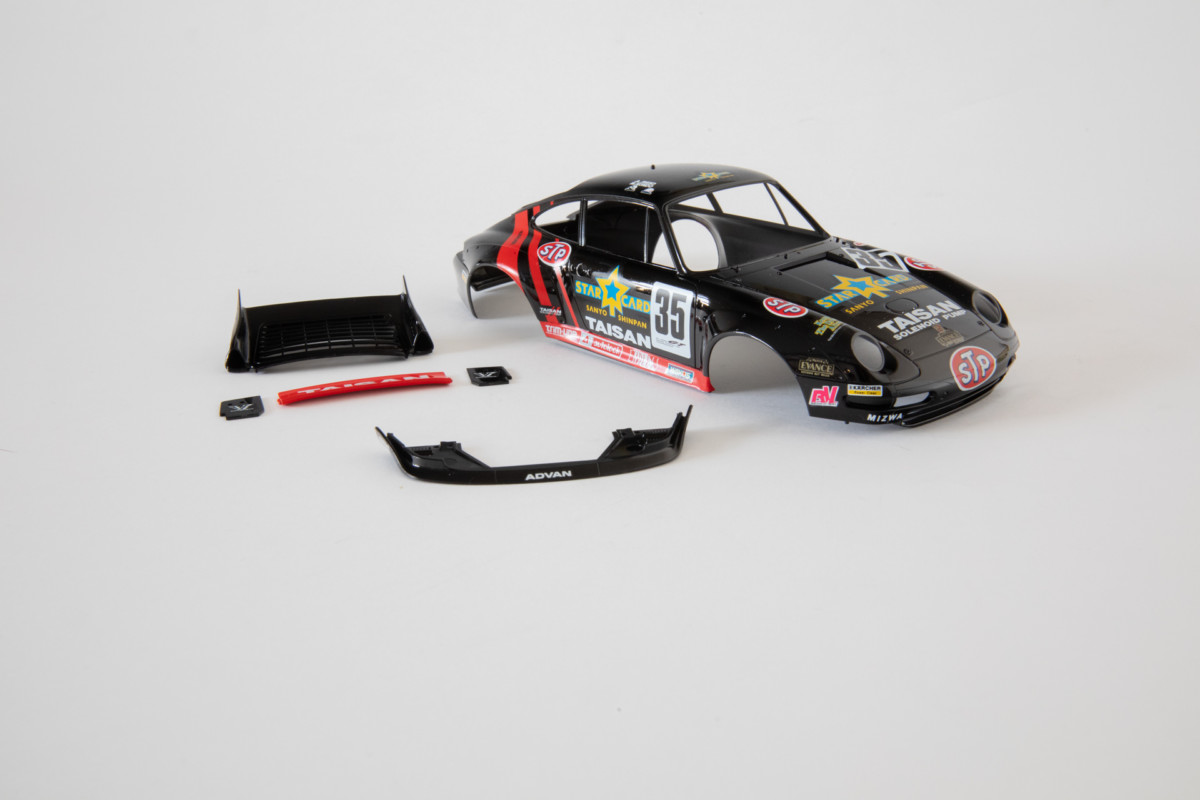
Body trim
The window glass consists of four separate pieces, and as you expect from Tamiya the fitment is seamless. To install the windows and lights I used PVA glue as it dries clear and does not mark the clear plastic parts, making it perfect for headlights and any other glass on a kitset.
Now that the body is ready it is time to add it to the chassis, just make sure to fit the wheels first as they tuck heavily under the rear guards.
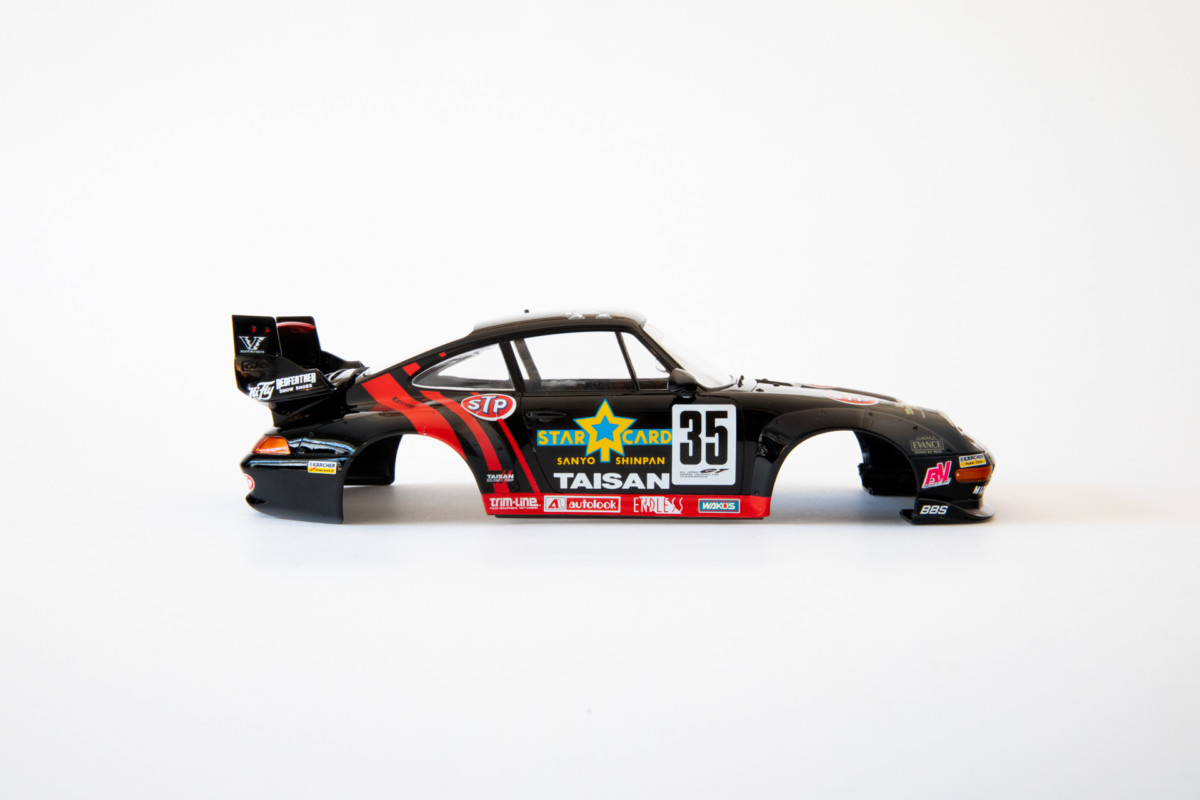
The finished kitset
The final product is as you would expect from Tamiya, a real looker. The stanced rear wheels, and sleek lines of the 911 are unmistakable. Not many cars wear a livery as well as this one, the black base coupled with red and gold accents just work so well together.
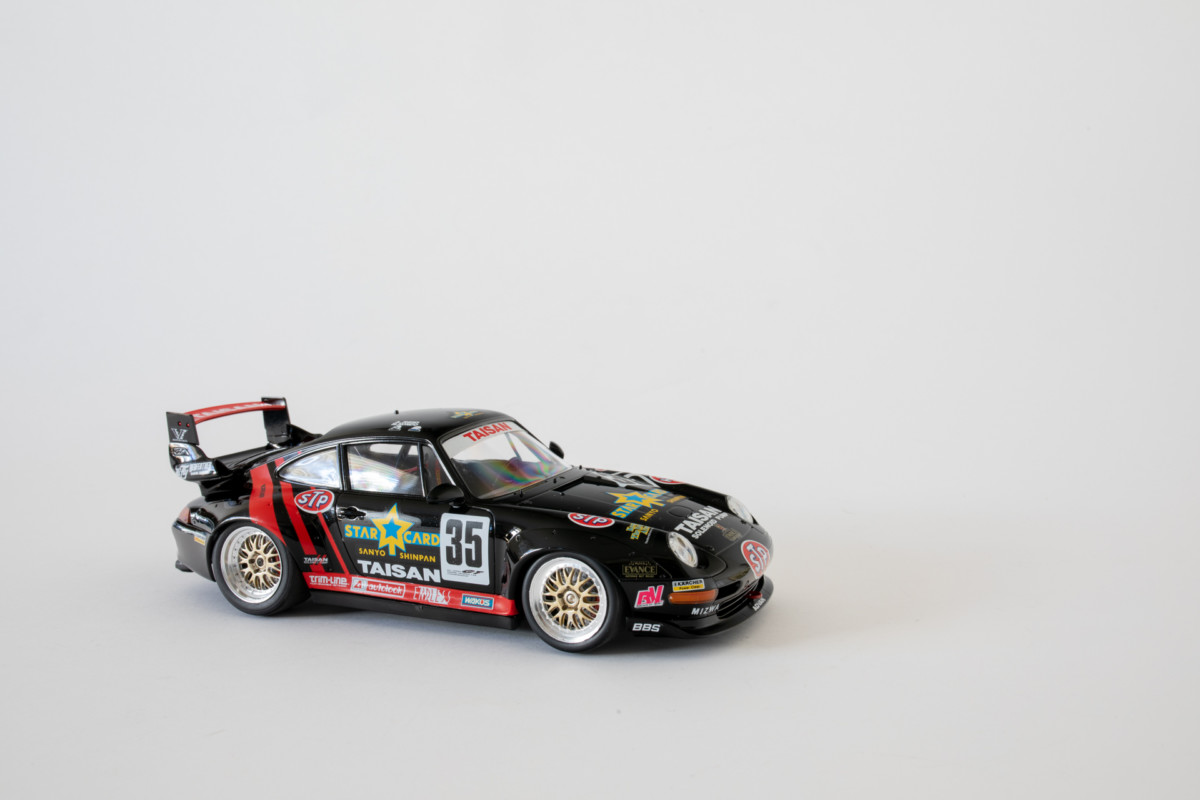

For a kitset that doesn’t burst the box with a large amount of parts, it truly turns out to be a stunner. It is no surprise that this 911 has been a staple on the Tamiya menu for hungry modelers since 1996.