Depending on what genre of model you make, decals are either a big important part or a non-existent step in the assembly process. As an automotive (motorsport especially) freak I have learned to love the decal step as this is what transforms my cars from meek and mild to angry. Over time decals have changed, evolved, and improved making what was once the scary part of my builds now an enjoyable step. Now there are a million ways to approach waterslide decals, but I thought I would share a few tips and tricks on how I sticker up my work.
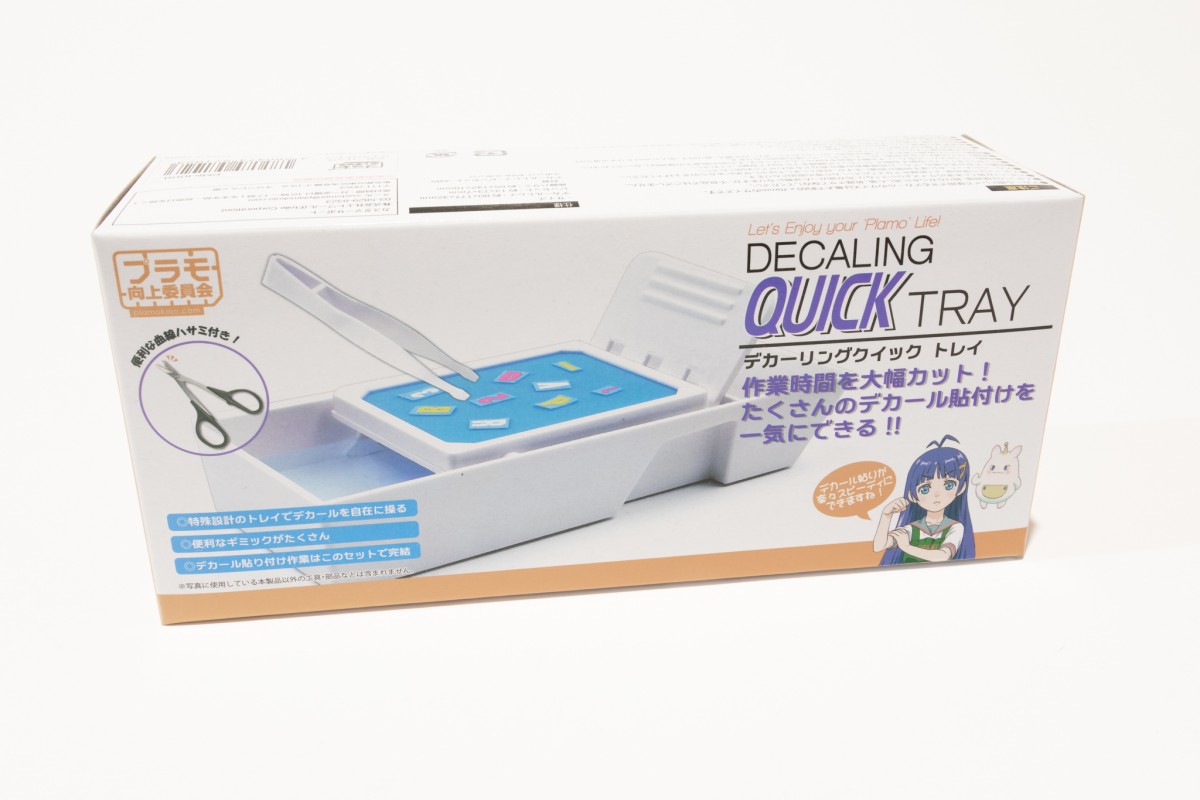
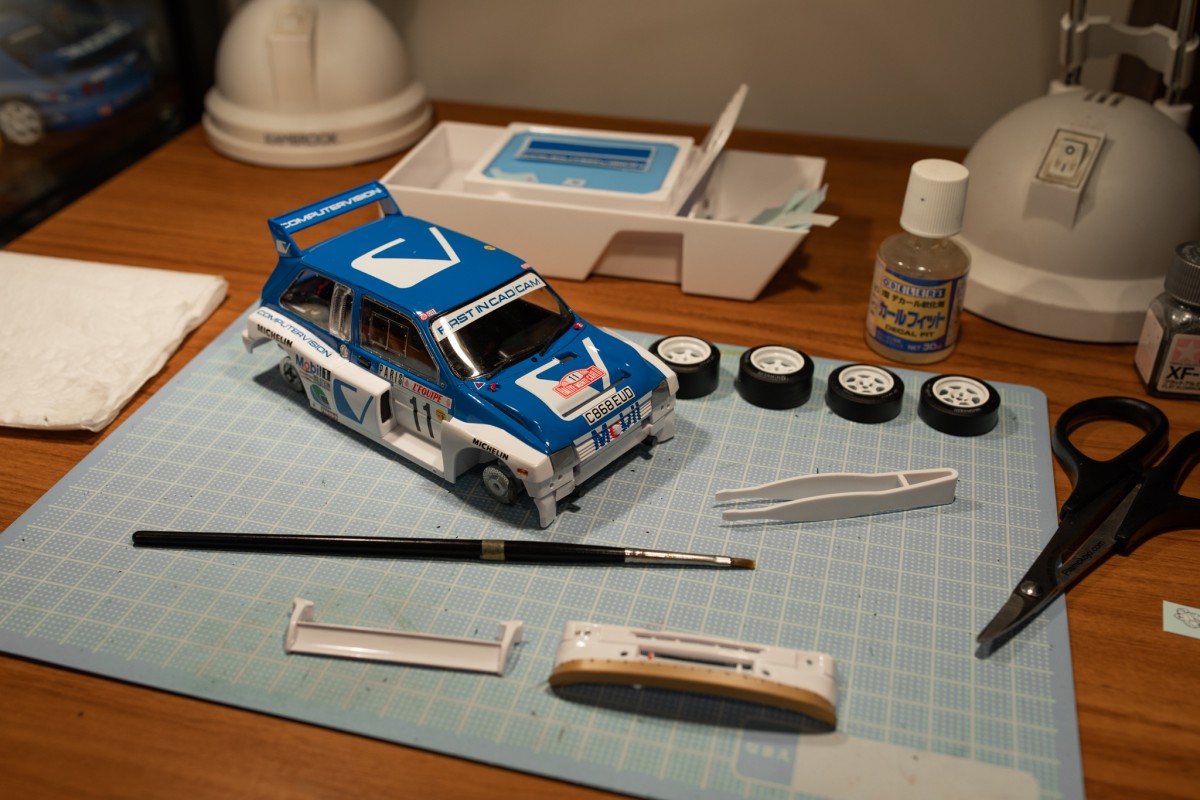
One thing I don’t do is clearcoat my builds, personal preference and keeping things simple is what I am all about. I obtain a paint finish as glossy as possible and then lay my decals down on top. In this tutorial I also want to highlight a wee tool that has assisted me in making decal work a breeze. I utilized the Decaling Quick Tray available at HLJ which was absolutely superb! More on that wee treasure below!
What you will need before getting started
- Cutting mat
- Water
- Tweezers (I use 2 pairs)
- Hobby knife with new blade
- Old paint brush
- Cotton buds & tissue paper
- Good desktop lighting (study lamp / LED light)
- Microfibre cloth

Prep work
Before the first decal hits the water you need to do a little prep work to ensure the best result. Some of the info might sound simple and obvious, although covering your bases is always best and the most unexpected thing can ruin a great finish. Ensure the surface the decal is going onto is free of finger marks, and residue of anything. A clean surface to bond onto is super important. I give all my models a wipe down with a clean microfiber cloth and then make sure nothing is left behind before any decals hit the water.
Read over the instructions, ensure you know if any particular decal needs to go down first with another to overlap it; this is common on race car liveries and knowing what order you plan to do things is always a big help. Cutting out the decals into groups also to visually know what order things need to occur will make it all flow smoothly.
Next up is to prep the Decaling Quick Tray.
Decaling Quick Tray
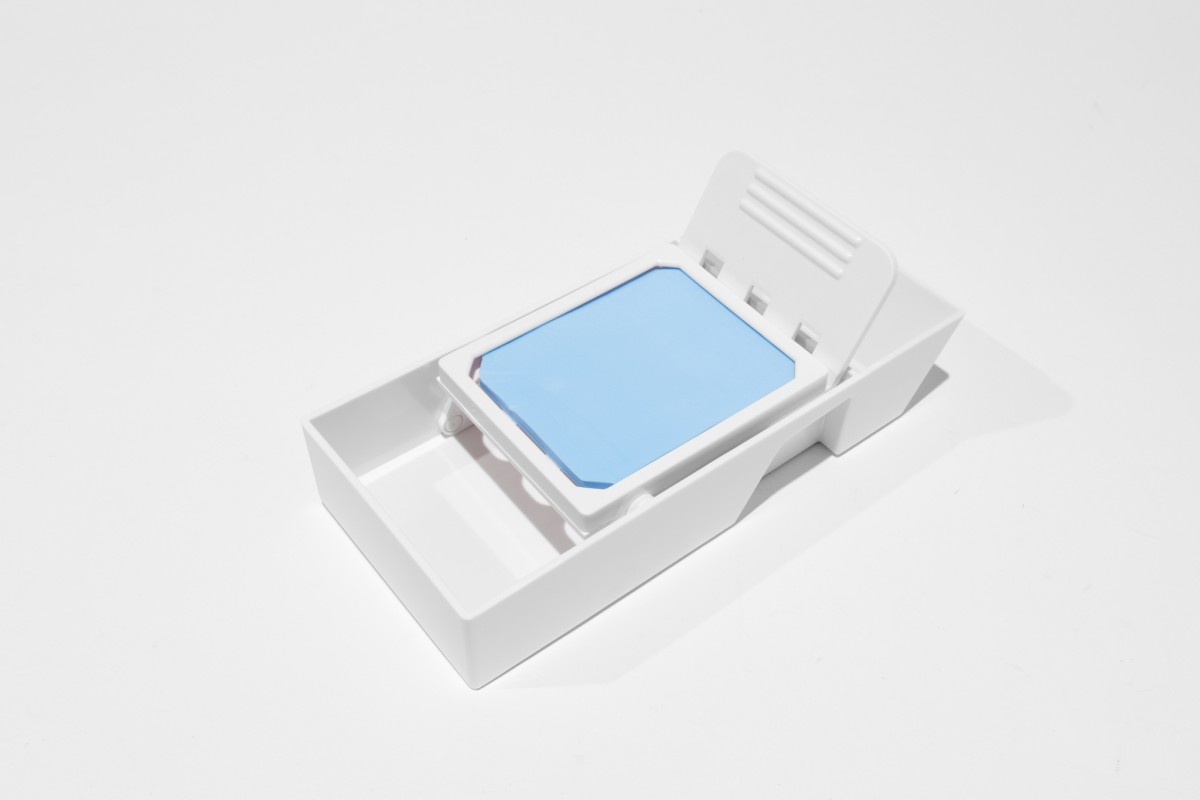
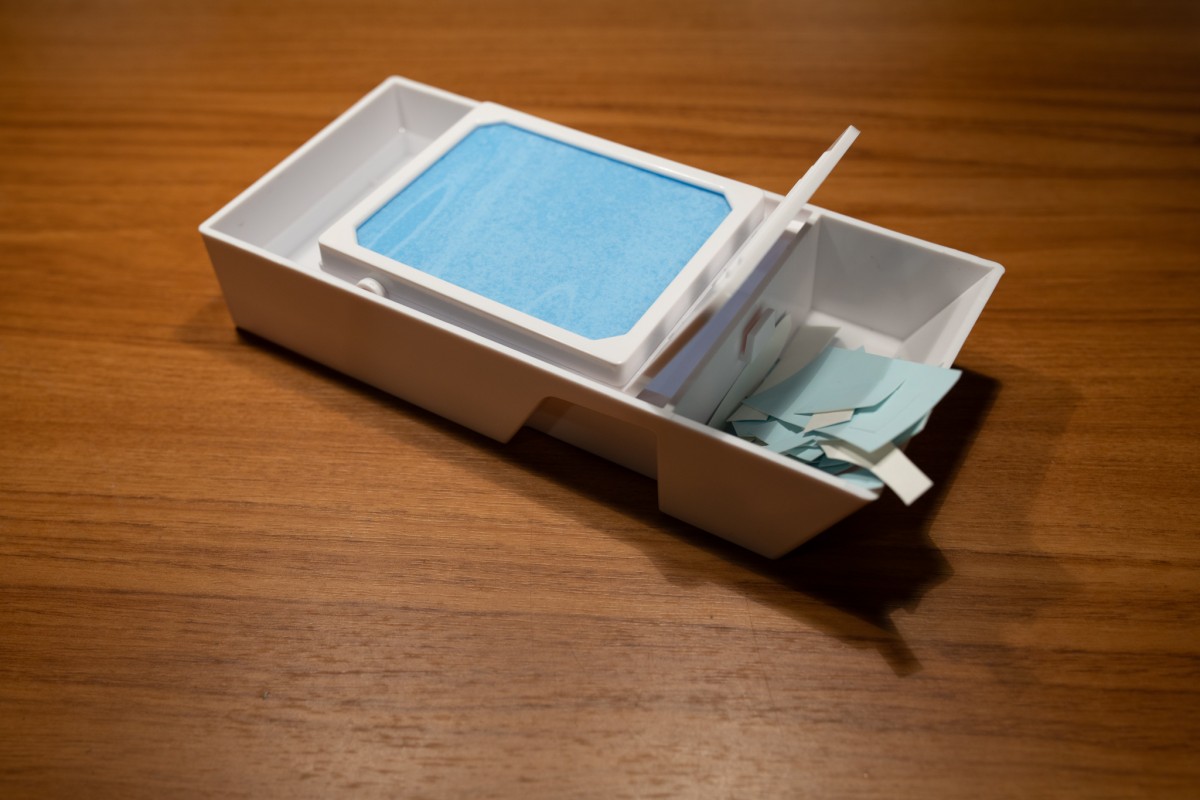
For years I used the traditional decal in a bowl of water method on my models, although recently I came across this wee gem that has transformed how I do decals. It consists of a water trough with hinging platform and sponge, curved scissors, and tweezers.


The issue I had previously was that I would only do one decal at a time, making sure not to let it sit in the water too long where it could separate from the backing paper and float around on top of the water if I was distracted. It was slow-going and when I fished it out of the bowl of water I had to put it somewhere then apply it to the model. Things were slow and at times messy… until now.
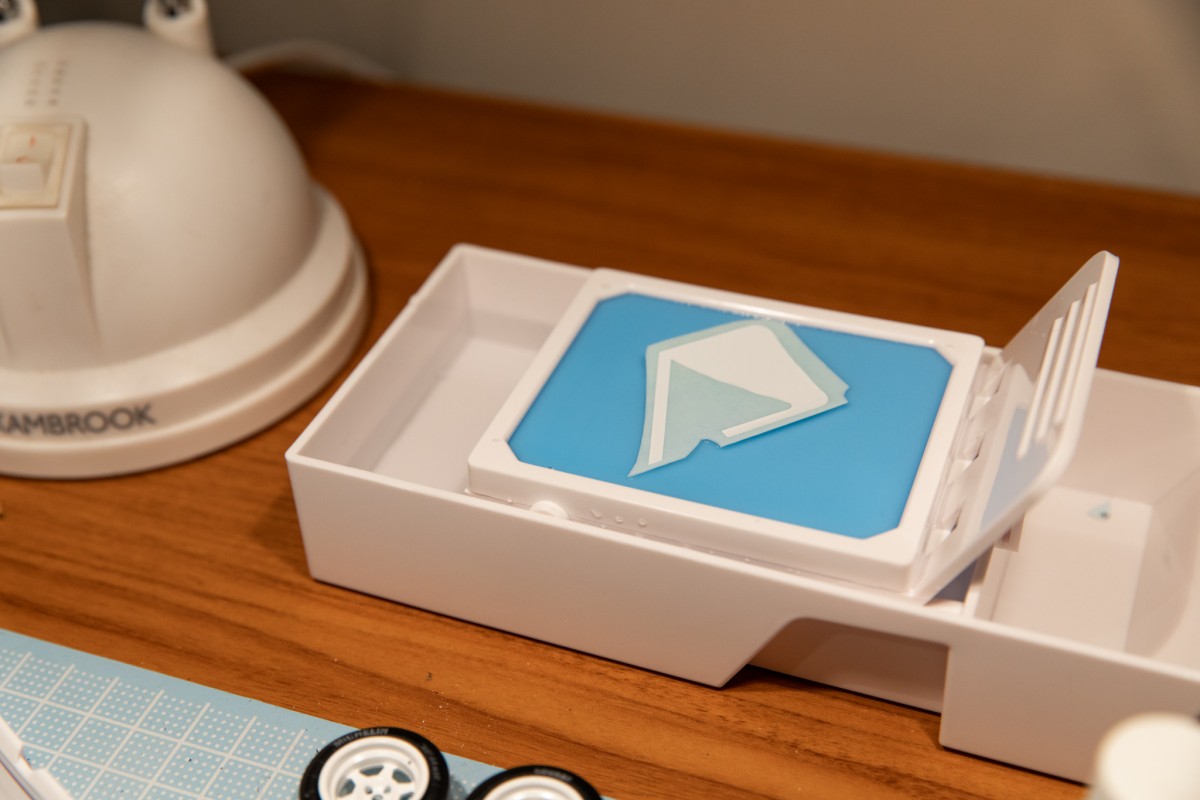
The Decaling Quick Tray fixes everything. Simply fill the trough with water, pop the sponge onto the rack and lower it into the water to soak. Once the sponge is wet lift it up, pop your decals onto the sponge and they soak up the water from underneath. Never again do you need to fish floating decals out of the water, and once you are done there is a side partition for the used decal paper keeping it off your cutting mat and desk. The scissors included are very sharp and great for cutting small decals out along with the fine tweezers for grabbing them off the tray.


Know your decals
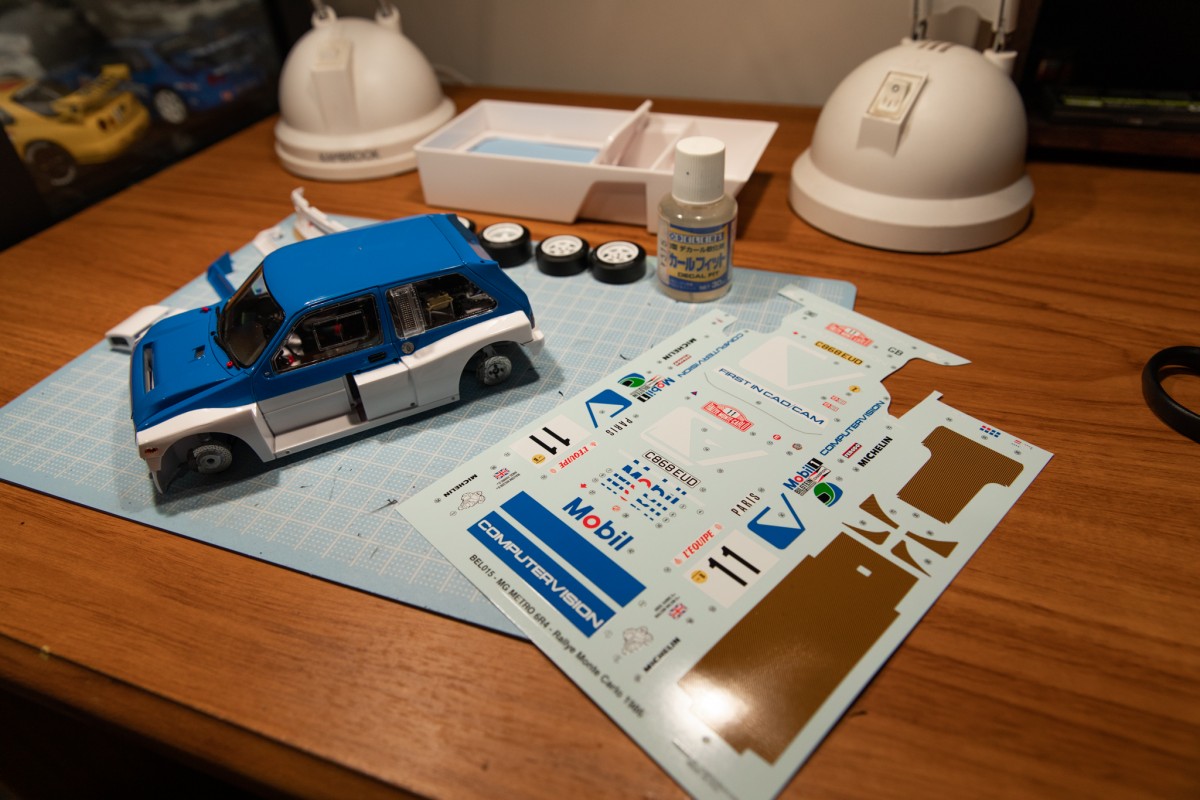
Up until a few years ago decals were decals, although that is certainly not the case now. Some companies produce thicker decals, some others use incredibly thin ones, and some will conform to curves without needing any help at all, while others will rip and tear if you are not careful with them. Tamiya, Belkits, Hasegawa and Fujimi among others all use high quality decals which are a pleasure to work with. Although many of us will have come across those thick, paper-like ones that no matter how much solution you use, they just don’t soften up and actually end up driving you nuts. It is important to have a look at the sheet before kicking off and knowing just what you are dealing with.
Application
This is the moment, the decal is sliding around on the backing paper and it is time to lay it down on the model. I usually use a paint brush and dab some water down on the surface to allow me the chance to move it around into the correct place. If it goes onto a dry surface it might not slide too far and nobody wants to have to attempt peeling it off.
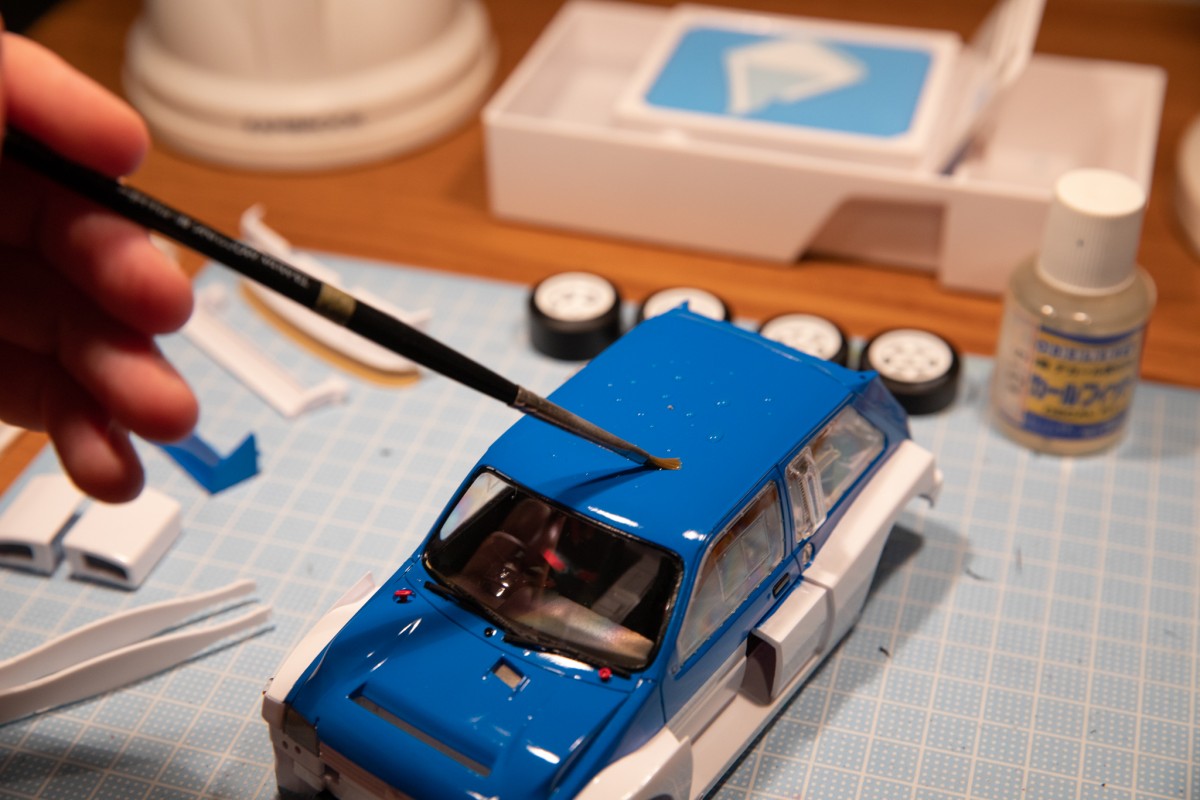
This water can very easily be worked out from underneath the decal once laid down with the brush and a tissue to catch excess. I recommend avoiding touching the decal with your bare hands as they stick super easily to your dry skin and can then tear, twist, or just not come off the tip of your finger. Tweezers (2 pairs are perfect) are best for handling and then the brush or toothpick can be used to maneuver it into the right spot.

Lastly I will apply a solution to the decal to allow it to soften when needed, and adhere nicely to the surface. It stops silvering which is an effect caused when the decal doesn’t adhere properly to the surface and it looks slightly ‘silver’ in hue due to the lack of adhesion usually around the edges.
Those pesky curves and weird shapes
If only all models were flat surfaced, decal work would be a breeze, but let’s face it that just isn’t the case. Curves on race cars and other subjects are a fact of life, and for some reason wherever there is a curve there is a decal. This is where a softening solution will become your saviour. I use Microsol which gently melts the carrier film allowing it to bend and flex nicely around curves, although there are many different kinds on the market so just use what you can get your hands on.
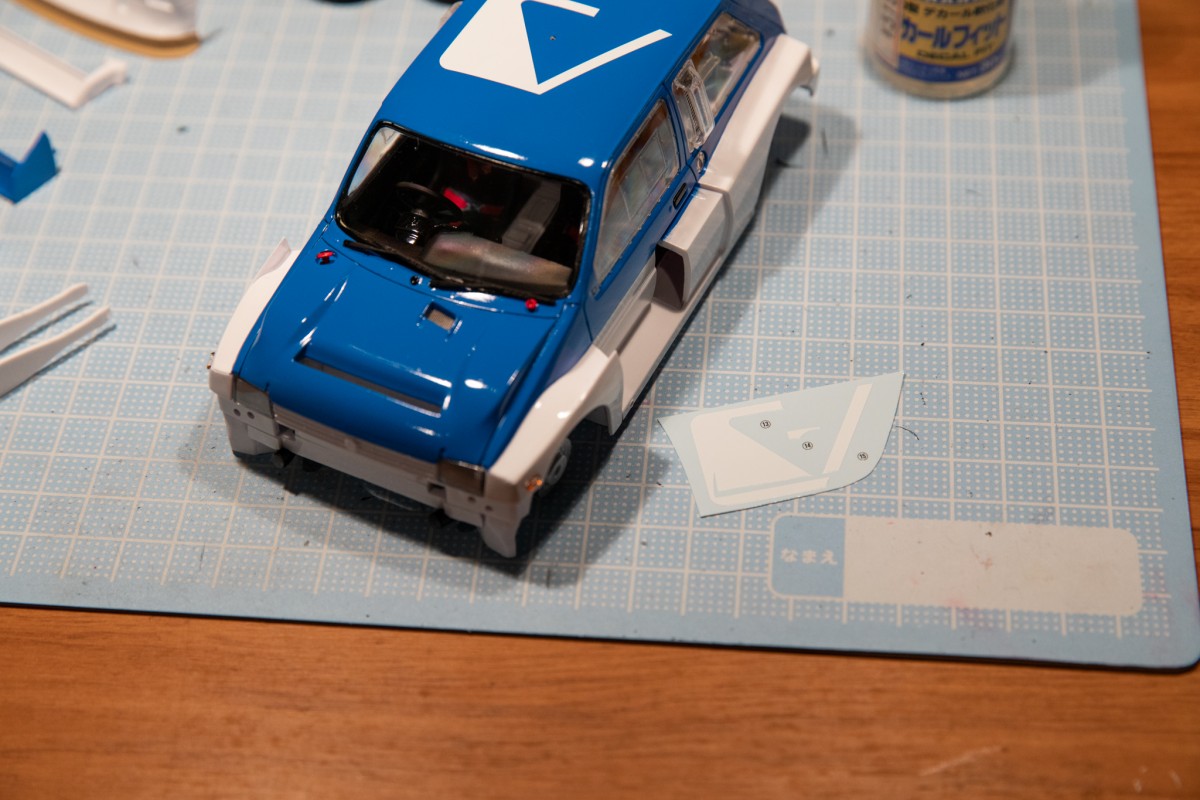
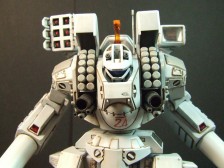
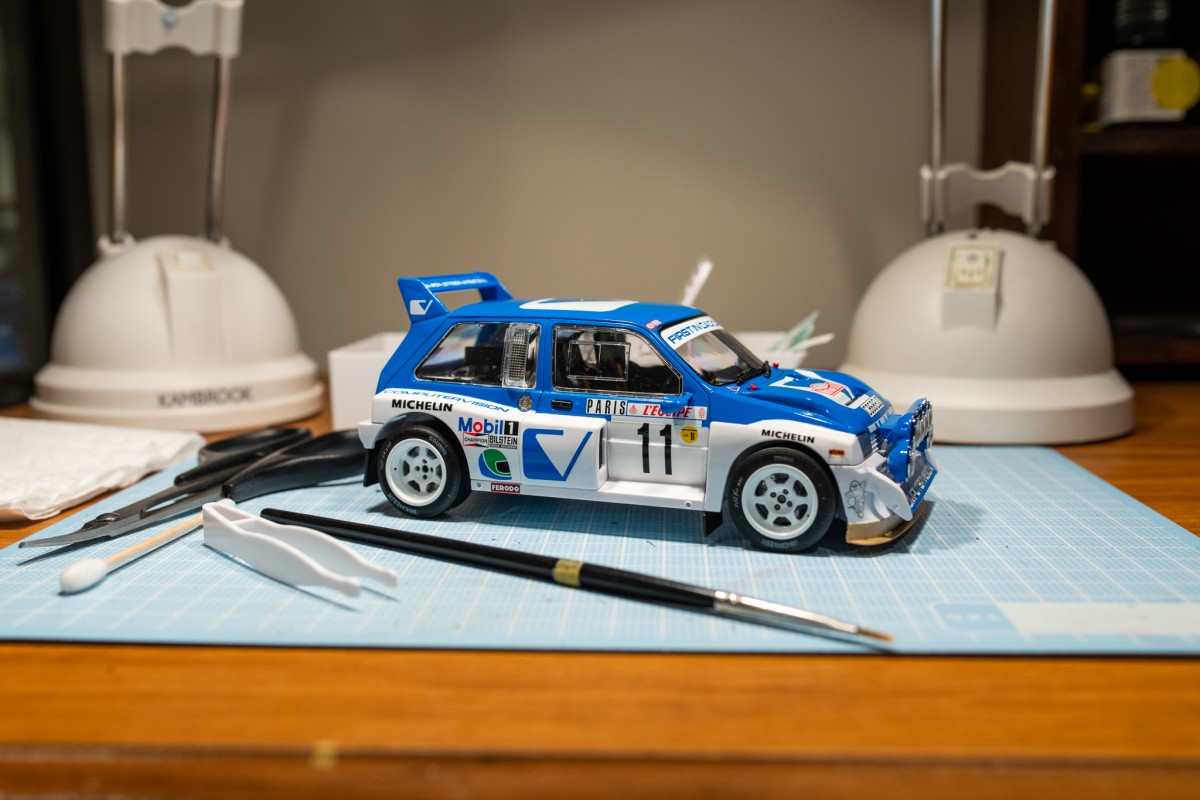
These three white decals above are destined for the bonnet vent on this MG Metro Group B rally car, and thanks to the decal solution this will be a breeze.

Simply apply the decal in position, and brush on the decal solution and allow it to soften the decal up. Usually 2-3 minutes later you will notice it starting to lay down better and perhaps some slight wrinkling. Depending on the thickness of the decal you can very gently assist it in conforming with a wet cotton bud or brush, but take care not to rip the (now much softer) decal. In instances such as the one below, without a decal solution a nice finish simply wouldn’t be possible…
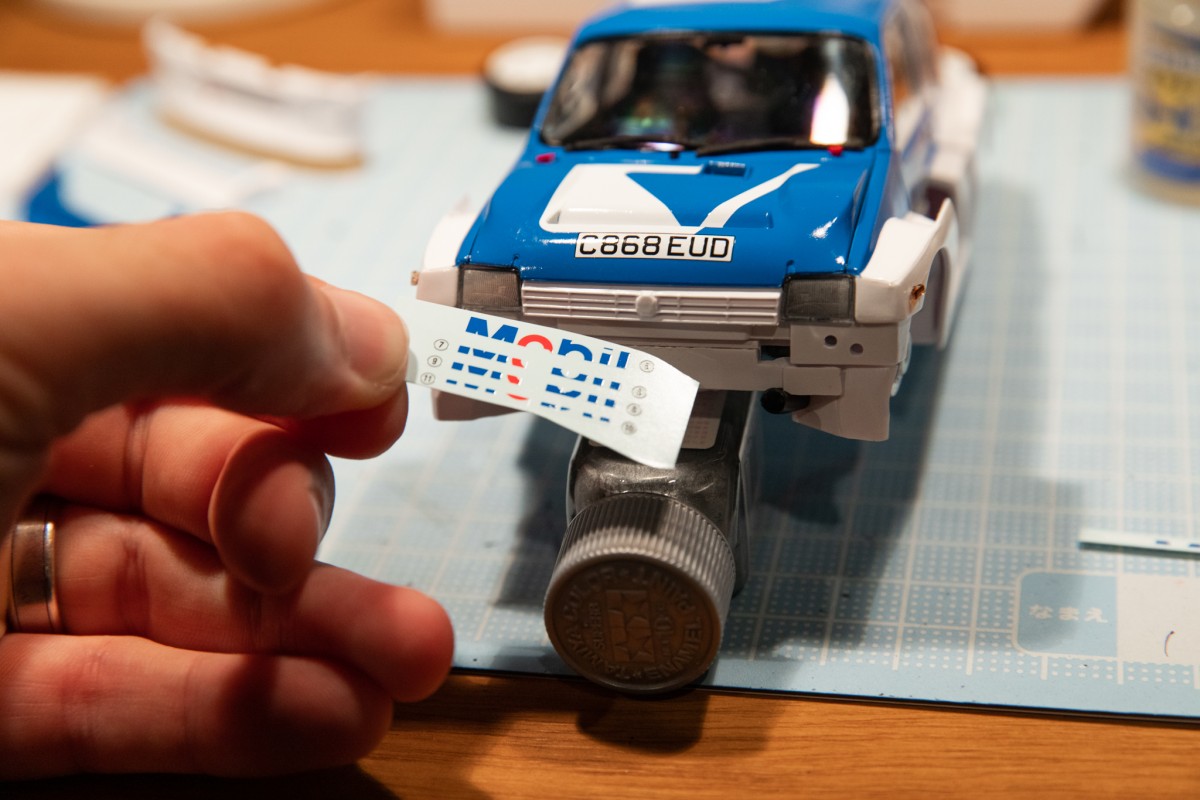
The key here is patience and a gentle hand, and you will be amazed at just what edges, curves and odd surfaces you can get a decal to beautifully conform to. The ‘Mobil’ decal consisted of 8 pieces and after 30 minutes the grille was finished.
As the process wound down, the ‘scrap paper’ bin filled up nicely, and no mess on the work bench was a very welcome change!
A couple more tips I would give on decal work are as follows:
- If the decal has a large border around it, trim it with scissors before putting it in the water, it will give a cleaner look upon application.
- If you wish to clearcoat after applying decals, leave it for 3 days to ensure there is no moisture remaining to allow the clearcoat to go on nicely.
- Take your time, never rush this process as it will always end up compromising the hard work you have input up to this stage of the build.
Hopefully this little tutorial has helped in some way, there is no right or wrong way to go about the decal process and it is important to find a way that works for YOU. More on this Metro 6R4 in a future build blog, too!