By Mario Covalski
Yes as the title states, the radio controlled (RC) scale cars are an option when you are bored ( although for a short time) of the static plastic / resin model cars.
This happened to me as I ‘m modeling since almost 50 years now, sometimes I need a break, building something different that a static model….. I mean a scale model but based is other rules, for example RC scale models.
I built airplanes, ships, tanks, cars and whatever you can imagine ( and run them), but this chapter will be devoted to RC cars, offering you galleries of some models I built in the last few years. I don’t like show just pictures I believe that the HOW TO is the secret of the life :-), but think that you will be able, through this blog, to ask about each model, then I will be happy to explain and show details, if this gets interest enough.
So, let the show begin!
Part 1 – My off-road garage
Some old RC subjects may be considered as true display models to be shown on a shelf, this is the case of the first RC(s) from Tamiya, offered in the late ‘70s and the early ‘80s.
I don’t want to go into great detail about the history of the first off- road models from Tamiya, nevertheless, what attracted everybody’s attention was that the manufacturer intended to get accurate replicas of real things, in this way the Rough Rider and Sand Sorcher introduced in 1979, were like those buggies running the dunes at the Baja California in United States, with the necessary changes to be converted into scale and radio-controlled models.
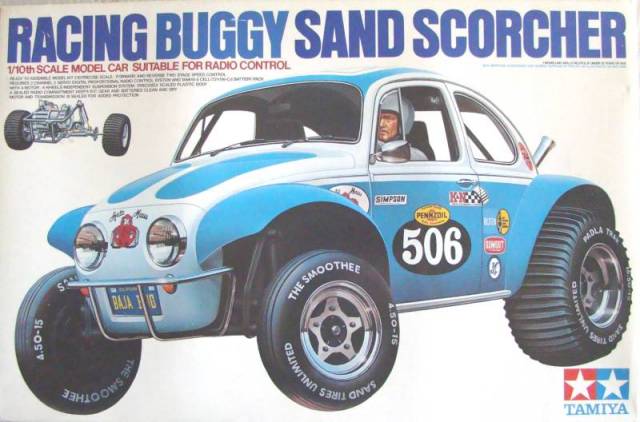
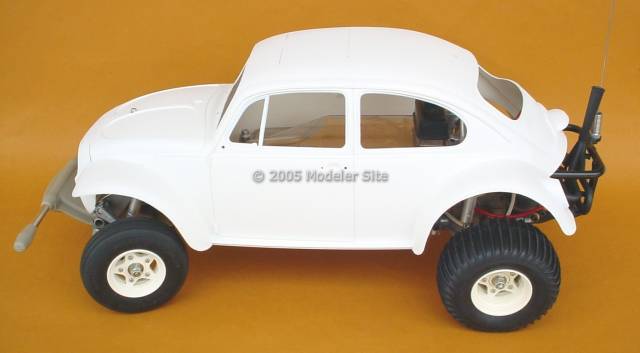
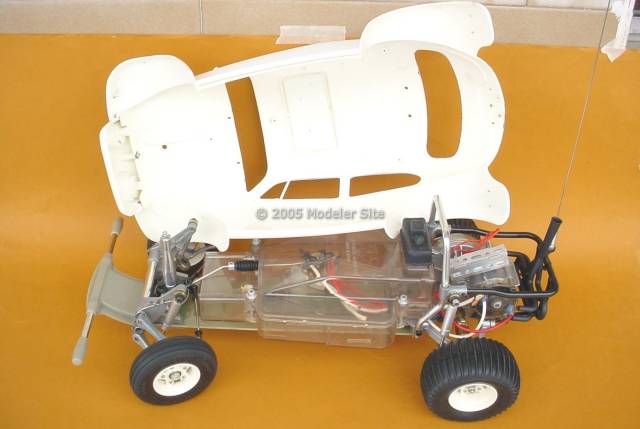
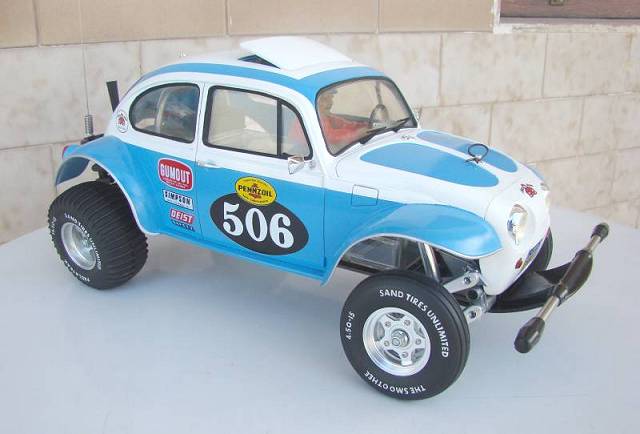

This buggy was reissued by Tamiya some months ago 1/10 Tamiya RC Sand Scorcher (2010)
By that time, road, sport, F1 and F2 RC model cars were abundant, but the first pickup which saw light in 1981, was the Ford F150 ranger, a chassis that had nearly nothing to do with the subject that represented the body; it was a 1/10 Sand Sorcher chassis with a 1/12 pickup’s body.
That year Tamiya released a radio-controlled pickup, in which they had been working for the previous three years, the 1/10 Toyota Hilux, with metal chassis and suspensions, which design (with the logical modifications), was taken from the real vehicle. This model introduced a three speed gear box, activated by one of the servos of the radio, and many others singular features, as four wheel drive, were incorporated. Also free wheels were incorporated into the front hubs in the form of one way roller bearings, as in the real Hilux.
As if it wasn’t enough, Tamiya offered the first electronic speed controller but needed another servo from the RC gear to be commanded.
The Hilux was also novel because of the radio it required, since while all radio-controlled vehicles needed only two channel equipment , the Hilux needed three: one for the steering, and two others for the speed controller and gear box. This turned the Hilux in quite an expensive “toy”, since the three or four channels equipments were only used for airplanes and gliders.
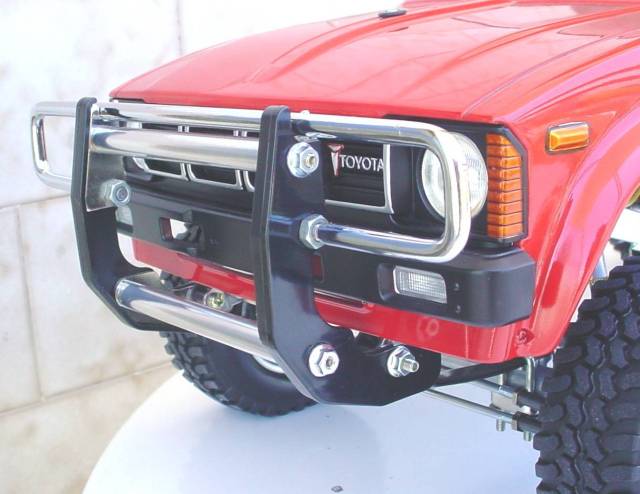
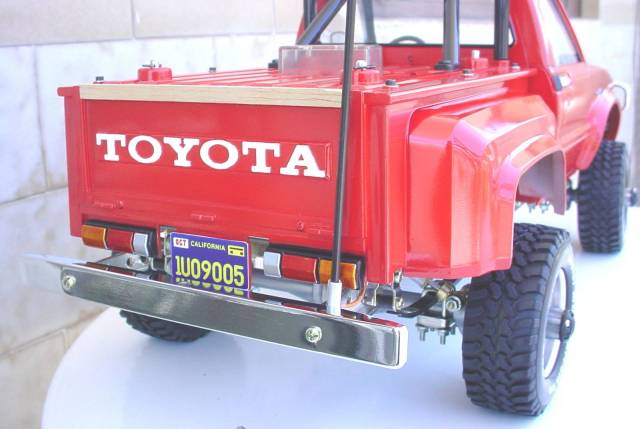
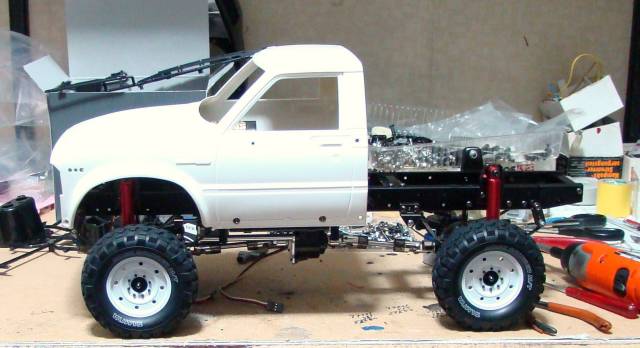
Here Pictures of restored Tamiya Hilux, it was in very bad condition when I got it.

More pictures of other 3 speed Hilux with modified cargo box
Picture taken during the restoring process
Three Speed trucks
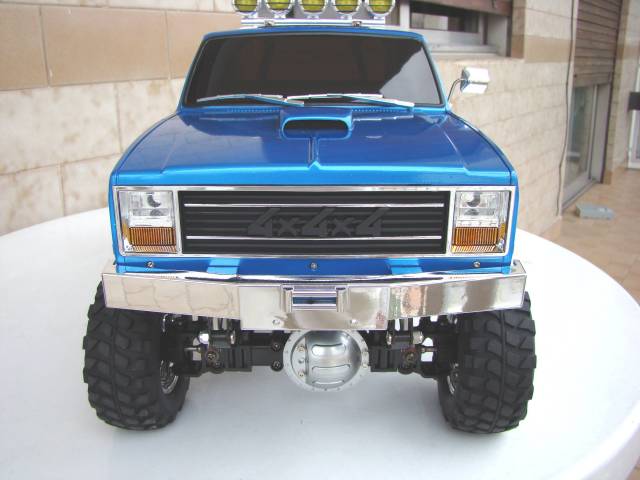
Tamiya followed developing the 3 speed trucks, the last models were the Ford F350 Highlift, The Toyota Hilux and Tundra, I built several versions of them, changing wheels, shock…etc etc, adding the MFC (multifunction control) which allows to have lights and noise as the real trucks. Here below a gallery of some of them
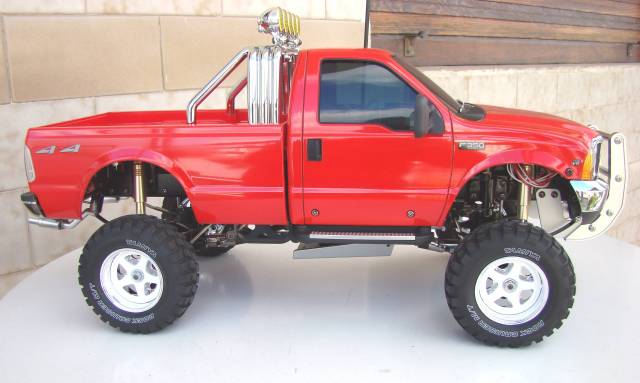
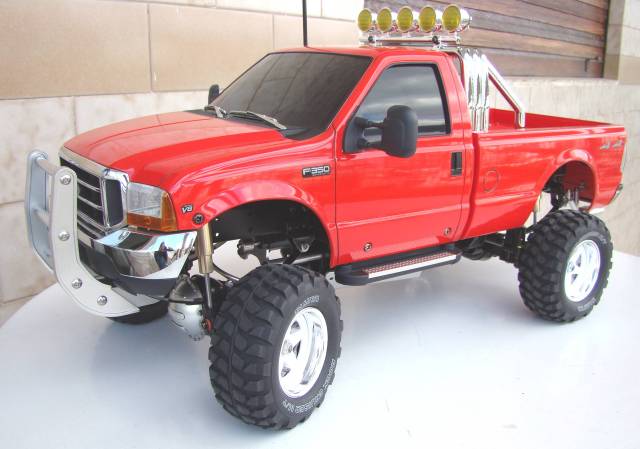
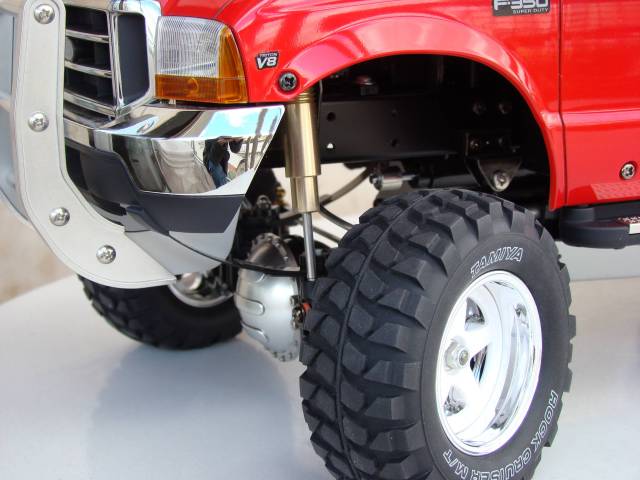
Ford F350, 1/10 scale 3 speed gear box, electric motor.
Kit 58372
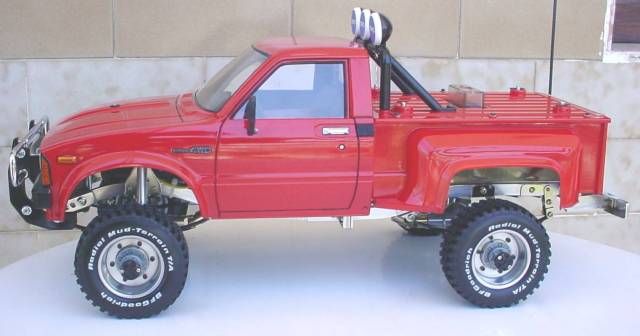
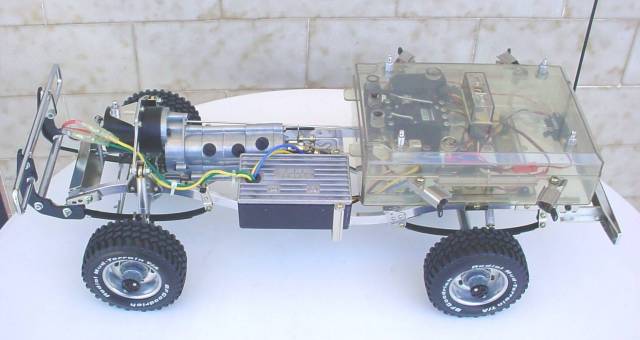
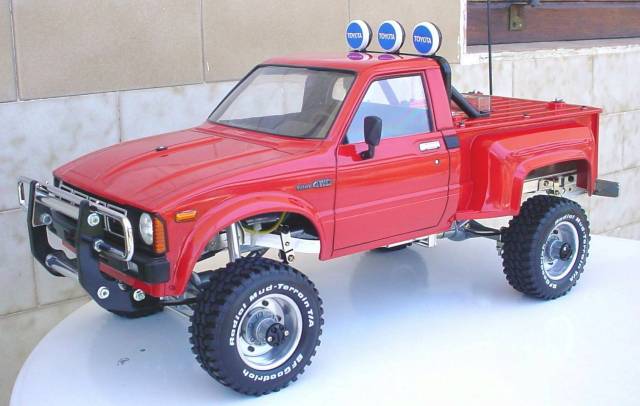
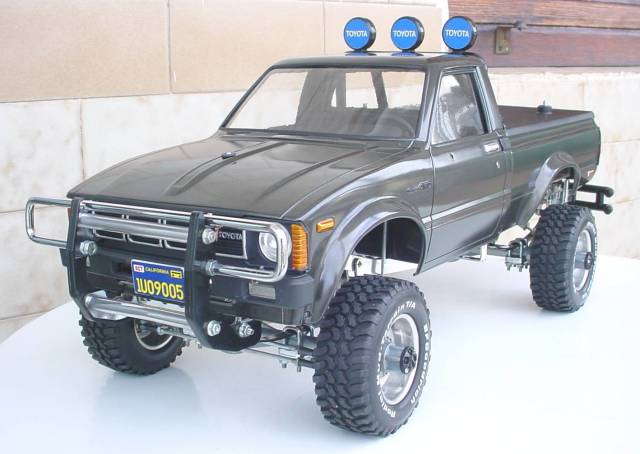
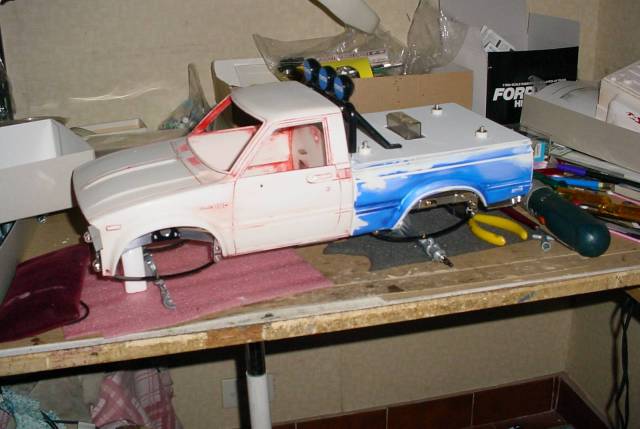
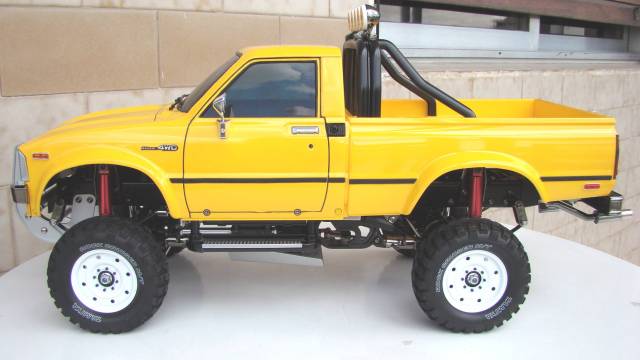
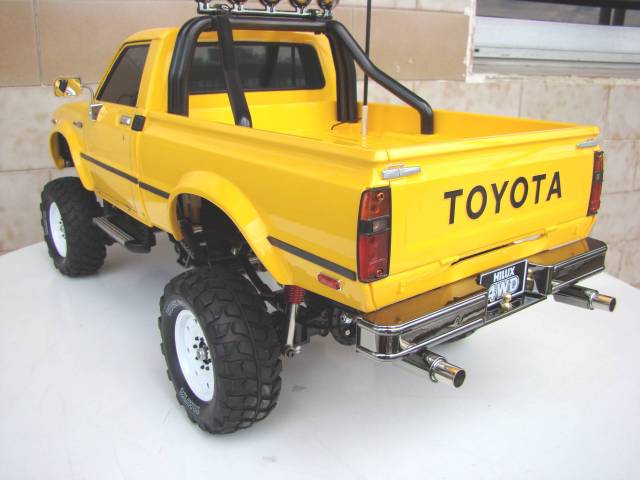
Toyota Hilux, 1/10 scale 3 speed gear box, electric motor
Kit 58397

Picture taken during the build
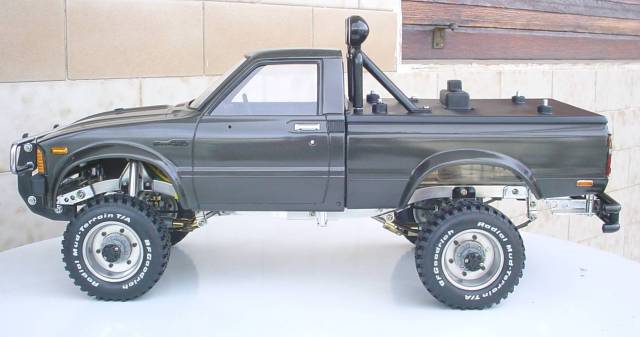
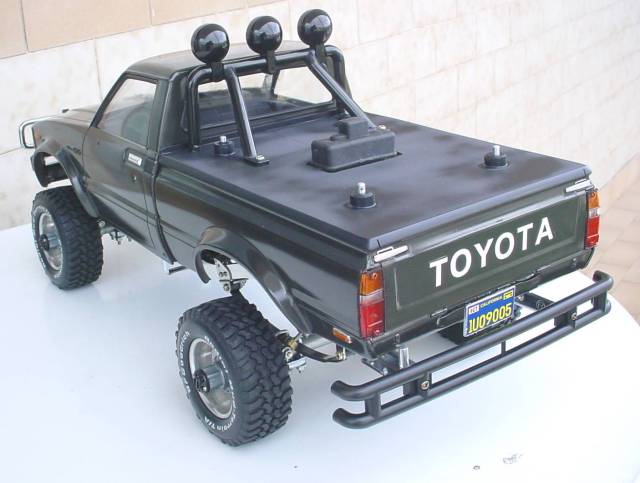
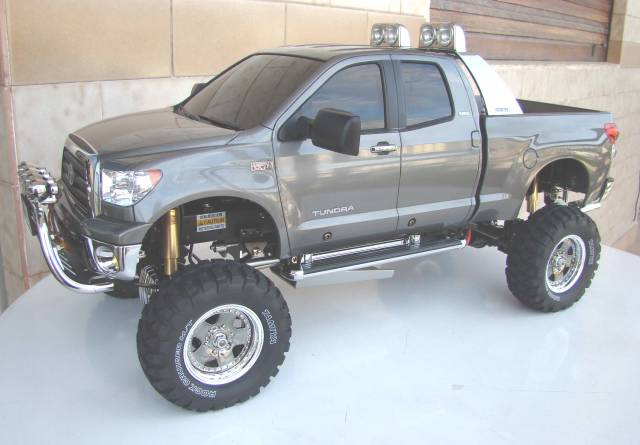
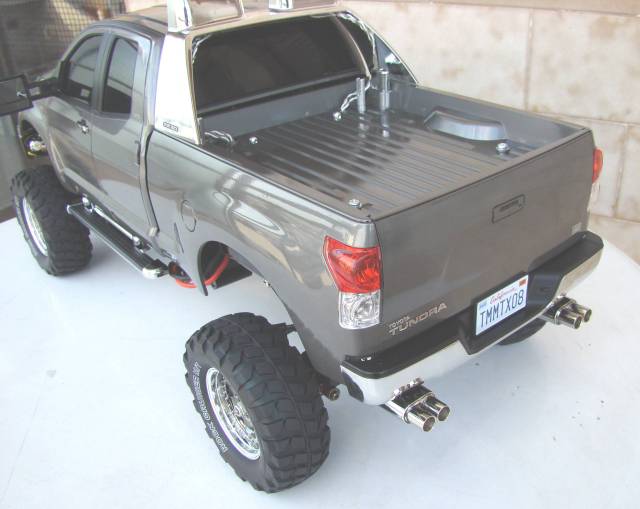
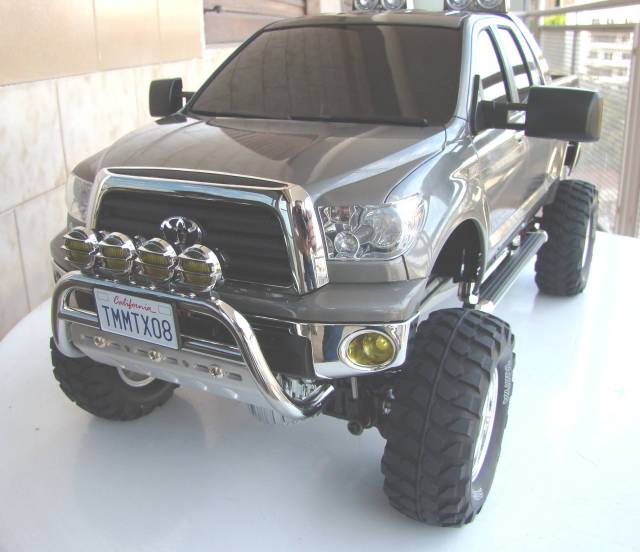
Toyota Tundra, 1/10 scale 3 speed gear box, electric motor
Kit 58415
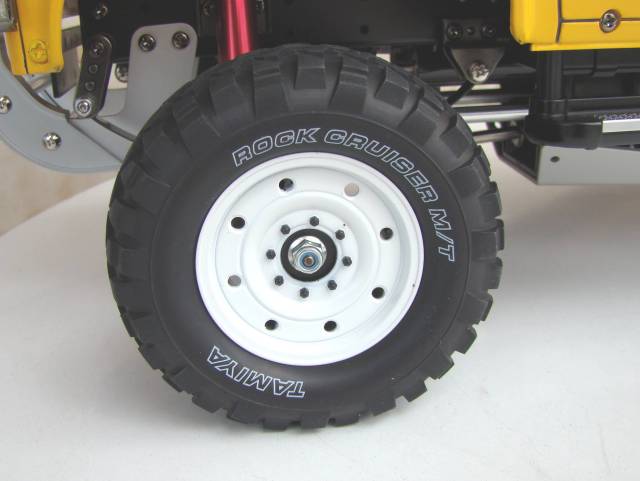
Before to read this you have to receive a warning, this is not crawling, off-road, tourism….etc etc, this is Tamiya 3 speed, is not the faster or better but just as is…. the best scale model RC car. The Tundra is the more beautiful RC car I have built, is a pity the dimensions of the body have forced Tamiya to make short leafsprings which makes harder the suspension. I didn’t use the wheels the kit provides but the ones from the Hilux, which I didn’t like, they are beautiful here, I think. Just removed the smoke paint in the rings leaving it in the center. I recommend to paint the red area of the tail light from inside, I did in this way. Also I placed the PE Logo parts on the sticker and then on the body as per the instructions, worked perfectly.
Tundra video showing all the MFC functions
Variants: The same Tamiya chassis with other hard plastic bodies.
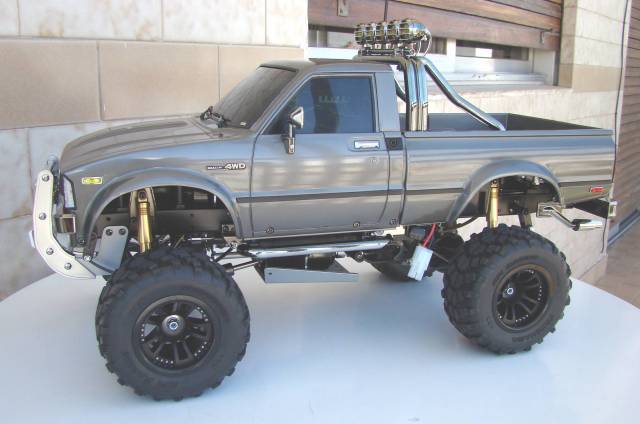
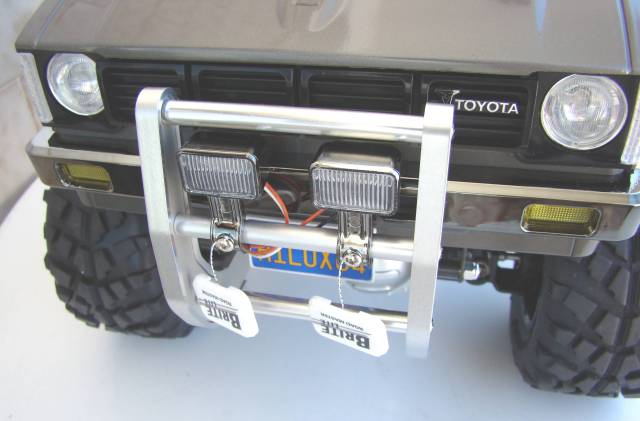
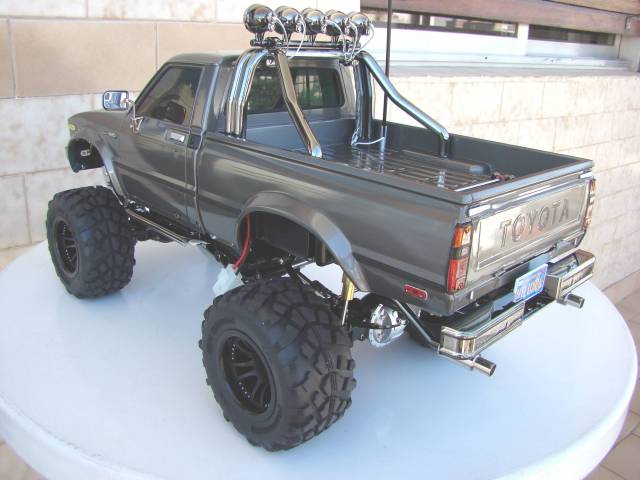
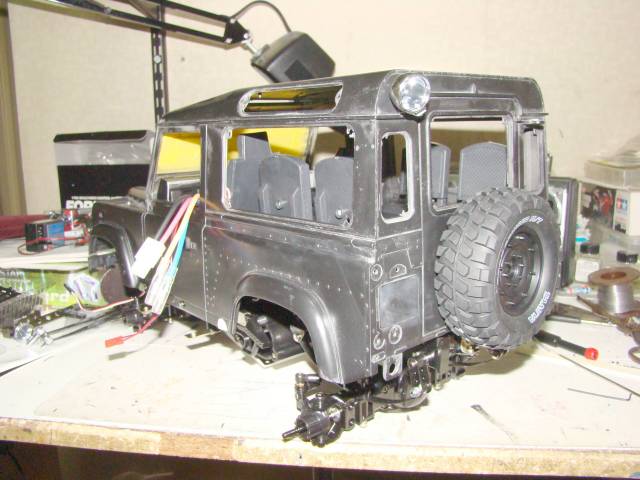
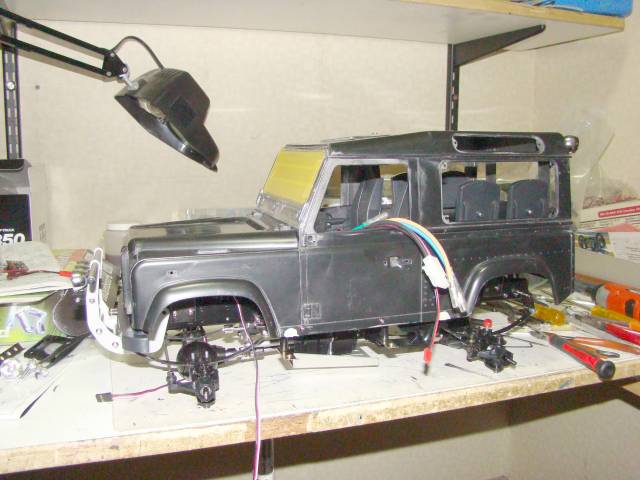
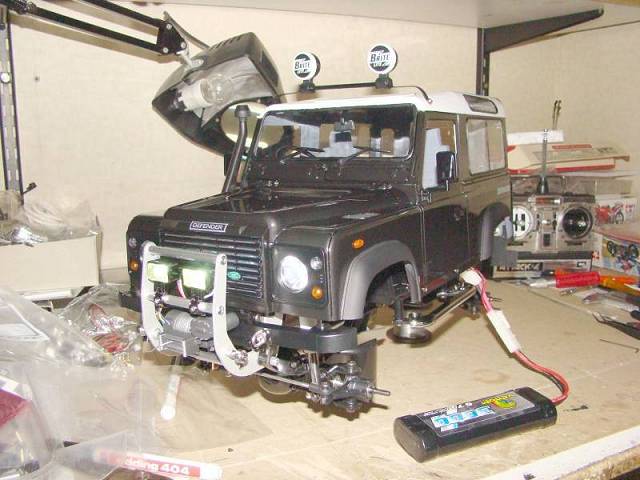
Since almost one year I wanted to make the Defender with a toy body. I got mine from eBay, unfortunately mine was very poor, half of the windows were scratched, small parts broken….etc. Anyway I disassembled carefully the parts and stripped the acrylic paint just with alcohol. I have seen so many good Defenders, that really I was little discouraged about how to face the project. After having in account the XC, SCX10, CR01…etc chassis I made my choice on the Highlift, basically because I didn’t see one ( probably there are many that I didn’t see) and it’s very strong and would be an interesting piece. Of course wheels are from the Tamiya Hummer, and I’m in the process to add details, just what I have at hand, as I like to take RC as is, for superdetailing I have my static kits. I made few modifications around the chassis to allow the new body is placed and modified the steering to remove all the large linkage replacing for a direct one. The color is graphite black, with white roof, still thinking if the whole should have been matt or glossy. I was thinking on the PE (sold at ebay) for the logos, but nowadays my old friend, the wallet is seeing me with a lot of fear, so I will leave to rest for a while. I have seen terrific pieces of work, I think this will be just one more for the pile, but it’s funny to share for those that still are working in a Defender.
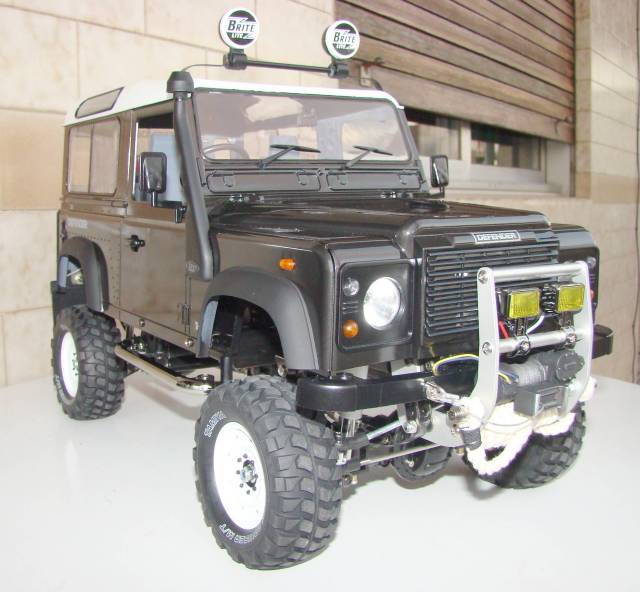
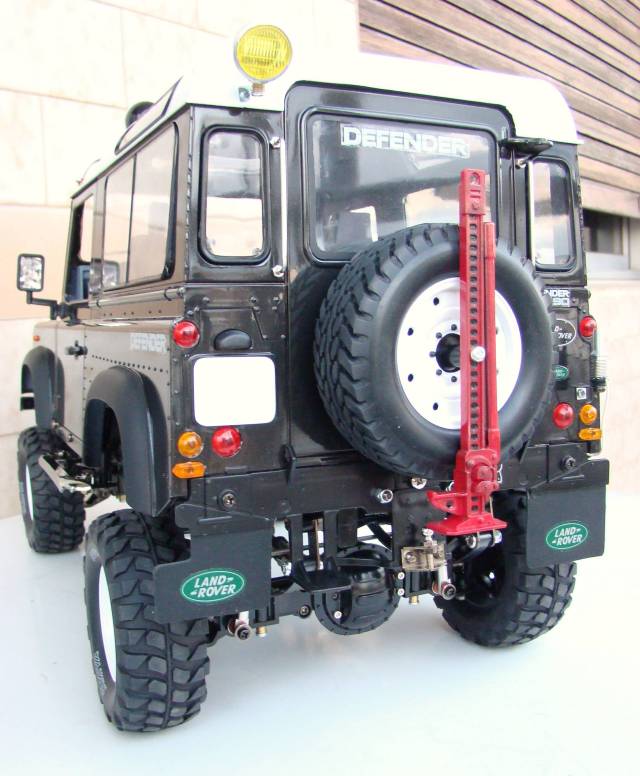
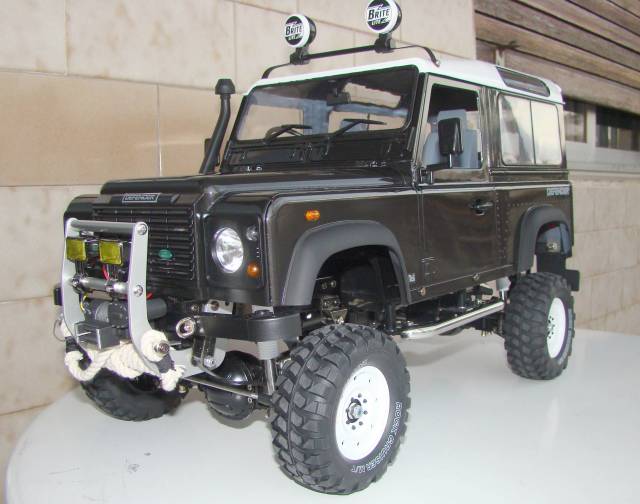
Pictures taken during the build
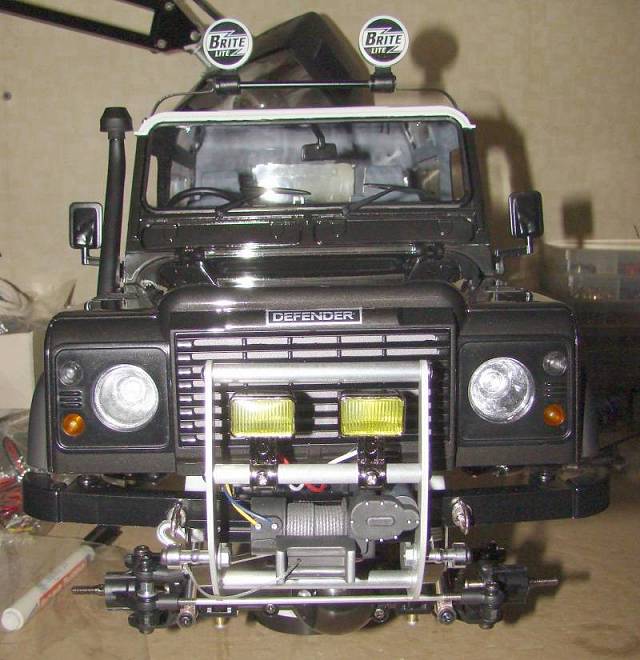
Testing lights. A Futab 4 channels was used to control the model.
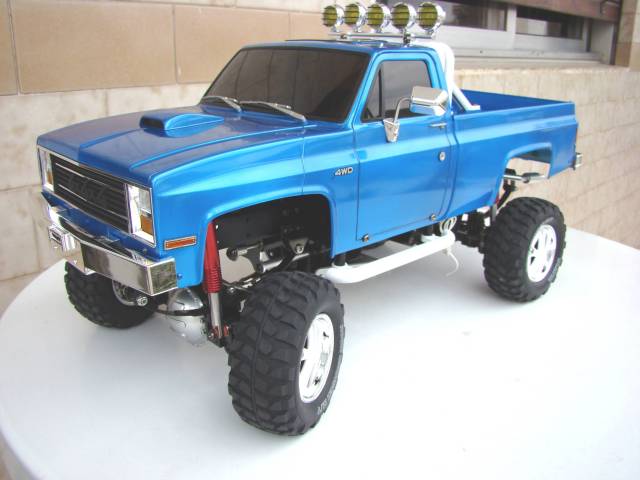
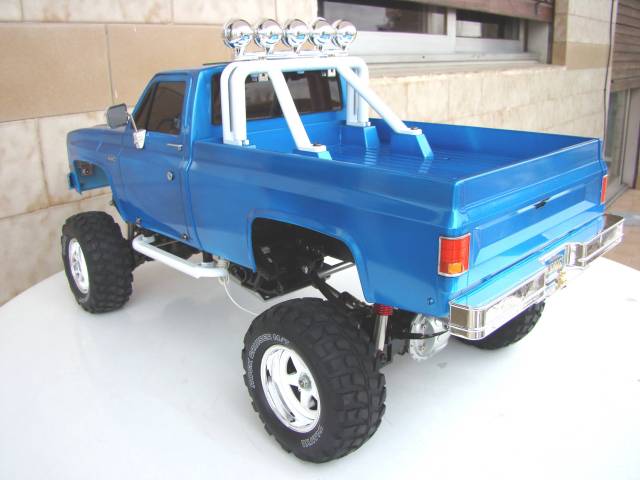
Other Tamiya highlift chassis this time with a Tamiya Clodbuster hard body
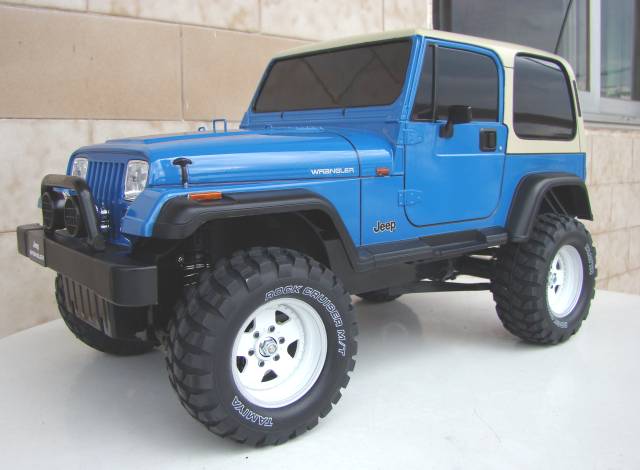
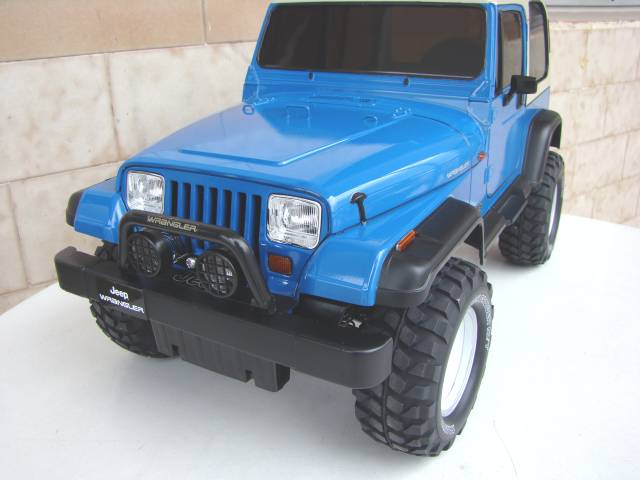
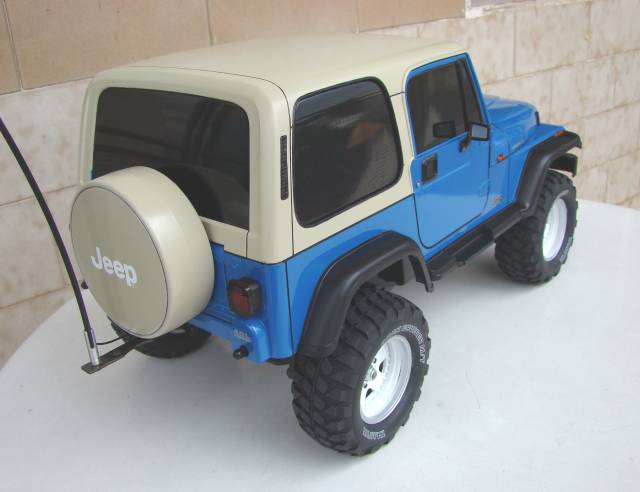
To finish with trucks some pictures of other Tamiya projects, as the 4×4 Pajero and Wrangler, both of them are CC01 chassis.
After a while looking the reissue I decided to go on with the Wrangler, I have a CR01 waiting but wanted check my fortune with the XC chassis which is very nice. I built stock, less: I lift the body and used modified Pajero wheels and Highlift tires. I cut 7mm from the Wrangler wheels and glued on the Pajero wheels. Paints were a mix of Krylons and airbrush, French blue looked a nice color. I didn’t add a roof rack or others parts and I guess the roof is soft. I didn’t use aftreparts in this build.
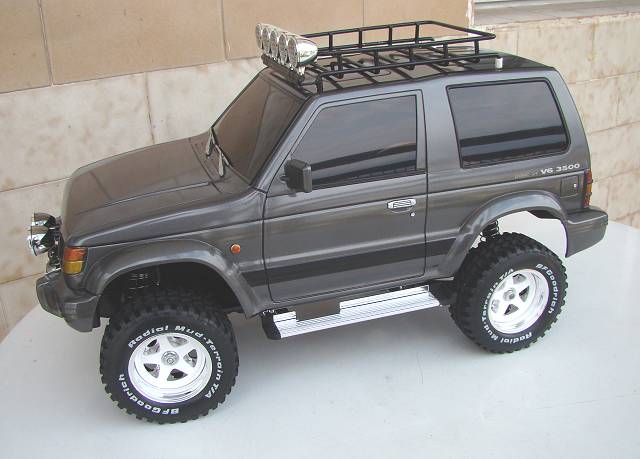
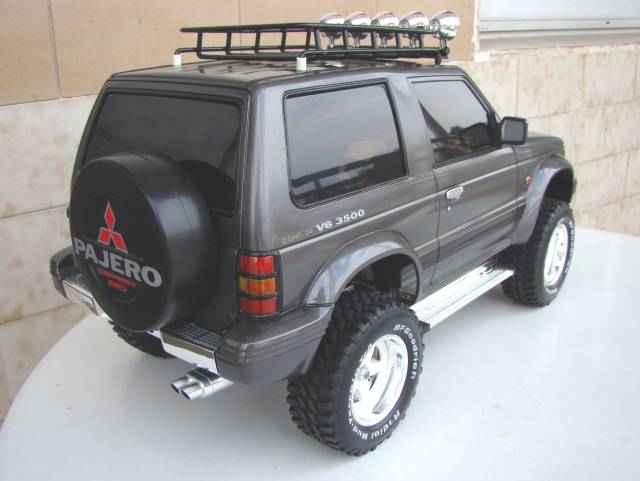
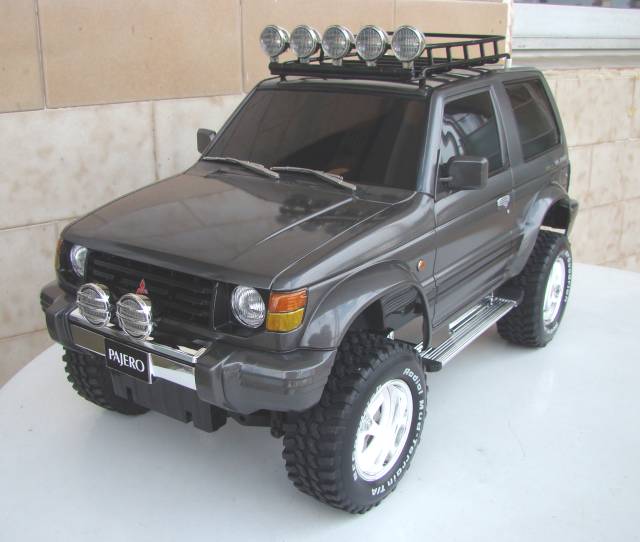
When Tamiya reissued the Pajero kit I got one and have around during almost one year, I used the chassis for all kind of projects and even though to use the body in a shorter Highlift chassis. Finally I decided to finished as is, in my favorite light gun metal color. The body was lifted 10mm and I used 2 pieces wheels to get a wider aspect. The roof rack and lights are an interesting detail I think.
To be continued…..


Charles
This is an amazing collection of Tamiya RCs. My first was a Blackfoot but I ended up just using it and abusing it. Im used to seeing non scale looking lexan bodied RC cars but I appreciate these more. They look very realistic. Thanks for sharing
colosus
Wow…these are amazing…. you did a great job to all those models…i’m busy with a Clod Buster Trail Adventure build in the rccrawler forum and this gives my inspiration… wonderful trucks man..
Could you tell me what the width & lenght was on that Defender body please…got a feeling its too narrow for the Clod axles even with them modified..drop a message here or email me please m8..
Thanx
Ilija
Hi, the Chevy Clod Buster on the Hihg Lift its coooooool. How do you made the Taillights? And where you have the rear view mirrors? Thanks
modelersite.com
The taillights are the kit ones, I just painted with silver and clear red over. The rearviews come from the Tamiya Hilux highlift kit.
paisley
I’m very pleased to uncover this web site. I need to to thank you for your time just for this fantastic read!! I definitely enjoyed every bit of it and i also have you saved to fav to look at new stuff on your site.
used car pricing
After looking into a handful of the blog posts on your blog, I seriously like your technique of writing a blog. I saved it to my bookmark website list and will be checking back in the near future. Please check out my website too and let me know how you feel.