-

GAML joined the group
Q/A & Help Group 11 years ago -
t-pain posted an update in the group
Q/A & Help Group 11 years agohay guys i need help, so i am build the MG red frame and am at the part with the chrome blade and i dont know how to cover up the nub mark on the blade to make it look like the rest of the blade so if any one can help i would thank you
-
There’s a Chrome Silver Gundam Marker made by Bandai and also from Tamiya available in the market. You can use that to touch up the nub marks. Although I am not sure if its available in your local hobby shops. 🙂
-
I forgot about the marker. You could try that, or possibly a very very light dry brushing of chrome paint. I haven’t had the chance to deal with this issue myself, so I’m curious to know what you decide to do and how it turns out. Good luck.
-
don’t know if it’s possible to completely hide such things one of the problems with gloss finishes and even worse on reflective surfaces is that you can’t really do touch ups but that said I’d use either an alcad 2 silver or a mr.color super metallic silver, there’s a few choices in each and they’re as far as I’ve heard the closest to an actual…[Read more]
-
-
Midnightshootingstar joined the group
Q/A & Help Group 11 years ago -
masterDS64 posted an update in the group
Q/A & Help Group 11 years agoHowdy, Im partially building a nu gundam ver ka and for the first time I decided to go use some decals, problem is as some may know they’re water slides D:
While I had some practice using paint I’m not at the point (nor have the eye to) pick out all relevant paints to make him then go decal him to death, what my plan was JUST doing the shoulder…[Read more]
-
Best thing that works for me and a lot of other peeps –
1. gloss coat
2. apply decals
3. top coat (gloss or flat)
Decals should be good and protected. 🙂-
Does the kit need to be washed before the first gloss, or will it be ok, just making sure
-
Yeah it doesn’t hurt to clean it. I usually clean the parts on the runners before I start. I know some people that don’t clean at all and they have no issues too. It eventually comes down to personal preference.
-
Ah, cheers for the info ^^
-
-
-
-
-
masterDS64 joined the group
Q/A & Help Group 11 years ago -
kidd0218 joined the group
Q/A & Help Group 11 years ago -
Positroneidon joined the group
Q/A & Help Group 11 years ago -
TheIrishLizard posted an update in the group
Q/A & Help Group 11 years agoHai guys, I was thinking about spray painting a kit or two, but there doesn’t seem to be any model shops within 3-4 hours of here, so I’m stuck with normal spray paint. Will that do the job? Also, should I spray on the runner or paint each individual piece?
-
I heard standard Krylon for plastics spray paint works well and you’ll want to paint each individual piece so your not left with spots where the runners were cut off afterwards. just make sure you keep it organized so you know which piece is which.
-
@TheIrishLizard
Be careful with the spray paints you see in the hardware stores. Some of them contain highly concentrated thinners. Some thinners can soften the plastic or even worst melt it. I agree with @Storm , Krylon spray paints is a good alternative and more cheaper than most of the hobby spray paints sold in most hobby shops. You may also…[Read more]
-
-
TheIrishLizard joined the group
Q/A & Help Group 11 years ago -
FiftyEight posted an update in the group
Q/A & Help Group 11 years agoHey guys, I have 2 questions and I would really like some opinion on it. First of all, I’m a beginner modeler, so if my questions seem too newbie, please forgive me, and I do hope I post in the right group. Anyway, here are the questions.
1. Is there a reversible way to fix a loose join? I’ve heard people use super glue to fix it, but wouldn’t…[Read more]
-
Regarding the nub mark sitiutation… What I do depending on the colour of the piece is use a bit of gundam marker… For example I’m build the strike freedom atm and on the dark blue bits… I put a bit of black marker on it and rub… An it blends in to make it look darker! The same with the red I used red gundam marker and did the same……[Read more]
-
Thank you. I’ll try that.
-
-
I’m also quite new and this is what I’ve found about tightening joints:
To tighten a loose joint you would use super glue on one of the pieces, wait for it to dry, then put it back where it belongs. By doing this you give the joint some extra friction so it will be stiff but still movable as apposed to just gluing the whole thing together where it…[Read more]-
oh, so that’s how it works. ok thanks. I’ll check that out.
-
yup you don’t glue it into position you use glue to thicken the joint but don’t over do it or you’ll end up making it too tight and then it won’t move. and make sure the glue dries fully like leave a full day atleast.
-
Oh ok. I understand. Thanks.
-
-
-
-
-
FiftyEight joined the group
Q/A & Help Group 11 years ago -
Josh Klingler posted an update in the group
Q/A & Help Group 11 years agoHope no one hates all my question yet how much water to thinner medium to future should I mix for thinning acrylic
-
What acrylic are you using? And how are you applying it?
Usually a ratio around 3:1 or 4:1 is a good starting point, but what you want is paint that flows freely, but not so thin that it’s ineffective. “Consistency of milk” is a term that’s thrown around a lot.-
I am airbrushing vallejo model color and I guess what I was asking is if I was to mix up say a 250 ml of thinning mix made of water, thinner meduim, and future? how much meduim to water to future should I mix? I’m a complete nub to acrylics let alone airbrushing them.
-
-
If your doing brush work, mini painters would say you can not mix to thinly. It’s pretty much about the even spread of pigment over a surface, . It’s easier to paint more thin layers, and almost impossible to strip of thick layers of paint.
I would suggest getting an old model and doing paint tests to see what you feel comfortable with.
It’s…[Read more]
-
-
Short Purple Hair Lover joined the group
Q/A & Help Group 11 years ago -
Gianpla posted an update in the group
Q/A & Help Group 11 years agomy HG are always broken because i always touch and pose them everyday, can you guys help me how to just let them display at my shelf?
-
Pose them and leave them,simple.
Or just wear realy big gloves thst wont allow you to touch them.
🙂-
lol thanks for your advice 🙂
-
-
I had the same issue, what I done is take a few of the best poses I can, take a pic of each with the best camera you got then leave them in THE best pose you can think of as the final one.
This way while the hg death scythe hell is falling to bits…but its MG counter part is intact 😉
-
haha!! i really hate 1/144 today 1/144 scale hg,fg,ng bring me bad gunpla memories 🙁 so now im collecting those 1/100 scale models like NG, i have a lot of knowledge about MG but until now i still don’t even a single master grade lol
-
Heh I broke one a few days ago (mind you was still building…too much force when sanding paint off XD) but I don’t have many issues with 1/144 kits…
I build, I make my fav pose, I leave him alone, same for mg’s (their complex gimmicks worry me more than my old pre 2000 hg gundam wing ew kits!)
-
-
-
-
Gianpla joined the group
Q/A & Help Group 11 years ago -
Josh Klingler posted an update in the group
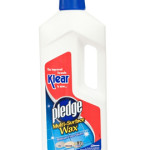
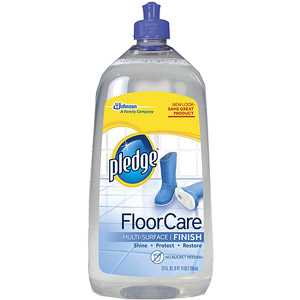
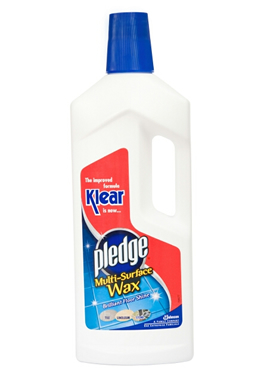
Q/A & Help Group 11 years agoI press post before done but some sent me this pic 1 but can’t find I did however find pic 2
-
Its pic 2 in ohio usa thankz wed
-
Josh Klingler posted an update in the group
Q/A & Help Group 11 years ago -
Josh Klingler posted an update in the group
Q/A & Help Group 11 years ago -
Josh Klingler posted an update in the group
Q/A & Help Group 11 years agoPlease can anyone tell me witch type of pledge to use for future finish. I am using Vallejo model color paints and I read there soft when airbrushed
-
crzydrunknmunky posted an update in the group
Q/A & Help Group 11 years agoHey! I’m looking for some advice on how to fill in seam lines. So in the photo I’ve already glued, puttied (Tamiya Basic Putty), (wet) sanded and primed the piece but there’s still a faint line going down the middle. Before priming it felt, looked and seamed (haha get it?) flat. Do you guys have any advice on how to get that flat seam line? and…[Read more]
-
Can’t see it in this photo… But depending on what’s going on, my suggestion would be one of three things:
If you’ve still got a faint little recessed line, it could be that the putty shrank (putty does this) – just add more, let it dry thoroughly, and sand it again.
If the edges are uneven (creating like a “stair-step” between the two parts)…[Read more]-
Thanks a lot for replying! Yeah, I figured that I could only see it because I know exactly where the problem is, but it is a faint little recessed line. From what I’ve read on other places it does seem like shrinking is the culprit. So next time, should I prime right after I finish sanding so I can prevent shrinking? Well! back to more sanding!
-
The putty shrinkage is just part of how most simple putties work – as part of the hardening process, solvents in the putty evaporate. Priming over the putty before if fully dries would slow the process but not stop it. The way to deal with putty shrinkage, generally, is just to let it happen and then apply more. But there are also alternatives…[Read more]
-
Hey thanks for all the help! I puttied and sanded it a couple times but the lines were still there so I ended up spraying a really thick layer of primer onto the part and softly sanded it and the seam line disappeared!! I may be using that technique from now on. Thanks for your great help!
-
-
-
-
- Load More