-

Amuro posted an update in the group
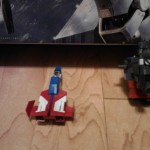
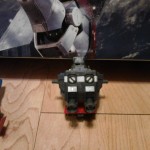
Q/A & Help Group 9 years, 3 months ago these my kit stupid nubs any tips to get rid of them would help
Amuro posted an update in the group ![]() Q/A & Help Group 9 years, 3 months ago
Q/A & Help Group 9 years, 3 months ago
these my kit stupid nubs any tips to get rid of them would help


Best thing you can do to fix gate marks is to not make them in the first place – I tend to be a bit careless about this, and the consequence is that I have to sand and perhaps putty the gate marks prior to painting. But you can avoid doing that repair work if you do the initial cutting more carefully: Careless cutting will actually tear out some of the plastic from the part, leaving white stress marks and even divots on the surface of the model. It’s better to use a little care up front and avoid the problem, rather than make a mess of things and then have to fix it.
The first cut should be at least 1mm away from the part, leaving a little bit of the gate still attached to the part.
If you have good-quality nippers you may be able to cut down the rest of the gate that way, cutting a little bit at a time until you reach the base of the gate where it attaches to the part.
A hobby knife (a good sharp one – change your blades as soon as they start to dull) is also useful for cutting down the leftover bits of gates – again, cut a little at a time rather than trying to do the job all at once.
Then finish up with sandpaper. Depending on how much of the gate is left you might want to start as low as 320 grit, then work your way up through at least 600 grit to smooth out the surface again.
I’ll add something to what Tetsujin said. When cutting with a hobby knife cut in one way then in the other way. When you start cutting the blade will naturally go up leaving the other side of the nub untouched. Don’t try to force the blade to go down the nub because you’ll risk to force damage the plastic leaving a white mark or worse carving the piece you’re working on. At the end you should have a little nipple of plastic pouring out. If you sand it at this moment you’ll only level down the plastic leaving the nipple. Just put this time a very little pressure on your blade being careful not to carve the plastic, keeping the blade as straight as possible. Then sand it. I personally use a light pass of 400 to get rid of the bigger marks followed by 800 then I use a sanding stick I don’t know the grid but it seems to have no sand on it, only a kind of interlace kind of texture when you look close on it. It smooths the plastic so much that it seems absolutely untouched and shiny. Don’t ask me the brand I don’t know it since I got this sanding stick a long time ago as a gift with a kit order. By the way it seems also to never wear out as I used it on countless kits.
I forgot to add something:
if you still have white marks and you’re not painting your kit you can use Gundam markers of the appropriate colors. They come individually or in sets, for example Seed or Zion sets. Shake it well then apply a little dip on your mark. Then I personally use a cotton stalk to get rid of the excess of paint and smooth the area.
so would 1000 grit sand paper be good enough for it I have a few places to touch up that are noticeable and I am not sure even thou it is my first model if I should clear coat it I know the principle of it but im not sure suggestions? oh and what should I use for panel lining
When sanding you want to start with something coarse enough to do the job efficiently, and then progress through other grits until you get to something fine enough to get the surface really smooth. It’s important to work your way through a number of intermediate grits from coarse to fine because each sandpaper will leave scratches on the part. To smooth these scratches out you need a sandpaper coarse enough to level out the scratches, but fine enough that the scratches it leaves will be smaller than the ones you’re eliminating.
1000 grit is pretty fine, it’s something you’d use to put the final polish on something after it’s already smoothed out. If there’s any nub left on the part at all when you start sanding you probably want to start with 320 or 400 grit.
Coarser grits leave coarser scratches on the parts, of course, which is a bit of a problem: and so you don’t want to use coarser sandpaper than necessary to avoid creating work for yourself. But you also don’t want to start with too fine a grit, or it’ll be ineffective, and you’ll waste a lot of time scrubbing a part with sandpaper that’s not tough enough for the basic job. That can ultimately lead to damage as well, because with all the scrubbing you have to do with fine grit sandpaper, the resulting work will be less precise, less specific to the area that really needs to be ground down.
400 grit is about as fine as you can go and still make a real structural difference to the part you’re sanding. It’s also about as coarse as you can go and still have a reasonably smooth surface. 320 has a little more bite to it, and usually it’s where I start when there’s something minor I need to sand off – but it also leaves deeper scratches than 400 grit, so for small enough jobs it may be worth starting with 400.
Yeah I cant stand the scratches it makes me nervous so I can still see the scratches do I have t go over the entire part? cause the scratches are quite noticeable oh and any tips besides gundam markers for tiny white marks when I started I made a few
If you do it right the sanding process will result in a smooth surface. Sanding with 320 grit will leave significant scratches, and that’s why you follow up with 400 grit… which is strong enough to smooth out the 320 grit scratches but fine enough that the scratches it leaves will be smaller. Go 320, 400, 600 and you should have a nice-looking surface again, almost indistinguishable from fresh plastic. Going to 1000 grit or thereabouts should make it totally smooth.
But you should always paint models, of course. 🙂
yeah i thought about clear coating it but some how i can see me messing it up and painting on this model just dosnt make sense cause the colours are so good
Bahh… It’s always worth it to paint!
And if you have any interest at all at getting good at painting models… You’ll never get better at painting models by NOT painting models.
yeah but this model was kinda a surprise present so i might try my hand on a cheap model like a car or something then move on to bigger things:)
so i can put the decals on befoore i clear coat correct?
You’re correct then your clear coat will protect the decals. I presume you’re using stickers and not water decals.
Just be aware that clear coats will pop out any sanding region and imperfection even if you don’t see it with bare eyes as matt coats would hide them. I recommend you make a test on a a piece of the runner that you sanded before like you did on your kit.
thx will do