Hello again you laser-loving, model building people!
AllDaLazurs aka Adam K here again. In my first post, “Gundam photography real laser effects: Intro,” I explained the photography equipment and materials needed to create these light effects, and explained the light painting photography technique that we are going to use to accomplish the effects. If you haven’t seen that post yet, you should probably do that before continuing to read this one.
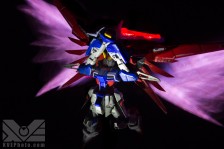
This time I’ll show you how to pull off perhaps the most awesome light photo effect I’ve done so far – the Destiny Gundam wing effect!
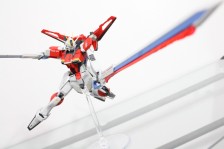
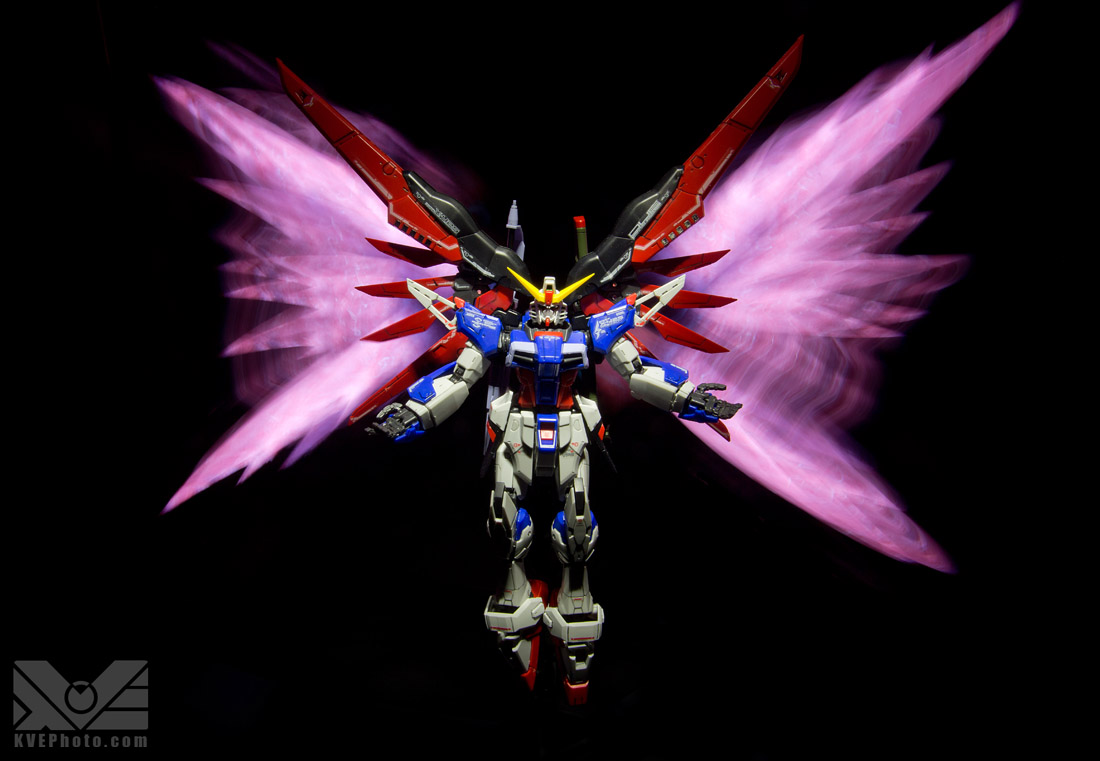 Before you say anything, yeah, I totally copied the classic Wing Gundam Zero pose, but it looks so cool on Destiny! Anyway, this effect is accomplished in a similar way to the sword effect which I explained in a previous post. And don’t be fooled, there are no plastic effect parts used in this photo.
To get the primer on how these effects work, check out my first post, Gundam photography real laser effects: Intro.
To accomplish this effect, you will need your automotive work light, coloured tissue paper, elastics, a cardboard stencil and a white flash light, shown here:

The automotive work light is at the top left of the photo.
Take your automotive work light and cover it with tissue paper of the appropriate colour (here I used red and blue). Next, make a cardboard stencil. The one I made has a point at the end with several feather-like protrusions.
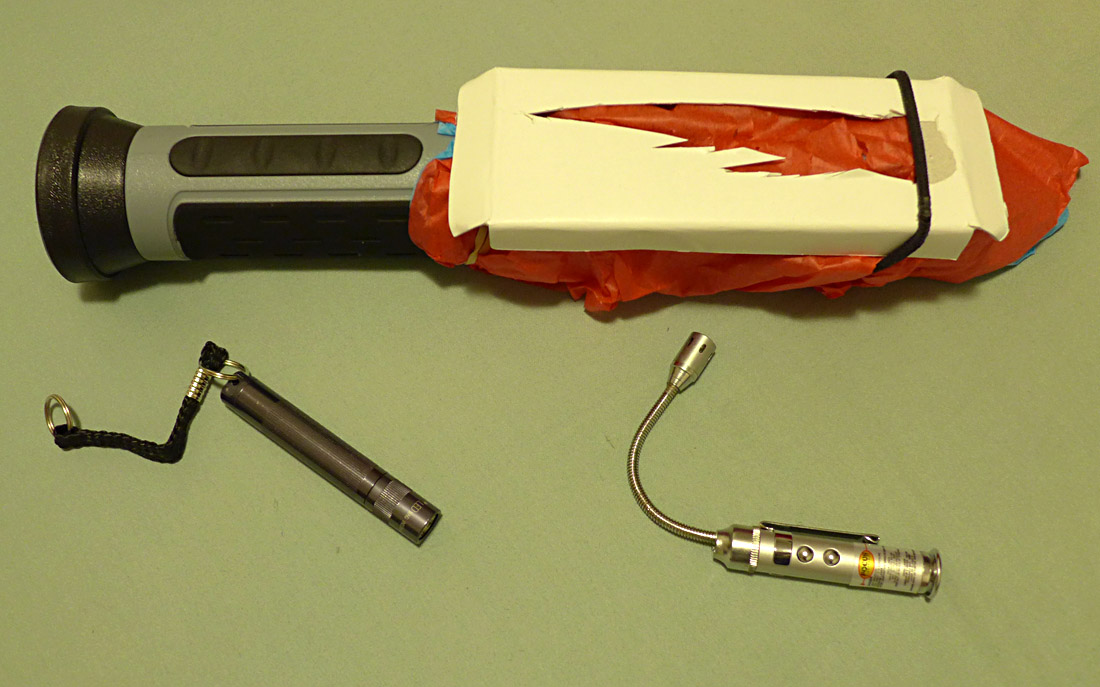
This is what my stencil looks like on my automotive work light with the tissue paper sandwiched together. Get your stencil and your tissue paper, put it on your work light with elastics, and set up your model in the desired pose, and basically do what you did with the beam sword effect – slowly wave the light around behind your model.
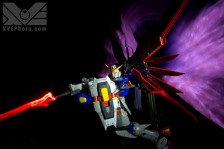
 Here I have my automotive work light with tissue paper and stencil covering the light. The light is pointed towards the camera, but from behind Destiny’s wings.
Remember to keep the light from your automotive work light pointed towards the camera as you move it around behind your model’s wings. Consider the shape you want to create. Don’t forget, your camera should be set to take a 30-second photo, and that all other lights in the room should be turned off so it’s as dark as possible.
For a brighter, more solid look in some places, keep the light in the same position for a second or two. Finally, once you are done with your wing effects, don’t forget to shine a white LED light at the model to light it up. In this post’s first photo, I pointed the light down at Destiny to give it a dramatic look.
And there you are, Gundam photography laser effects with a couple of flashlights, some tissue paper, cardboard and elastics.
 Remember, these effects are tricky, so experiment a lot, and keep shooting until you are satisfied. Also, do your best not to knock your model as you are taking your photo, as this can make the model look blurry in the photo.
If you know how to use photoshop, you can clean up some of your mistakes there, re-align some of your effects, and digitally remove stands.
I hope you have enjoyed this tutorial. I’m super excited to see who else tries these light painting effects, and what their results are. I’m sure there are a ton of new and cool ways to do this, so explore as much as you can.
Thanks again for reading. I’m Adam K, aka AllDaLazurs.


RedVal89
ahhh, so that’s how you do it!!! hehehe nice2x tips and tutorial
AllDaLazurs
Thanks:) Hope you try it yourself!