-

maninthesuit posted an update in the group
Beginner Modeler – Modeling Competition 2013. 9 years, 3 months ago 1/48 New Layzner WIP update
Time running out appears to be the best motivator for me. Built the waist yesterday and one-and-a-half leg the day before that. But since I consider the leg section to be incomplete no photos on that. Instead, I’ll talk about the head.
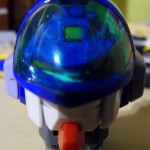
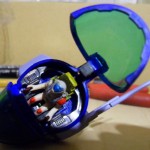
The head for me has good and bad points. The good is the style. Now I have a soft spot for glassheads so the Layzner was an instant hit for me. The fact that said glass-head is actually transparant with a detailed cockpit and pilot figure makes it even better.
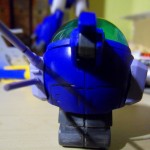
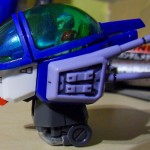
The bad parts are minor really. I can count three. First of all I don’t like how I can’t get the cockpitdome to be flush with the head. You can see the gap in the side-views. The second problem is a gap on the underside of the head. Now the dome could have been my fault but this underside gap is definitely by design. It means that when seen from the right angle the chair and pilot’s legs are visible. The good news is that this angle is practically impossible when the head is actually mounted on the torso.
Building the head presented me with a few problems beyond the aforementioned flaws. Now usually I keep my painting down to just some panel-lining and fixing up some sandingmarks. But for the cockpit I couldn’t take the minimalist approach. The box gave me a fully detailed interior and by golly I was going to use it.
The pilot was the first problem. Try as I might, I can’t seem to get the white marker to actually fully cover the plastic’s natural colour. So I went over it till I got so frustrated I dropped the whole kit for over a month. Yeah, bad move. And when I look at the photos, I don’t see the problem anymore. Go figure.
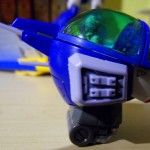
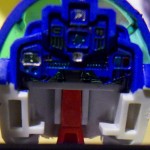
The instrument panel was a second issue. Now I’m not a fan of stickers. They’re always off by half a milimetre and peel off the moment you look at them. But the instrument panel had a really nice one so I tried. The manual hinted I dipped the sticker in water for 3 somethings (I tried seconds, then a few more seconds when 3 wasn’t enough) and then rub it onto the panel with a q-tip. The sticker broke. So I did it the hard way with oversized markers. Blue for the housing and chrome/clear green/red/yellow for the various screens, buttons and dials. It came out pretty well all told though it is hard to get a good angle on it when the head is fully assembled.
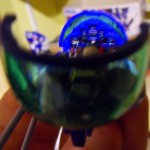
The glass dome had more blue stickers as structural support. But I used the marker instead. No more stickers for me. Using the marker also had the advantage that I could go over the corresponding bits on the inside as well as the outside to give the ribs more of a sense of depth instead of being strictly two-dimensional. Not necessary but I just know it would keep nagging me if I didn’t.
The face comes in pure white but the manual had everything from the eyes up done in dark green. I only have my clear green but I figured that the blue would be close enough and it fits with the colour the back of the head has. I also hoped that by colouring it I could make the eyes pop more. No luck on the popping and I couldn’t jam the marker all the way into the brow but I’m halfway satisified with what I did manage. I also did the back of the facepiece so the instrument panel wouldn’t be sitting in an ugly white rim.
What else is there to say? I did the usual panel-lining, some extra on the antenna-pieces. And the eyes were a transparant piece which I went over with chrome silver and some yellow.
It’s looking quite good. Which anime it’s from?
According to wikipedia, Blue Comet SPT Layzner. I never actually saw the show and as far as I’m aware it was never released in english.