-

MohnJadden posted an update in the group
Intermediate Modeler – Modeling Competition 2017 6 years ago Update 3: http://imgur.com/a/W9ZFF 2/12/17(first photo is at the end of the photos, based on how the forum organizes things, sorry for the inconvenience – the Imgur link above makes life easier)
Midsection parts are primed and ready to go after an overnight cure.
–
I can’t get too close with an S7 camera and still have a photo but you can see here how smooth the seam-filled part is. The Mr. Surfacer paid off in spades.
–
This is the part that I’ve really been dreading. The upper leg not only has a visible seam but it’s at multiple levels, with some surface detail above it. I’m really kinda concerned about how I’ll pull this off.
Since it cements around the lower leg part, I used Mr. Masking Sol Neo on the parts of the lower leg that will eventually be exposed.
Rather than Tamiya Extra Thin cement, I gambled on trying normal Testors in the trapezoidal-looking container, in hopes of getting a cement weld bead that was contiguous and easy to just scrape away, to minimize sanding.
–
My hopes did not pay off. The bead was kinda all over the seam. Sanding it out was not really easy. I ended up just kind of twist-grinding 400 grit sandpaper with the point of a finger to sand it in. You see on the right one, just to the left of the big glob of blue Mr. Masking Sol? There’s red fragments of sandpaper all over it.
What I ended up doing was getting an artist’s sponge that I was using to test out sponge paint chipping, and wrapping the sandpaper around that to give it enough shape to get into the gap while still conforming to the surface detail.
–
The sponge method helped but not entirely. The bead in the bottom one was splotched across. I undertook a method that one should not use unless you’re desperate, and I was desperate. 240 grit sanding disc at very low speed on a Dremel.
See how it’s kinda slashy across the seam? The disc dug into the plastic as it took care of the seam. It’s a highly destructive method but I was basically out of options. I am more than open to suggestions on how to do this better next time.
Mr. Surfacer into the gouges and onto the other less-neat parts should help a bit.
–
The finished part, primed, painted, and gloss topcoated. Not the world’s greatest seam join but it’s as good as it’ll probably get. Plus, every single flaw is visible under a naked bulb and gloss topcoat. Once I put down the matte coat it’ll probably lighten up a bit.
What I really wish that Plamax did was do the thing for the FRONT of this part to the back. It’s held together by a piece of armor. Sure would have been nice to keep the surface detail and keep the seams on the sides, where it’s easier to deal with. Oh well.
–
The waist armor goes around the previously-painted waist frame parts. There’s a big seam but a lot of it is covered up. This part of the bottom and another part of the top are getting cemented for tomorrow’s work.
–
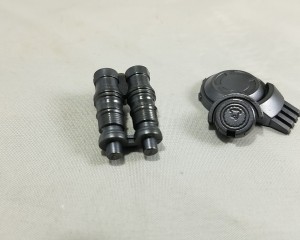
Speaking of frame parts, I wanted to take a second and make mention of how great Mr. Metal Color is. I’ve been using the Iron color for my last few inner frames. Put it on over a gloss black enamel base of even reflectivity, wait for 15-20 minutes, and buff. You get amazing shiny results.
I’ve been using old pajama pant legs and cloth buffing wheels on my Dremel. The former gets a nice even polish, the latter helps polish and accentuate the detailed parts.
The result is a highly reflective and shiny bare-metal-looking piece. I can’t recommend trying this setup enough. It’s a great color for your inner frames – metallic without being too shiny, dark without being too dark.
–
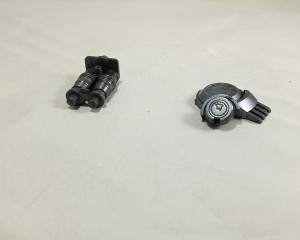
A better photo of the buffed parts.
–
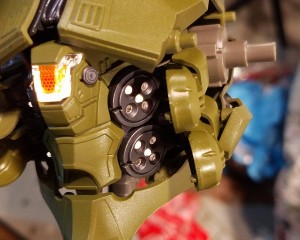
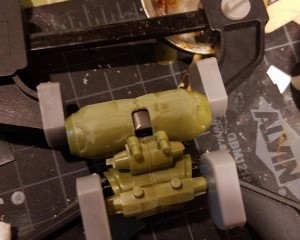
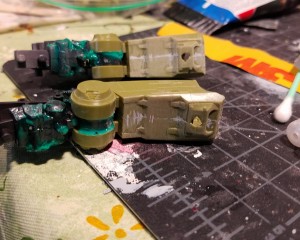
Sneak preview time! Here’s your boy’s midsection all finished up under a gloss topcoat. The color is Vallejo 094, Russian Uniform Green.
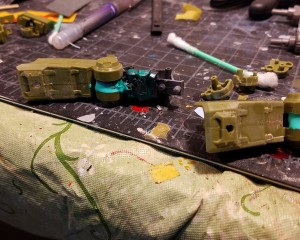
The inner frame parts got Mr. Metal Color iron and extensive buffing with a cloth wheel. It helps the pipes turn nearly stainless-steel in color. The other cool part of the buffing wheel is that it leaves behind some of the pigment in the little pipe rings, so it looks a little shaded.
The inner frame parts were separately topcoated with Testors Metallizer Sealer. That’s as close as it gets to a fully transparent clear coat, which lets the metal retain its luster.
–
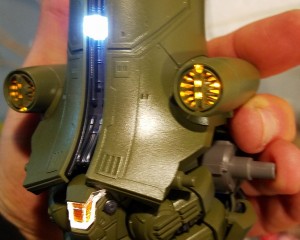
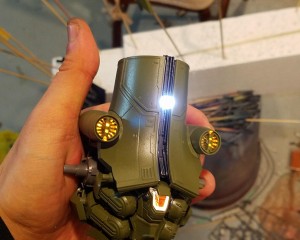
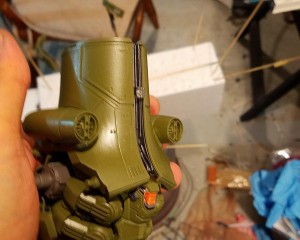
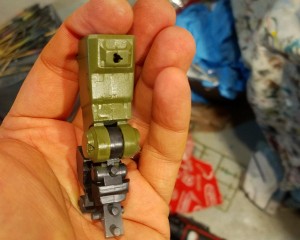
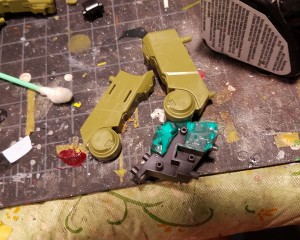
The lights work perfectly!
–
The yellow is magnified by a cone-shaped clear plastic part.
–
The clear parts for the side lights kinda diffuse things a bit. Next time I might paint anything facing them white to reflect the light a little better.