When we showed you a preview of the 1/144 Real Grade RX-78-2 Gundam back in July we were unsure what to expect with this new grade of kits and, due to the limited amount of time we had, couldn’t really delve into the build in depth. Well, we can’t let something this unique just go by without further explanation so we’ll be doing a series of posts regarding the building of the RG Gundam and what to expect and watch out for when you build your own. And I hope to take it a step further.
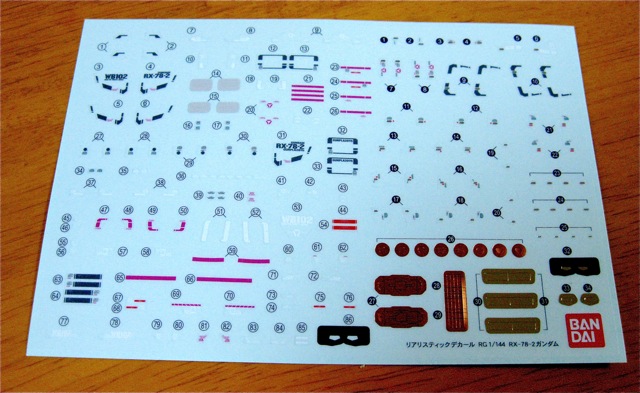
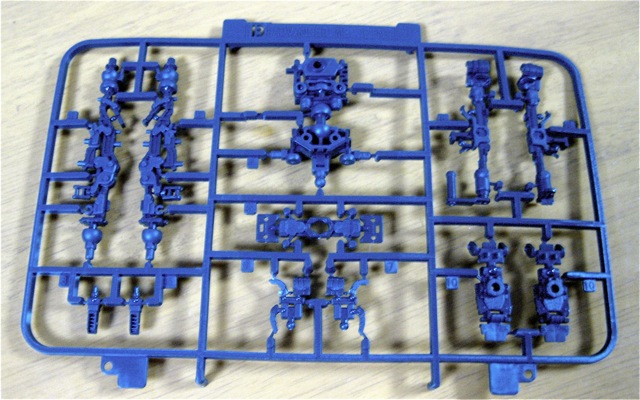
When you start opening the plastic bags and removing the runners the first thing you will notice is that there are quite a few runners for a 1/144 kit. There is also a tremendous amount of stickers. But these aren’t your regular Gundam stickers. These markings are unique to this kit and Bandai has taken it up a notch with the stickers just as they did the kit. We’ll explain more on all those stickers later.
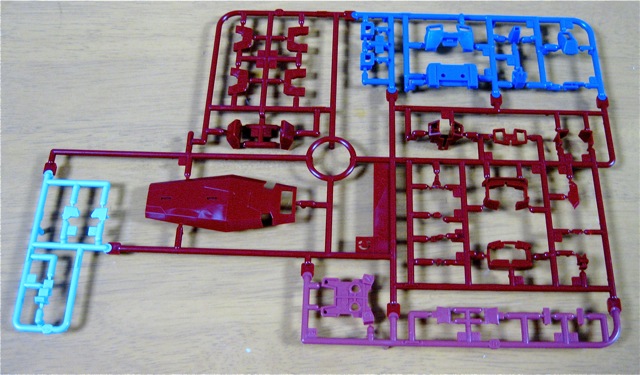
There are a lot of parts on these small runners. Bandai has even gone ahead and molded runners with parts of different colors.
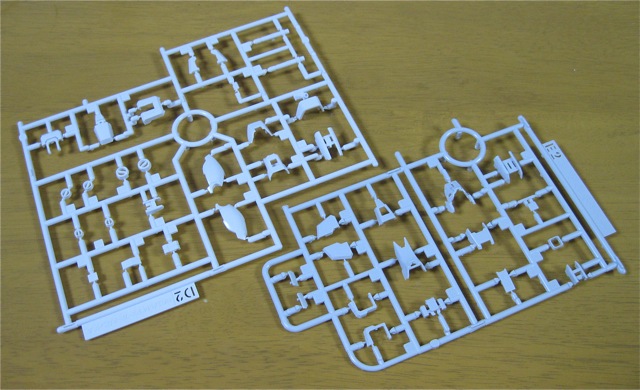
The armor comes on two different kinds of runners with the shade being slightly different, although the picture does not show it well.
Bandai was keen to hype the frame of this kit and as you can see why as this is different from any 1/144 scale kit we’ve seen before. The arms and leg frame are molded as one piece, yet are fully articulate from the outset. The plastic is flexible as well, but this also can lead to breakage if you are not careful.
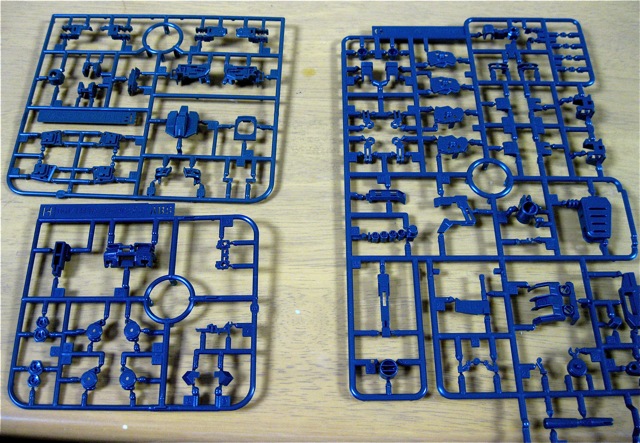
And the remaining runners consist of frame and weapon pieces.
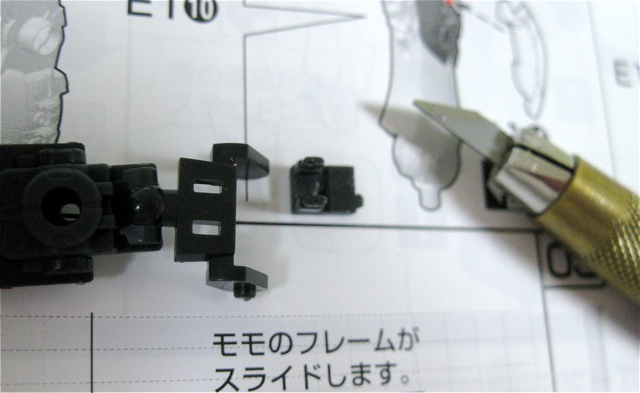
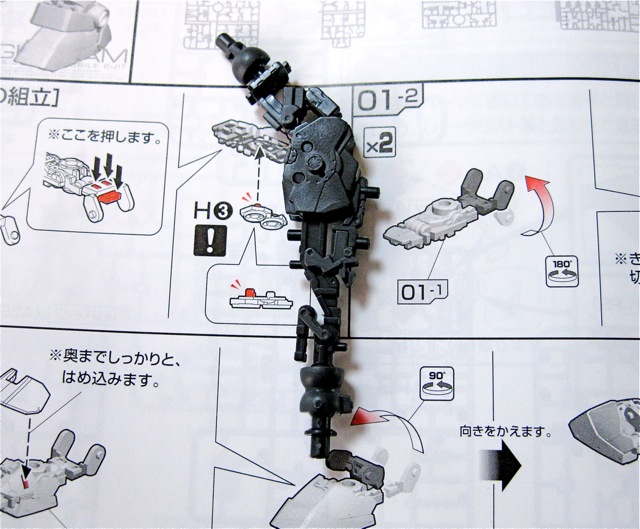
Right from the start of the build Bandai has something new in store as you need to remove a part of the piece you just removed from the runner. That’s right. There are pieces that were part of the mold process which are not necessary for the build. That said, there are also parts that need to be removed from one part of the frame and then used again later on. So don’t throw anything away!

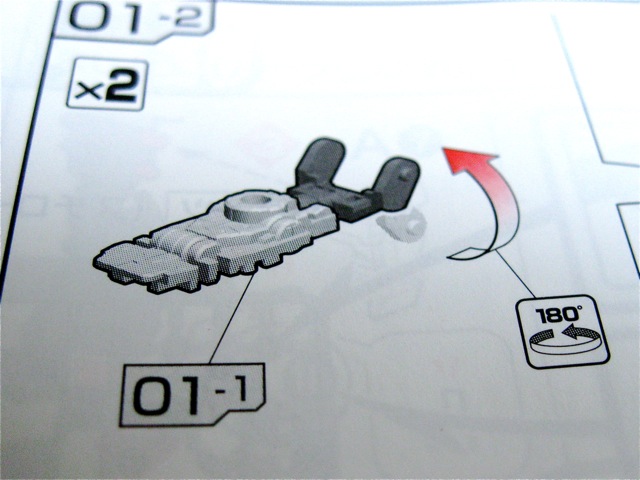
Flexible feet! The feet, right off the runner, are flexible and bend in two sections. Interestingly, Bandai instructs you to swing and swivel some pieces 180 degrees before continuing with the application of frame or armor pieces. Follow the manual closely.
A normal 1/144 scale HG may have just three pieces for a foot. A bottom half, a poly-cap, and then a top half are pretty standard. The Real Grade is a whole different ball game.
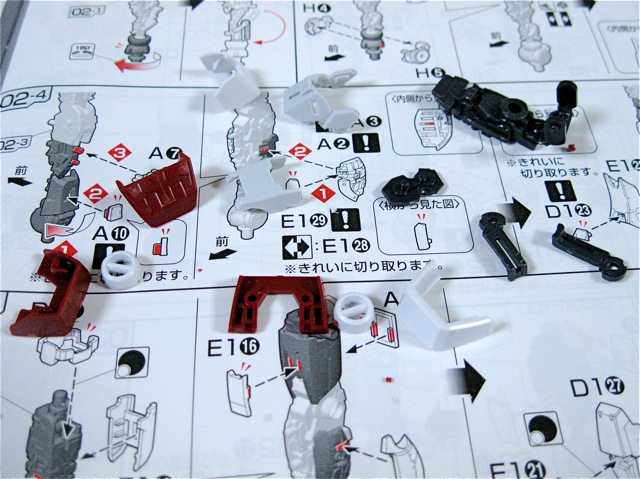
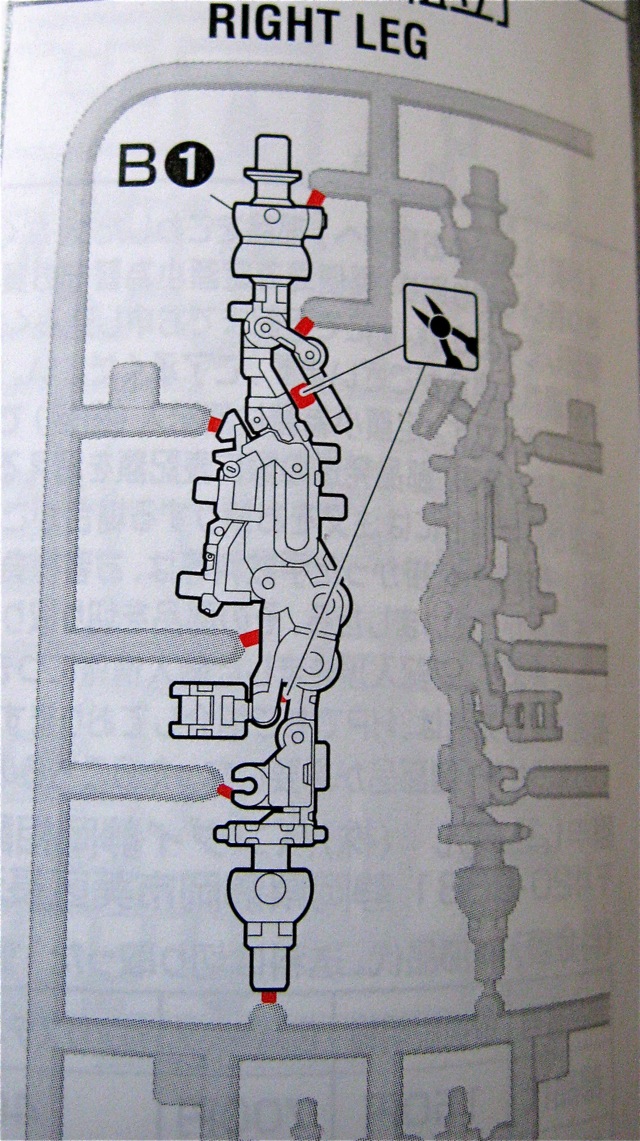
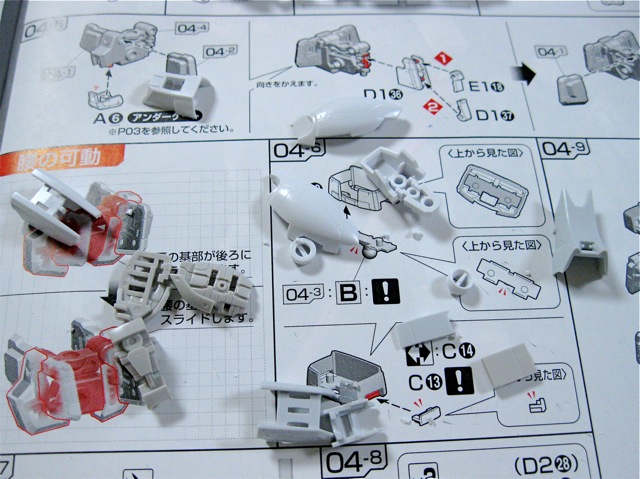
After the feet come the legs and it’s here you have to carefully remove the leg frame from the runner and then cut away the unnecessary parts which are indicated here in red.
Again Bandai has you swinging some pieces around.
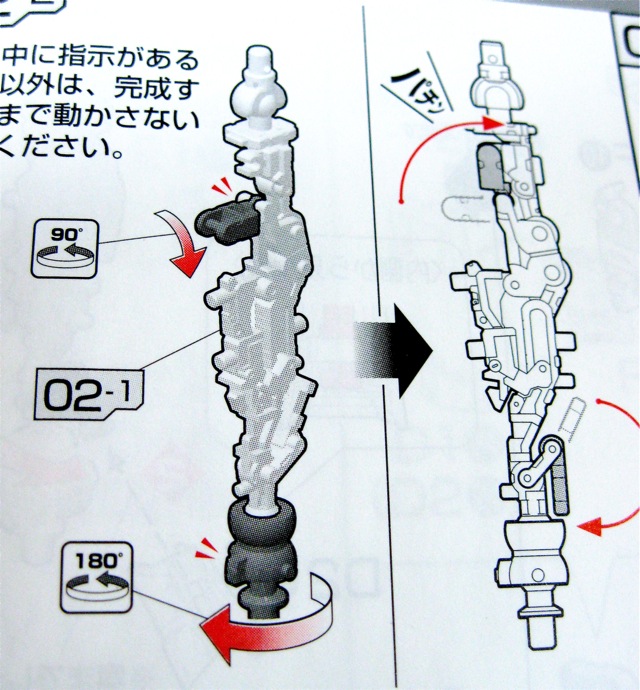
Once you swing those pieces around and connect them to the main part of the leg frame those pieces will move. But be careful! My advise is to loosen these pieces by slowly bending the leg back and forth before you apply the armor. You’ll thank me later.
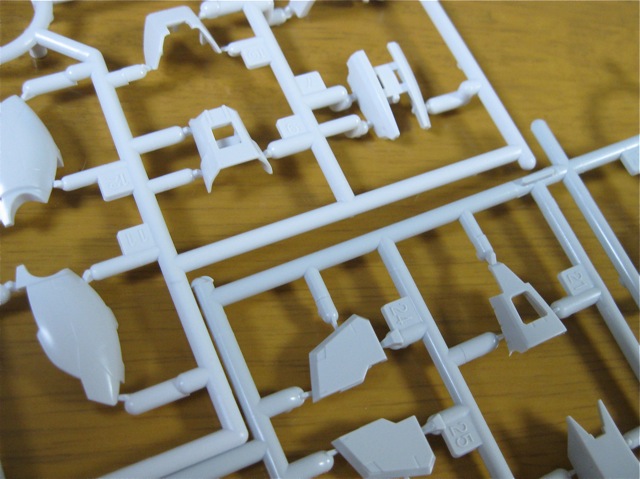
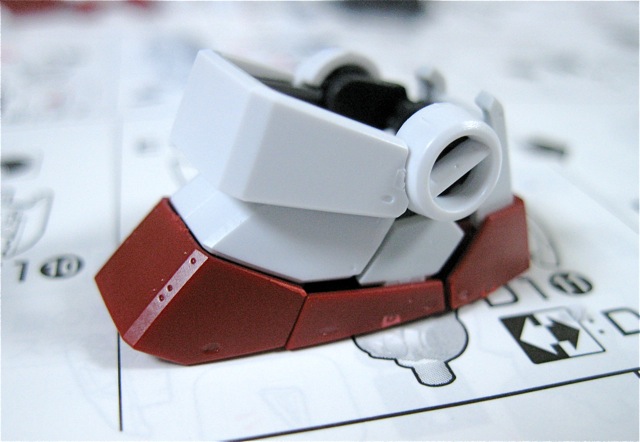
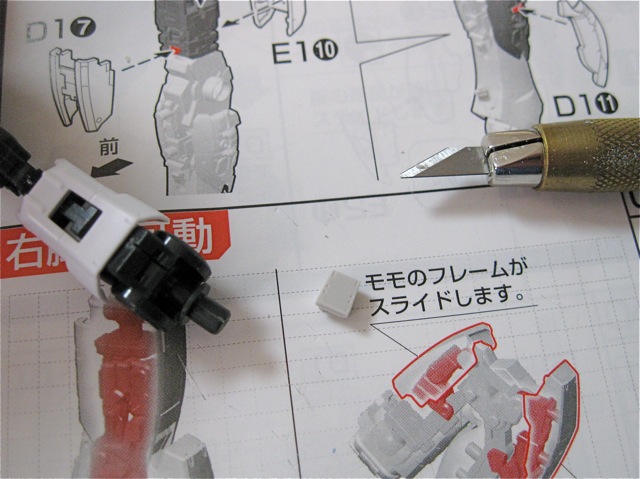
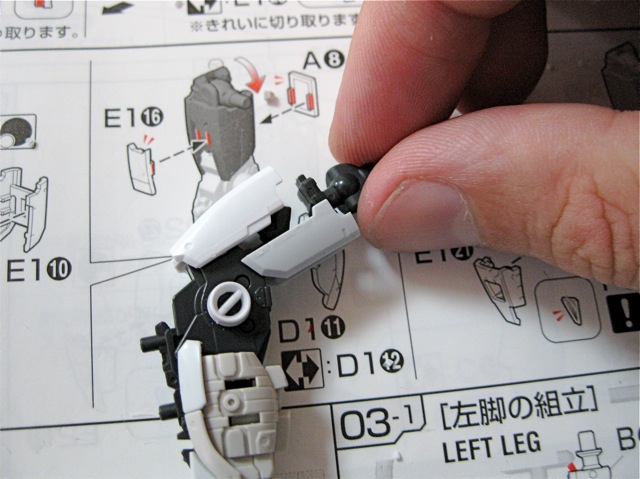
Armor!
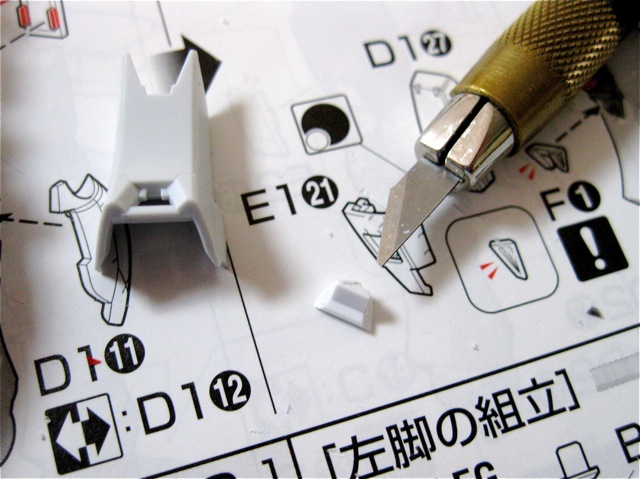
Bandai has accurately recreated the 1/1 Gundam in 1/144 scale so you will be working with some really small armor parts. It’s also important to note that you will need to use your hobby knife to trim the gate marks right down otherwise the armor won’t line up properly.
Here is where I want to shout my word of warning to all who are undertaking this kit. If you are not careful when it comes to bending the leg, you will break the leg joint just above the knee. I broke both of the knee joints on the RG we built for the video so this time I knew what to expect and I want to show everyone how they should go about bending their RG legs.
Normally, when we play with our gundams, we will bend the leg by taking hold of the top portion and the bottom portion as well, like so.
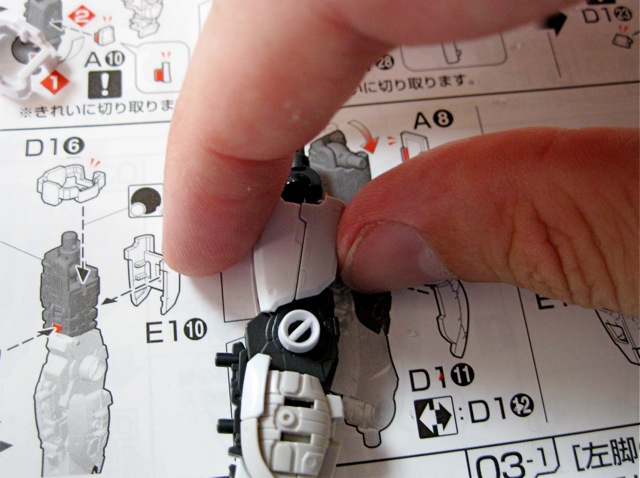
This is a big no-no. If you take hold of it in this way and bend the leg, the front thigh armor will not be allowed to move with the frame and that’s when the knee part of the frame will break. Once again, not like this!
But, like this!
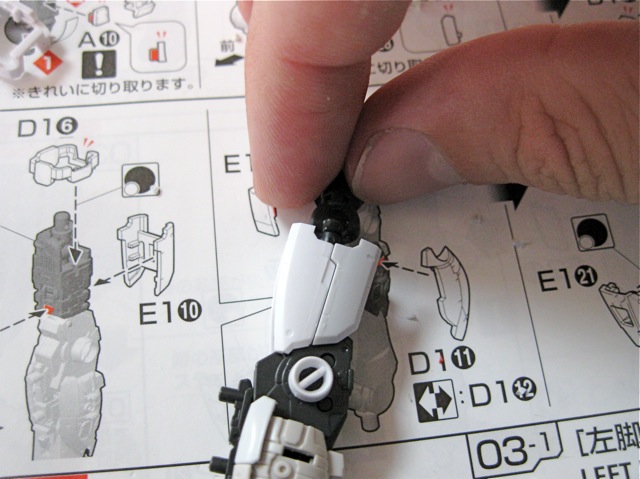
Take hold of the leg at the hip joint. This will allow the armor parts to travel with the movement of the frame.
The amount of movement the leg has is fantastic for a Gundam kit and moreso for 1/144 scale kits in particular. Great job, Bandai!
In the next entry we’ll continue along with the build and show you some other things worth noting and watching for.


Mack
I’m not a fan of the hand design, the fingers pop off to easy when weapons are being put into the hand.
spikesagitta
nice preview before i start my own RG RX-78-2
Gundammeister007
This Gundam looks cool.
George
It’s neat that they put in the sliding armor in the leg – but from the photos it looks like when the knee is bent, you can see right through the hole that opens up in the leg… I feel like the combination of a minimalist internal frame with sliding armor segments was a poor choice.
Shinra
What about the eyes! What’s the best option? Sticker? Paint the edges black and let the clear piece show the yellow plastic behind? Or just paint the eyes clear yellow like a MG?
Syd Sked
I actually think Bandai did an excellent job on a kit this size. What other 1/144 scale kit comes with a full working inner frame?
When it comes to the eyes, Bandai offers you two choices with their included stickers. You can put one sticker on, or you can put one sticker on and then two smaller yellow eye stickers on overtop to add depth. Of course, you can always paint it with a clear yellow lacquer, then use black enamel around the edges. The are lots choices when it’s gunpla!
John Logan McKee
I find the art of injection molding one group for parts over another set of parts, and then have them function, fascinating.
Matt Mrozek
This is a great little kit. It’s the only 1/144 kit that I have ever bought. I never got into the HGUC kits because of the lack of detail but this little kit blows away most MG kits. The one thing that sucks are the hands. I have spent more time looking for the fingers that have popped off than building the kit. This will be the first kit where I will not paint. I am going to give the stickers a try. I usually just trow the stickers away and get water slide decals but I like the way the stickers look for the RG kit. They look to be much thinner and the added metallic bits are a nice touch.
George
My point about the moving armor on the leg wasn’t that there’s anything wrong with a simplistic inner frame – just that when the inside of a model is vacuous and undetailed, you don’t want to be showing it off… And sliding armor panels do just that… I was concerned because your photo shows a side view of the bent leg, and you can see through to the other side. I think this is one thing that can kill the effect of a good kit very quickly…
However, I hadn’t realized that the leg assembly in which you show the sliding armor gimmick of the upper leg was incomplete. In that photo you show just the inner frame plus the outer armor. Looking at Dalong’s photos of the kit, there’s a middle layer, gray parts that go on the inner frame under the white armor, so when the kit is completed for real, and that armor piece slides, there’s another layer there that shows through in the gap. It’s not super-detailed but at least it’s something… So that’s kind of a relief. 🙂
Syd
George,
The assembly of the entire leg was complete in that photo. You can see through to the other side if you view the leg from a certain angle. I’m looking through Dalong’s review of the Real Grade right now and i see a kit that looks exactly like what I have built twice now and shown in the photo.
George
The leg assembly is clearly not complete in these photos. All kinds of parts from the lower leg are missing, obviously – but a few from the upper leg are missing as well.
Parts F11 and F15 (or is it F10 and F16?) are the culprits. They’re not present in any photo on this page. These gray parts cover up the hip joint (note that this joint is bare in the photos on this page) and they also fill some of the space inside the leg, so that when the sliding gimmick opens up, the leg hasn’t got a big hole in its side view.
If the intent was to leave those parts out to better illustrate the fragile mechanism you’re cautioning people about – that makes perfect sense. I just didn’t realize, when I first saw the photo, that those parts were missing, so the gap worried me a bit.
Syd
Hi George,
I did leave some of the parts off the lower leg while taking these photos as I wanted the attention of the reader to be on the upper leg and the moving mechanism. With the frame parts off you get an idea of the moving mechanism, however with the frame parts on the gap is still there on the lower thigh. We’re both right. 😉