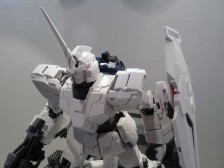
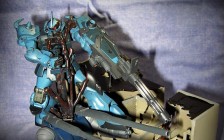
This RX 78-2 in 1/100 scale from Bandai, in the Master Grade series, is was also offered in 1/144 and 1/60. Nowadays it’s possible to find new versions of this kit including all mechanical details in body, head, arms and legs in the same scale.
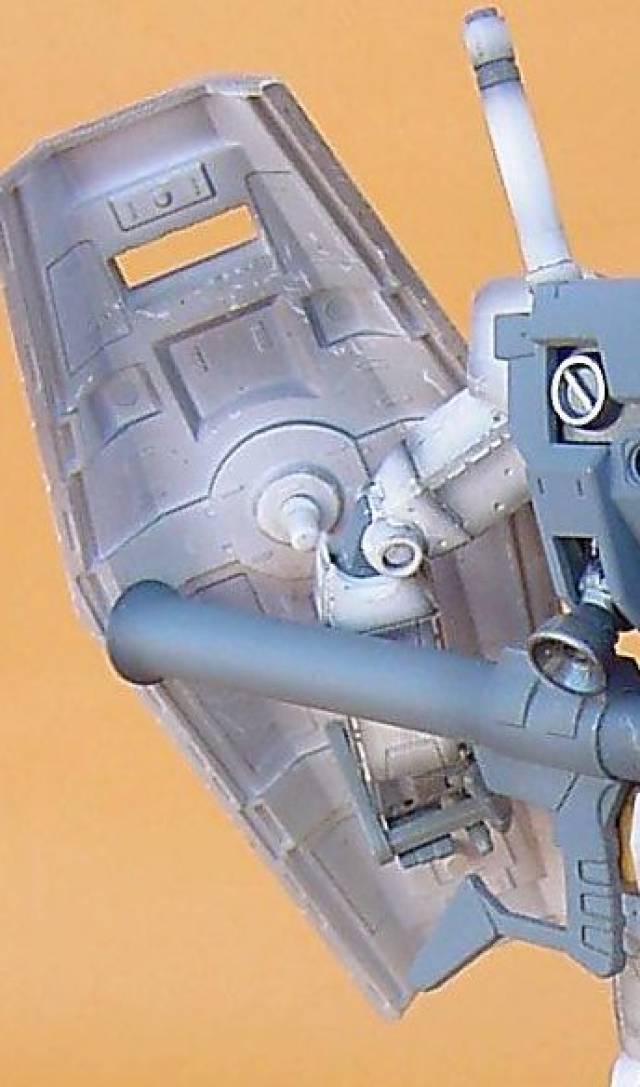
Moreover, the badges on the shoulders are already moulded in. Not only does this kit include the ship in which the RX 78-2 transforms, but also the shield, the cannon, the gun and two light swords.
A non-skillful kid or newcomer could build it without difficulties using neither glues nor paints, as the parts are already in their right colors and with snaplocks fittings.
Nevertheless, if we aim at giving more realism to it, we will have to glue and paint the parts in order to give the model a weathered appearance; in this way, it won’t look as if it were a toy, but a replica of an Rx 78-2 robot.
As I said before, the instruction manual is easy to follow, and this kit does not pose great challenges. So I will just describe the step by step process that I have used to paint the shield, because this part, can resume all the techniques needed to paint the whole model.
Painting the shield
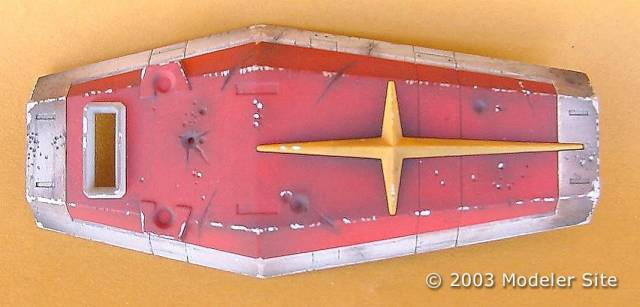
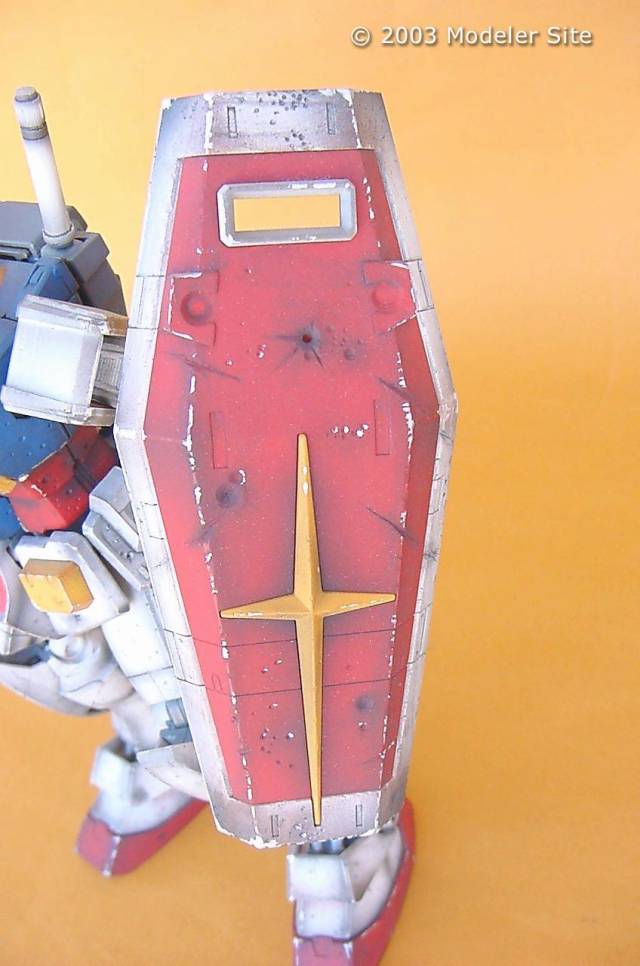
When comparing the shield’s size with the body’s, we realize that it is rather big . This is why it is very important to give the shield the best real look we can achieve; otherwise, the whole model would look “lifeless”
Step 1
After cutting the five parts from the sprue, I made several cuts on each one, using a knife; in this way, we will simulate the damage the warriors “Zaku” inflicted with their weapons and axes.
Step 2
Using 0,5-1mm drills, I made hundreds of tiny holes, without going through the plastic!!! In order to represent the gunshots, or the impacts of particles dispersed around Space. It’s very important to place these holes at random, not in a symmetrical way, to give the shield a real look.
Step 3
Then with a 6mm drill, I enlarged some of the holes and made some cuts on their surfaces, to simulate the explosions the enemy impacts produced on them.
Step 4
Once this stage was over, I airbrushed each part separately using Tamiya’s acrylic paints. The shield was painted with a flat white base, with the star in yellow, and the outside in red. For this area I mixed flat red with a bit of yellow, to obtain almost an orange color.
Step 5
When the red mix was dry, I added to the same paint a few drops of flat black and applied it to the edges of the red areas. I also used this technique for the white areas. You should replace the black with flat light grey, in order to avoid overloading the white with black, which is a very common problem when you mix white with very dark colors.
Step 6
To paint the yellow star, I used orange instead of black to get the right mix, because of the above explanation. It’s important not to mix primary colors with very dark ones (like black) to darken them, as the result could be dirty brown colors.
Step 7
Once all the layers were dry, I sanded the edges very softly (using #1000 sandpaper ) to wear out the paint, giving it a weathered aspect.
Step 8
Then, with a 000 round tip brush or a “liner”, I applied tiny spots of aluminum, to highlight the chipped paint. Let’s suppose that there is metal under the red, white, etc.
Step 9
After letting the aluminum color dry, I prepared a wash, mixing black and brown 50/50) very well diluted, and applied it all over the shield, as many times as it was necessary until all the recessed lines and cuts were standing out (because of the combats/ fights), that I made before starting with the painting process. This gives volume to the part, which is necessary to achieve a 3D feel.
Step 10
When the wash dried appropriately, I made a mix with brown and black chalks that I crushed until getting a dust which I lightly applied, using a soft and flat brush, over the gun impacts and cuts that I made before.
Then, I applied a new mix, prepared with orange and brown chalks to give some areas a rusted look. You can try as many times as necessary until you get a satisfactory result. The chalk powder is easy to remove, so, if you aren’t satisfied with the result, you may start again.
Step 11
To protect all this fragile decoration work, specially the one I did with chalks, I slightly varnished the surface, coating it with a mix I prepared with semi-gloss and matt varnishes. You should airbrush this mixture at very low pressure, to avoid “flowing out” the chalk powder from the surface.
Following these sequences step by step, you surely will succeed in turning a simple kit into a very attractive model that will impress you.
English text by Mario Covalski
Model and text by Nicolas Fiorentini, Modelersite’s contributor


Yuri Barbosa Ordeste
Oh my, this is a pro work! I wish I could do that, it’s so perfect!
KL
Great tutorial. I notice most people use Tamiya flat colour vs. normal color (i.e. Flat Red vs. Red, Flat Yellow vs. Lemon Yellow, etc.), are there any special reasons behind this selection or just simply because their shade are closer to the Gundam basic colour.
Nicolás.
Wow!!! Thats the first Gundam model i build, and that kit haves more that 11 years!!!
Now, is very diffucult to find that kind of models in my country (Argentina) because they are very expensive. Its also expensive the shipping of this kits from Japan because the weight of the kit itself but, if you never builded a kit of this you have to make an effort and spend a few more dollar to get one of this Bandai´s marvels. Im a Tamiya fan, but, Bandai is the Tamiya of Sci-fi without question. PG kits are just a work of art, and the last Macross Valkiries are just amazing.