-

teriyaki82 posted a new activity comment 9 years ago
It was a tiny spot of gaia fluorescent paint, so a composite picture that stacked a normal photo, and another photo with UV light shined on it to reflect the blue light. 1/144 Takemikazuchi doesn’t have too much room for even a 1.5mm LED.
-
teriyaki82 posted a new activity comment 9 years ago
thanks 🙂 wasted so much red and black paint during the process
-
teriyaki82 posted an update in the group
Completed Gunpla/Models 9 years ago1/144 Takemikazuchi Type-00A – fully painted, this kit requires a fair amount of masking and detailed brush painting, it’s actually harder than making an MG in my opinion. -
teriyaki82 posted an update in the group
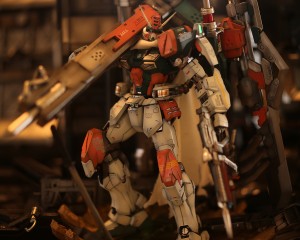
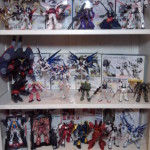
Completed Gunpla/Models 9 years, 1 month agoFully custom painted/custom built Dearka Elsman’s custom mid-long ranged assault mobile suit – Buster GundamI’m a part-time landscape photographer that builds and paints gundam for fun, I have an fb which I’ll start using it to share some of my finished work too 🙂
-
teriyaki82 posted a new activity comment 9 years, 2 months ago
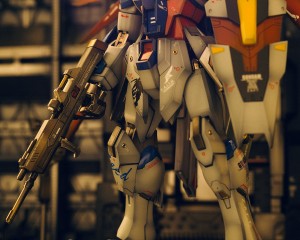
It’s clear blue over silver base coating to mimic titanium blue 🙂
-
teriyaki82 posted a new activity comment 9 years, 2 months ago
thanks 🙂
-
teriyaki82 posted a new activity comment 9 years, 2 months ago
Thanks 🙂 I actually spent a lot of time on the wings but decided to shoot it at an angle and cropped out wings to makes it look huge.
-
teriyaki82 posted a new activity comment 9 years, 2 months ago
Hi, it was painted in this order: white primer -> Gaia duralumin silver -> clear orange -> clear red -> fluorescent red
-
teriyaki82 posted a new activity comment 9 years, 2 months ago
Hi, Gaia black primer -> Mr. Hobby SM06 -> Gaia Clear Red x 3 -> very thin fluorescent pink -> clear red . Those are metal thrusters, I painted the inner rim, you need to have very low ratio thinner when painting metal parts. Weapon effect is white primer, Gaia duralumin silver -> clear orange -> clear red -> bit of red at the very end, hope this…
-
teriyaki82 posted an update in the group
Completed Gunpla/Models 9 years, 2 months agoShin Asuka’s customized mobile suit – MG 1/100 ZGMF-X42S Destiny Gundam custom painted and custom decals. Took me 2 weeks to complete.-
Very detailed. I like the level of preshading on it too.
Destiny gundam is by far my favorite suit, its just so pretty to look at lol
-
Thanks 🙂 I actually spent a lot of time on the wings but decided to shoot it at an angle and cropped out wings to makes it look huge.
-
Looks good!
-
-
teriyaki82 posted a new activity comment 9 years, 2 months ago
Thanks, I applied 6 layers of paint on the armor 0.0
-
teriyaki82 commented on the post, Gunpla TV – Episode 166 – Hi-Mock and New Releases! 9 years, 2 months ago
I’m definitely getting that RG Raiser, I hated all Crossbone variants be it MG or HG, everyday I regretted purchasing the MG Crossbone FC, everything just falls apart when you try to pose it, and it feels like an HG comparing to other MGs. If I could turn back time, I would go back and punch myself so hard out of conscious, purchase that MG Force…[Read more]
-
teriyaki82 posted an update in the group
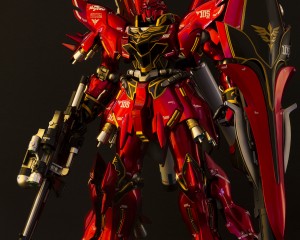
Completed Gunpla/Models 9 years, 2 months ago-
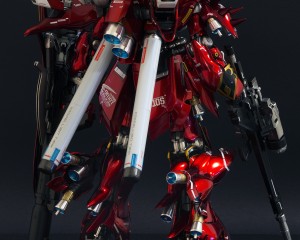
awesome paint job on your Sinanju
-
Thanks, I applied 6 layers of paint on the armor 0.0
-
Very nice. love how the red turns into purple/pinkish. If you don’t mind me asking, what paint did you use to get this kind of effect?
And are those metal thrusters, or did you paint them that way? And love the colors of the weapons!
Thanks in advance and again, great build! -
Hi, Gaia black primer -> Mr. Hobby SM06 -> Gaia Clear Red x 3 -> very thin fluorescent pink -> clear red . Those are metal thrusters, I painted the inner rim, you need to have very low ratio thinner when painting metal parts. Weapon effect is white primer, Gaia duralumin silver -> clear orange -> clear red -> bit of red at the very end, hope this…
-
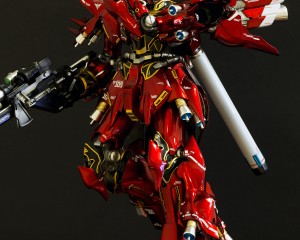
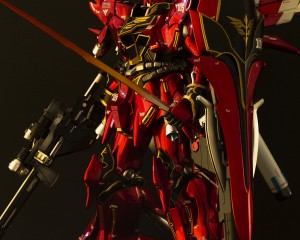
how did u do the beam saber effect this is one awesome sinanju
-
Hi, it was painted in this order: white primer -> Gaia duralumin silver -> clear orange -> clear red -> fluorescent red
-
Excellent paint job, looks godlike.
And the effect parts look great
-
OOoo! Shiny
-
Wow, I really like the blue!!!
-
thanks 🙂
-
It’s clear blue over silver base coating to mimic titanium blue 🙂
-
-
teriyaki82 joined the group
Gunpla TV kit bash 9 years, 2 months ago -
-
teriyaki82 joined the group
The RG Group 9 years, 2 months ago -
teriyaki82 joined the group
Missing Piece Group 9 years, 2 months ago -
teriyaki82 joined the group
Master Grade Discussion 9 years, 2 months ago -
teriyaki82 joined the group
What just arrived from HLJ?? 9 years, 2 months ago -
teriyaki82 joined the group
Lets See Your Collection! 9 years, 2 months ago - Load More
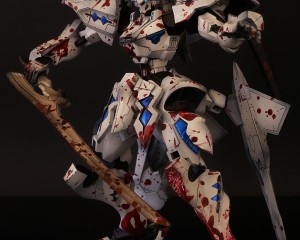


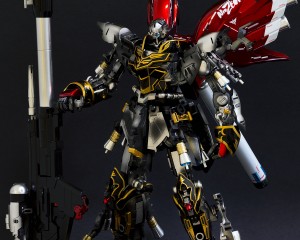


Totally awesome splatter paint job!
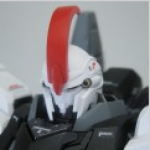
Did you install an LED in the head as well? it really pops in this picture. Great work, this looks astounding!
thanks 🙂 wasted so much red and black paint during the process
It was a tiny spot of gaia fluorescent paint, so a composite picture that stacked a normal photo, and another photo with UV light shined on it to reflect the blue light. 1/144 Takemikazuchi doesn’t have too much room for even a 1.5mm LED.
wow great effort on a 1/144 kit , I prefer the none scale which is 1/100 i believe
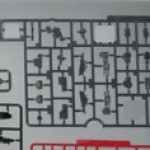
ya 1/144 is quite difficult with many parts requiring reverse wash and small spots to hand painting, the shoulder, stomach, fists, feet and waist section came entirely white so had to do a lot of reverse wash like sinanju gold trims.
omg, i love the blood-stained/spattered effect from cutting up BETAs!!!
ha ya it’s a no-return process, if u fail u repaint the whole piece