Building an accurate M51 Isherman from the Tamiya RC kit 1/16 scale
by Mario Covalski
Editor modelersite.com
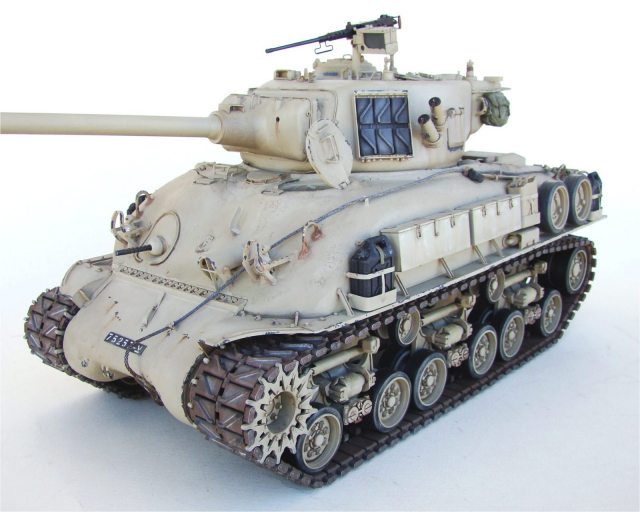
There were many versions of the Sherman, however, the last modification the Israelis made on them, is to my liking, the most showy and the one that converted a WWII tank into one of the 60 and 70 decades. I’ll not extend in describing the history of the M51, there’s a lot of information in books and internet, just enough to say that, as well as the M50, there were so many variants, that it’s recommended to build one tank in particular if you look for historical accuracy. As is my custom….I didn’t do so and just made generic versions that could have really existed.
The aim of this article is to share with the reader the 250 hours of work to convert the erroneous Tamiya 1/16 RC kit into two acceptable M51. This is not an article for you to copy exactly what I did, but it may give you ideas of how to or get the basic things you need to build two versions of the M51.
The Project
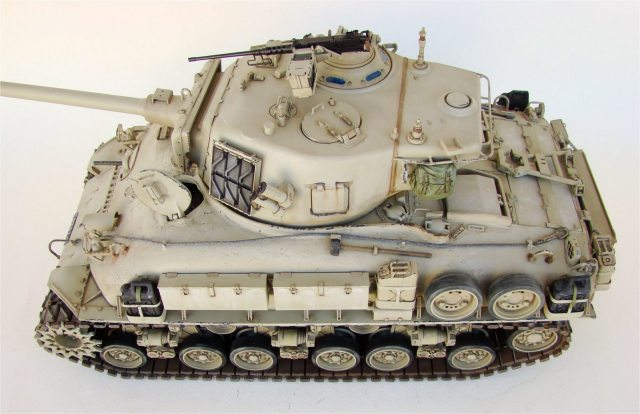
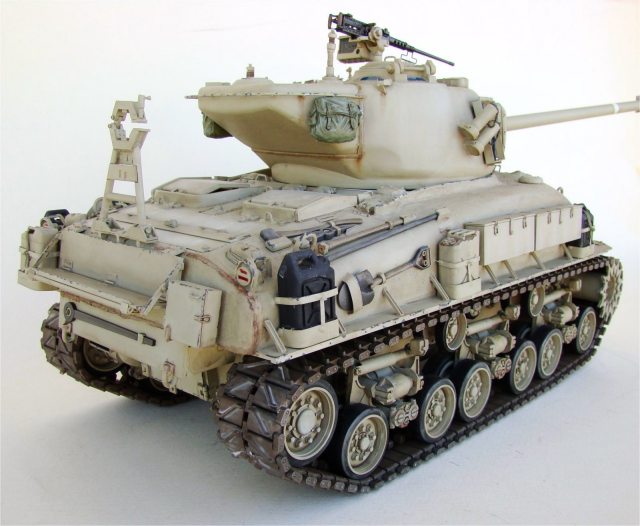
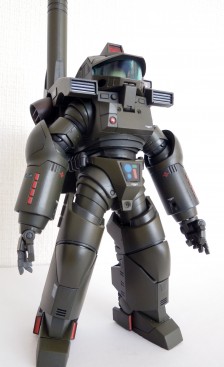
Everything started with a picture I saw in the Israeli Sherman book by Thomas Gannon. It shows two M51 patrolling a Jerusalem corner, both have the same configuration and I guess they belong to the same battalion. But what is curious with this picture, is that while one of them is based on the A1 cast hull, the other is a 47’( degree) welded hull. This surprised me since to my knowledge the M51 had been modified from a cast M4A1 hull with the HVSS suspension and adding a French 105 mm CN105 F1 56 gun which had to be shortened so that it could be installed in a Sherman turret, as it offered not enough recoil space.
By the time I saw the picture, Tamiya only had in 1/16 scale the M4 with HVSS suspension and 105mm howitzer. Since I did not have great modeling skills, building a complete turret like the M51 (based on the T23) meant a very difficult task and the project was left aside.
1/16 RC M4 Sherman Full Set/a>
At the end of 2009, appeared the M51 wrongly called “Super Sherman” by Tamiya which refreshed my interest in the project.

1/16 RC M51 “Super Sherman” w/Controller
The kit
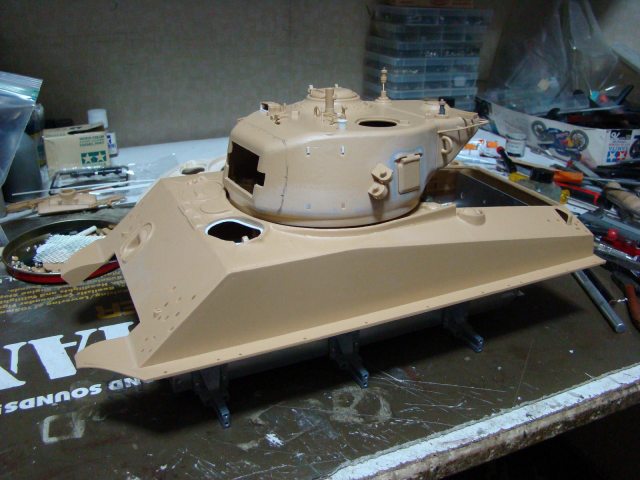
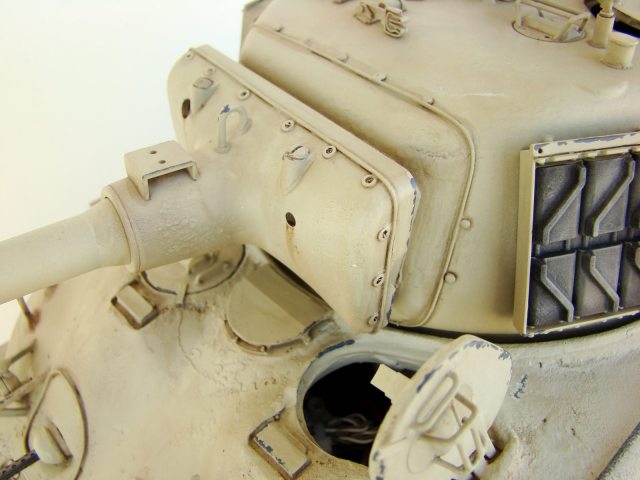
Contrary to the 1/35, the 1/16 ( #56032) does not represent any M51 that has existed, or at least not seen in pictures or book references. Besides the accessories and storage boxes configuration is wrong or inexistent for some items. Nevertheless, the turret is a faithful representation of the real thing and needs just a few minor additions.
Kit errors:
Here a list that shows why it is not possible to build a faithful representation of the M51 starting from the Tamiya kit without including major modifications:
- The upper hull is A3 and is correct for a welded M51. The HVSS (Horizontal Volute Spring Suspension ) suspension is correct, but the engine of the M51 was changed and all the engine deck is wrong. I do not think that there has been a M51 with radial engine and the engine deck represented in the Tamiya kit is mistaken. Obviously, they only used the old M4 mold.
- The so visible and big travel lock at the back in the M51, is not supplied with the kit.
- The typical storage boxes used in the M50 and M51 have been poorly reproduced; they look like the wooden ration boxes the Americans M4 and M26 had, used in other kits.
- The jerry can holder frames are not provided and only 3 jerry cans are included while the M51 used 7, besides they are different to the ones used in the American tanks.
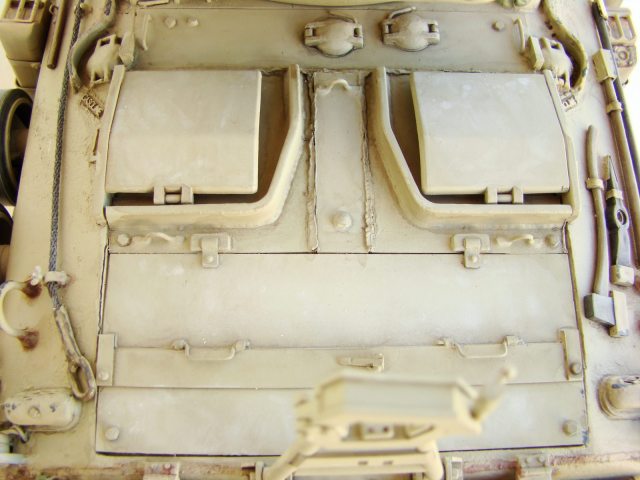
- All the rear panel even the engine access doors…etc are wrong or inexistent.
- This is basically what is bad and is quite a lot, but still there are minor details I had to add as I went along.
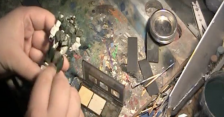
Construction, stage 1
I started gathering all information I could, books, magazines and hundreds of pictures. My project would not be so ambitious regarding details and scratch but would undertake two tanks at the same time, one based on the A1 cast hull and the other on the A3 welded hull.
Having received from our sponsor, Hobbylink Japan both kits, what I only needed was to gather all the necessary material and scratchbuild what was not available. I have seen modelers spending hundreds of hours and I myself did, making parts from scratch, but if they are available, why to waste time on them?.
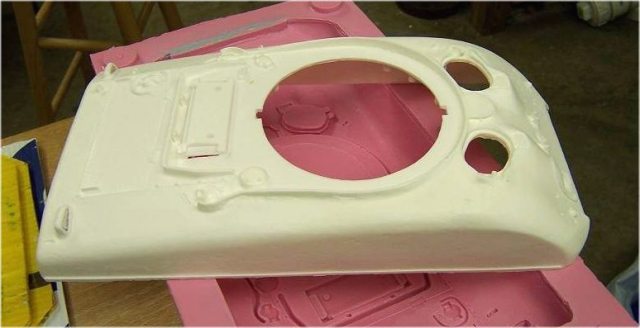
Basically, I needed a A1 cast hull and fortunately, several years ago, Nick Aguilar, a talented modeler in USA, had converted a Tamiya welded hull into a cast one and offered resin copies.
On the other hand, I got an excellent aftermarket from Axels Modellbau Shop which would be useful for the stowage boxes, mounts for the spare tires, infantry comm….etc.
Starting with the hull…
My biggest goal for this article is just to focus on the modifications and addition of details for both models.
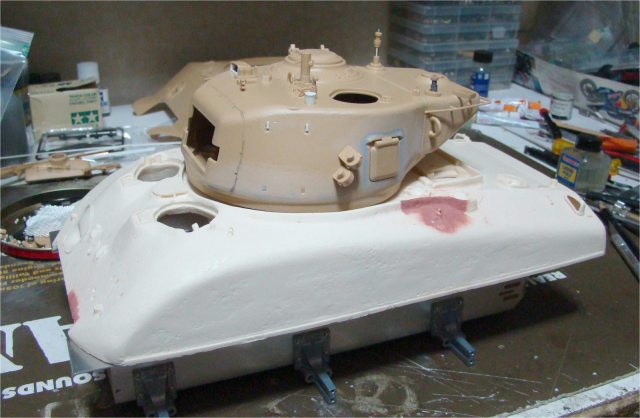
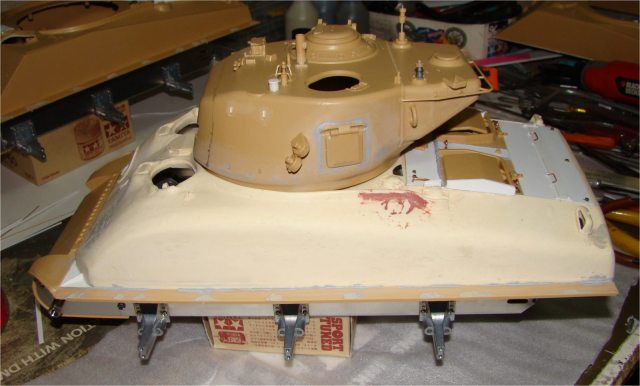
I started with the upper hulls, and to make the work easier, I built the turret which would be useful for dry fitting, modifications…etc.
Cast hull over the chassis with the turret placed.
Welded hull
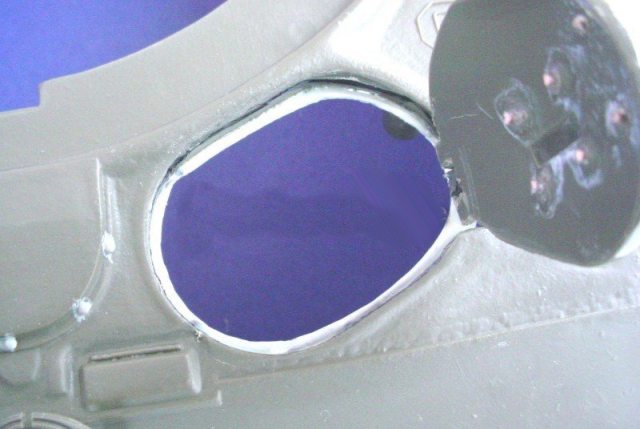
The driver´ s hatch was opened in order to place the switch of T-05 control unit.
It seems to be difficult but it’s not, I made holes close to each other with a 0,5 mm drill along the same gap being very careful around the hinges’ area. Once the holes were accomplished (a great deal of patience here!!!), With the point of a sharp cutter, and taking care with your fingers, I cut the joints between the holes until the hatch loosened from the hull.
With #200 first and #400 next, I sanded all the excess plastic from the hatch edges and hull’s opening, up to getting them smooth.
Then I placed plasticard of 0,5 mm on this opening, and sketched its contour with a pencil to cut then a hole, but leaving 2 mm surplus where the hatch would lean on.
Finally, a 0,5 mm hole was drilled on the hinge and a piece of 0,5 mm bronze wire was added, then the hatch opened properly.
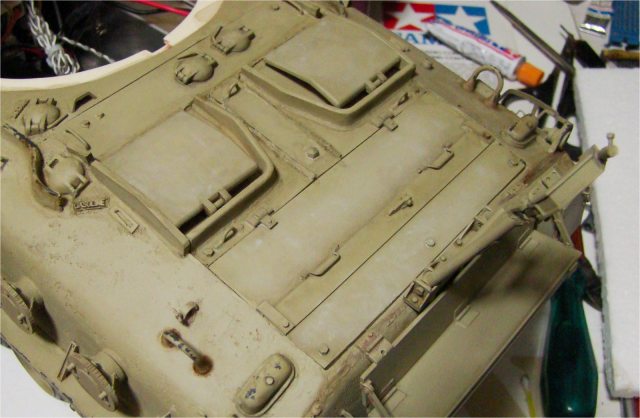
Next step was to cut the old cover where the new engine deck would be placed. I made this on both hulls, an easy task with the plastic one using a new blade, but would be very difficult with the resin one due to the kind of material, and because the hull wall was reinforced increasing its thickness. So I had to use a jewellery’s saw and much care and patience. Note the blue lines where I made the cut.
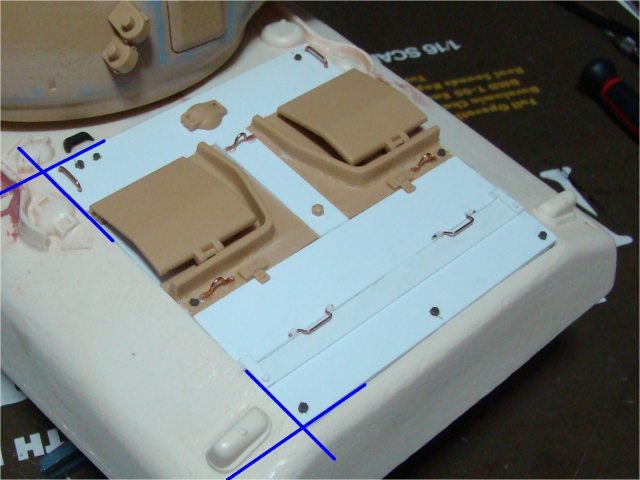
From this moment on, the serious work began, I had to scratchbuild two engine decks.
The Schumo M510010 set, to detail the rear panel, includes the exhaust for versions until 1973, so, I decided to build two engine decks without the upper exhausts and grill vents, to make the job easier.
For the new decks, I took as reference the one provided with the Dragon M50 kit, but made a drawing adapting the measures to the room on the hulls. Note that the Dragon’s deck belongs to the long A4 chassis while the M51’s were the short one.
The engine decks were made on a 1mm plastic rectangle to which the different parts were glued on as can be appreciated in the following image. The sizes should be adjusted with the cut previously made on the hulls, this is why they are approximate.
Check the full article at Modelersite for more constructive details.
Final aspect of both engine decks, already glued to the hulls using 10 minute epoxy glue.
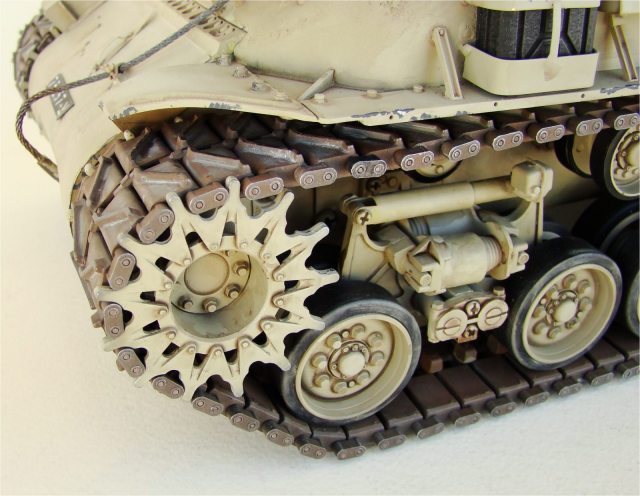
Next, I focused my attention on the cast hull. The one Nick scratchbuilt, is a M4A1 with VVSS (Vertical Volute Spring Suspension ) for T-48, T-54…etc, tracks, while the M51 used HVSS suspension and T80 tracks. The main difference for the hull is that the T80 tracks were wider and the hulls needed wider sponsons.
The Tamiya kit based on a M4 with HVSS has the right configuration, regarding the suspension, tracks and sponsons but the new hull I would use not, so I should modify it.
After test fitting the sponsons and fenders (I glued them a few millimetres backwards but realized after two weeks when was too late) I proceeded to glue them in sections of around 20 mm applying a large amount of cyano. Once cured, the joint was reinforced with more cyano and accelerator. CA is an excellent glue to adhere resin to plastic. The job was finished by sanding and filling. A triangle was added as reinforcement to match the reference pictures and was also useful in order to reinforce the joint on that area.

Construction, stage 2
This second stage consisted in detailing. To improve an overall comprehension of text, I will show you pictures followed by their descriptions. In the following image..
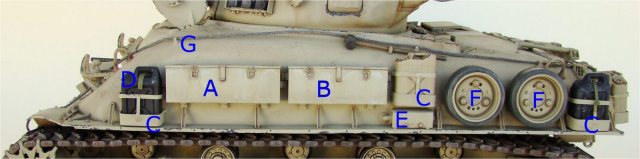
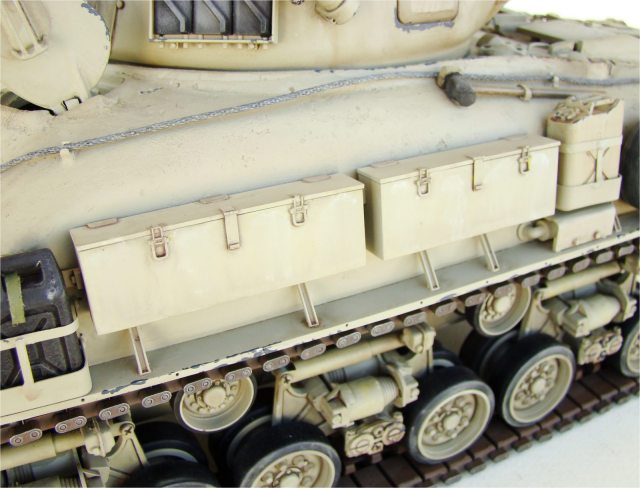
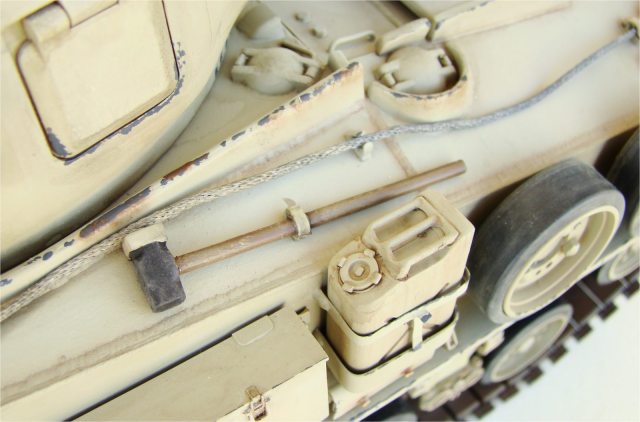
A & B: They are storage boxes from the Schumo-kits # M510011 made out of resin, and include brackets for the hull. Their position was decided according to reference pictures and the available 1/35 kits. They cannot be installed without considering other accessories, thus, I had to make adjustments to get a perfect fit. These boxes were not screwed to the hull.
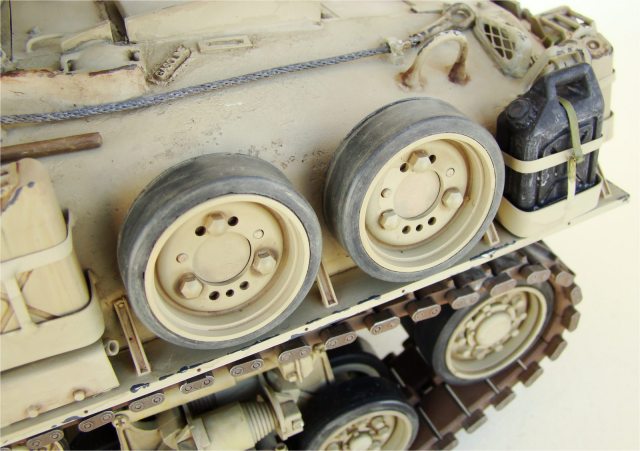
C: The holder frames for the cans of the fuel and water were made from scratch using bronze strips which were bent and welded to each other. They were attached to the hull with 0,5mm bronze wire also welded and glued in the drillings made on the hull. They are 7 for each tank, so I had to make 14 which took many hours of work. It would have been easier to work with plastic strip but the result would have been very fragile.
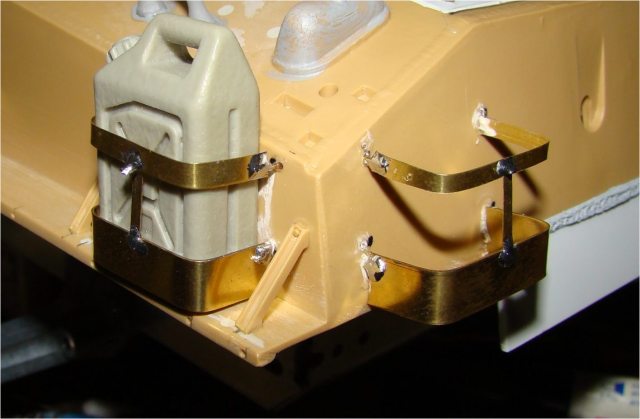
D: The IDF fuel cans were different to the american jerrycans, however in some pictures, you can appreciate a mix of them, usually the IDF’ s were painted in black. Fortunately, I could use the ones of the Schumo-kits # M510013SP to which I removed the molded frames with the help of a cutter.
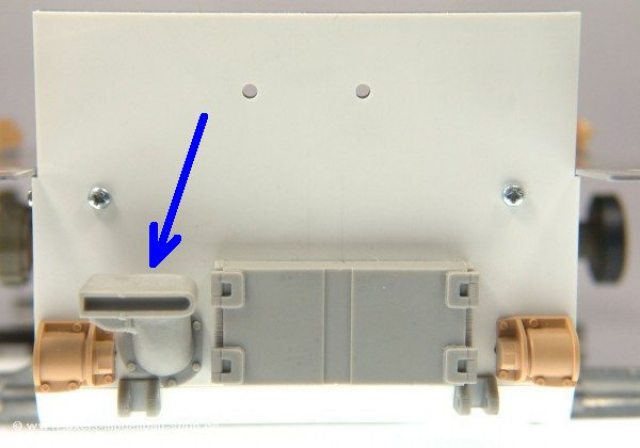
E: The auxiliary generator exhaust was made from scratch using plastic tube and a sprue bar.
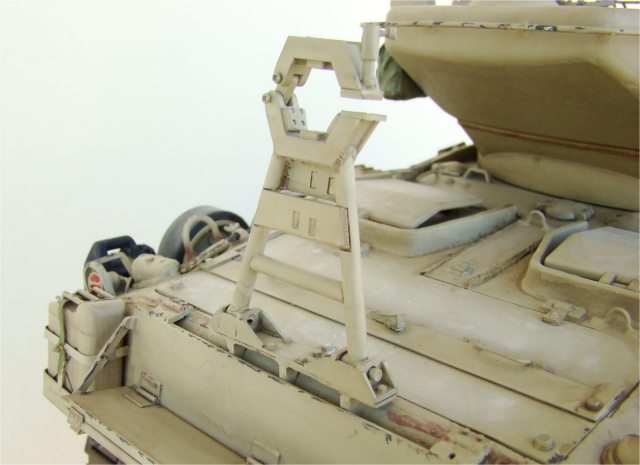
F: The spare wheels holders are also from Schumo-kits. They were built for the Tamiya welded hull, so I had to modify a couple of them so that they could be adapted to the curved side of the A1 hull.
G: The towing cable and mounts are also from Schumo-kits #Sh0027N.
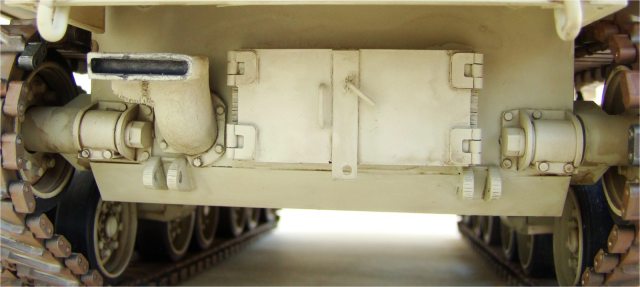
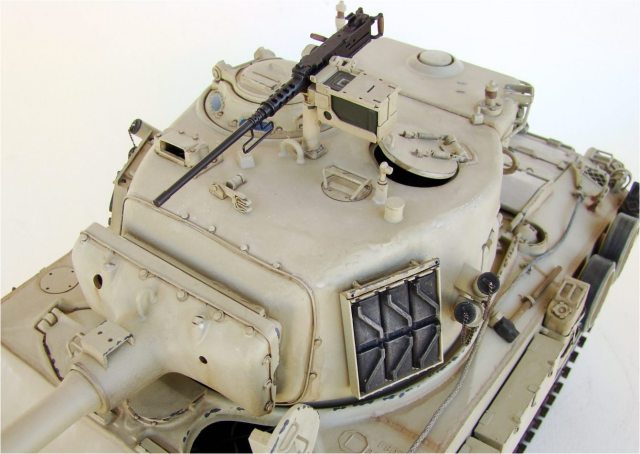
The rear area of the chassis received the new engine hatches and exhaust taken from the Schumo-kits set #M510010.
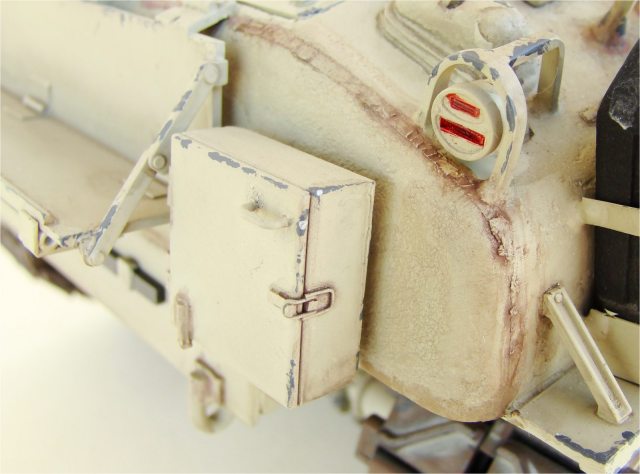
Also I added the external infantry comm. #M510015 to the hull rear panel.
And finally, one of the most important missing parts in the Tamiya kit, the gun travel lock #M510016.
Other details
To reproduce a M51 Sherman as faithfully as possible, I had to add more details. Here you have a summary with images


The full article about building can be read in our magazine www.modelersite.com
Painting
It’s not the intention of this note to explain the advanced techniques of paint, remember that basically I am a car modeler.
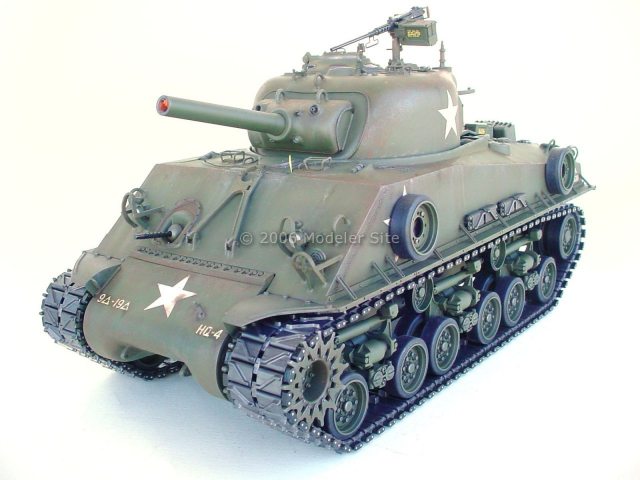
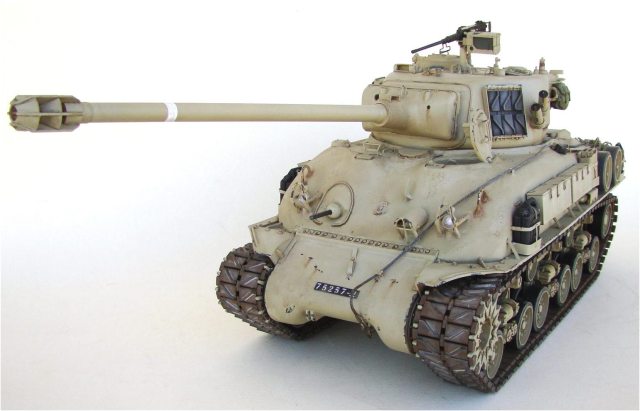
According to what I’ve read and seen in pictures, there were M51 painted in a kind of Olive Drab and a Desert Yellow typical of the IDF which is very close to the Buff. One of our collaborators, suggested me to use a mix of Tamiya Desert Yellow XF-59 + Buff XF-57. Actually, I believe that these tanks once painted had a semi gloss finish, but as result of the desert, they quickly became matt, so it’s correct to paint them matt color.
Once the mix was prepared, it looked very yellow, more similar to the paint needed for a vehicle of the WWII burnt by sun exposure than for an Israeli one, so, I added very small amounts of grey, yellow, buff…etc until the result satisfied me. I think this is the best method since the IDF didn’t followed the FS standard but the resources they had to hand, and two equal vehicles in different periods would look different.
I used enamel since, have in mind that this is a RC model and would need intensive handling. I lightened the centre of the panels with very diluted Buff
For the weathering, I used acrylics starting from a couple of filters with burnt umber as well as punctual washes with the same acrylic darkened with black and /or lightened with burnt sienna, and grey, white, rust pigments…etc.
The traces of water were made by applying a point of white acrylic , giving downward strokes with a clean brush wet in alcohol. In this way I accomplished different vertical marks, mixing yellow and white points.
I didn’t consider it necessary to give any drybrushing, but black lead taken from a 6B pencil scraped with a #180 sand, applied with my finger tips on the hatches’ edges, tools…etc.
I painted the tracks with Tamiya enamel XF-64 and gave black and buff washes. Then, white and sand pigments were applied and finally I used abundant graphite for the area where the tracks touch the ground.
The ID plates were drawn and printed in paper to be later glued on the hull. The size should be around 25mm. The PDF version offers high resolution images that can be printed using a laser printer.
Conclusion
The first that comes to my mind is that, every minute of the two months spent on this project, was gratifying but exhausting at the same time. Repeating each task twice, is not funny and perhaps it was redundant building two tanks with the same livery, but when you have a project in mind during years, it is difficult to abandon the temptation of getting it completed.
For beginners, I recommend to build the Tamiya kit with the aftermarket without extra modifications and using the hull as offered by Tamiya. Who knows that perhaps there was a M51 running through desert with that configuration….and only Tamiya saw it.
PD: June 3rd 2013
The resin hull can be obtained from my Nicholas Aguilar firenick1265@yahoo.com , he lives in Texas USA.


KNB
great idea to do this article.. This is why I come to this site it gets better over time and this is evidence of that.
Mike
Thanks.
Great story. Ive been thinking of building one myself, but Tamiya’s Shermans are so wrong. How did you get tha M4A1 upper hull???? Thats my starting point.
Thanks Mike
Ps: know of any 1/16 M4A1 or M4A3E8 T23 turret kits to convert my borring Tamiya M4E8105mm Sherman???
modelersite.com
Hi Mike
I sent an email with the info about my friend Nick in the states, he made the cast hull and also some beautifully detailed T23 turret, which includes the barrel.
We are working in a M4A1E8 which has a T23 Turret, the project which will be soon at hobbylink.tv
Cheers
Mario
MARK HUGHES
the m51 aleph had the radial engine , built in the early sixties & used bythen4thcompany usually, i only found out about the aleph in 2013 through the sabinga martin book lioness & lion of the line volume 2 m0 & m51, tehy do several books on idf shermans & other tanks/ vehicles & are a valuable reference nice work on the m51 you built