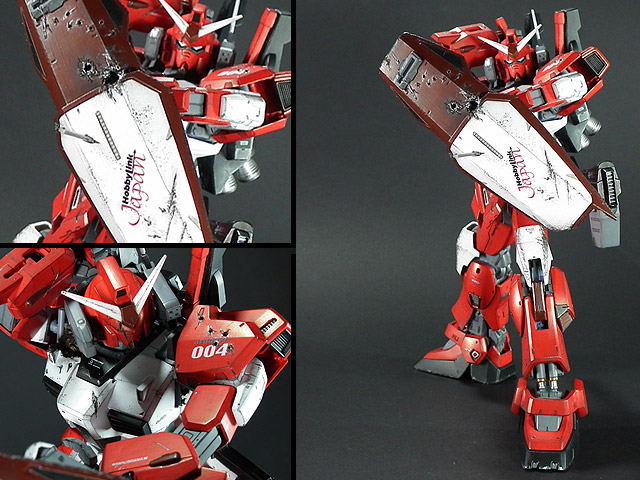
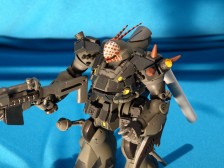
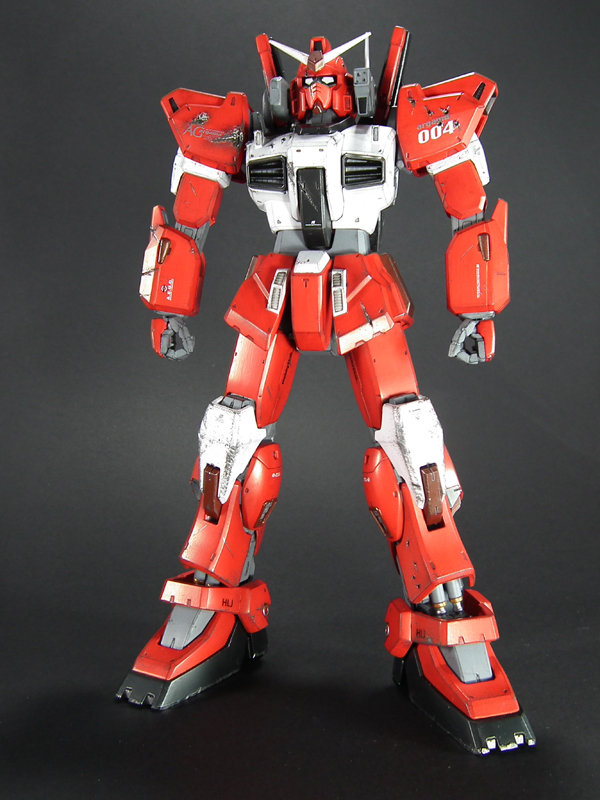
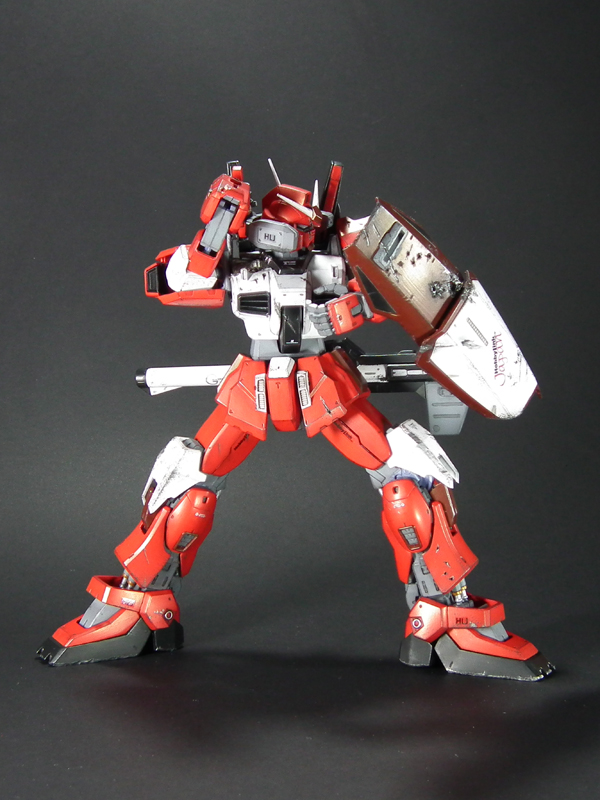
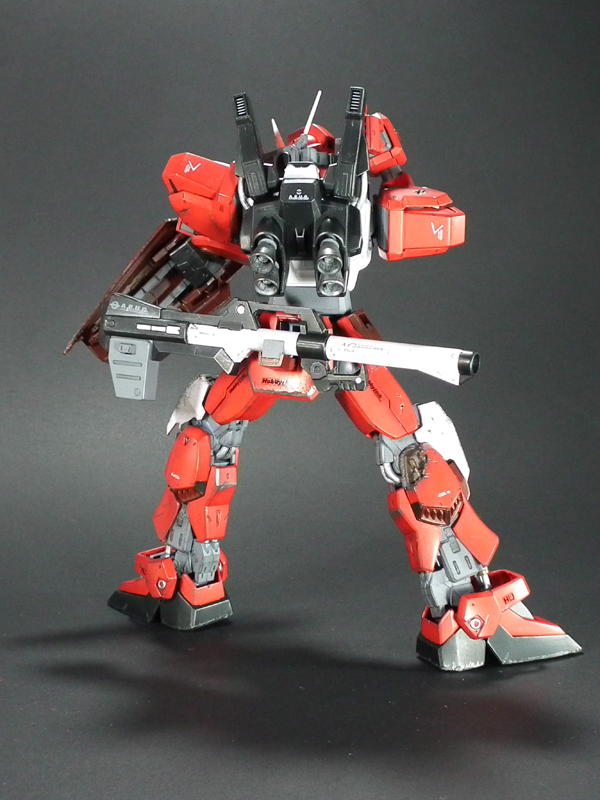
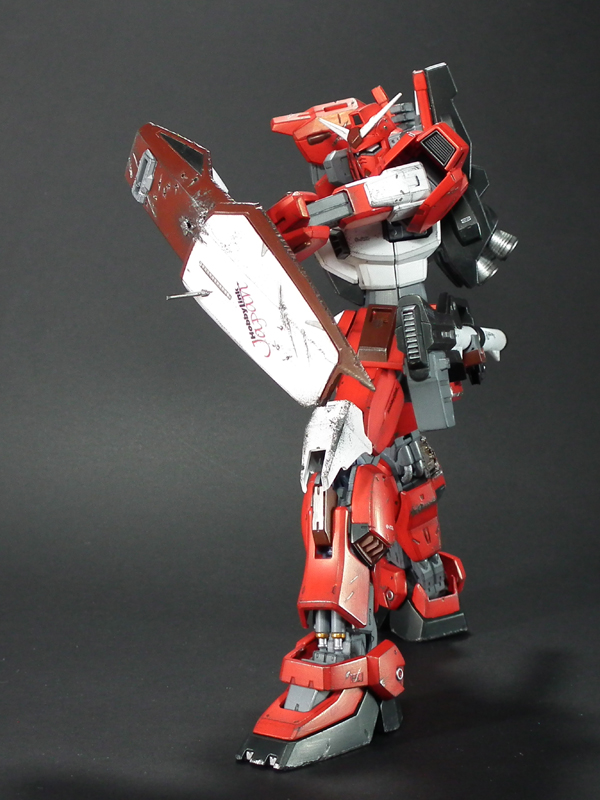
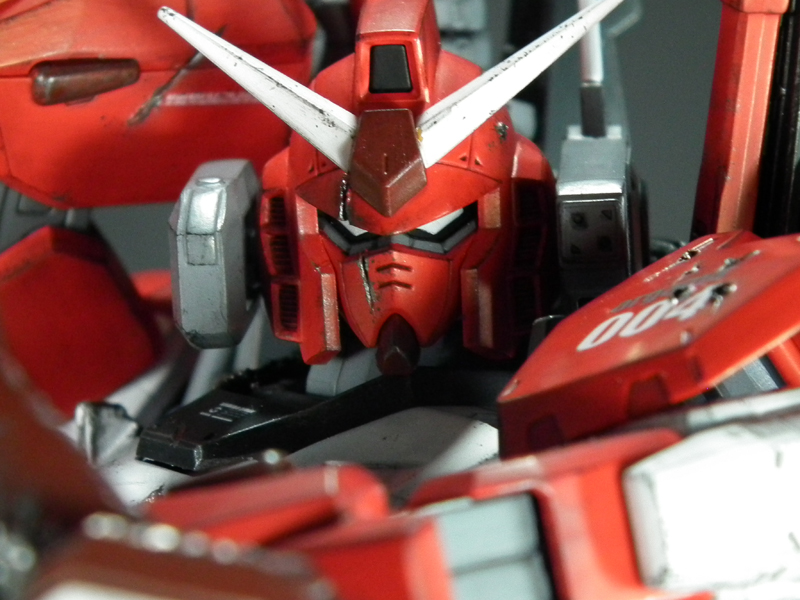
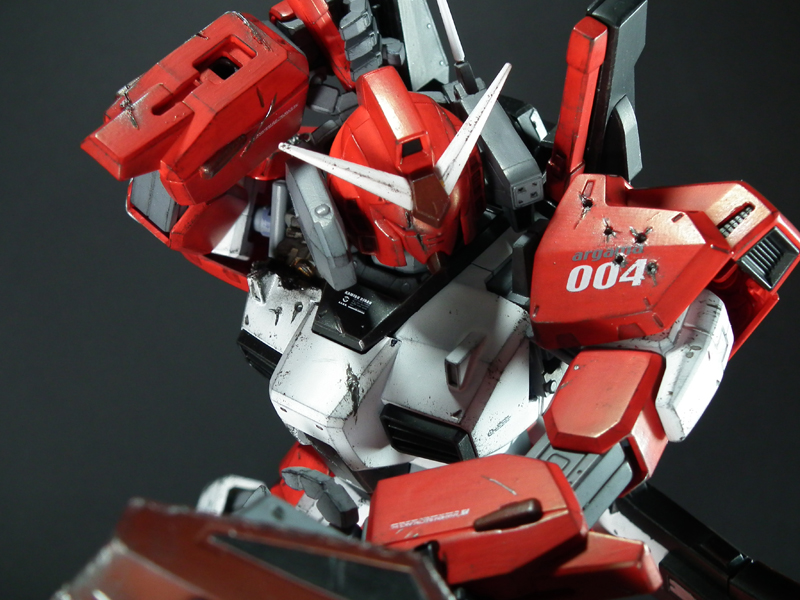
This model (1/100 MG Gundam Mk-II Ver. 2.0) was completely hand painted by myself and took me around 1 month to finish. Usually it would take me more then this but I tried to complete it asap for HobbyLink Japan. Overall im happy with the kit and I do believe my lack of experience in modelling hindered the final result. ( I was a bit nervous and anxious about doing a model kit for HLJ!)
Most of the tools featured in this tutorial are available from HobbyLink Japan, follow the links below to find what you need.
– Pin Vices
– Drill Sets
– Hobby Knives
– Mini Routers
– Cutting Mats
– Soldering Irons
Now lets get started with the tutorial!
If you would like to see the video tutorials they are located at the bottom of the post.
Step 1: Planning
The first thing I would do when creating battle damage is to create a plan I can work from. This plan will then act as the blueprint for my models damage. It is possible to create damage without a plan but in some cases this damage can look “random” and/or “rushed”. For planning I usually take a picture of the model and edit it using software on my computer.
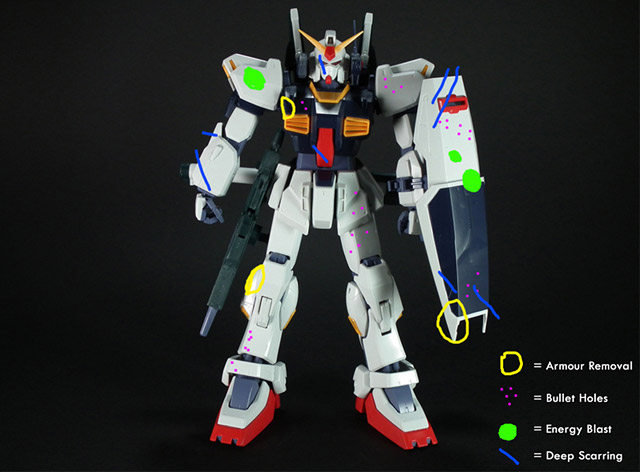
It is important to take into considering the final pose and the actual mobile suit your working with in the planning stages. An example of this is the Inner Frame of the model. The MK II has a really detailed Inner Frame when I planned the damage for the kit I purposefully chose to expose areas that had nice detail. (The upper right chest & Lower right leg)
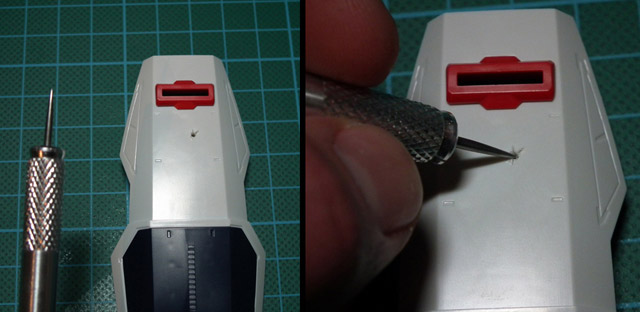
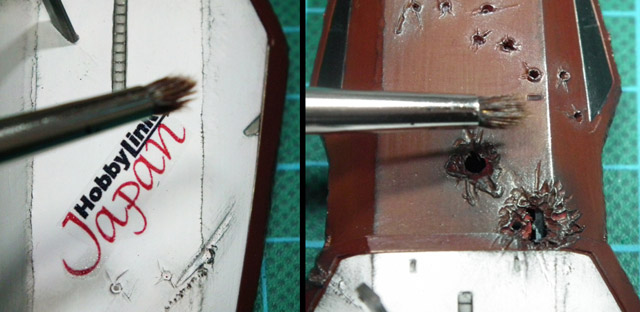
Step 2: Bullet Holes
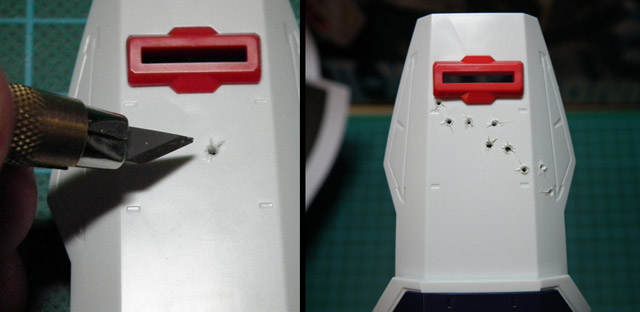
Creating bullet holes is very simple and can be done a variety of different ways. These ways involve using a Pin Vice, Drill or Hobby Tool. When I create bullet holes I use the tool you see below. By pressing down into the armour you can create interesting and quite realistic bullet holes.
Once the hole is made and you are satisfied with the depth and overall look. It is then a good idea to create stress fractures along the armour. You can do this by cutting small lines with a hobby knife close to the hole.
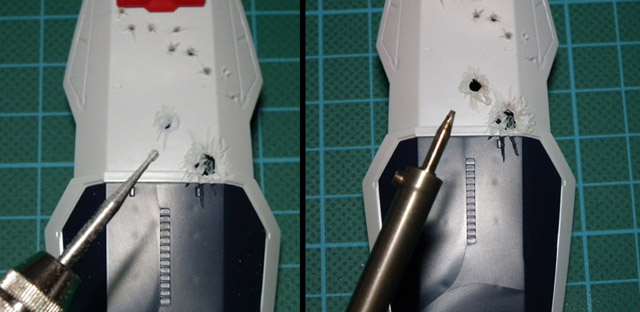
Step 3: Energy Blasts
To create Explosive Hits/Energy Blasts I use a specific drill bit which is in the shape of a “crown” or “star”. You can see this in the first picture. As this isn’t the only method of doing this a more commonly used method is creating a hole and then applying “Epoxy Resin” or some kind of putty to create a more realistic look to the blast. As you can see from the first picture the blasts at present look a bit “sharp” and need to be softened. The way I do this is by using a Soldering Iron (second picture below) to slowly taper off the edges hoping to create a burnt metal effect.
Step 4: Deep Scarring and Damage to edges
When creating deep scars I know a lot of modellers who just use their Hobby Knife. I sometimes do this but when I can I use a small Circular Saw attached to a drill. Again approaching this slowly working from the plan you can create some nice scars and remove armour easily. Once the scars are placed in the model I then use a small Circular Grinding Stone to help smooth out the scars and also for roughing up the edges of the model.
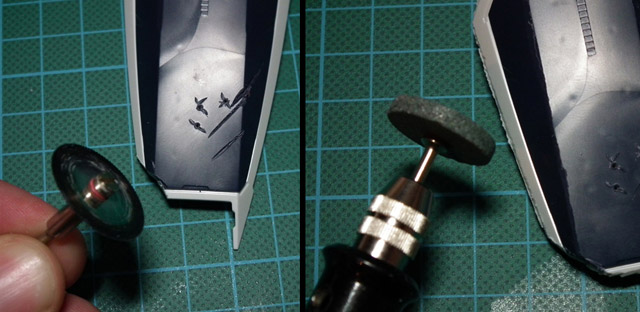
When using the grinding stone to chip away the edges I use the very edge of the stone. The reason for this is to create a subtle yet effective worn edge. (This can be applied to a lot of edges on the model and when done correctly it can create a great worn effect)
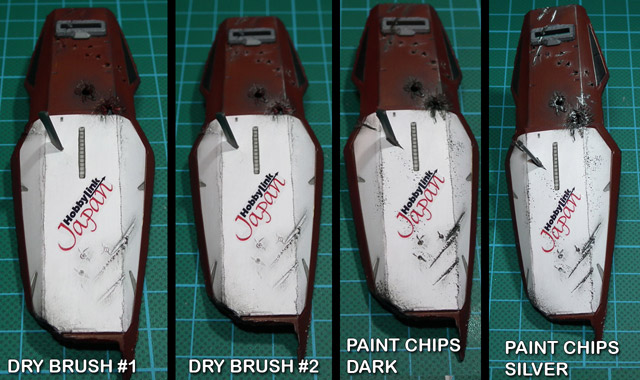
Step 5: Drybrushing
Once the model is painted “clean” and all the markings are applied, the next step is to dry brush the model. I usually do a dark dry brush (black or a darker shade of the original colour) and then I apply a dry brush of a metallic colour (mostly silver) Without boring you guys or going into too much detail, dry brushing is essentially used to highlight raised details on models and to be honest I am still not very good at it! As you can see in the pictures the effect needs to be subtle and not over done.
The brush I use for my own dry brushing is quite small. I know a few modellers who’s skills surpass my own who use larger brushes, it all comes down to how you prefer to work I guess! The key to “good” dry brushing is to make sure there is very little paint (pigment) on the brush. To do this, first apply a small amount of paint to the brush. Proceed to rub the brush on a piece of paper until no more paint is coming off the brush. Then slowly begin to gently brush the model until you see the edges being highlighted.
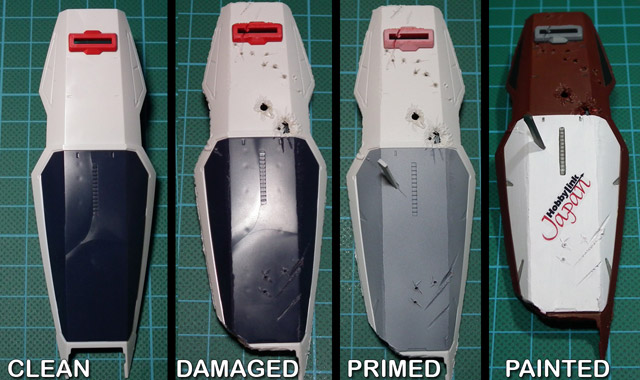
Step 6: Applying Paint chips & Scratches
The easiest way to apply random and effective paint chips is to use a sponge. You can see in the picture below the type of sponge I use (its just a simple cleaning sponge) Applying paint to the corner of the sponge and then to the model is as simple as it gets! Choosing the right paint would be the tricky part. Firstly choose a paint with high pigment (or don’t thin your paint too much) As you only want to apply the chips once, you won’t be doing multiple layers of paint. Secondly decide how many layers of paint is going on to your model. I usually go 2 colours a Dark Brown colour and a Shiny Metallic Silver. Using more than one colour can give you some nice interesting effects and professional modellers sometimes use 3 or 4 layers of colour if not more!
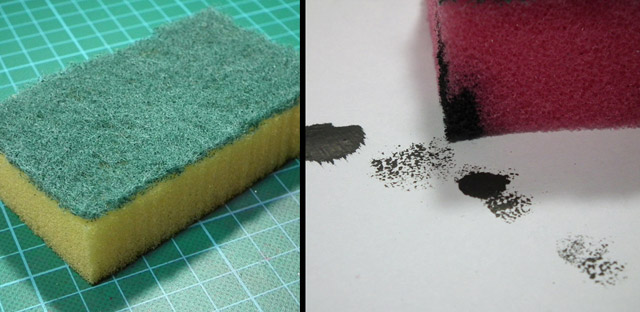
After sponging the model and getting the look I want. I then take a fine brush and apply scratches or just tidy up the chips I’ve made. By painting silver inside the first colour (dark brown) you can get a nice layered look achieving a nice chipped paint effect.
By Kamm


Gianni
Awesome tutorial! I feel part of this project because I was one who requested a tutorial about weathering so much when Kamm shows us his The-O model.
Thank you so much! I’m downloading the videos…. 😛
Chris
Great Job Kamm. Nice tutorial to help people get started!
tc012009
This is a fantastic tutorial, which will be of huge value to modellers of all level of experience.
Great to see HLJ supporting a highly skilled modeller, I hope to see more of Kamms tutorial work in the future.
Excellent work.
Noel Coloma
Awesome work! Seeing tutorials like this really makes me want to move froward from out of the box building to customizing.
Dave
Great tutorial! Maybe you can fill in for Syd on episode 23!
Do you have your own blog somewhere?
Spikesagitta
Nice, pretty detailed battle damage and weathering tutorial, and it’s easy to understand too, with plenty of picture for references. Thanks!
Roger
Umm yeaa badasssssssssss
xD all i gotta say
zetaplus
Brilliant work, great to see a skilled gunpla master at work.
Hope to see more from Kamm in the future.
KRIZ
AWESOME!
KRIZ
awesome tutorial, and excellent finishing on the kit.
Jay
Awesome tutorial, & model!!
Just watched this for the second time, thank you for putting this together, I am new to this hobby & just at the point where I am looking to try these (damage & weathering detail) to bring more realism to my models.
There is a lot of tips here, and I will be using this as a resource for reference as I undertake painting my models.
1 question, would I need to completely paint the model first before dry brushing? or would I be able to get away with just top coating an unpainted kit (straight build) and then start the dry brushing?
cheers jay
Kriz
Oustanding Tutorial, The way you achieved the damage is awesome and very helpful.
Love How this turned out bro.
shiro11
Saw the videos on MAC but the written tutorial is even better.
Great Job.
Gallen (Adam)
Wow~ hand painted? Looks airbrushed! Amazing hand painting skills 🙂
I like this colour scheme. Having the whites coloured in reds would make it look like Char’s machine ^^;
Great job on the tutorial too. I find it very informative. And the tools used is available on HLJ.com?
HLJ : Luke
@ Gallen you can find a whole range of tools on HLJ, click any of the links below.
– Pin Vices
– Drill Sets
– Hobby Knives
– Mini Routers
– Cutting Mats
– Soldering Irons
Kamm
@ Gianni, Chris, TC, Noel, Spikesagitta, Roger, zetaplus, Kriz, shiro11, Gallen – Thank you so much guys! Thank you for taking the time to leave such positive comments. Im really glad that this has helped atleast one person ^^
@ Dave – Thanks for the nice comment! I couldnt fill in for Syd lol ^^ hes way more skilled then me. Im sorry but I dont have a blog, i just used my youtube channel which is: http://www.youtube.com/user/kamniks?feature=mhum
@ Jay – Hi Jay!, Firstly thank you for leaving such positive feedback. It means a lot. In terms of drybrushing a “clean” model. Thats fine. You can apply all the techniques above to an “Unpainted” model and it will still work. The only diffrence maybe that when you drybrush the paint may not stick as well (as the model isnt primed) but you should be ok! It definitly can be done. I hope that helps!
Thanks everyone for the feedback ^^ Im glad that people like this. 😀
Noel Coloma
Just a general question to everyone out there.
Is it better to
a)build the kit, battle damage and then paint/weather
or
b)paint individual pieces, build it, and then battle damage and/weather
If building the kit out of the box is better first, I would love to see a tutorial on good masking techniques.
Lay Yulius
wow….
amazing project….
this is a good consept.
I really like it, good job
two thumbs up
b(^.^)d
Bene
Hey Kamm!
one word I’d have to say “EXCELLENT!”. you did a fine job on the model man! and excellent tutorial! I’ve learned a few on how to do battle damage because of you 🙂
keep it up buddy!
Thanks to you and HobbyLink Japan for the knowledge!!
ciao!
DigitalPhantom
Hey Kamm, Still remember me?
This tutorial is excellent. Good work! 😀
Have you dropped by GE recently?
Kamm
Hey DP! 🙂
Thanks for the kind words man. Ive moved away from GE now. Im more active at:
http://www.themacforums.com Theres a big European contest going on over there sponsored by HLJ. You should check it out. I hope your well 🙂
Connor
Is there another place to see your video tutorial? Both of the videos had bad links and I’m really hoping to see the step by step process youused
Rick
This tutorial helped me alot, when i do some costume detail and painting i always enjoy to give gunpla kits a battle worn effect and this is definitely a great guide to do that.
TheTrollestSuperSaiyan
where is the video? i can’t find it
Timothy Mccord
And, contemplate it: by refusing small things in yur own life, say for example a conpliment or
someone holding thee doorway for you personally once yor arms are brimming with packages, actually
causes it to be harder tto get ven larger gifts which could present themselves.
Beyond a forward thinking front door painted red you will even benefit from
developing a simple, consistent type of flowers and plants that outline the path in the doorway towards the street.
If you feel that you’d rather make use of the money you might
have saved for Christmas on receivin the family together and enjoying your
tome and efforts together, yoou will find new ways to pay to tthe expensive presents that you simply buy.
Cara Powers
Many students use the student loans aas a means of financing their college and earn the most effective for knowledge
development. Pressure washing will also go far in cleaning up the
grime that builds over years of seasonal weather.
If I receive comments in answer this short article for the effect that life isn’t that
fair, this perception is, inn itself a useless and self-defeating thought whose energy is creating
ongoing lack.