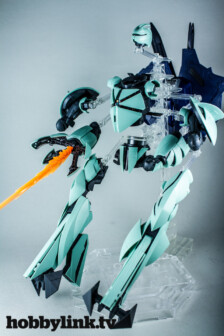
Hello everyone! I’m back with the Galbaldy, and it’s time for the little surprise I mentioned at the end of the last update. Now that we finished the mobile suit, we’re going to build a display base for it. It may sound intimidating at first, but with a bit of effort and planning we can make a really eye-catching scene that will look great on your display cabinet.
Layout
I always start from the backstory. What kind of scene do I want to create? Is it set in a space colony or the Earth? What does the terrain look like? …and so on. After I answer these questions I’ll have formed a general idea, which I then put on paper.

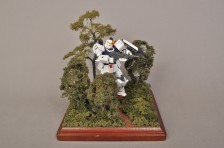
At this point the plan is: the Galbaldy, whose pilot is experienced but not a leader of his team (hence the high number on the markings), is in a colony that has been severely affected by continuous battles. This is a rural area like those you will see in Gundam series every once in a while, and the terrain is predominantly flat. There is a derelict house and a dirt road running across, two vital elements that provide context. Based on these ideas, I sketched different layouts and combinations.
Use of diagonal lines


Apart from a couple of exceptions, my dioramas usually feature elements placed diagonally on the base. This helps set the scene free from the edges of the base, so to speak. It makes viewers unconsciously imagine that there is more to the scene, and the diorama depicts only a portion of it.
Naturally, this is also the case with the base we’re making for the Galbaldy Beta. Although the diorama will be considerably simpler and won’t tell a complex story, we can make the most of the elements we’re utilizing.
Basic construction
From the fascinating world of theory and imagination, we shift our focus back to the workbench. Let’s take all these concepts into consideration and start building!

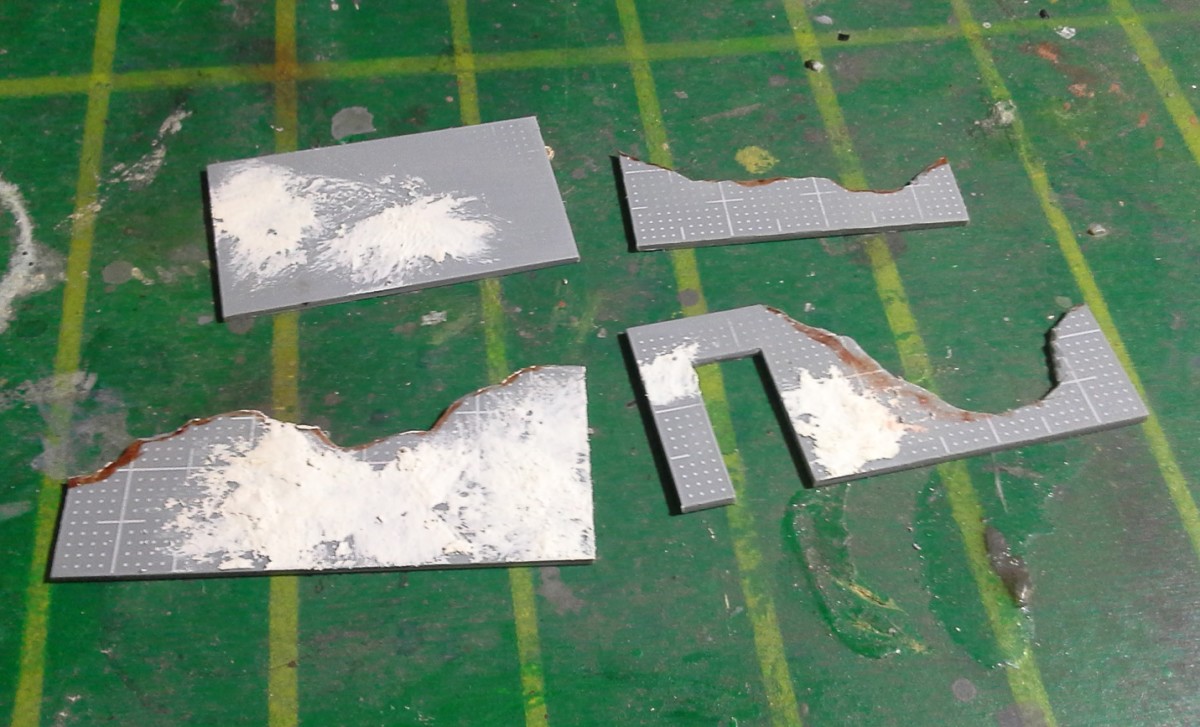
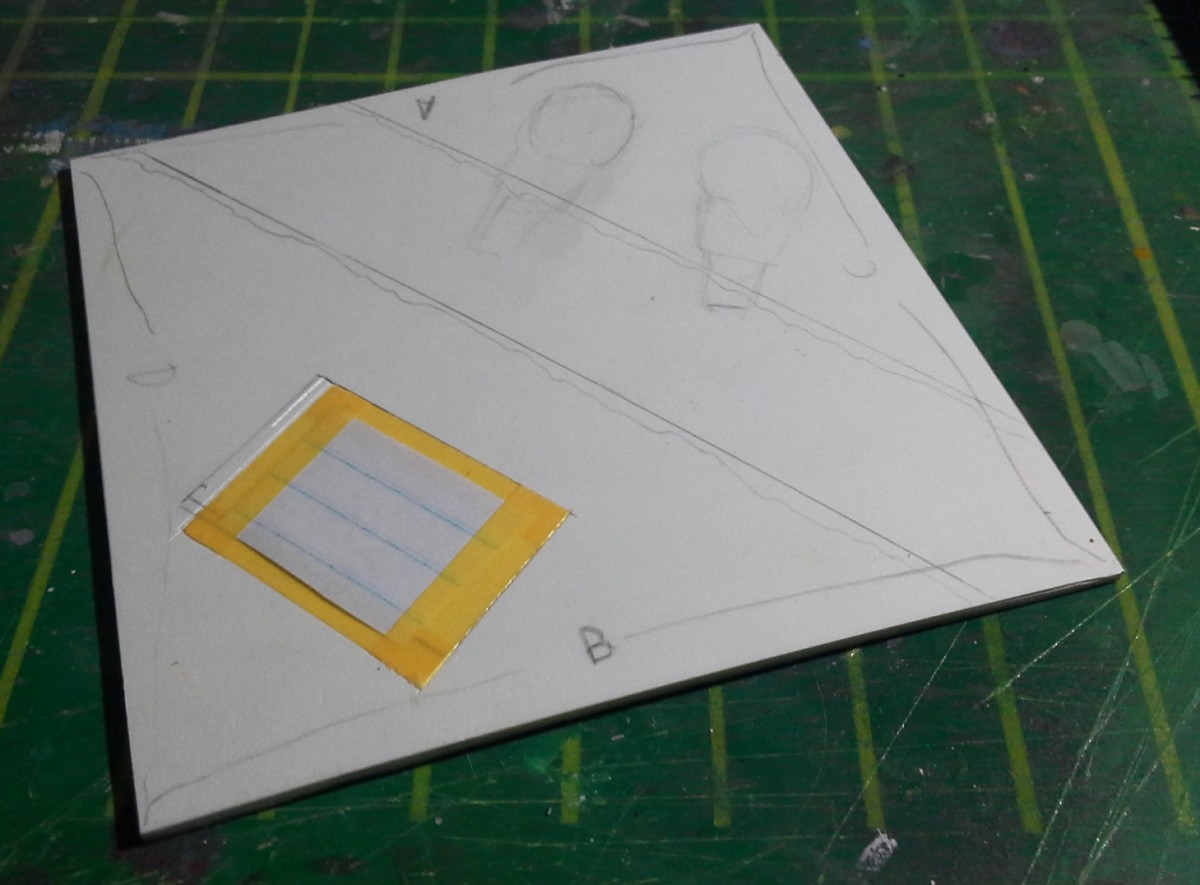
The diorama base will consist of two parts: a big piece and a smaller one on top. We’ll start by the smaller piece, which requires most of the work, since it’s the one in which we’ll make the terrain and glue on the elements.
This smaller piece is made out of polystyrene. It’s a cutout of an old sign from a local hospital, which I recycled. The material is excellent. It’s way more dense than styrofoam, but not quite as much as your regular styrene sheet.

I did my best to cut out a perfect square that can fit the model comfortably. As I said before, we’ll glue this piece on top of the wooden base pictured above later on.
Scratchbuilding the house
Fundamental shape
Making houses and buildings from scratch is something I thoroughly enjoy. The process is just so much fun and straightforward. However, if you don’t feel ready to take this step, you can get yourself a model kit of a house. Tomytec and Sankei make very good kits in 1/150 scale, which work perfectly with 1/144 models.

We are going to build our little house with 1.0mm styrene sheets. Most people prefer thicker plastic (such as 1.5mm or 2.0mm) for this sort of task, as it ensures more durability. Yet, in order to make cuts quickly, I stick with 1.0mm. What I normally do is reinforce the building from the inside, something I can’t do with this particular house, given the exposed interior. I guess I’ll just have to be careful when handling it, haha!

Using the Hobby Color Converter app‘s scalator tool I found an ideal size that would make sense in real life while looking good on the base.
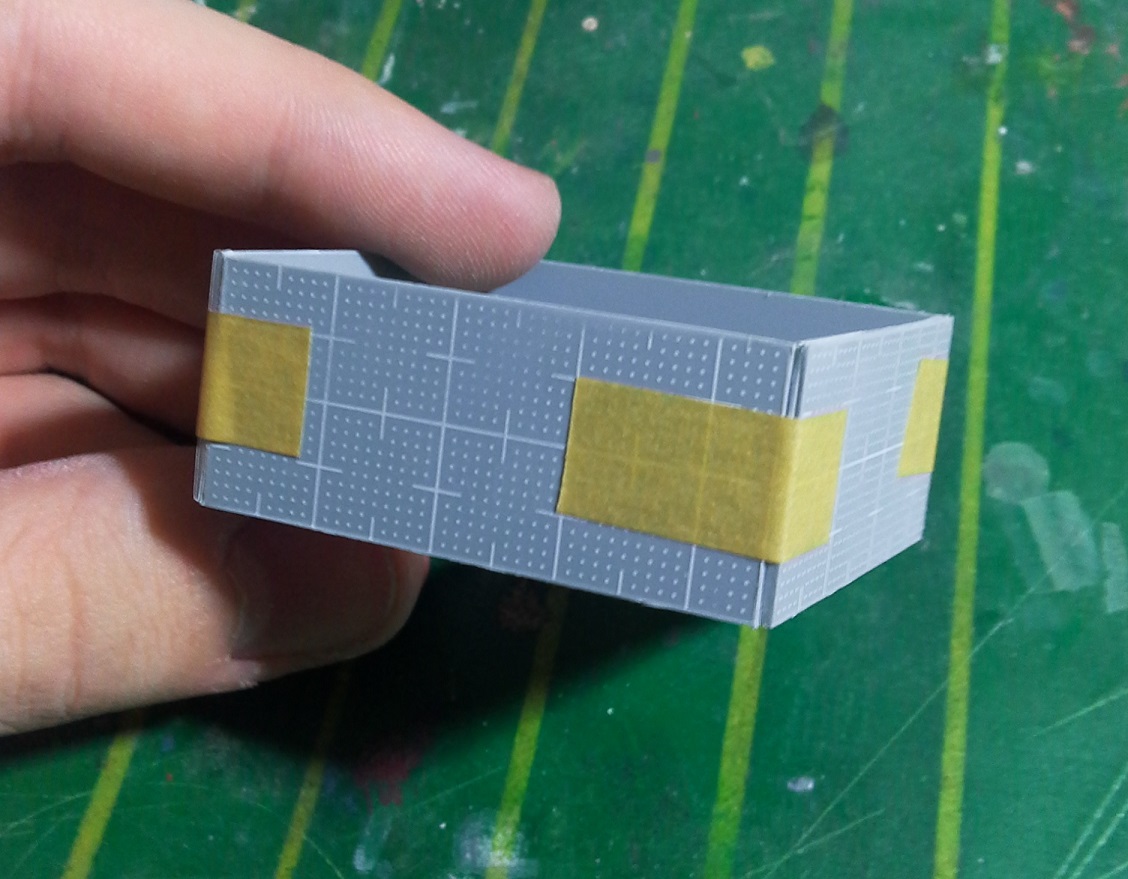
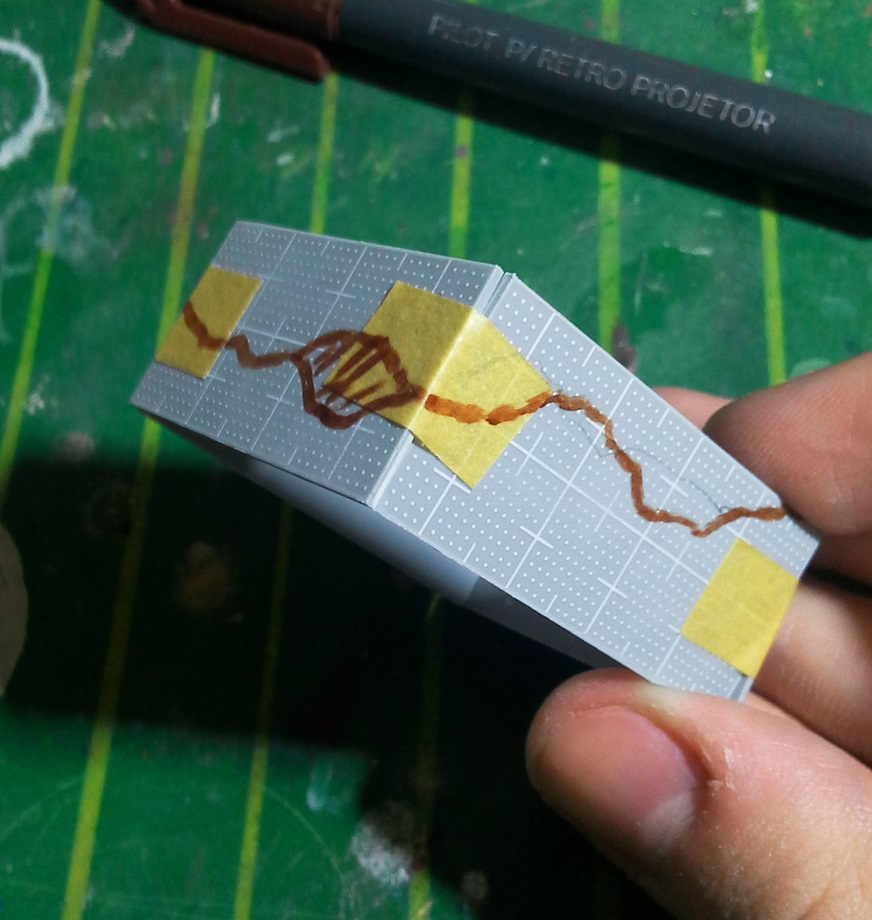
I cut out the pieces for the walls and stuck them together with tape. This allowed me to easily go in with a marker and draw the outline of the damaged areas. If I had glued the walls with cement, cutting would be significantly more difficult.

Damage effects
After cutting, we’re left with a nice and irregular shape. But the edges still require a little bit of work.
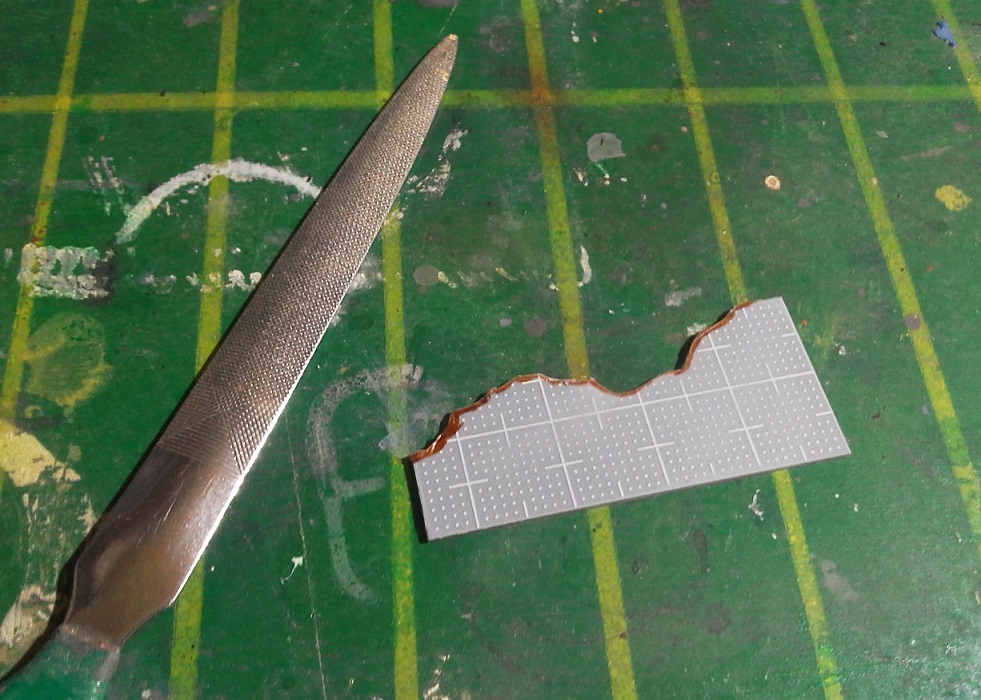
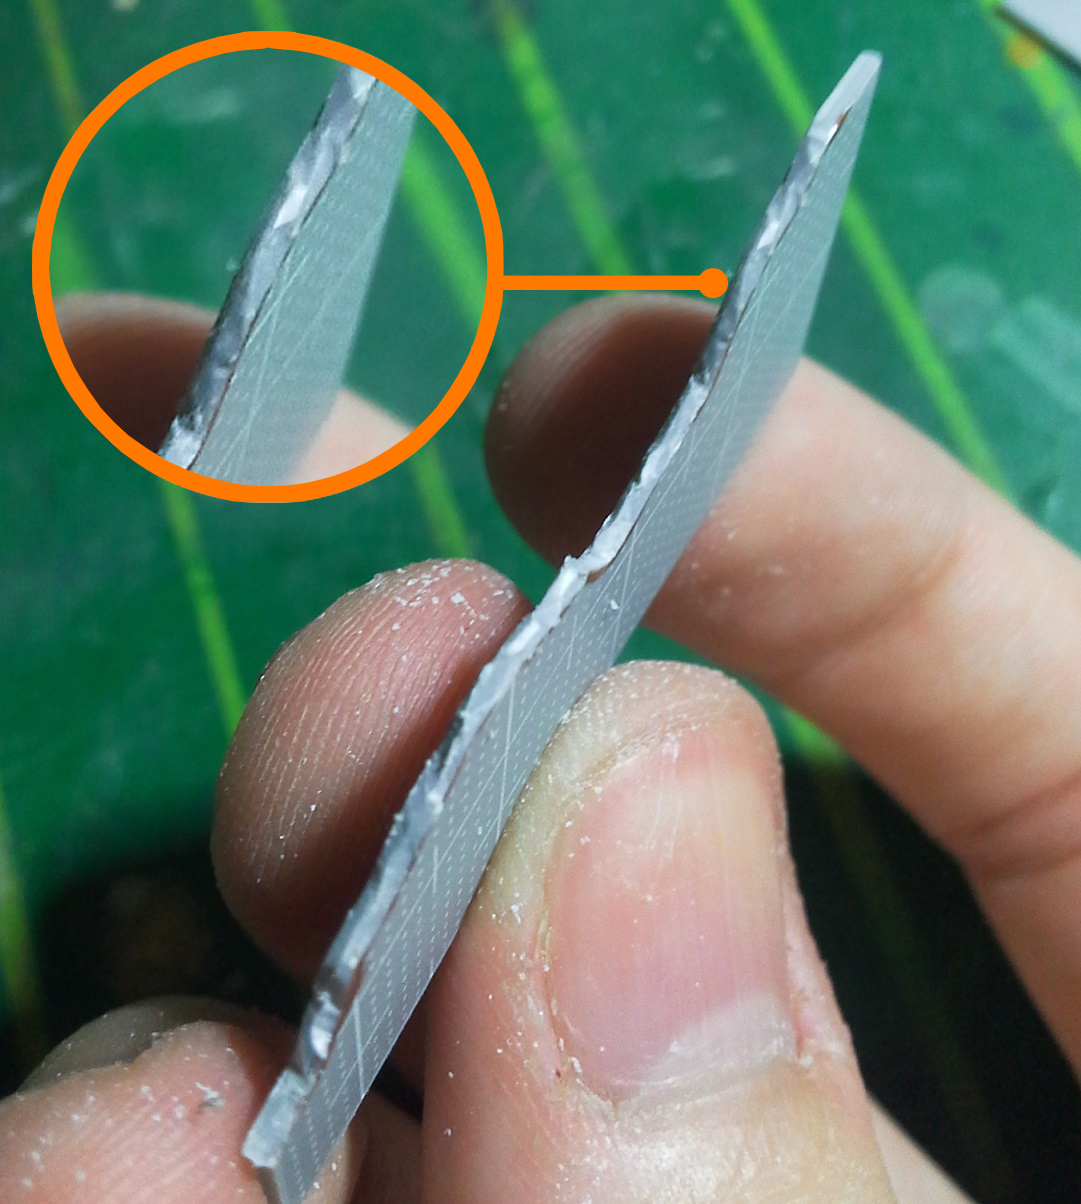
In my story, these walls must’ve been hit by several objects coming from different directions over an extended period, so I replicated that with a cheap half round file.
Speaking of irregular surfaces, I made a textured effect applying Tamiya white putty with my finger. This way the walls won’t look too perfect and pristine.
With this, our model is now ready to be glued together.
Internal walls


Some of the internal walls are still standing, albeit a little wrecked. I went with the same procedure as the rest of the building: cut out, damage with a file, glue on. These won’t receive the putty treatment because internal walls are generally neater and smoother.
Roof


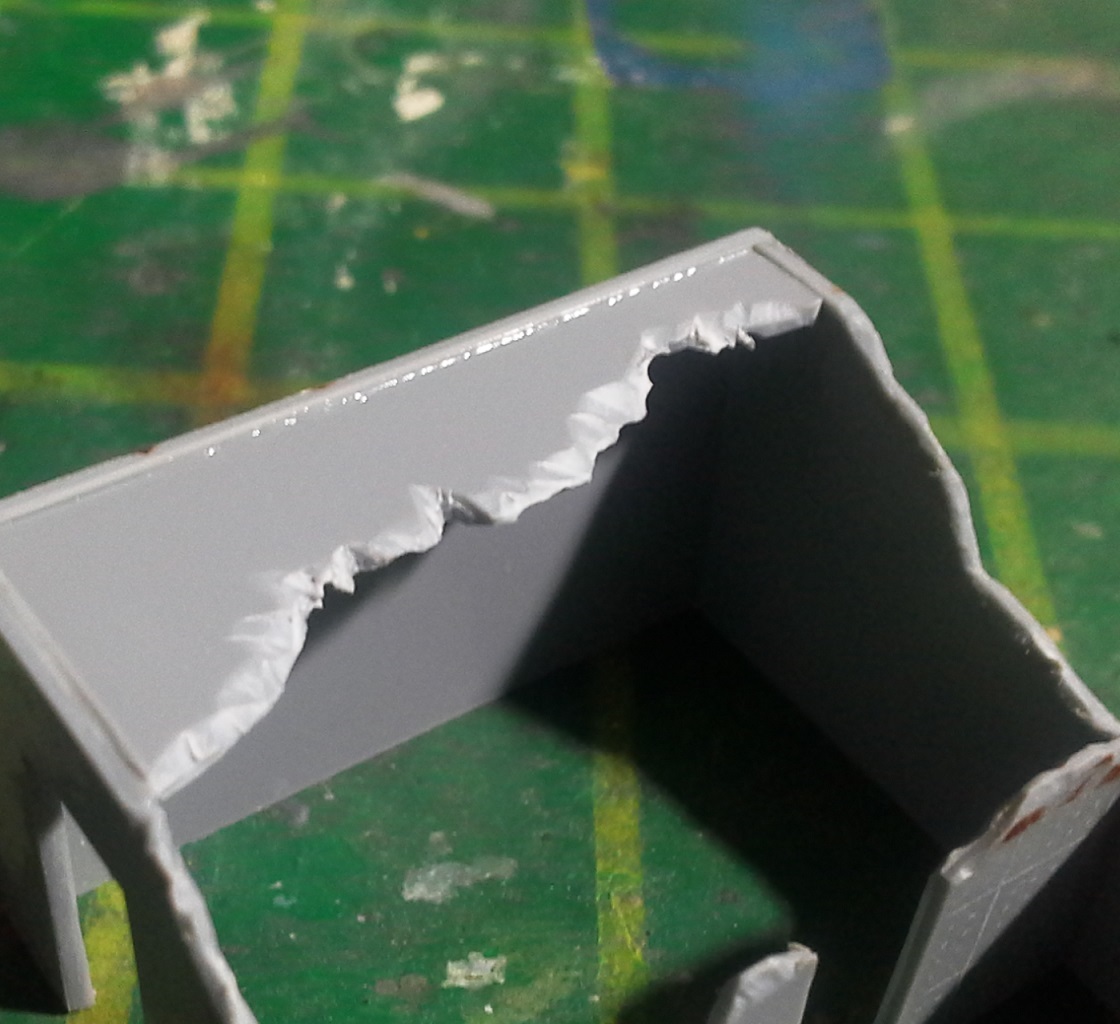
A portion of the roof is also still going strong, and I think this detail is what brings our scratchbuilt model together. It looks much more like a house now.
However, after gluing it on, the roof piece wasn’t flush with the top edge of the wall. Thus, I filled the area with putty, and once I sanded the excess down, the surfaces became even.

Cutting out a window
The only window in the house is now indiscernible due to the all the damage. This causes the building to look too plain and unrealistic, so I decided to add a new window on the more intact wall. Needless to say, this should’ve been done beforehand. My bad for not thinking of this earlier!

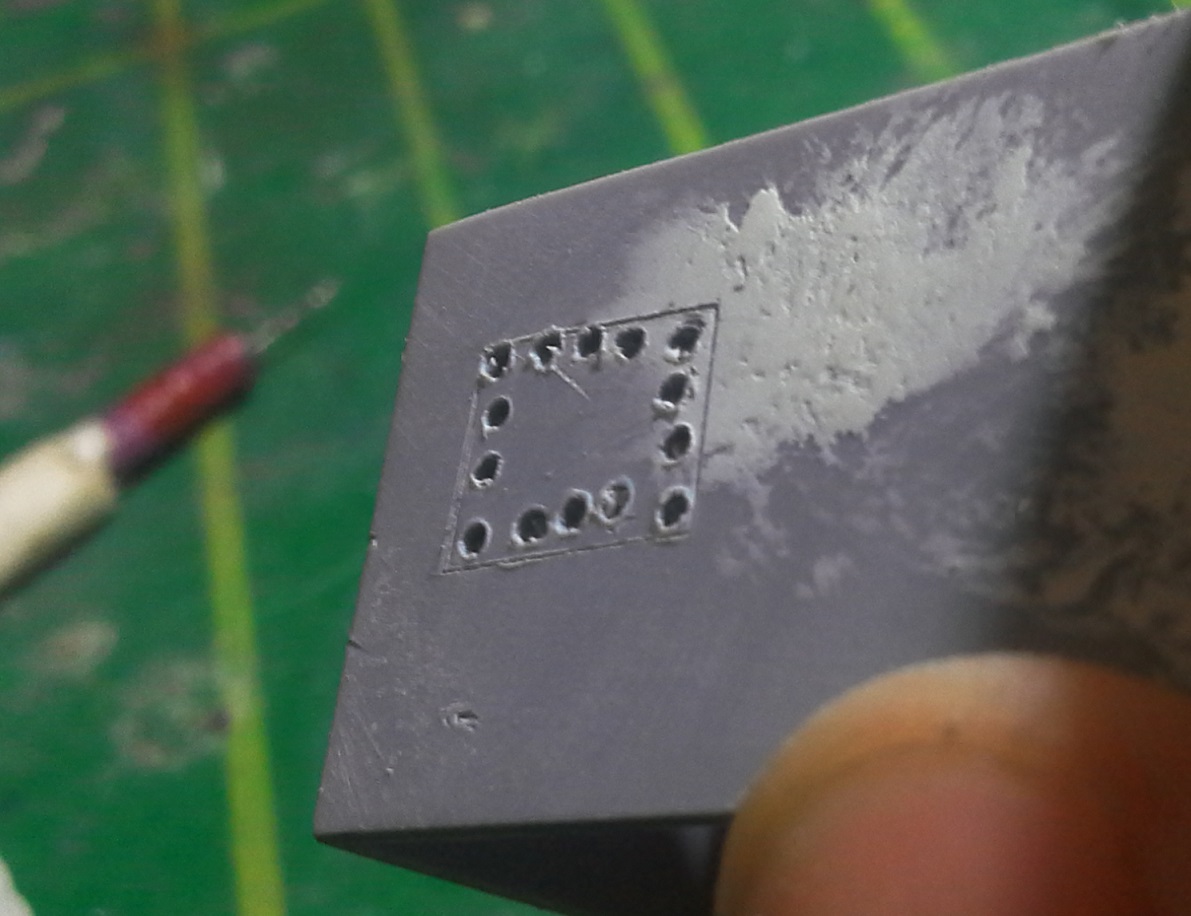
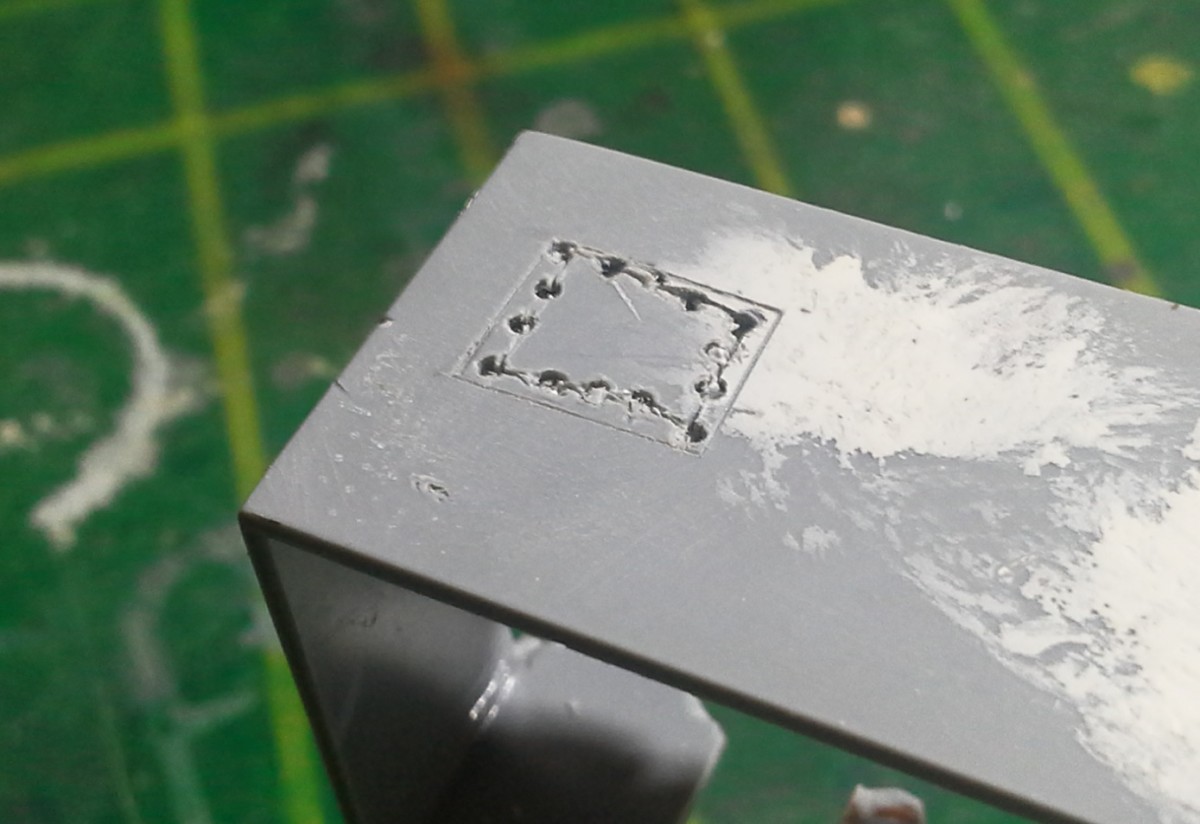


The process is time-consuming, but relatively simple. First, I scribe the shape of the window as a panel line; in the same fashion as the detailing stages of the build. Then I drill holes with a pin vise, following the outline of the window. Next, I carefully connect the holes with cuts, lightly going over and over with the blade. This is when the sturdiness of our building is put to test. We are applying some pressure, so we need to be careful. Fortunately, these walls held on with no issues whatsoever. After that, I poke the plastic we don’t need from the inside out, so it comes off and we can proceed to cleanup. I tidy up the edges by cutting with a blade and filing with a precision file.
Making a frame for the window could be a nice touch, but I figured it should be destroyed by now, lying amidst the debris we’ll add later.
Building the door


Switching to a thinner plastic, a small piece of this 0.3mm sheet was my base for the door. After painting it, I’ll glue it at an angle, as if it’s halfway open.
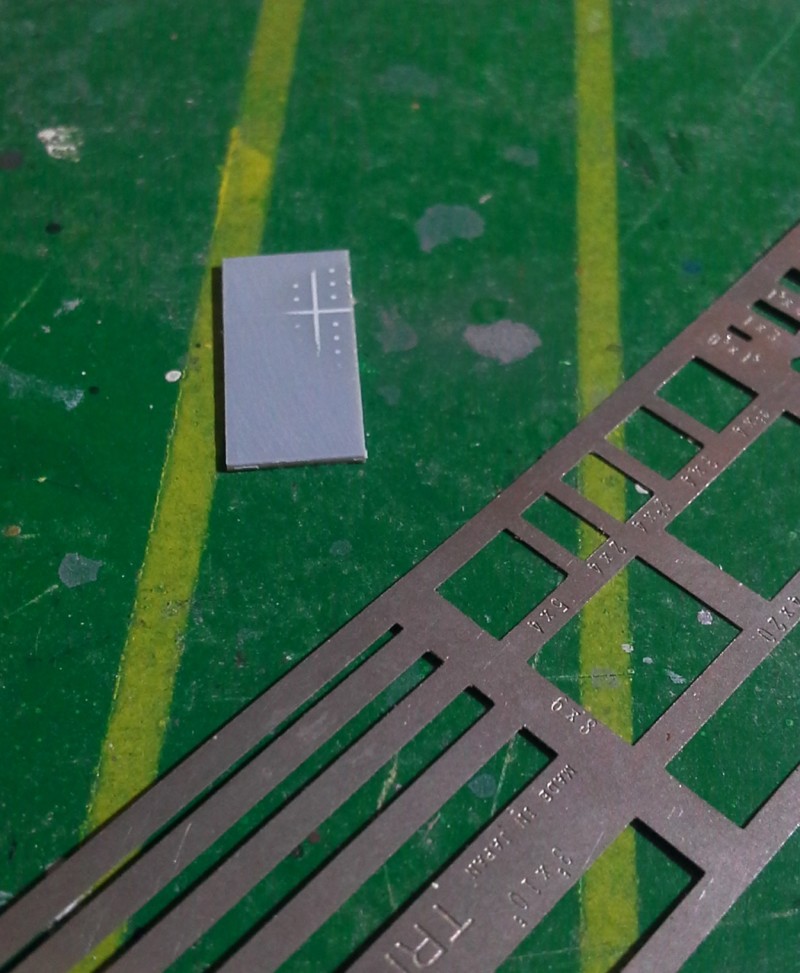

Using Hasegawa scribing templates and my trusty carving needle, I gave the door some detail. Additionally, I made a door knob with stretched sprue.
The building is now ready for primer and paint!
Terrain
Now I’m all set to begin making the terrain. The first step is to create a textured effect. In order to avoid potential problems, I masked off the area where we’ll glue on the house.

I’ll be making the grainy texture with a very thick craft primer I get locally. If you have access to products designed specially for this kind of job, such as Vallejo rough ground textures, I highly recommend you use that instead.

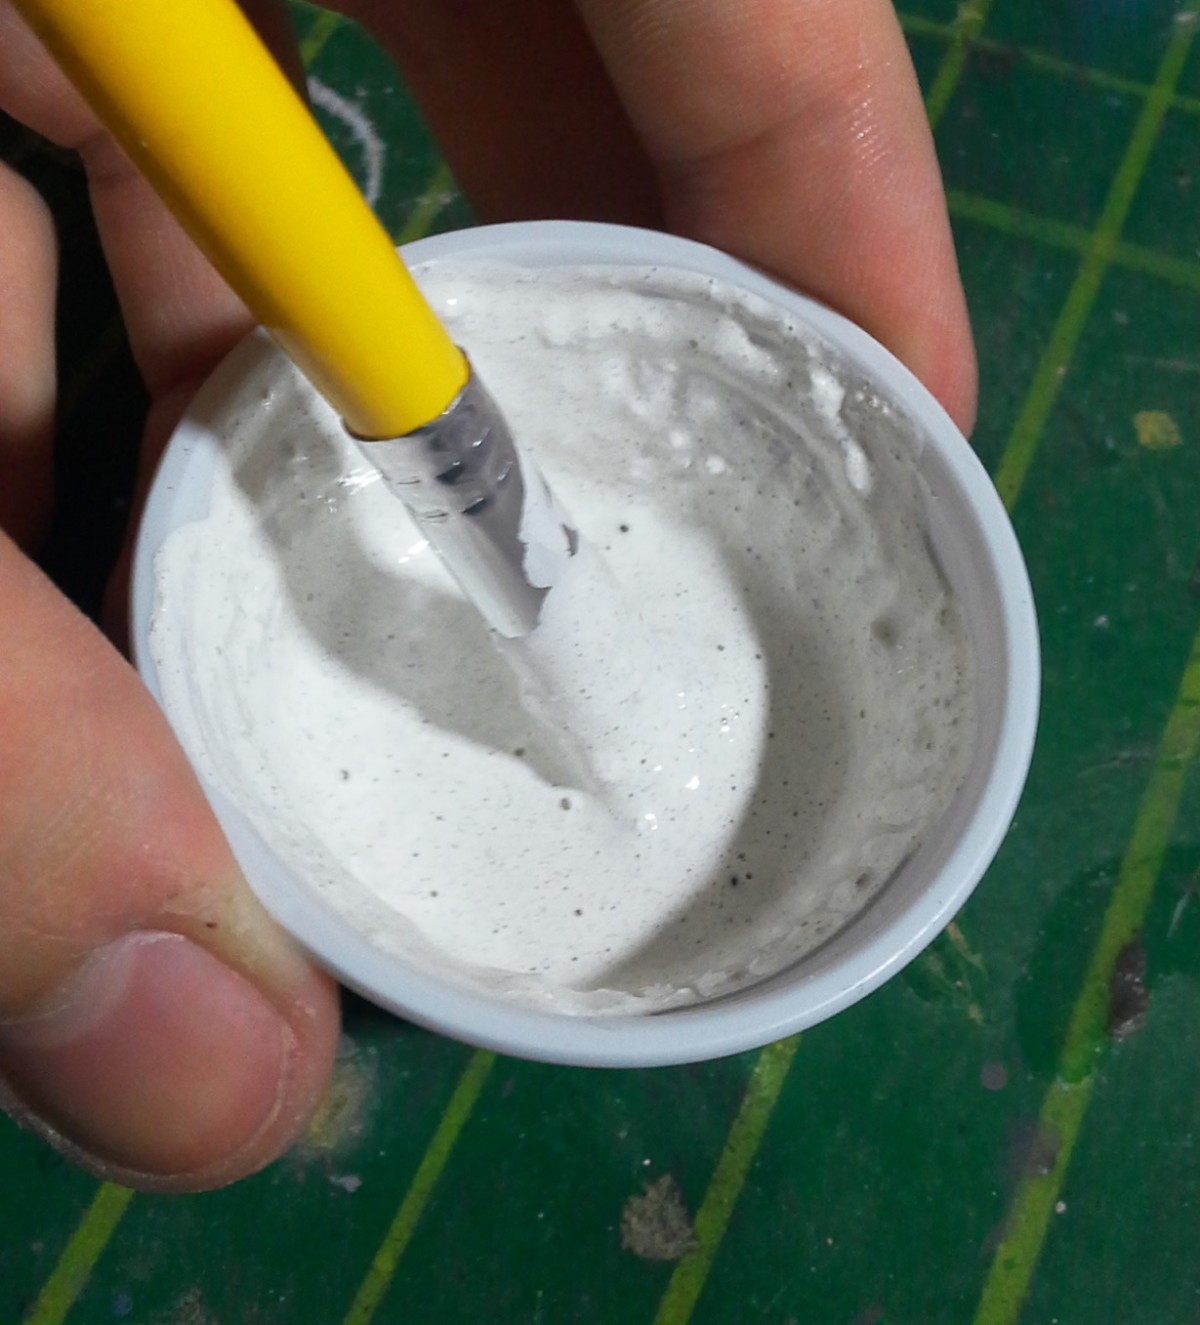
Unlike ready-to-use modeling products, this primer is just thick; which is good, but it doesn’t have any texture. Mixing it with dust I collected from my yard easily solved that.
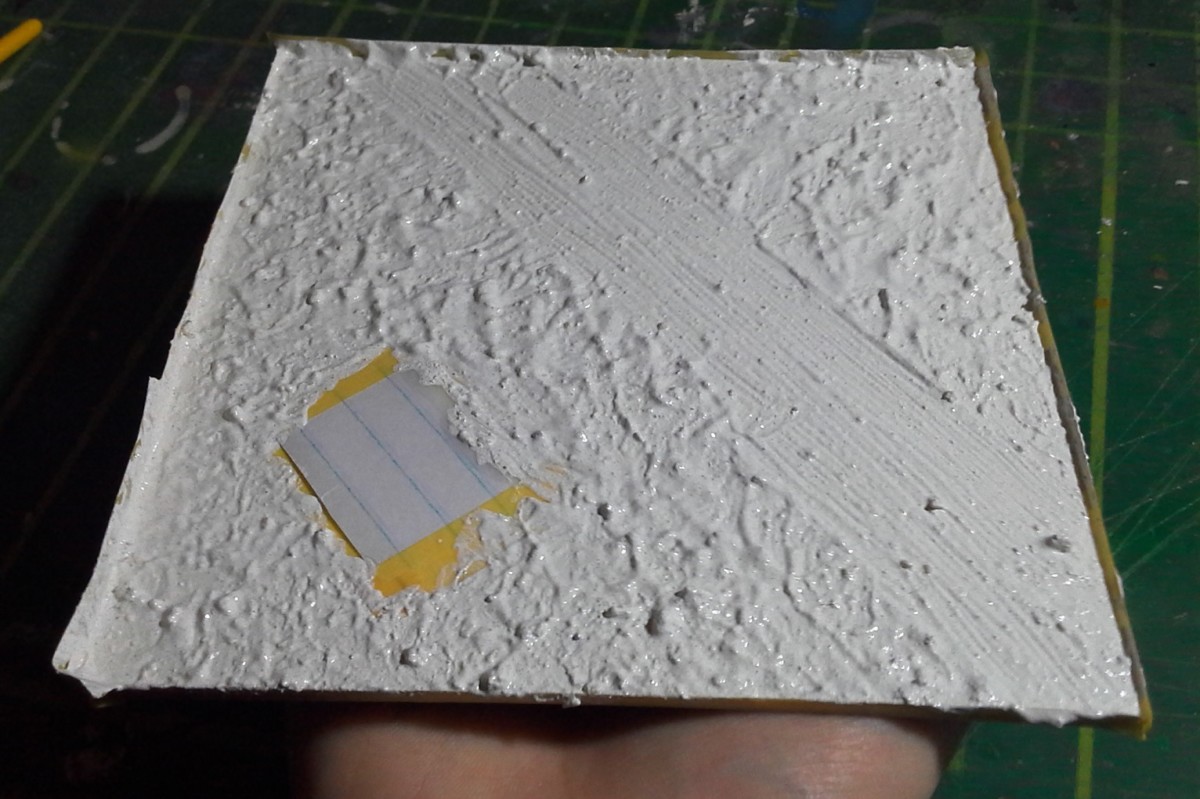


Applying the mix is easy. Using a wide brush, I stipple it on to get some unevenness going. For the road, though, I brush in one direction.
Before the paste dries, I remove the mask. This is a somewhat thick layer and the product I’m working with dries to a solid piece, so waiting until it’s hard to peel off the tape will also lift a portion of the texture around it.
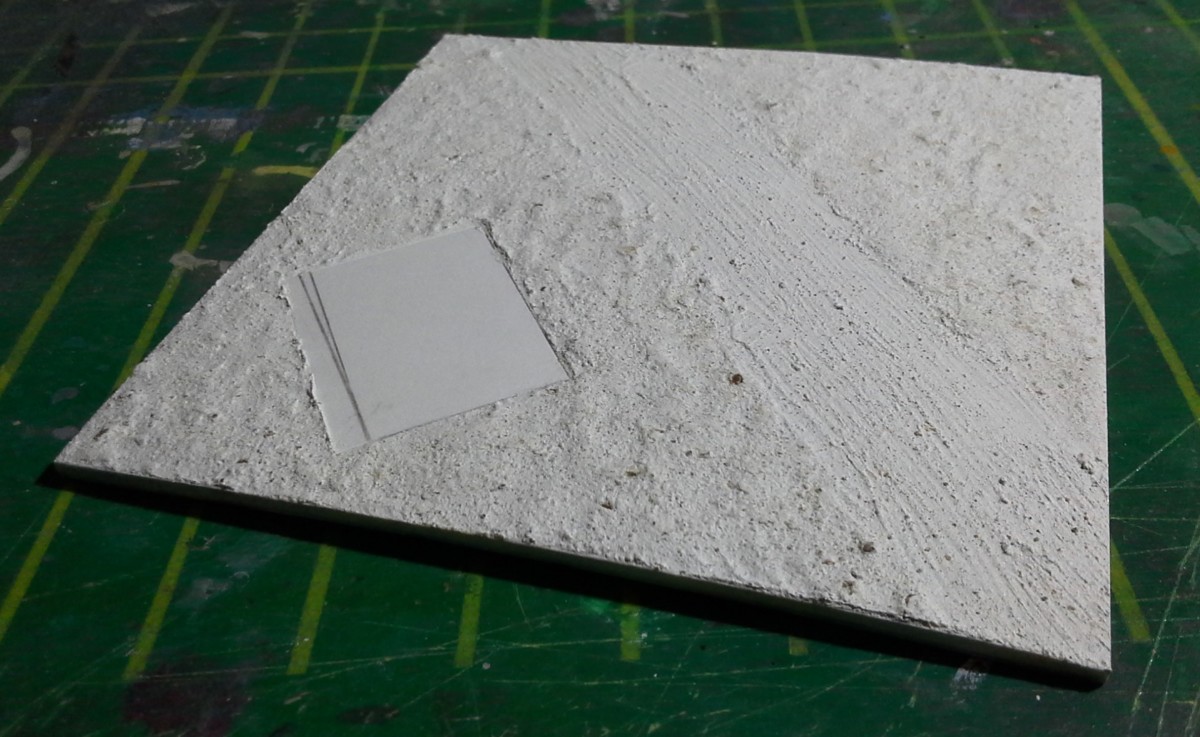
As you can see in the 2nd picture above, the surface was a bit too bumpy halfway through the drying process. Thus, I added some more paste on the lower areas to level it out (3rd picture). 4-6 hours later, we will have achieved a lovely, grainy and moderately uneven texture.

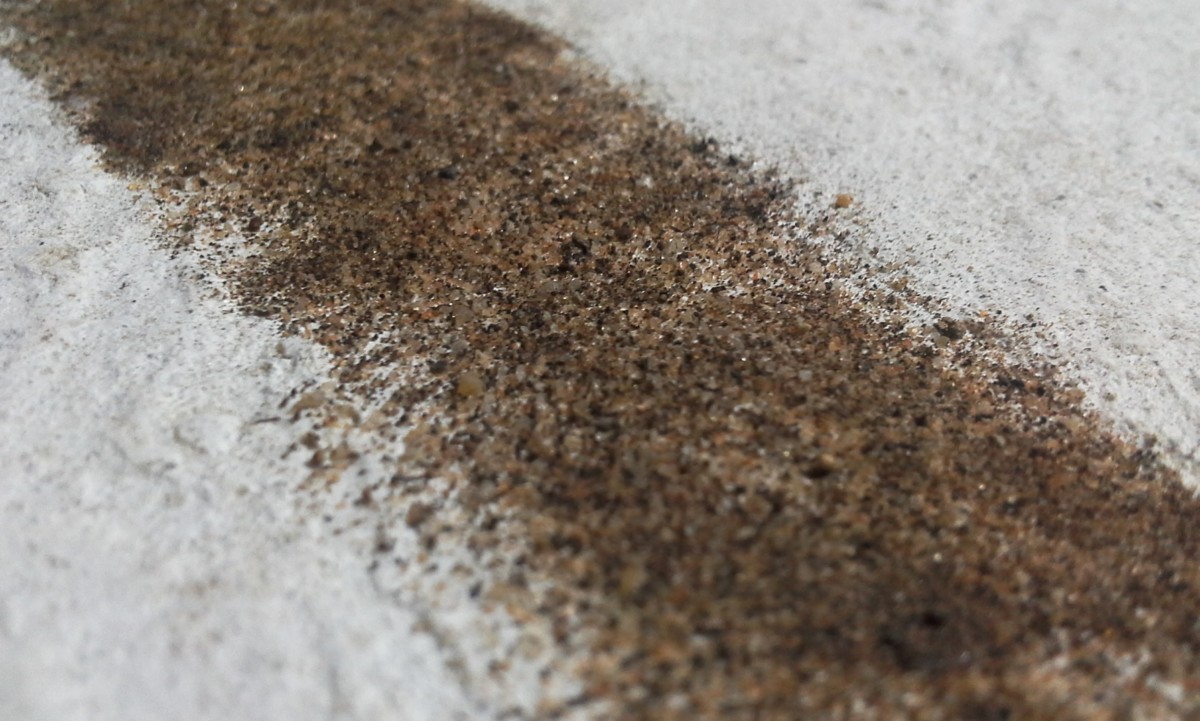
The next step is the dirt road. This area should be more grainy than the rest of the base, since it’s supposed to consist of just that: exposed dirt. Making it was very easy: I just glued more dirt from my yard onto the base, using slightly watered down PVA glue. As simple as that.
Final construction
Last but not least, all we have to do is glue the plastic piece onto the wooden base. I used standard multi-purpose glue for this task. It’s important that we make sure there isn’t too much glue near the edges. We don’t want the glue to ooze out from underneath the plastic piece.
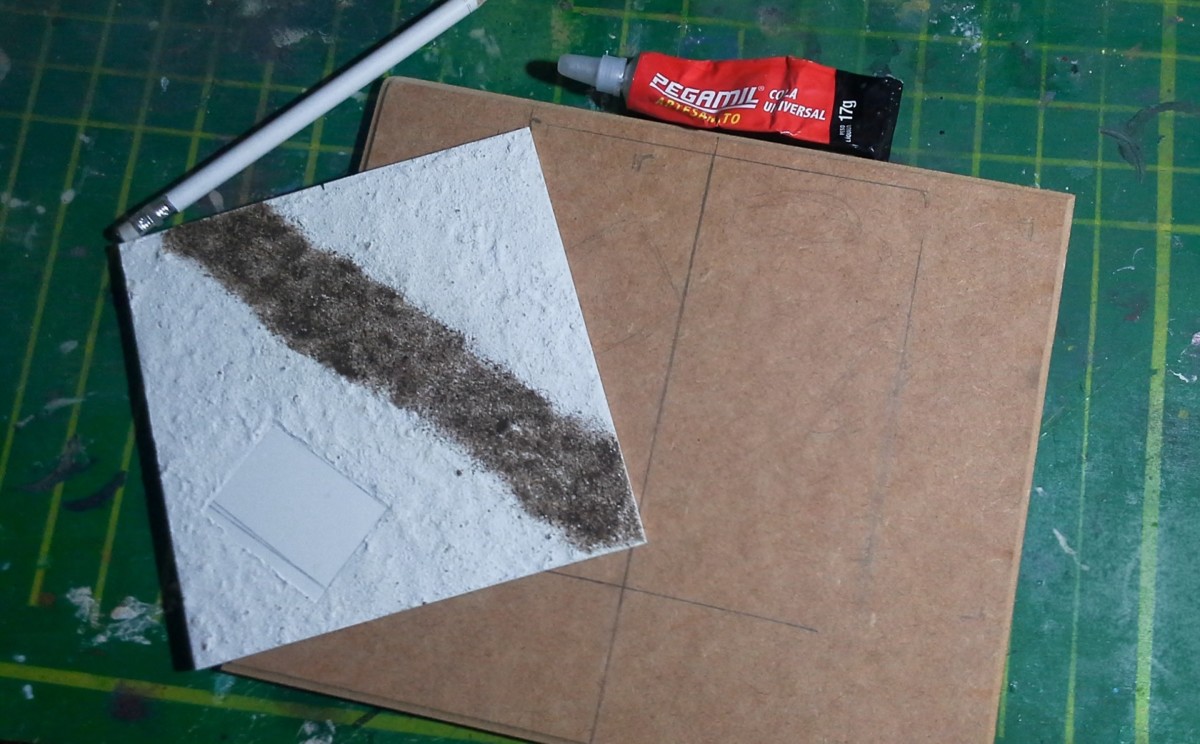

I left the glue curing overnight, and the bond is very strong after drying. The top piece can’t move or lift unless you really try to do it. Thus, I can safely say that giving the glue 8-12 hours will suffice. Also, it’s crucial that we put some weight on top while the glue dries, as the plastic sheet has a tendency to warp.
The other pieces I added to the base will be useful later.

With this, we’ve concluded the construction process of the diorama base! I hope you learned something that you can apply on your future projects.
In part 12 we’re going to paint the diorama base, which should be a lot of fun. Until then, stay safe and happy modeling!


Ramrod
Nice!