Doi’s Corner #4 : Sculpting Heads for Figures
I’ve talked about scratchbuilding 1/35-scale figures many times before in various hobby magazines. What I’ve almost never discussed, however, is the scratchbuilding of heads for 1/35-scale figures…it was always thought to be a bit too difficult for the average reader of those magazines. So, I thought this blog would be a great opportunity to show how I scratchbuild heads, outlining the materials and tools I use and the steps I take.
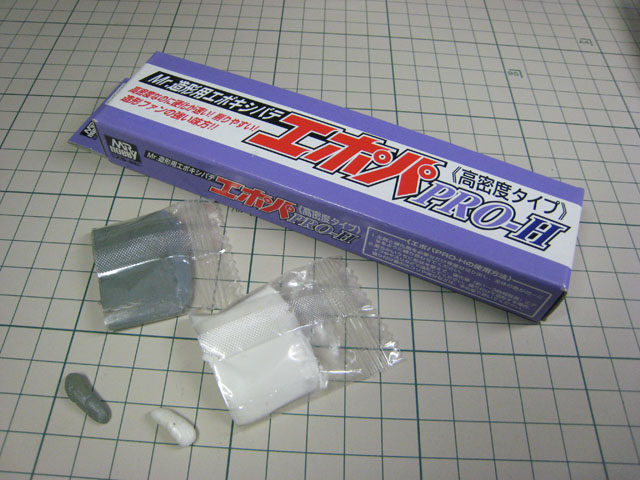
First, the materials. I use epoxy putty for sculpting. There are currently many types of epoxy putties on the market, but for making heads I mainly use Tamiya’s Fast Drying Epoxy Putty and GSI Creos’ Mr. Epoxy Putty Pro-H. Both of these putties harden quickly and feature a dense and fine “grain,” perfect for the fine sculpting necessary for creating figure faces. To compare, however, I feel that the Tamiya putty is just a bit finer, with the slightly coarser GSI Creos putty better suited for 1/16 scale or larger figures. On the other hand, I find the GSI Creos putty to be stronger and more resistant to crumbling when sculpting fine details. As I’ve gradually gotten used to working with the GSI Creos putty, I find that I’m using it more and more. So, in this blog, that’s the putty I used.
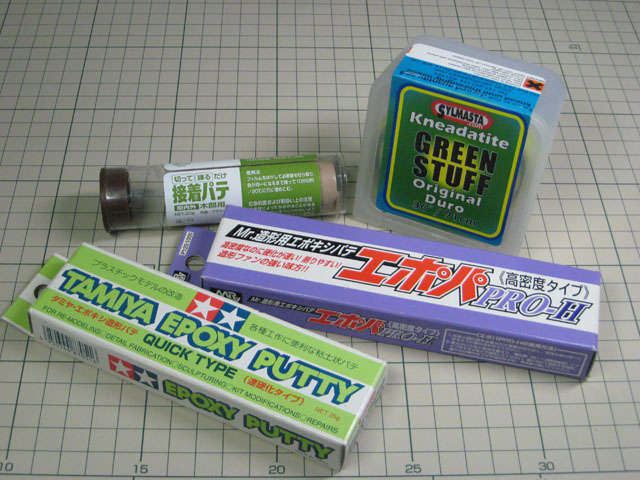
The GSI Creos putty comes in two parts; the putty and a hardener, which you cut to equal amounts with a hobby knife or even scissors and mix together. You don’t need much putty to sculpt a head, so you can cut just the amount you need to avoid wasting putty.
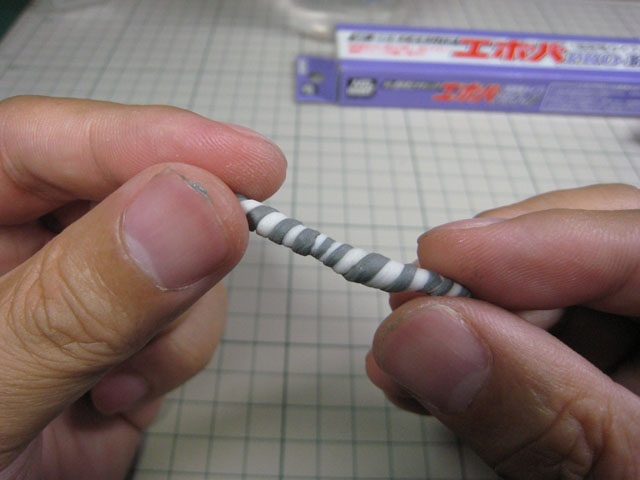
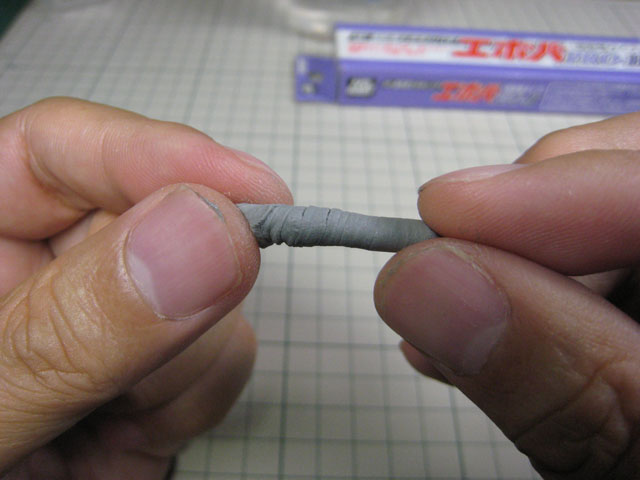
An efficient way of nicely mixing the two parts of the putty is to spiral it together in a cylindrical shape, then mix it together.
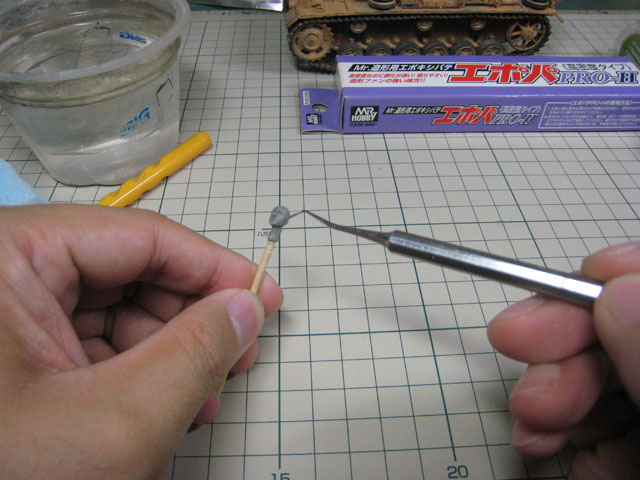
Form an appropriate amount of the mixed putty into a lump, then stick it on the head (not the point) of a toothpick.
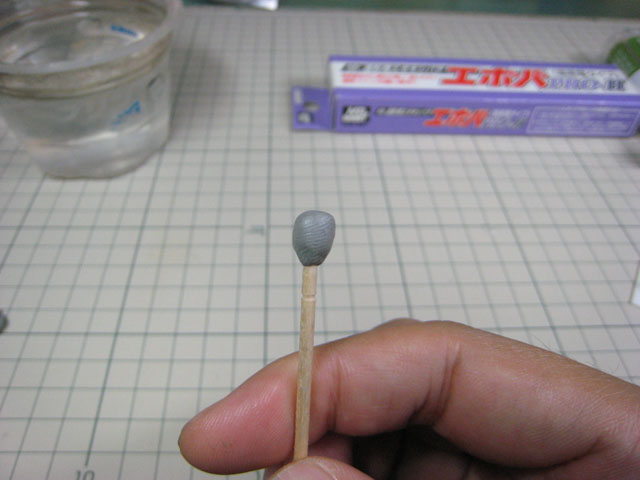
Roughly form the lump of putty into the shape of a head, and then rough in the location of the eyes and nose with the point of a toothpick. Dipping the point of the toothpick in water will help keep the putty from sticking to it.
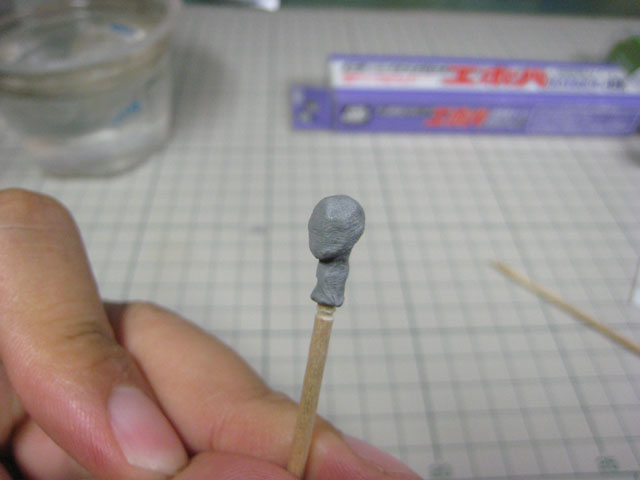
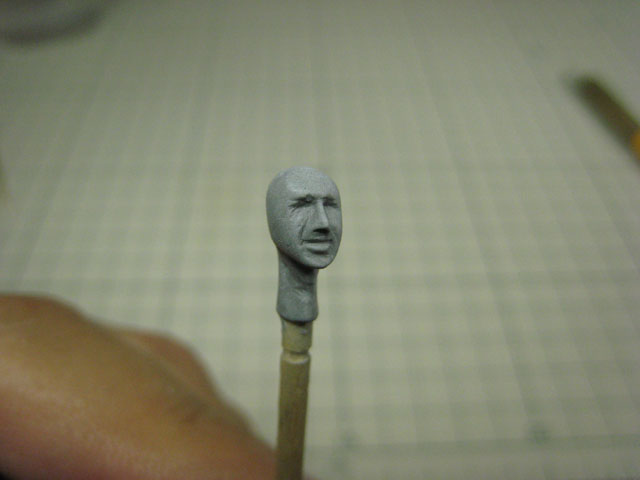
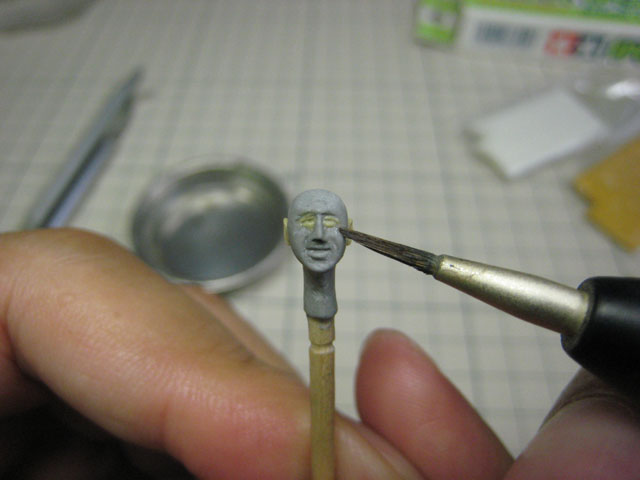
Once you’ve decided on the position of the eyes and nose, start sculpting in the fine facial details using a metal dental pick. You don’t have to get all the detailing done in one fell swoop; create the shapes with small delicate movements over the same place repeatedly until you get the shapes you want. It usually takes me about 20 or 30 minutes to get to this stage. At this point, stop sculpting and let the putty harden. For the eyes, there are only the upper eyelids to sculpt, but the eyes are definitely the most difficult aspect of sculpting your own heads. So, in order to concentrate on that work, let the lower eyelid and eye area harden completely, then add lumps of fresh putty and start sculpting.
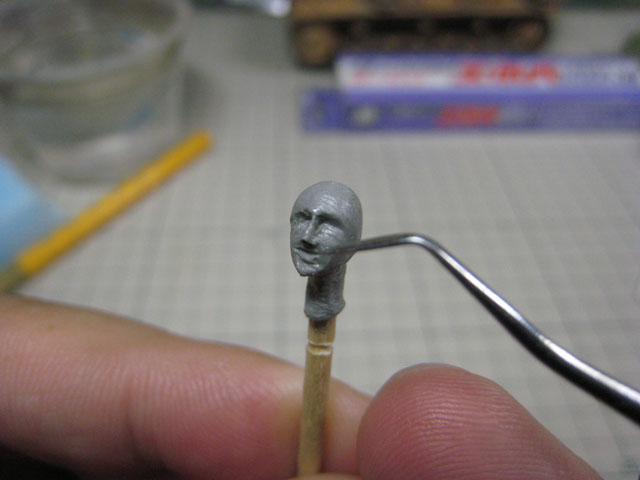
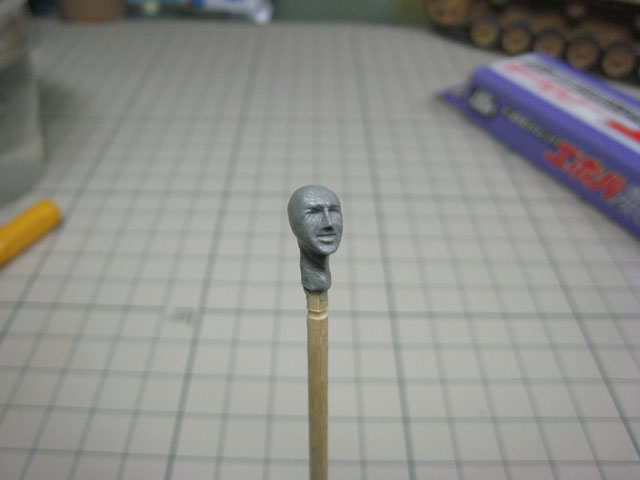
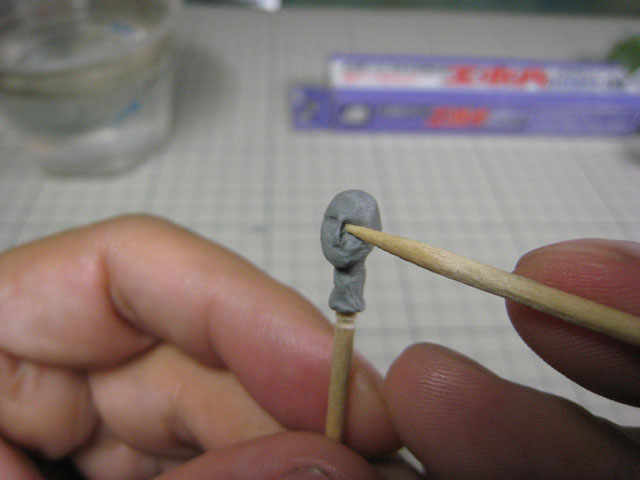
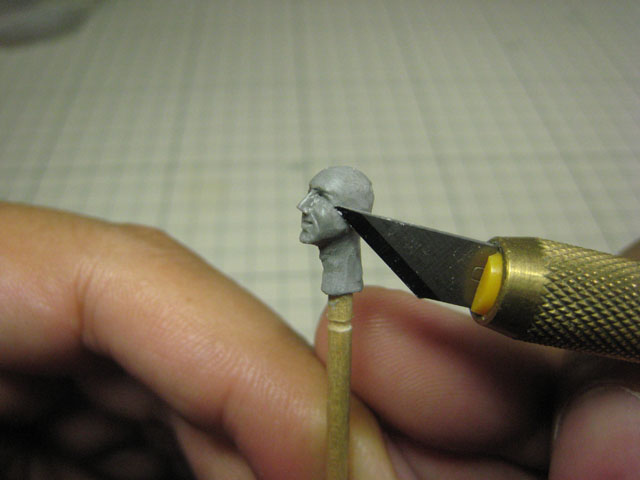
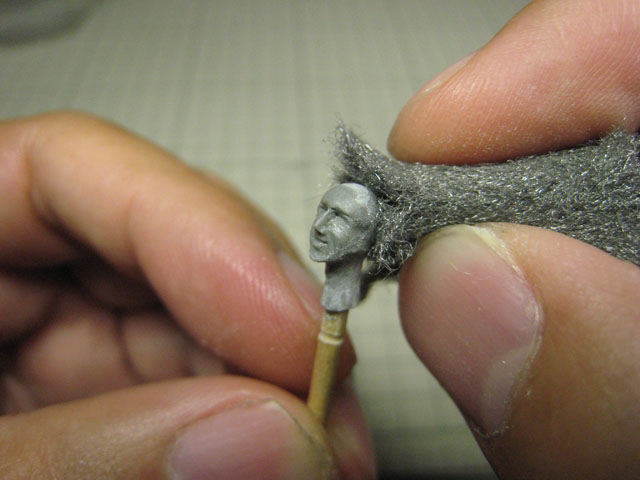
If you think the contours or features of the head look a little too exaggerated for the scale, you can always go back and shave away putty with a hobby knife or sandpaper or even steel wool (0000 grade) to reshape and smooth it out.
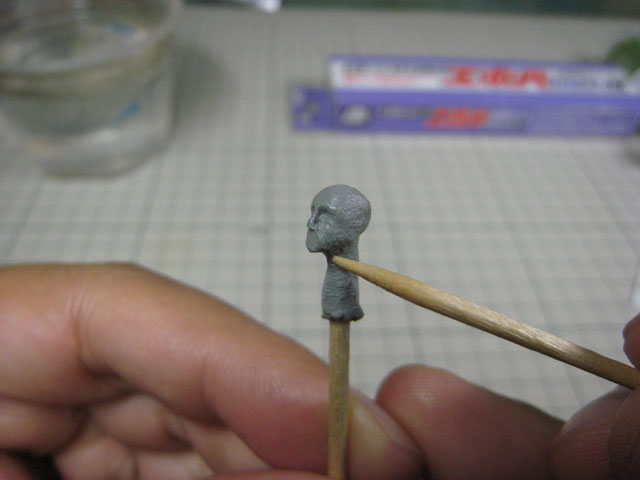
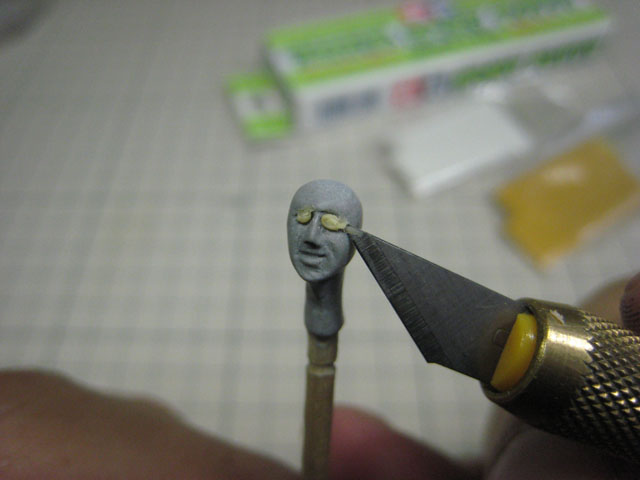
I use the slightly finer grain Tamiya putty for the eyelids and ears. Place a small lump of properly mixed putty in the depression where the eyes go with the tip of a hobby knife, then sculpt to shape.
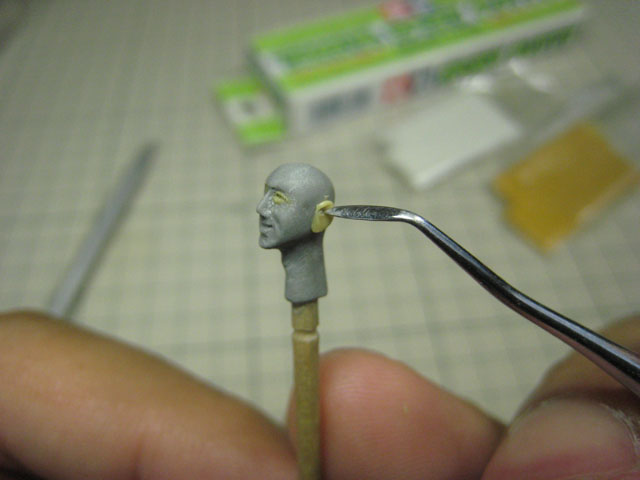
After the eyes I do the ears. The starting shape is pretty much the same as the eyes!
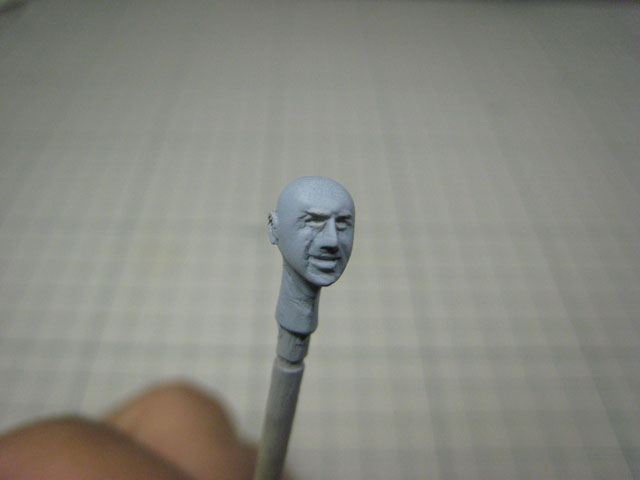
Once everything is shaped the way you want it, smooth out the surfaces with a brush soaked in lacquer thinner.
Finally, spray the finished head with a surfacer such as GSI Creos’ Mr. Surfacer 1000 or similar. From the start up to this point took me about five hours, including time waiting for the putty to harden. Actual work time was only about an hour.
These days there are plenty of aftermarket replacement heads available for 1/35-scale figures, but even if your sculpt isn’t quite as polished as some of those off-the-shelf items, wouldn’t it be nice to have a never-before-seen all-original head that you can proudly say you made yourself? Give it a try!


Blargg
Absolutely stunning. It’s like magic.
You say to use a finer grain Tamiya putty for the eyes and ears, but do you mean to mix the putty differently? Or are there types of Tamiya putty that HLJ doesn’t stock?
Would be very interested in knowing, so I might attempt this.
George
I think he meant that the Tamiya was finer-grain than the Gunze putty.
As far as I know, there’s never a situation where you’d want to vary the mixing ratio for this type of putty.
Brian
Hi Blargg,
As George said, Doi-san feels the Tamiya putty has a slighty finer grain, so in this example he used the Tamiya putty instead of the Gunze putty to do the eyes and ears (the head itself is the Gunze putty). No actual mixing together of the putties; he was just using the Tamiya putty separately for the eyes and ears, because, again, he feels that it has a finer grain. HLJ stocks both the Tamiya and Gunze putties used in this blog, as linked in the blog itself.