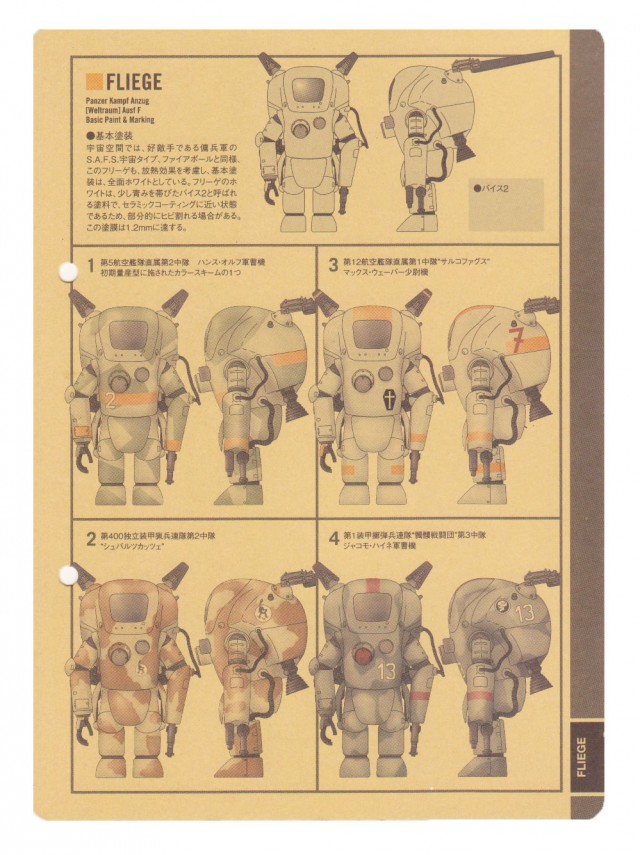
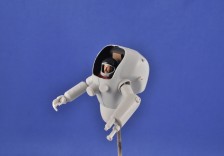
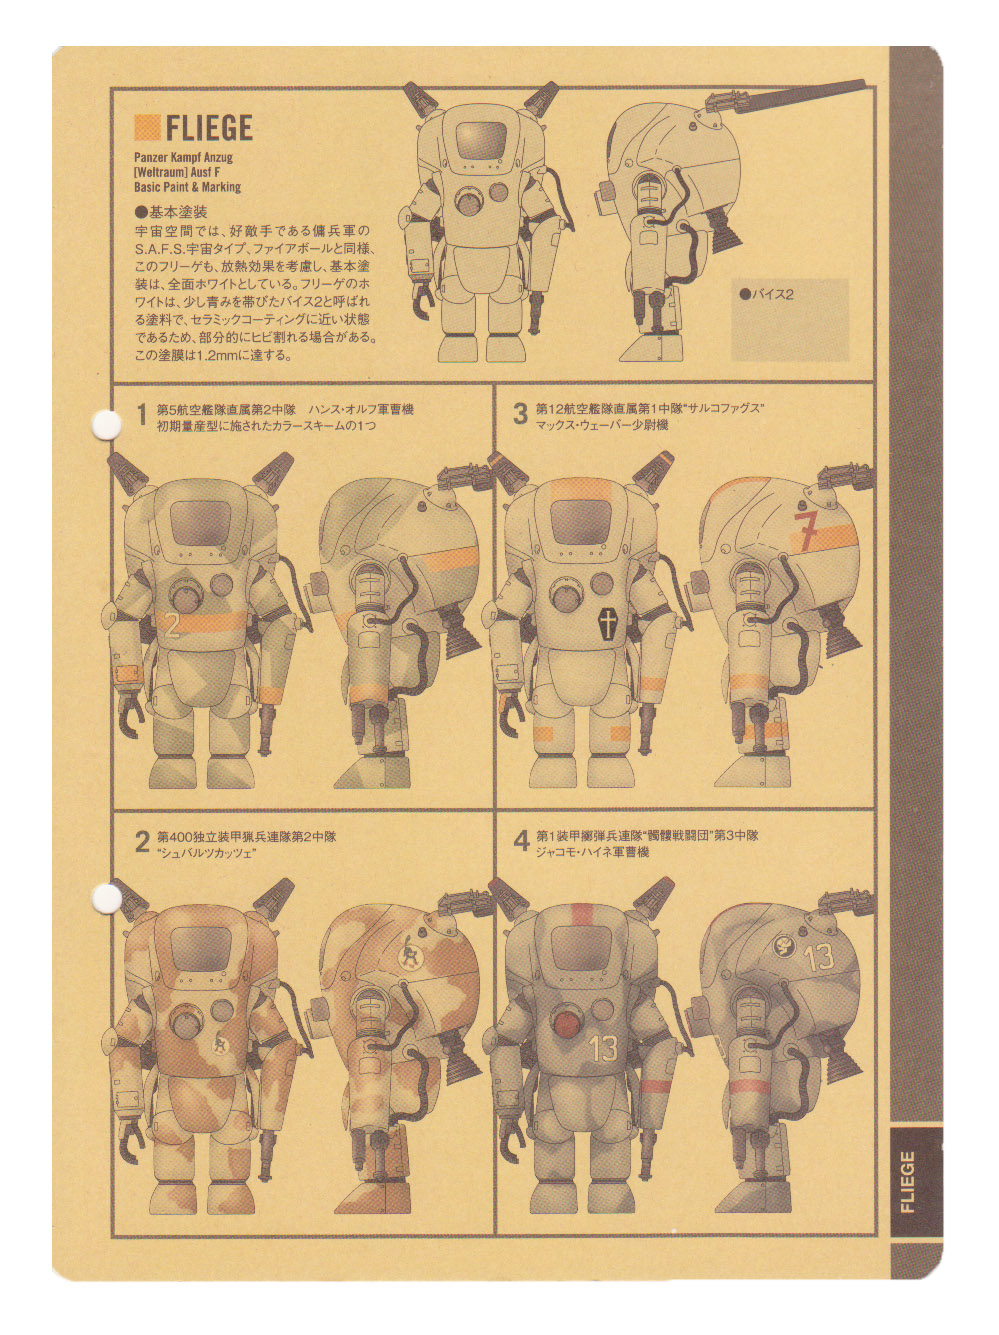
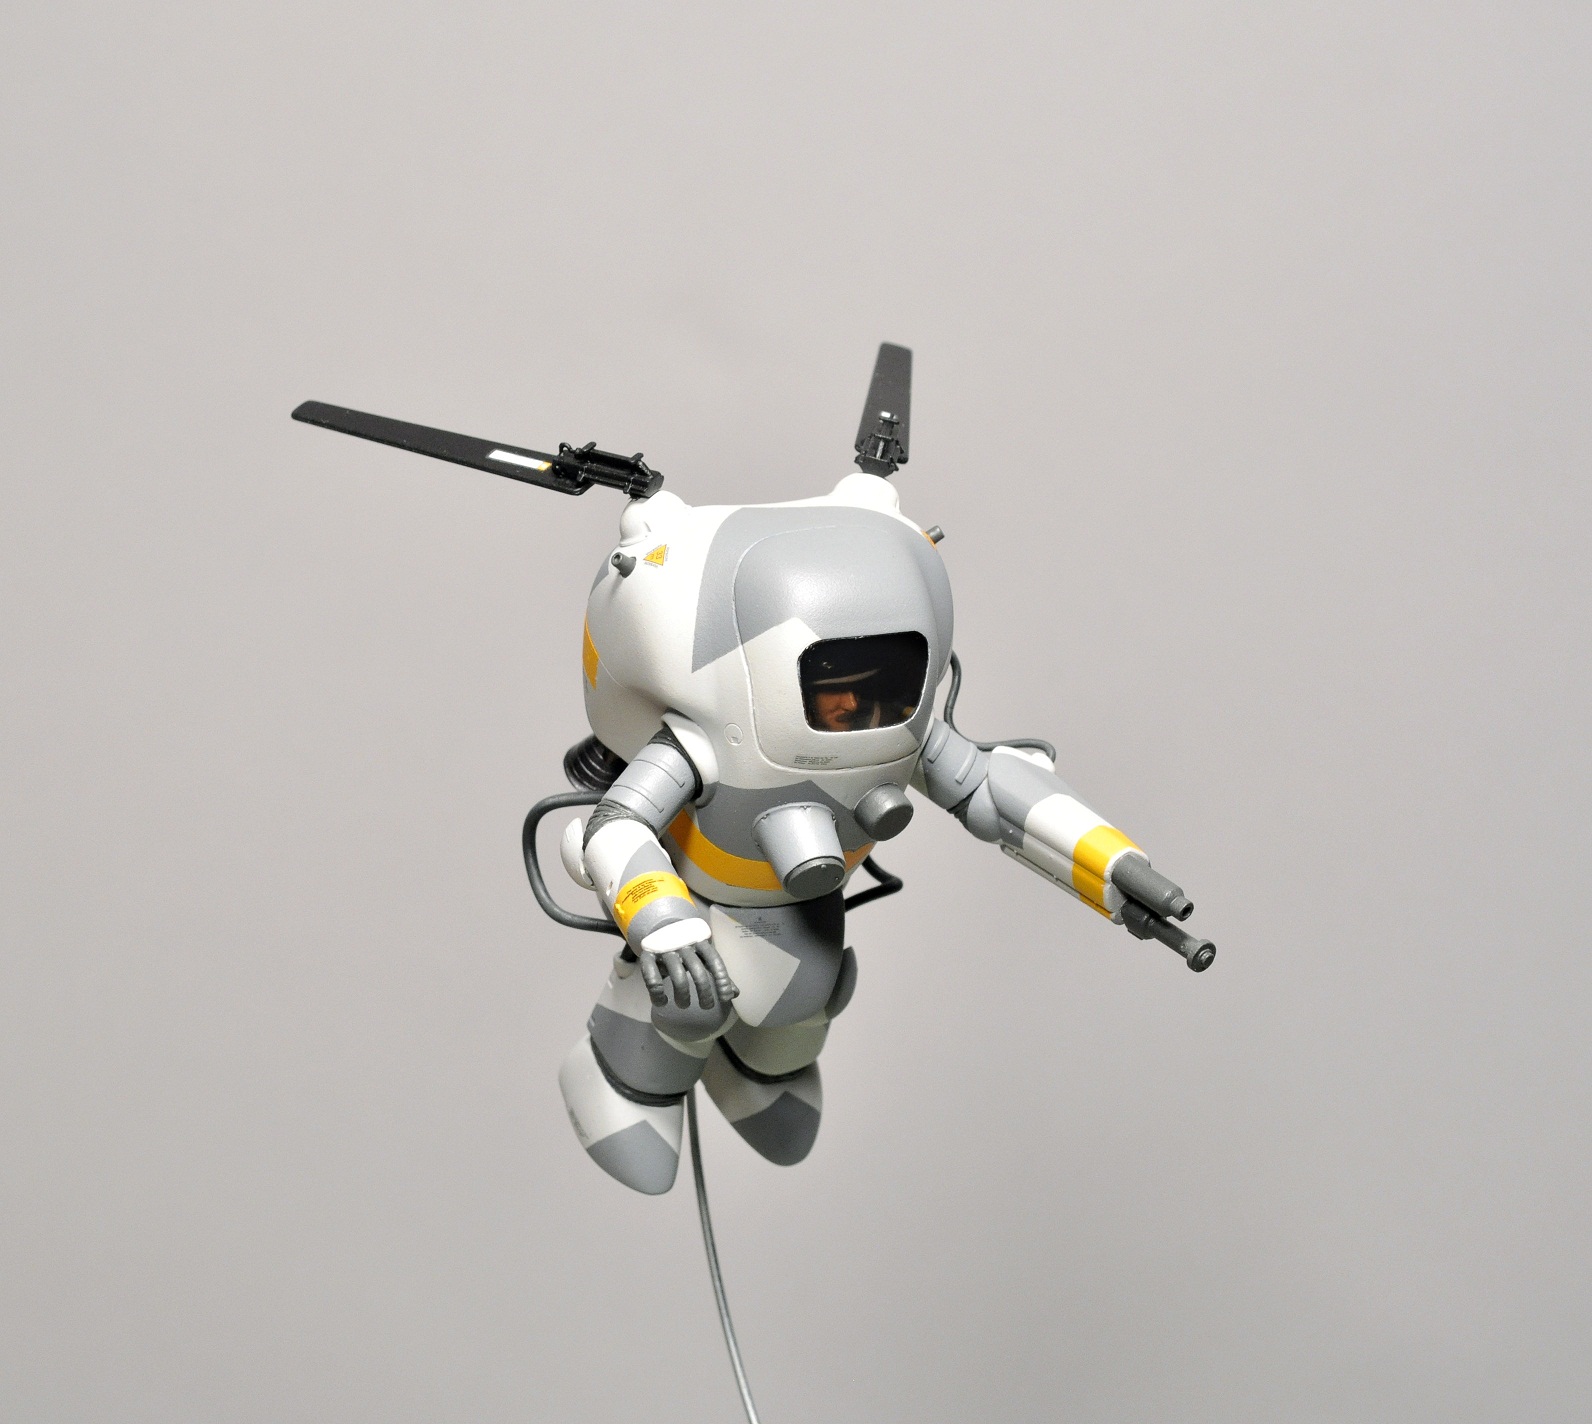
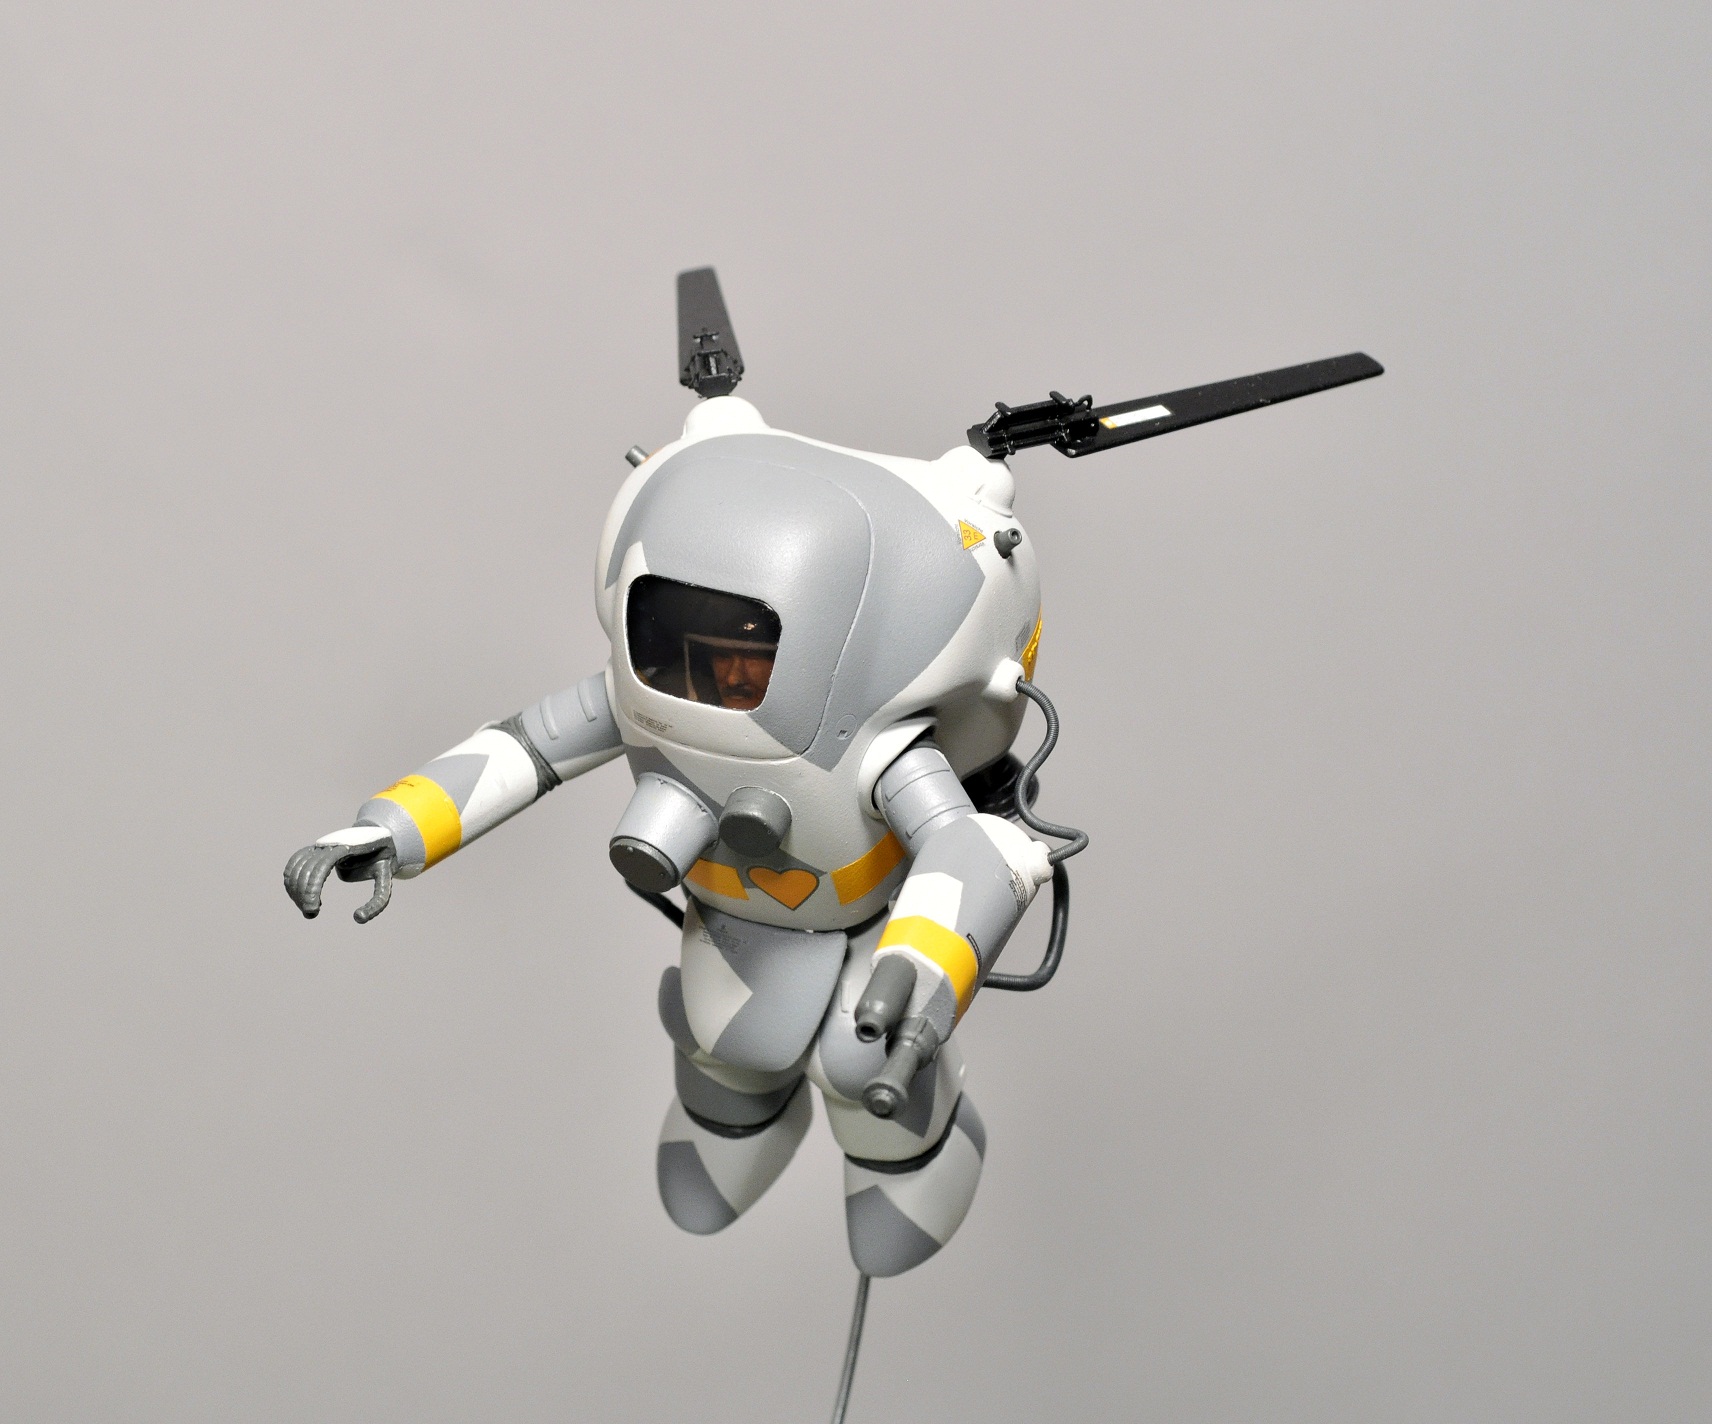
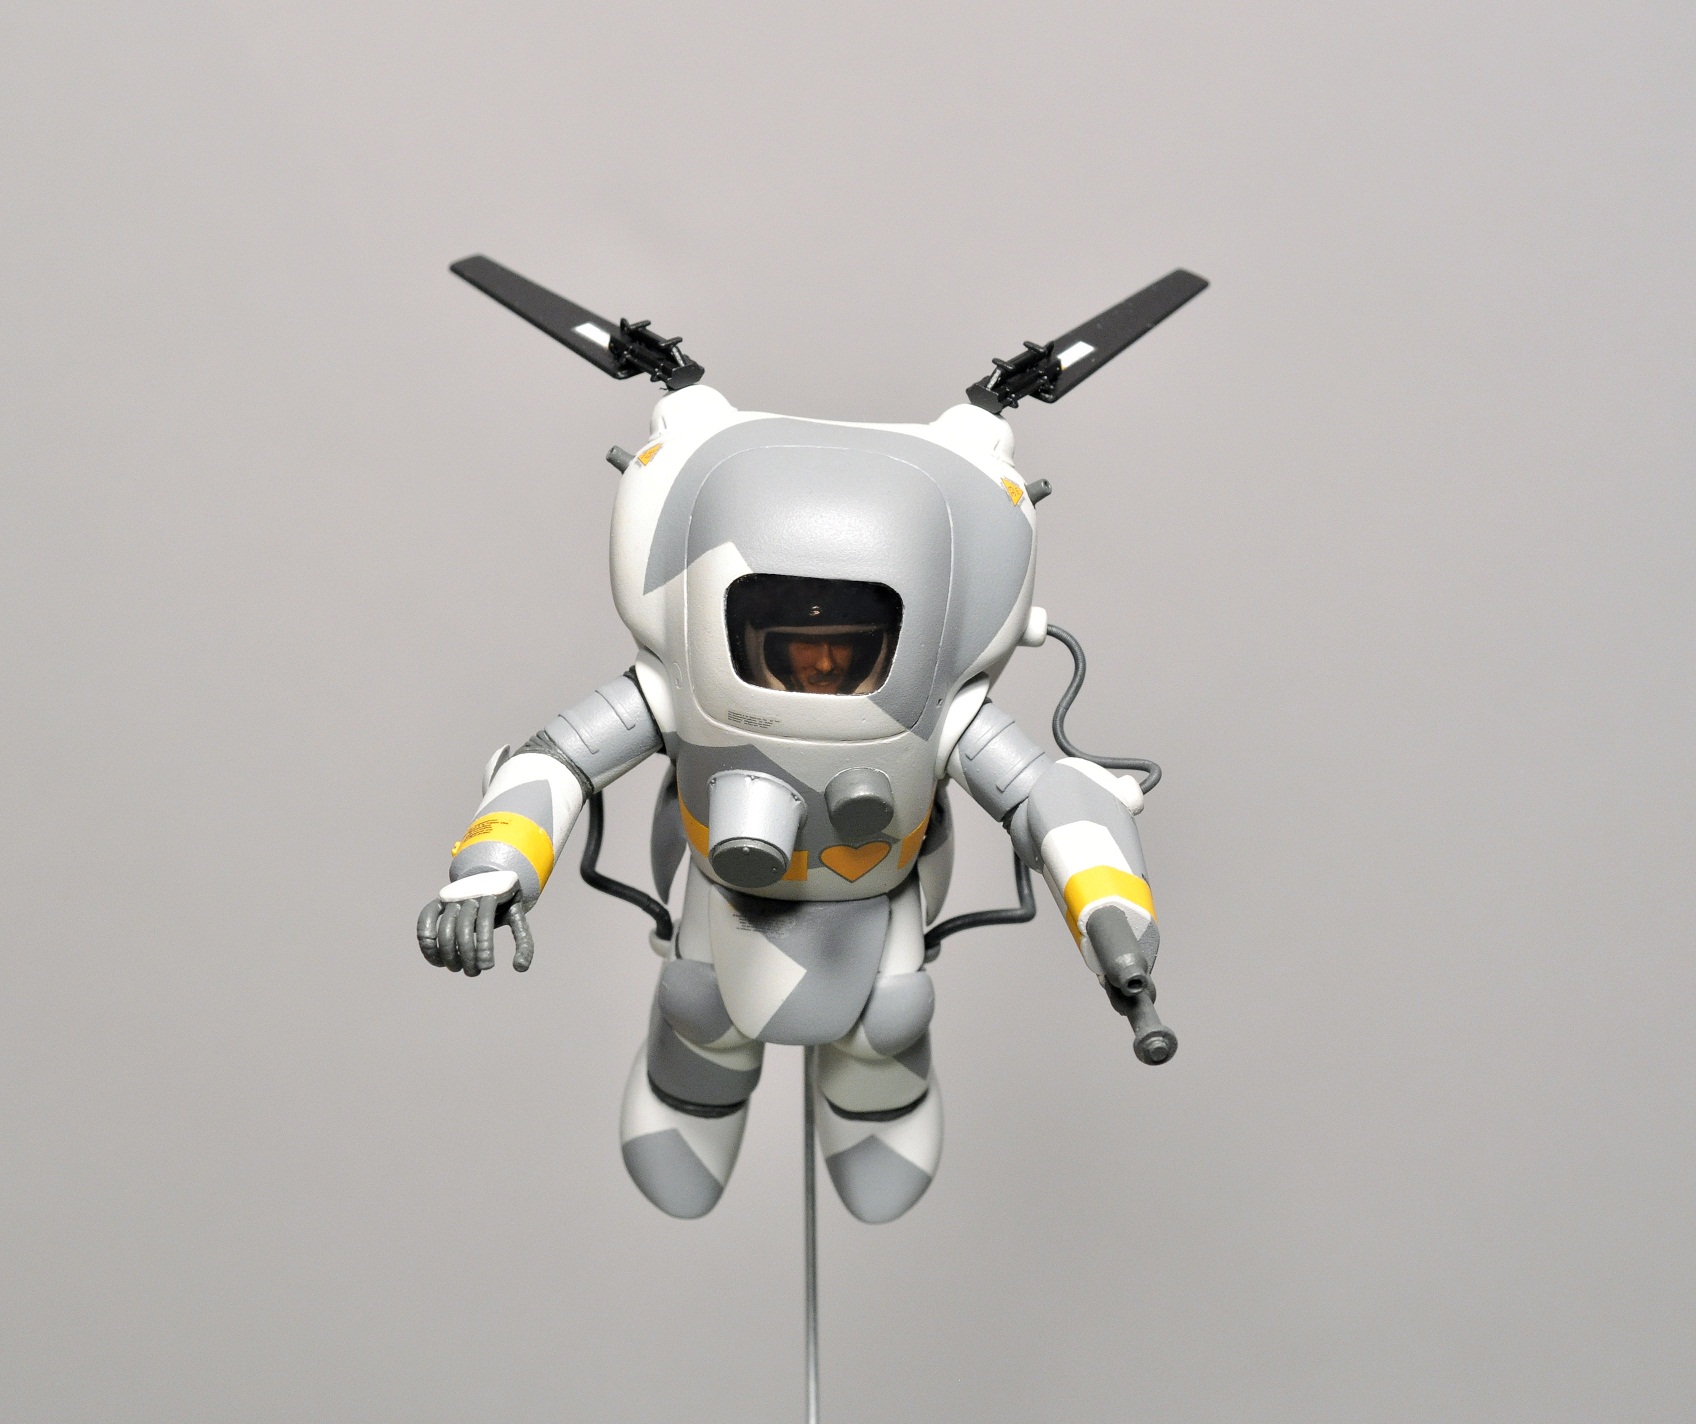
In the last post all the parts had just been assembled and ready for paint. Each Ma.K kit always come with a collectible punch card displaying various camo schemes of the different fictional mercenary groups. I decided I liked one of the color schemes on the card which had a very geometric two toned grey camo pattern and yellow I.D. bands.
The first step was to give all the parts an even coat of primer. For this I used Mr. Surfacer 1200 to fill in any tiny scratches and prepare the surface for paint. Then I laid down a coat of the base grey for the camo pattern and once that had dried i then masked off the areas for the darker grey sections.

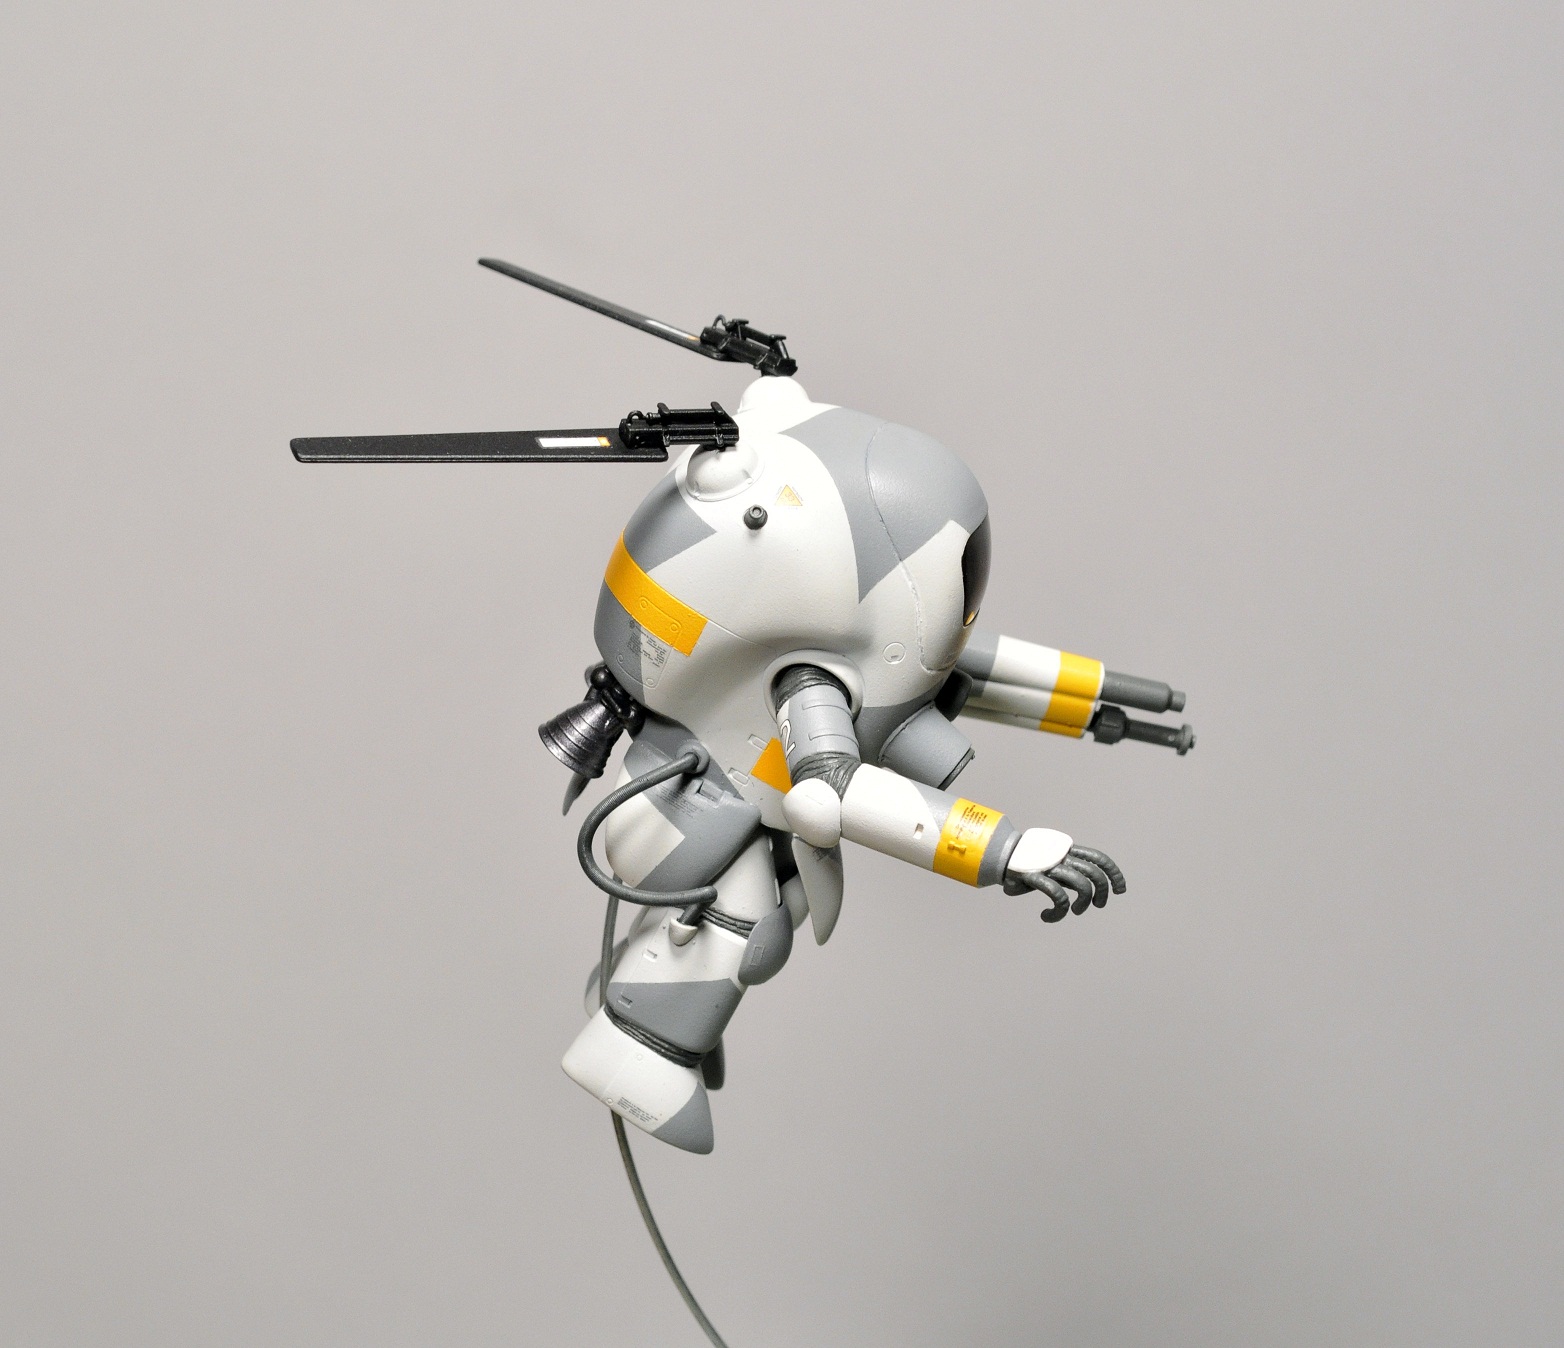
Since it was very geometric and angular I was able to use the masking method but for more organic patterns you would simply airbrush them or even hand paint them on. Once the light and dark coats had dried i then masked off the sections for the yellow I.D. bands. Once the larger sections of paint were laid down I then hand painted other smaller elements such as the joints, hoses, hands and weapons, and a few elements on the chest. This was done by thinning the paint much as you would for airbrushing and building up thin coats to avoid showing brush strokes. The thrusters and antenna pieces were painted separately and applied afterward. Once all colors were dried I completely assembled all the parts and laid down a coat of semi-gloss over the entire kit for applying decals ( typically you would use a gloss coat but I don’t particularly like gloss coats ). The same card with the various camo patterns also has the indications for where to apply certain decals, I of course went by the book to an extent but also added some personal touches as well such as the numbers on each bicep from separate Ma.K decal sheets and the heart to the front of the chest. I applied decal set to each decal as I went as well to ensure they adhered completely to the surface and to help them blend in, then I applied one last coat of semi-gloss to even everything out. After all the painting was done I then removed the masking from the cockpit window to reveal my mustachioed pilot once again. As a side not do not use any sort of super glue or similar glues for clear pieces such as the cockpit window as these glues will blush and dry out the finish ( I learned the hard way ). If this does happen simply apply a clear coat to the piece and it should be good as new. There is a small hole made in the bottom of the kit to accommodate a wire for display purposes.
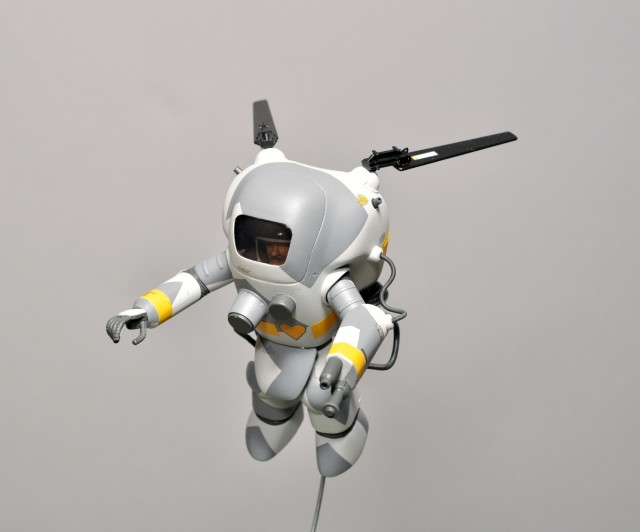
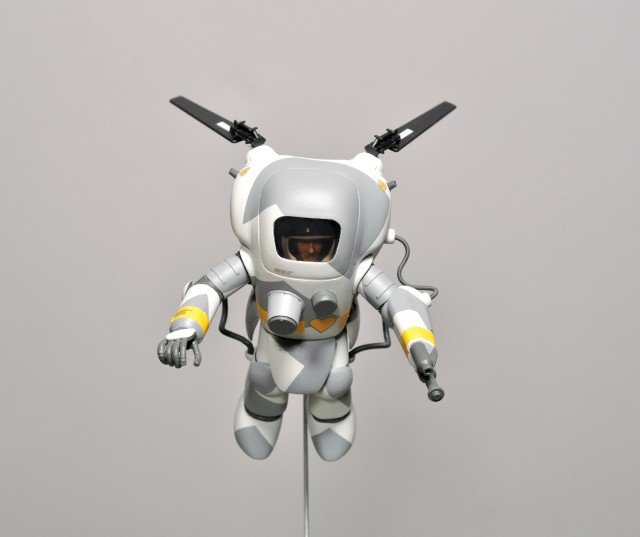
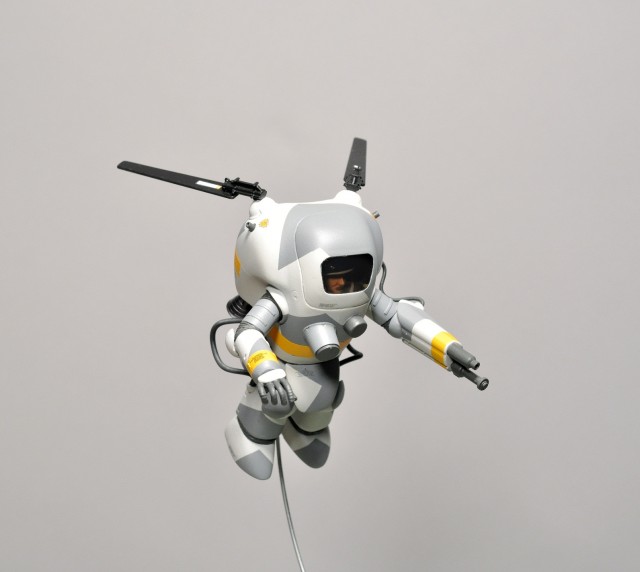
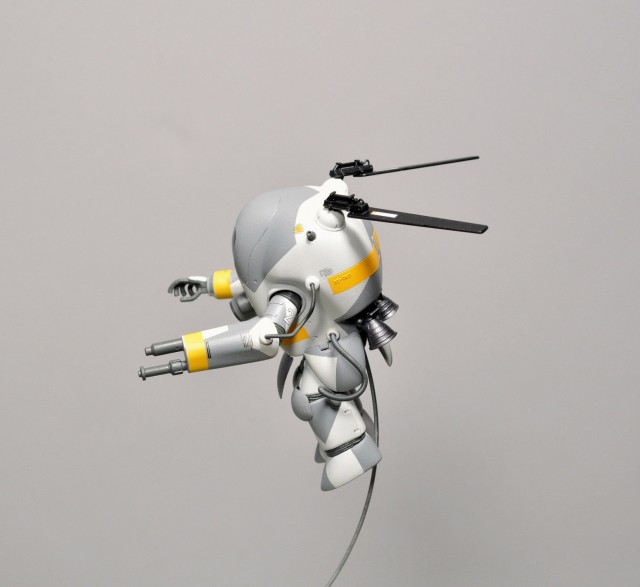
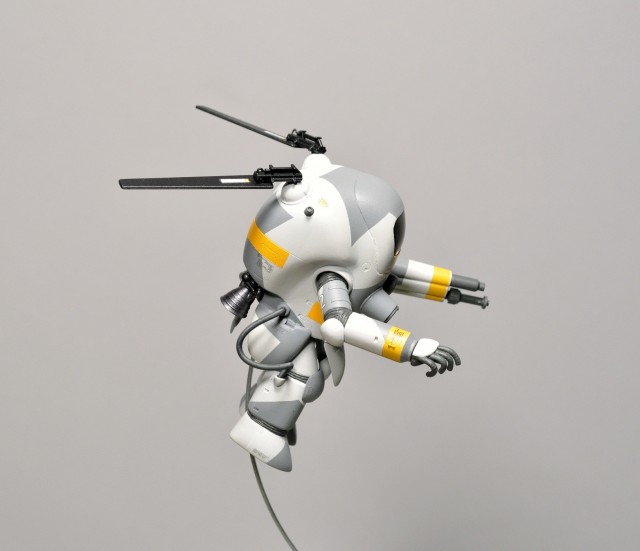
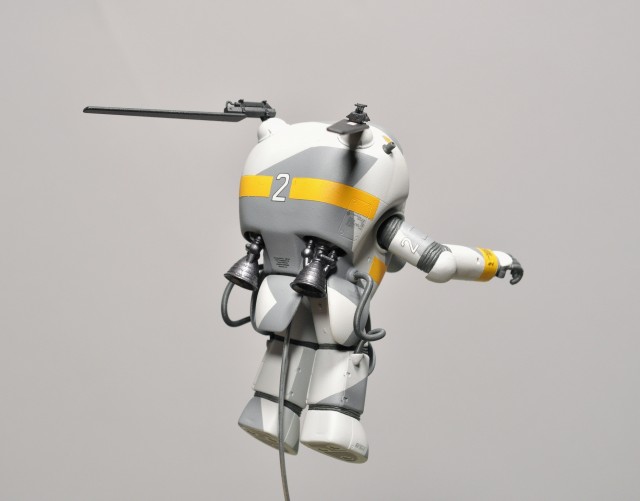
I skipped the weathering step for this particular kit because i wanted a somewhat factory new style to it, this Fliege has yet to see any battles. I have to say those flexible hoses have to be one of the most fun aspects to this kit. And there you have it the fully completed 1/20 Fliege, and keep an eye out or more Ma.K kits on the way!


Joe R
That looks awesome, great job!