Author: Enrico Asa no Hoshi

HGUC Galbaldy Beta Build Part 8: Painting II
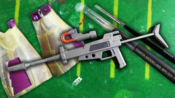
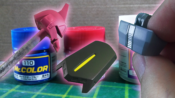
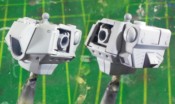
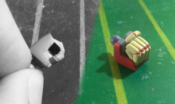
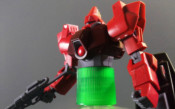
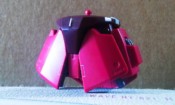
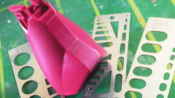
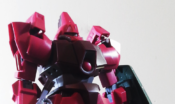
Hey, Gunpla fans! This is part 8 of the Galbaldy build series. Last time, we began the painting process by spraying most of the main colors. Today we will be spraying some more color and a gloss coat to protect our work. More masking Just like in the last update, we need to do a bit of masking work, mostly on the magenta parts. The vents on the back of the legs will require some extra effort, sinc...

HGUC Galbaldy Beta Build Part 7: Painting I
What’s up, everyone? It’s Enrico again, back with a new update on the HGUC Galbaldy Beta. Today we’re going to begin laying down some colors.This and the next update, just like the priming post, are not going to be full tutorials, but rather reports of my progress on this build. Naturally, this doesn’t mean you aren’t going to learn! You will find a few tips in these ...

HGUC Galbaldy Beta Build Part 6: Priming
Hey everyone! We’re back with a new update on the Galbaldy Beta build. Last time we sculpted new fingers with epoxy putty, and thus the construction stage of the build should be over. But before we can call it a day, priming is needed to check for imperfections on the parts.Primer also helps the paint adhere to the surface better, therefore I consider it a crucial step in the process. Prepar...

HGUC Galbaldy Beta Build Part 5: Modifying the Hand
Welcome back to the Galbaldy build series! This is the last part before we spray a coat of primer on the model and get ready for paint.There is one last modification I want to make to enhance the overall look of the model. It’s not as easy as the detailing we’ve done before, but it’s certainly worth the effort. The starting point The trigger finger hand is fine, but the left hand...

HGUC Galbaldy Beta Build Part 4: Detailing III
Hey, everyone! It’s been a while, but we are back with the Galbaldy Beta build series. Last time, we detailed up the legs and waist. Today, we are going to do the same but with the upper body and accessories. Since most of the techniques we are about to employ are similar to the ones we saw in the previous post, I’ll keep the explanations shorter and focus on the procedures I havenR...

HGUC Galbaldy Beta Build Part 3: Detailing II
Hello! This is part 3 of the build series on the HGUC Galbaldy Beta.Today, we will conclude the detail work on the bottom half of the body, that we started doing in the last post. Styrene sheet details In the first part of this series, I showed you my technique to hide seam lines without having to glue the parts together. I just glue a piece of plastic plate onto one of the parts, and the overhang...

HGUC Galbaldy Beta Build Part 2: Detailing I
Hey, welcome back to the Galbaldy build series! Last time, we did all the basic work needed to get the model ready for the next step: making it our own. Today, we will start adding details to the bottom half of the body. Adding definition Just like in the previous post, we are going to use the trusty Wave carving needle to make the nooks and crannies a little deeper, in order to give the surface m...

HGUC Galbaldy Beta Build Part 1: Basic Modifications
Hey, everyone!My name is Enrico Arezo, I’m a Gunpla modeler from Uruguay, and this is my first time posting on hobbylink.tv. In this series of articles we’re going to build the HGUC Galbaldy Beta, a 1/144 scale kit of a mobile suit from Zeta Gundam, one of my favorite anime in the franchise, along with the original Mobile Suit Gundam from 1979. This kit was released in 2017, and the fi...
- 1
- 2