Have you ever browsed Facebook and spotted those amazingly-built scale kitsets, with perfectly lit, staged, and composed photos? Do you want to snap some nice photos without breaking the bank? Do the geeky sounding terms like ‘fstop‘ and ‘white balance‘ sound totally foreign? Then read on! We will show you how to step up your photo game for those scale works of art you create.
Photography 101
Photography in its purest form is the art of capturing light. It is also full of nerdy, technical terms which can be very confusing. We just want to snap some neat photos to upload to social media or send to a friend right? The biggest thing about photography you need to remember is that it isn’t rocket science. I won’t go as far as saying it is easy, as just like you are aware, those kitset building skills didn’t happen overnight. Practice makes perfect.
Many people ponder what lens and camera is best for shooting our plastic-fantastic creations. The answer is simple: the one in your pocket. Yup, that’s right. If you don’t own a digital camera, your phone will do perfectly! If you do own a digital camera with manual capabilities, then you are in luck as I will include the basics of the geek talk I mentioned above too!
What do I need?
Ok, let’s kick off. Everything you need is easily sourced, so let’s make a list.
1. A white (or differing colored) length of paper. I use a 1.2 x 2.4 meter backdrop. Your local stationery store should have white roll paper.
2. Camera (phone or digital).
3. Tripod (if you are using a digital camera).
4. A model.

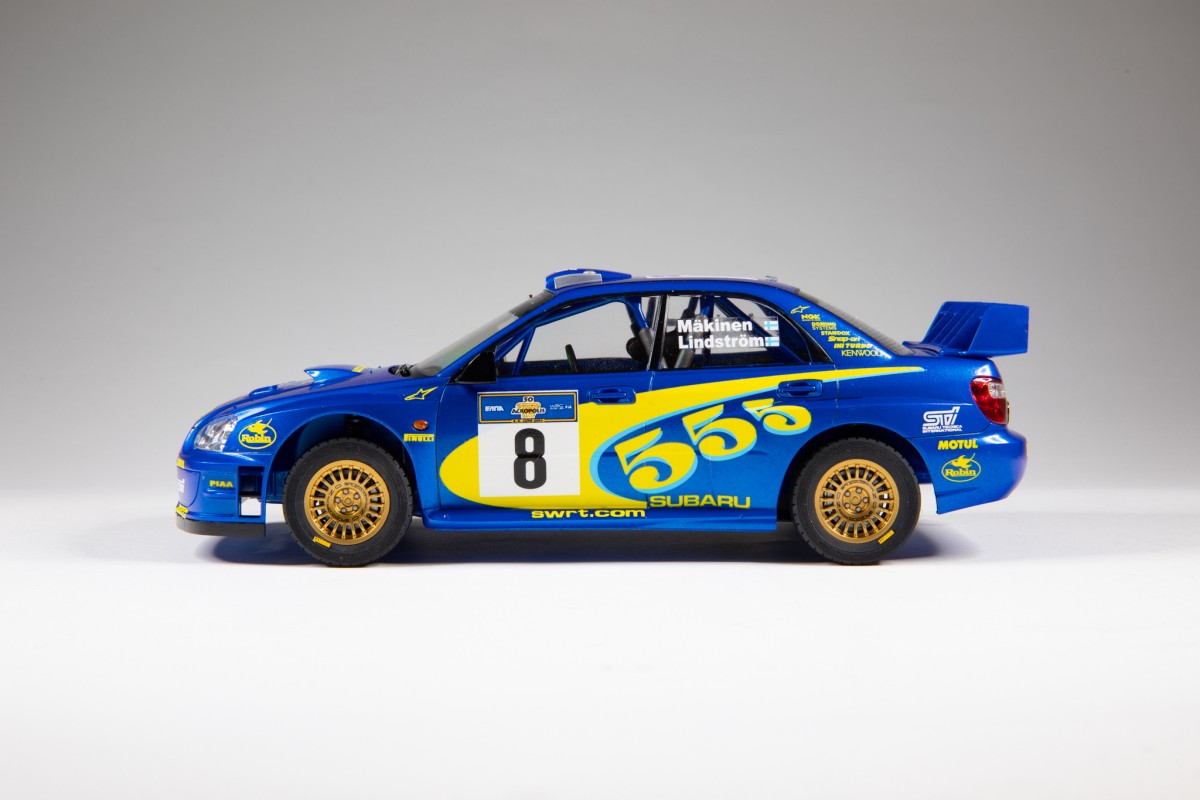
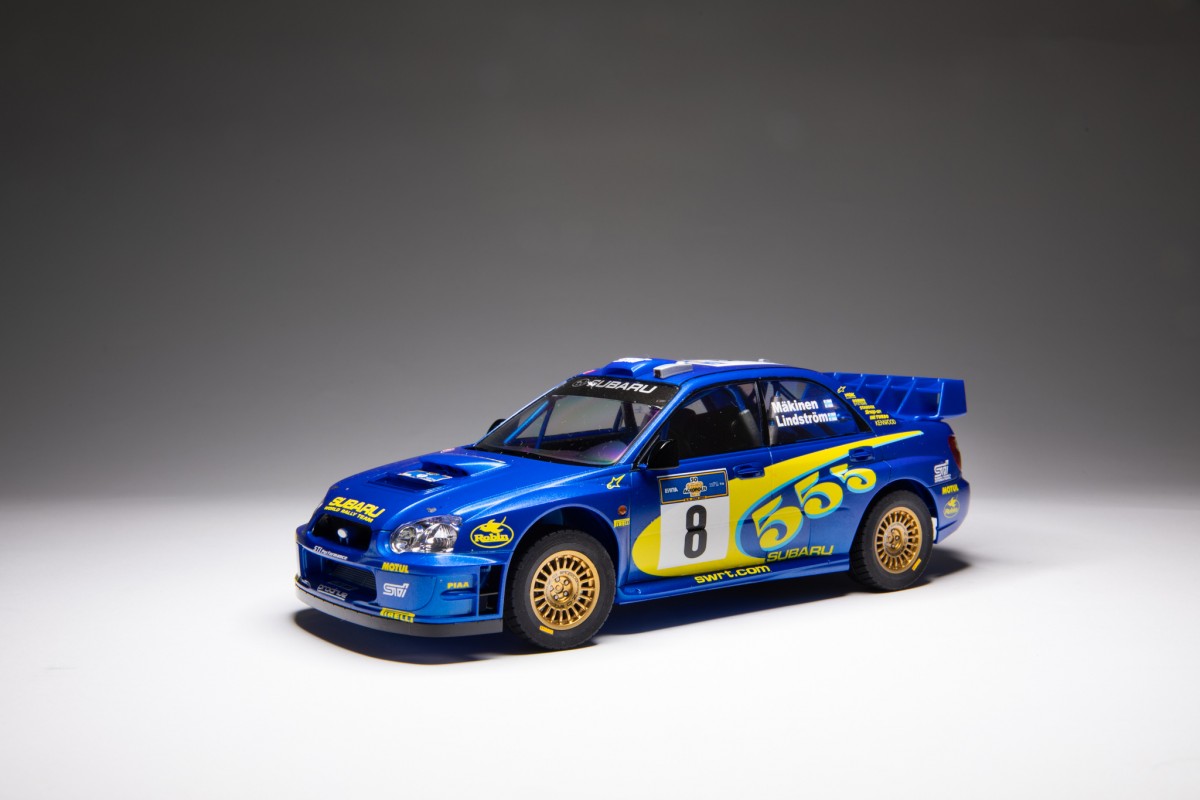
Simple, huh? Above you can see what I typically use. A digital SLR camera and lenses, my smartphone, and a tripod for the camera. The backdrop I use in this guide is actually a length of paper I obtained from a stationery store. It is 2.4 meters long, and 1.2 meters wide. I then took a set of drawers and placed a coffee table in front of them, then I draped the paper from the drawers down onto the coffee table to create a smooth curve.

The gentle curve is key, as this eliminates any 45 degree corners in the background which give off shadows and dark lines you would see running through your photos. I build some larger kitsets so I prefer a bigger backdrop, but a smaller piece of white paper taped onto a cardboard box will achieve exactly the same thing. It all depends on the size of your subject so make your backdrop suit your needs.
Snapping your photos
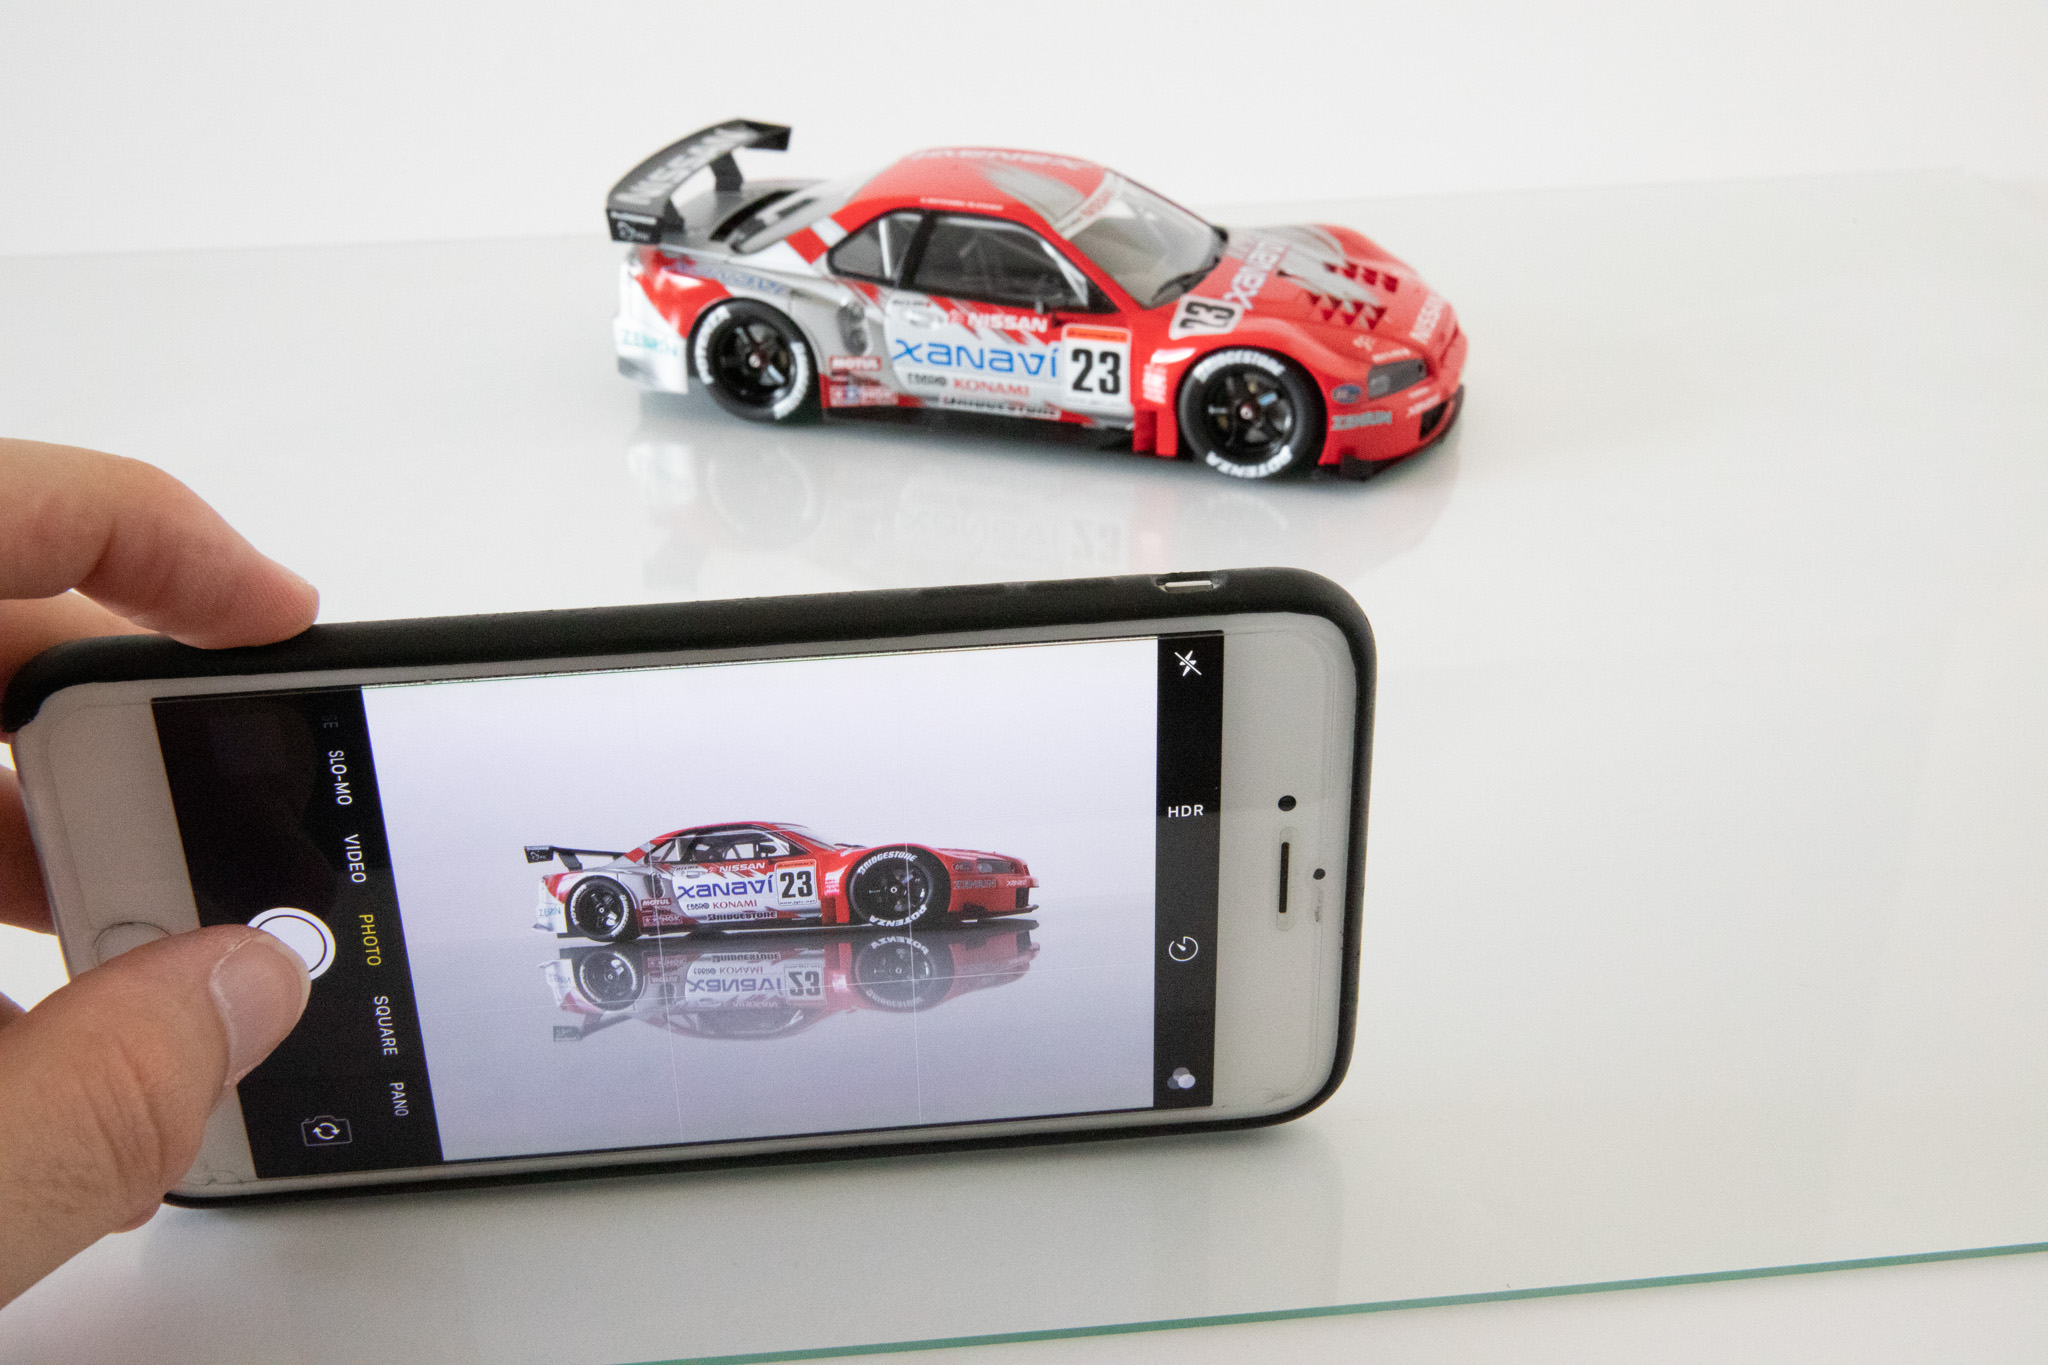
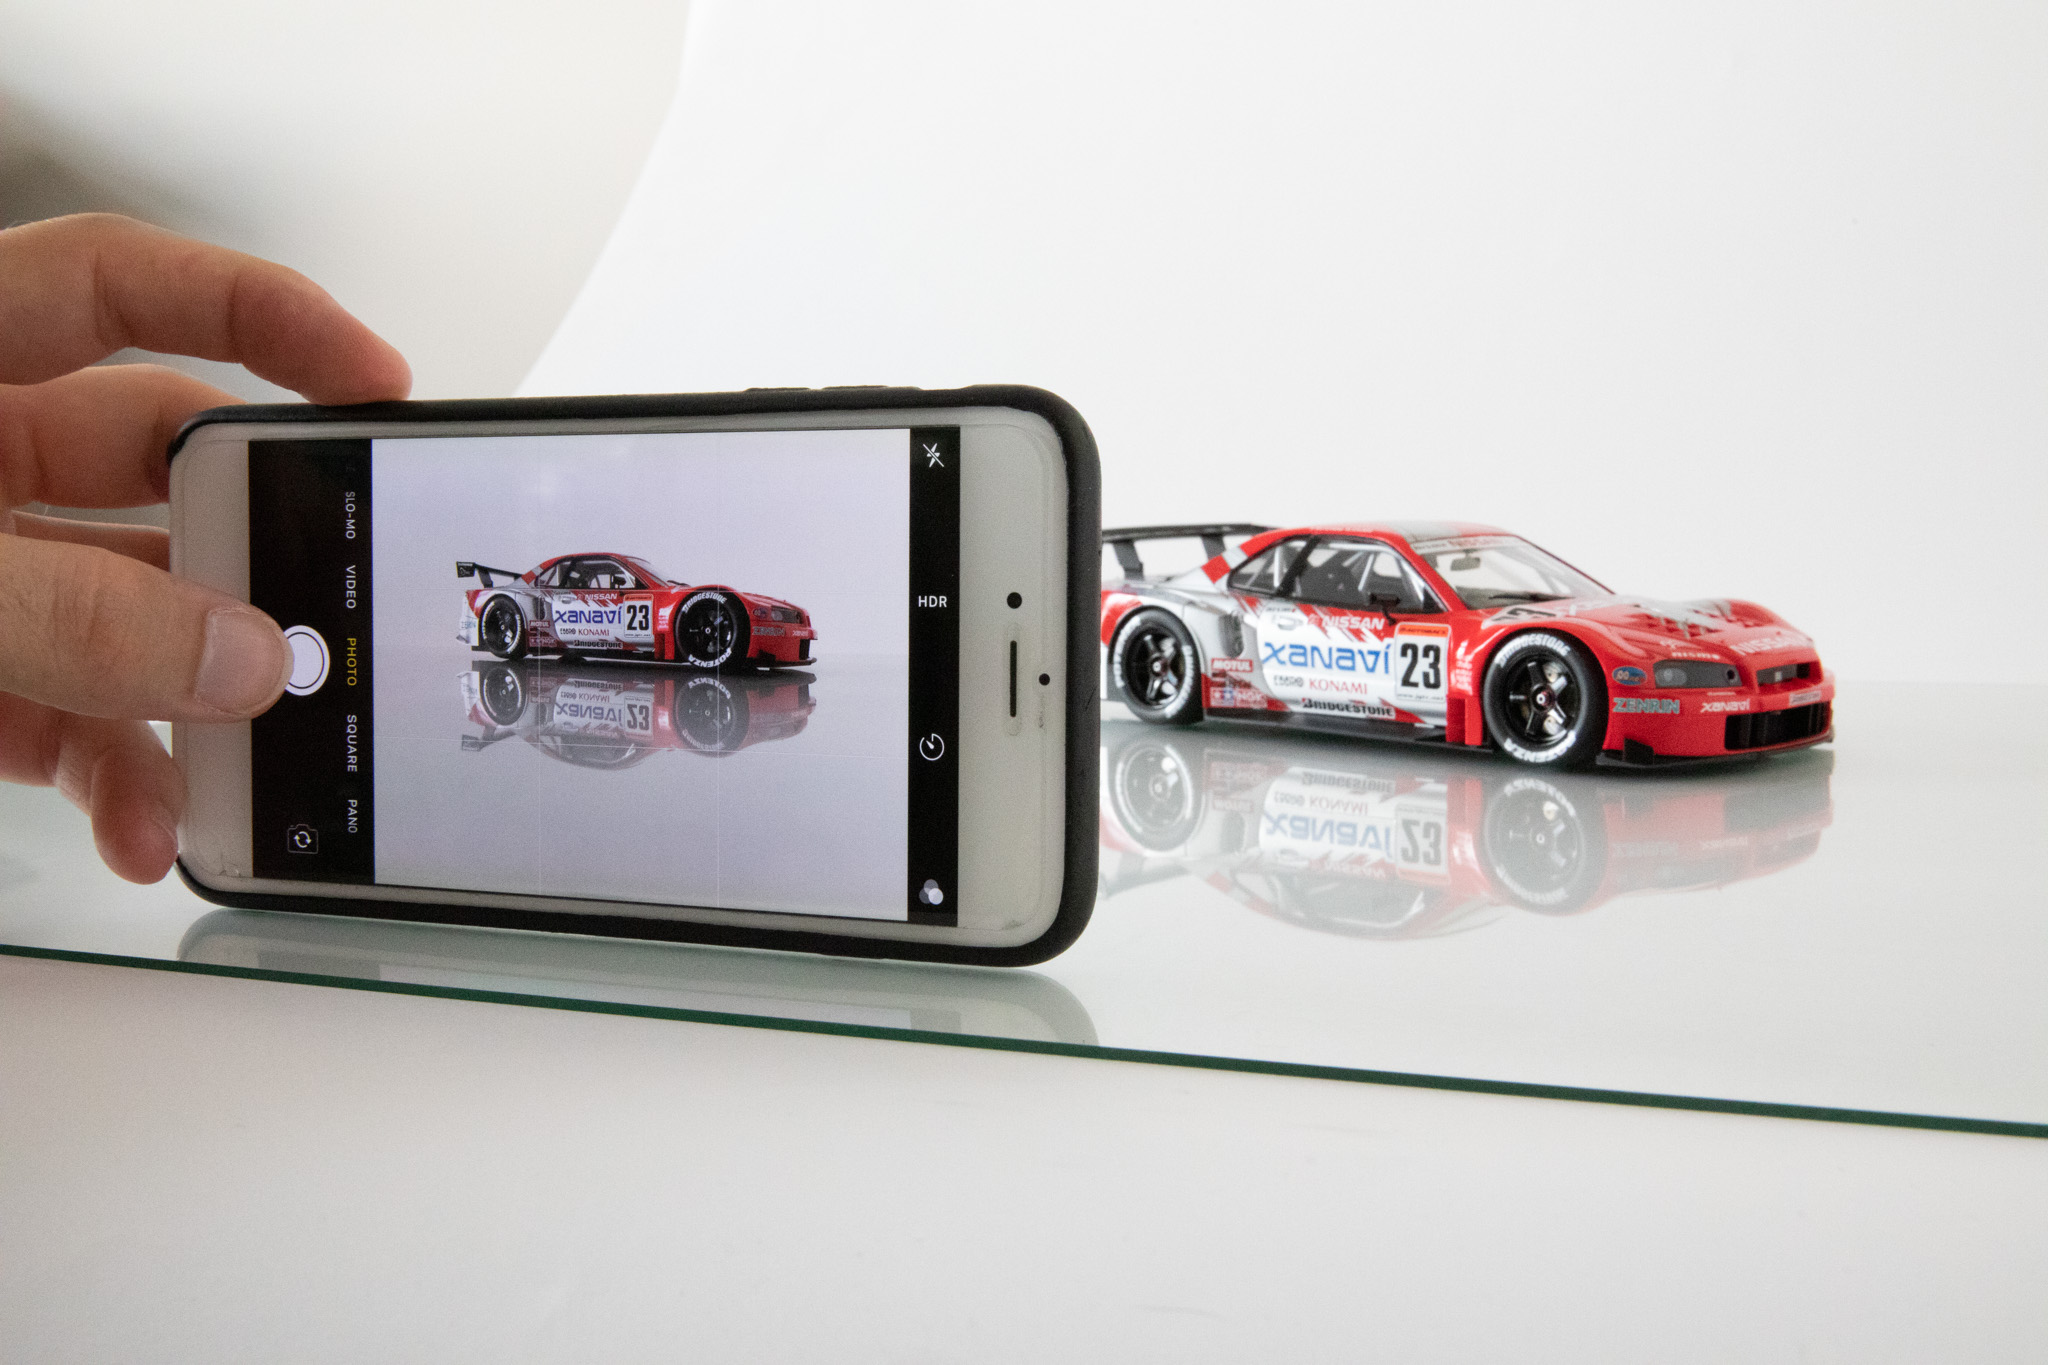
Now that your backdrop is ready for a model, it is time to snap some photos. The key to nice bright photos is, of course, a light source. If your location is a nice bright room you should be able to utilize the bright ambient light. Set up close to a window for a good light source. If using a digital camera set it up on a tripod in front of the paper backdrop and attach your camera.
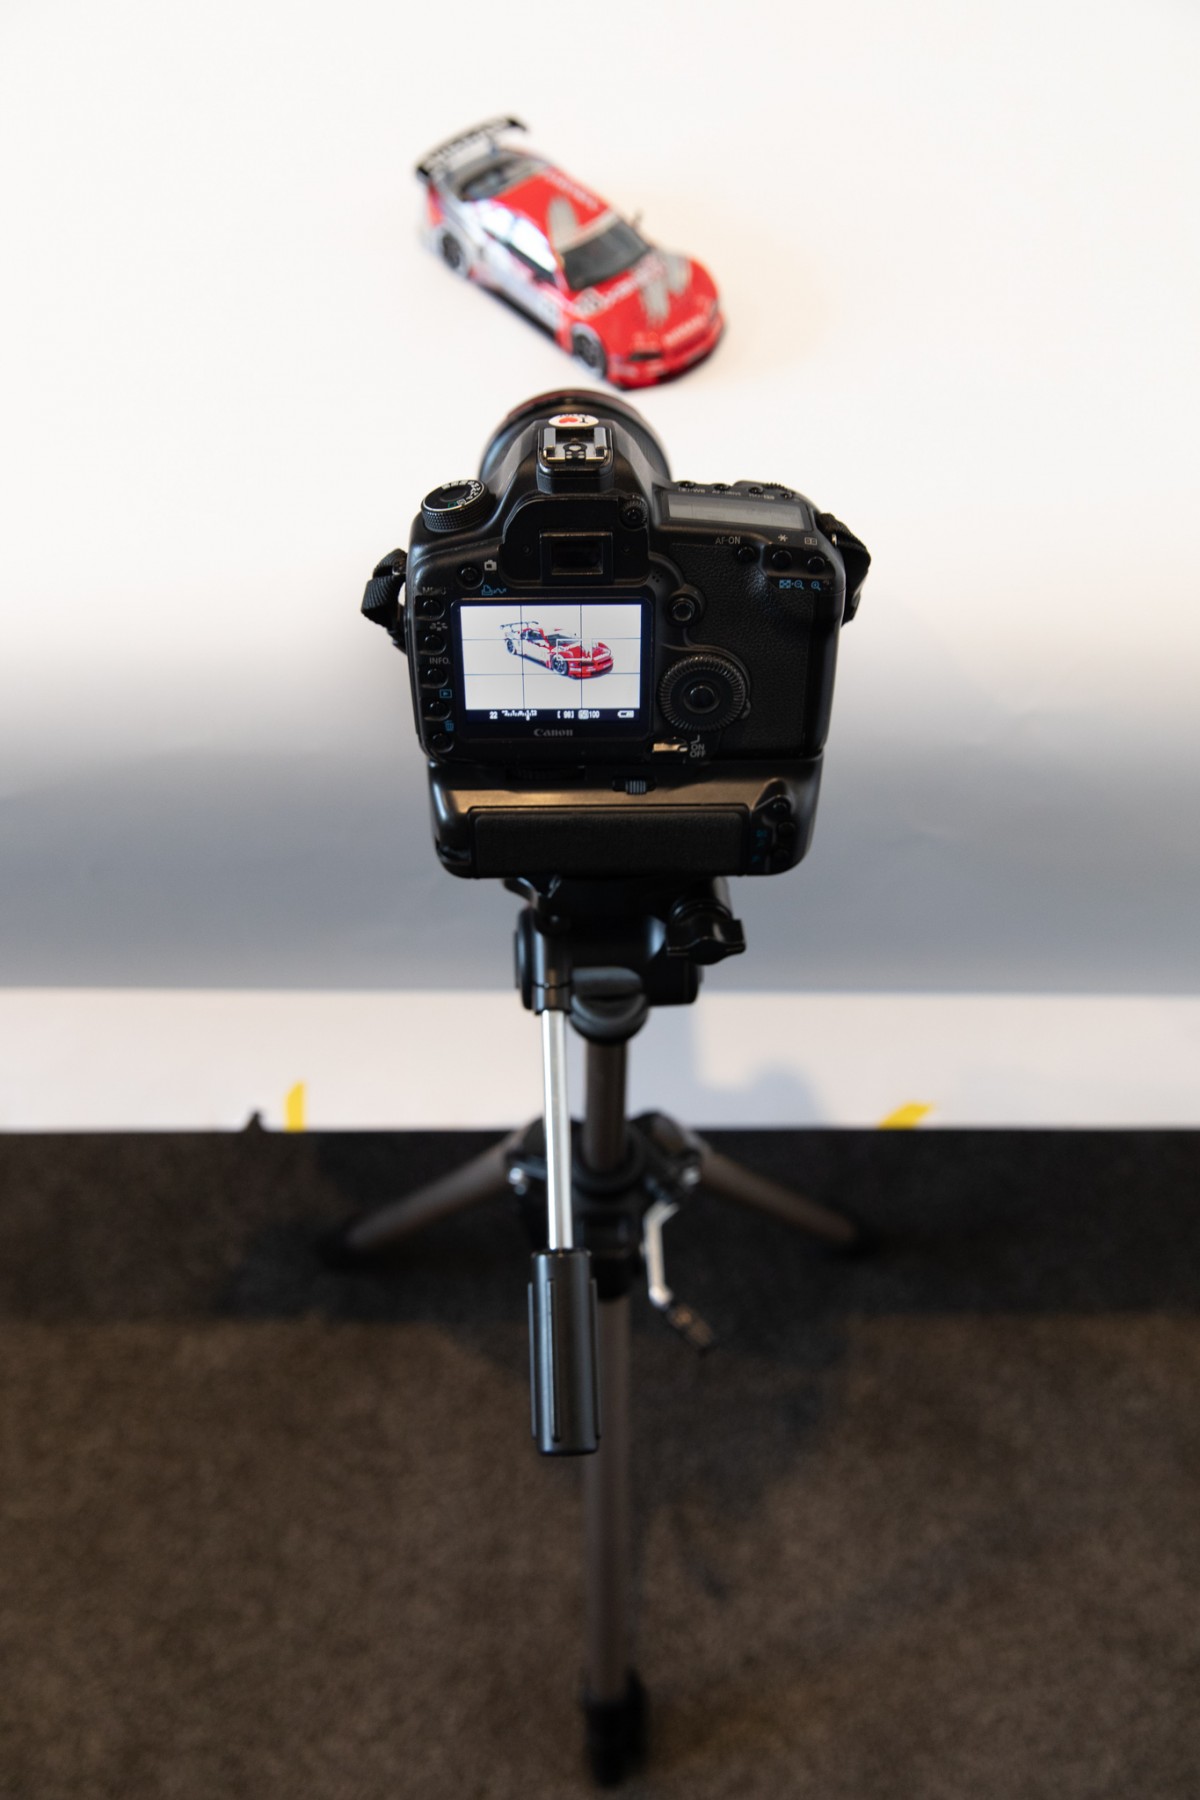
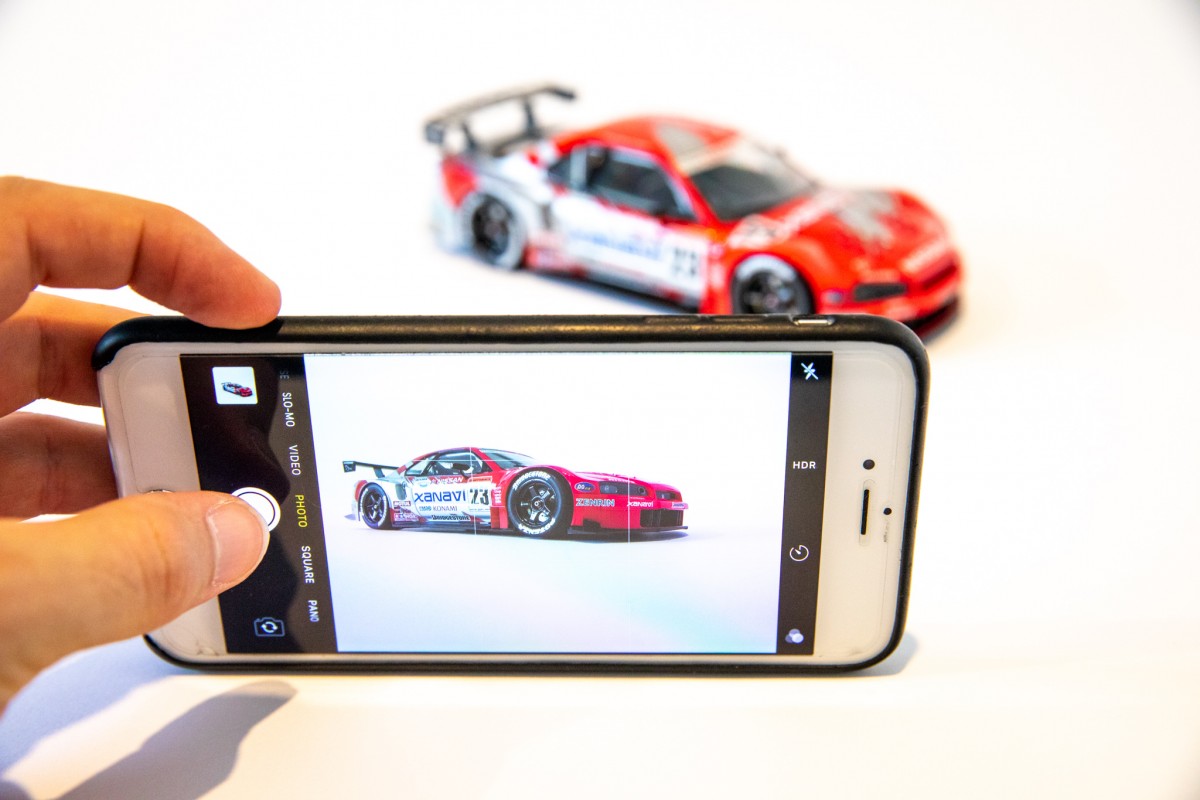
As you can see above, the camera is on the tripod and the model is framed up on the white backdrop. If you are using your phone, then pop the model on the backdrop and flick the phone camera on to auto mode and snap away.
I prefer to shoot on my SLR camera with the following settings as a starting base and will then adjust settings if needed. ISO: 100 / fstop: 16 / shutter speed: 5-25 seconds / +2 stops exposure
If shooting on a cellphone where you can also manually adjust settings, then dabble with those above, and when you have a nicely exposed image then you have hit the sweet spot and you can continue snapping away.
As you can see above, the curved paper creates an optimum backdrop to shoot against, and just like that you have just created your own simple scale photo studio. Experiment with different angles – high and low to achieve a look that you like.
If you are shooting at night and there is no ambient light coming in the windows, a wee tip is to position your backdrop directly under a ceiling light to illuminate the model. Just be aware that light bulbs may have a ‘warm’ (yellow) or ‘cool’ (blue) tint to them which may color your photos. More about that below.
Now, if you are planning on using a digital camera with manual capabilities to shoot, let’s briefly look at some of those geek terms I mentioned before. If you are snapping away on your phone feel free to scroll down a bit, although if it has manual capabilities then these might be of interest to you.
Photography technical terms
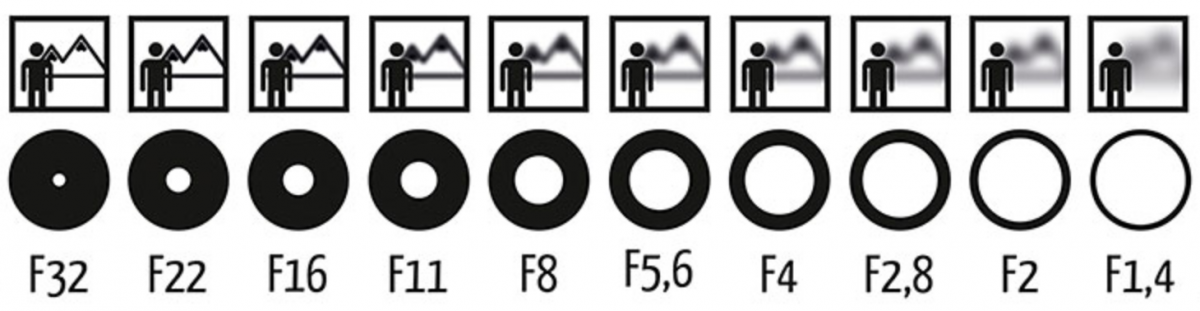
fstop: The ‘focal stop’ or ‘fstop’ ranges from 1.4 up to as much as 32 on certain cameras. These numbers determine how much of the subjects in the photograph are in focus. A wide fstop of 1.4 will mean a small amount of the foreground is in focus and the background is blurred. A smaller fstop of 32 would mean the foreground is in focus and also the background too will be in focus.
White balance: This refers to the color of light. Direct sunlight at noon is considered a normal color temperature (nice and white), and all light is compared to this. For example, light from an incandescent light bulb appears more ‘yellow’ than white sunlight. On the opposite side of the spectrum, shady areas appear more ‘blue’ than sunlight. In photography, we refer to these differences as being “warmer” (or more yellow) and “cooler” (or more blue) than our neutral sunlight reference point.
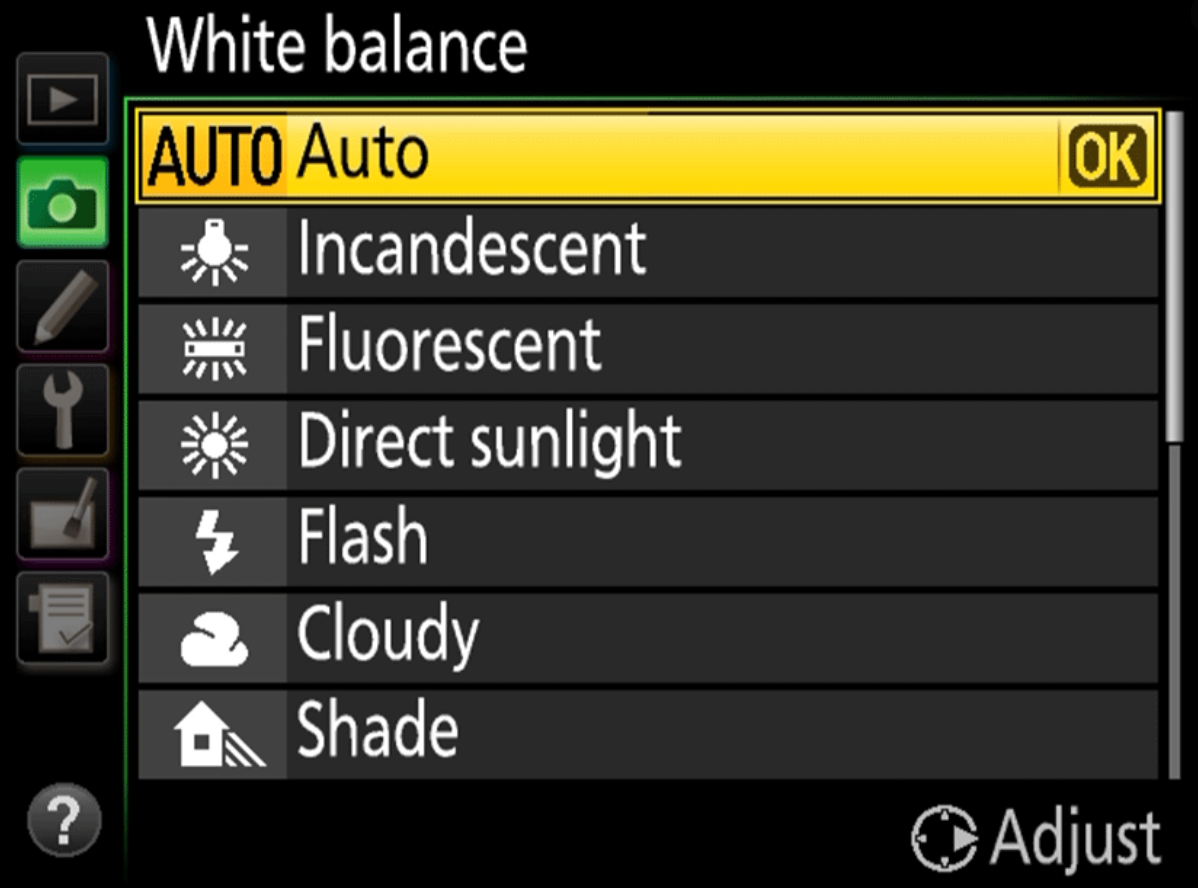
In most instances the camera will detect the white balance setting that best suits the light conditions. Alternatively if you are aware of the type of light, simply adjust the white balance setting in the camera menu and it should give you a nice neutral photo that is much like sunlight. If you are using your smartphone it should automatically adjust the white balance for you if the light is a bit ‘warm’ or ‘cool’ so the photo comes out nice and neutral.

Light and reflections
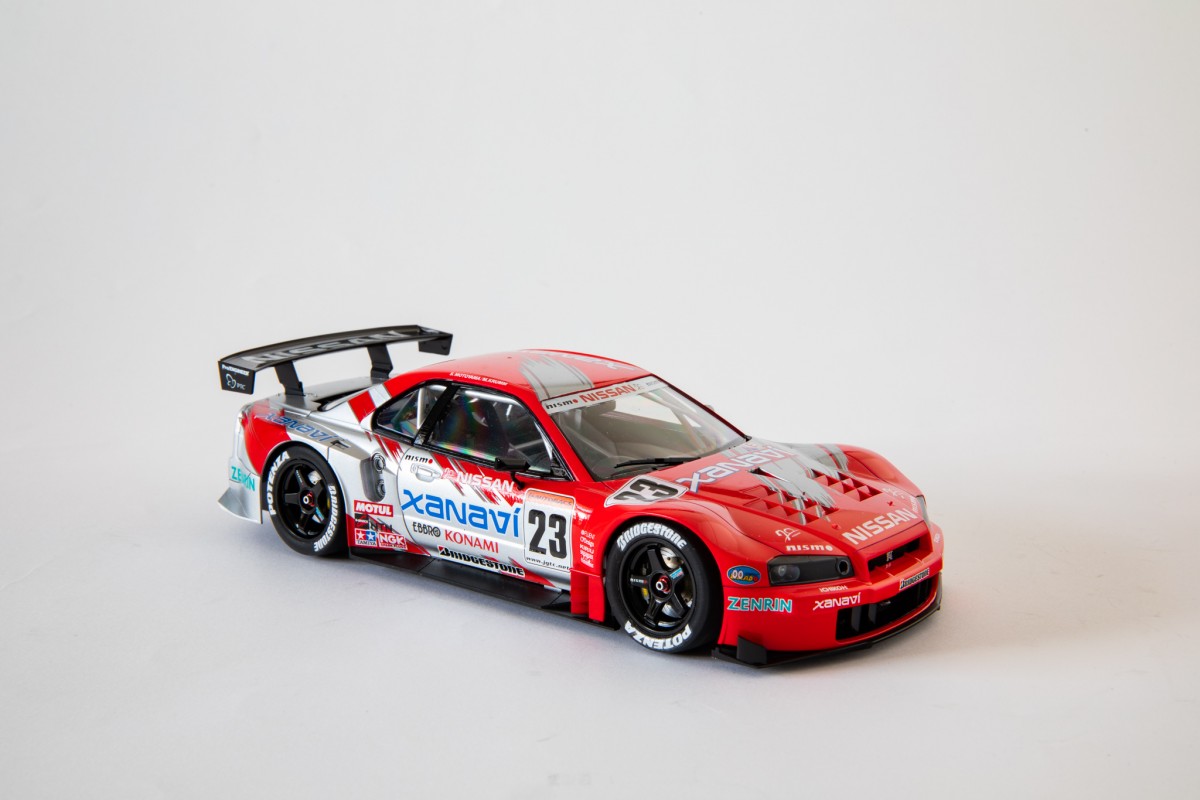
As I mentioned before, photography is the art of capturing light. Some photos you see will have a backdrop and no shadows as shown below.
Others show a light source coming from a single direction which in turn cast shadows as per real life.

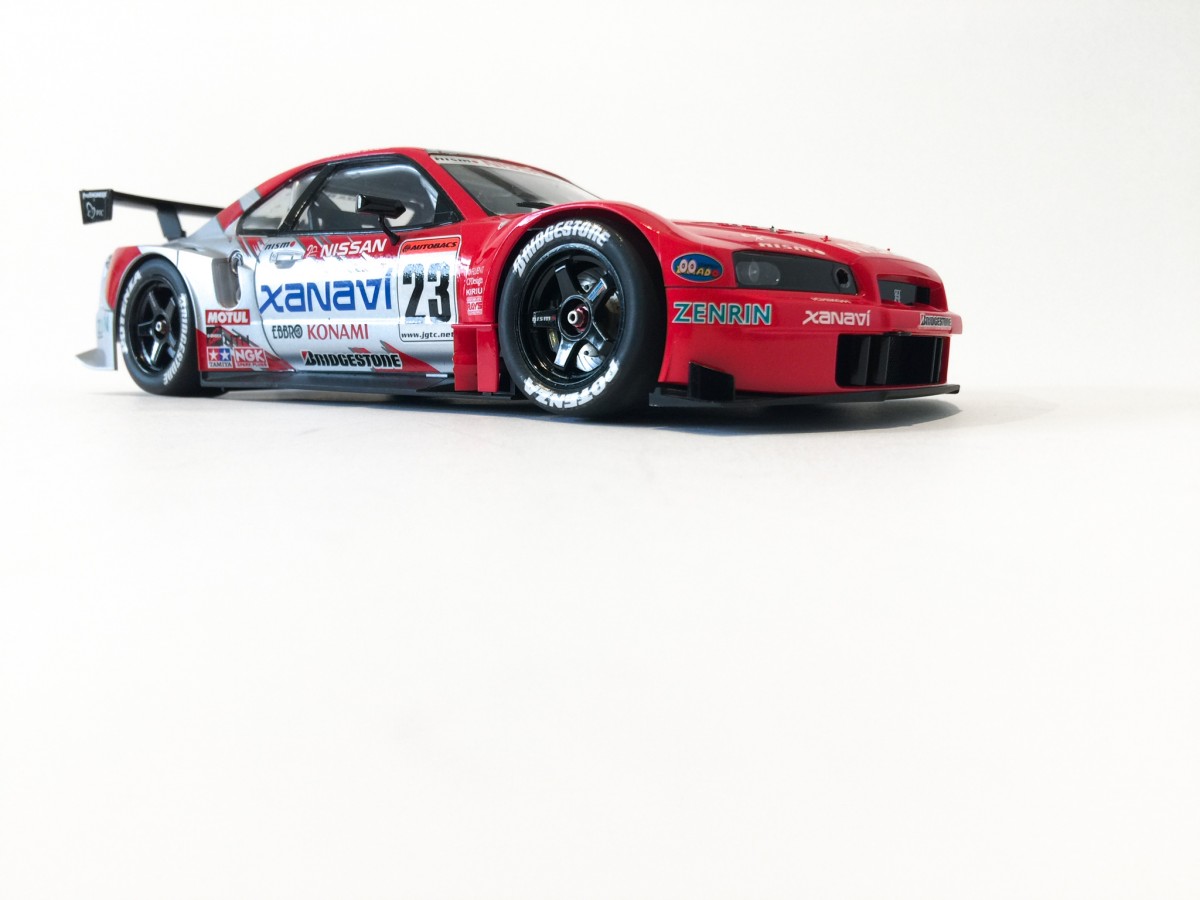
Playing with shadows can be a lot of fun and change the feeling of the images you produce. I predominantly build automotive kitsets, and with glossy paint and clear windows. The kitsets give off reflections depending on the light source and direction you are looking at them from. There is a clever little device that allows you to manipulate these reflections if you would like to step your photographs up just that little bit extra.

Above is a Circular Polarising filter commonly known as a ‘CPL’ in photography circles. They are available for both digital cameras and smartphones. They attach to the end of the lens and have a top piece of glass that rotates, and in turn changes the way light reflects off a subject. I use this to make sure my windshields and large panels don’t have that white reflection beaming off them. The reflections don’t disappear totally, but they shift allowing you some control over where they sit on the subject.
In the above photo I wanted the windshield and the top of the hood to have no reflection. So with a half twist of the filter the reflections suddenly shift off that area of the car and the desired area is just that… as seen below.
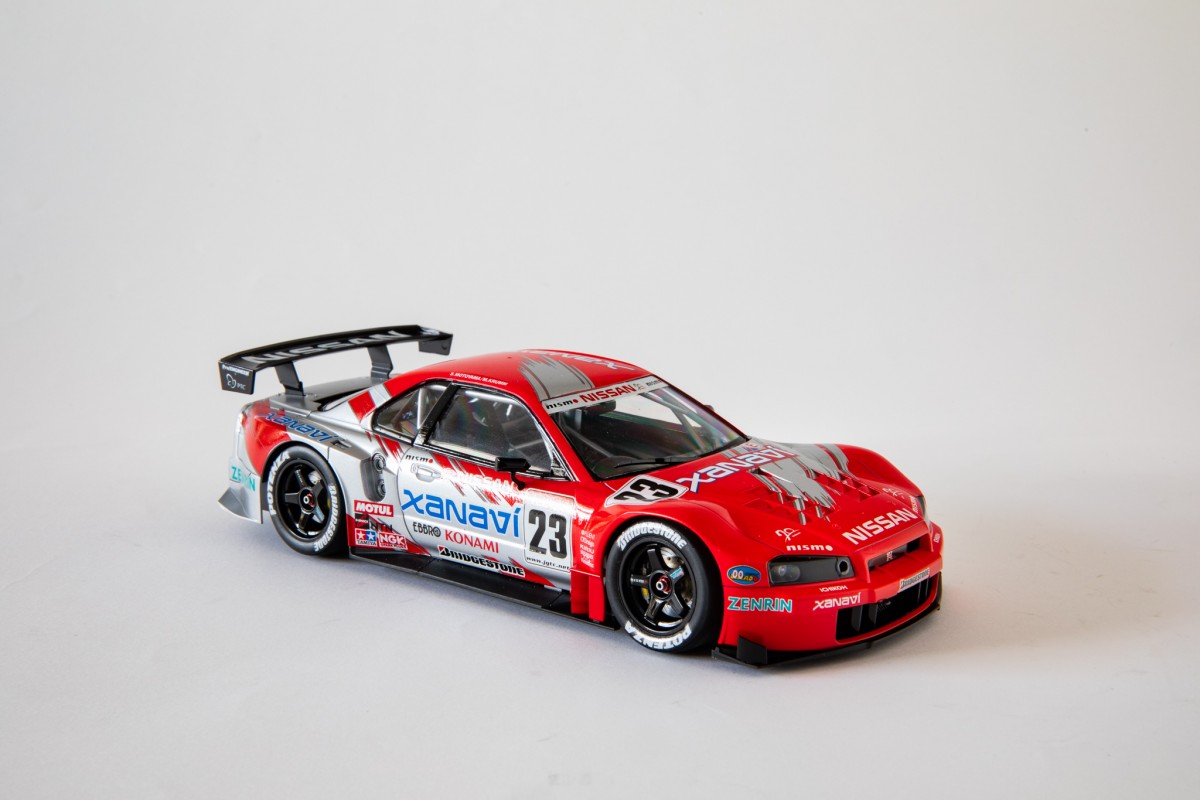
The trade off is that now the reflection has shifted to the side of the driver’s door, so with some additional fine tuning I find a happy medium between the two images and settle on the following one.

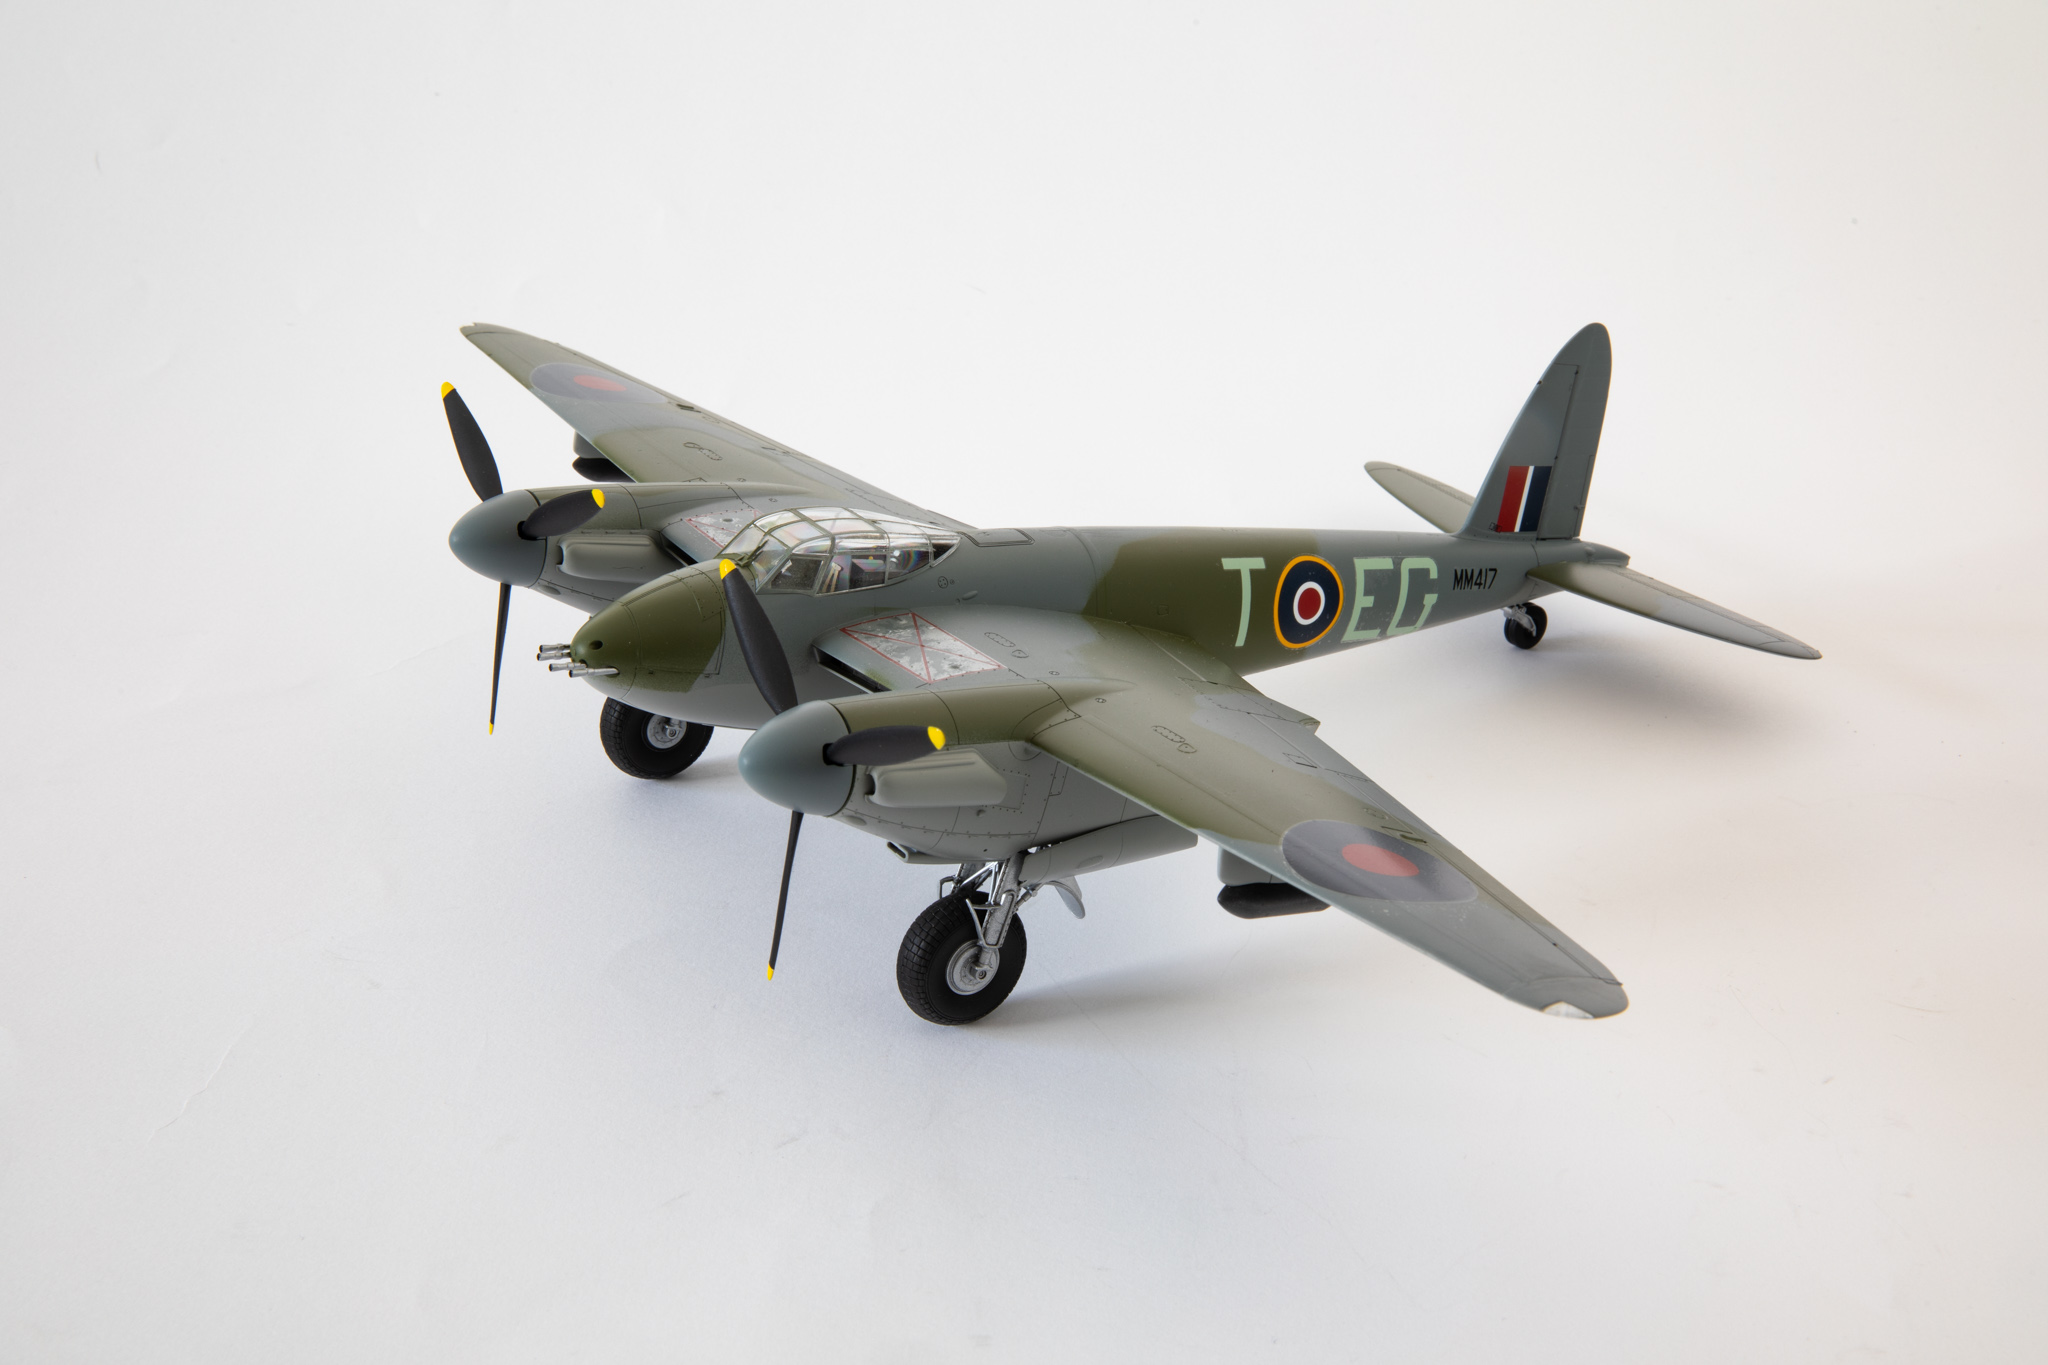
The same works for cars, aircraft and anything with a flat surface which light can reflect off.

Two for One
Another simple yet highly effective trick that you may have seen used is the following one: the mirror image photo.

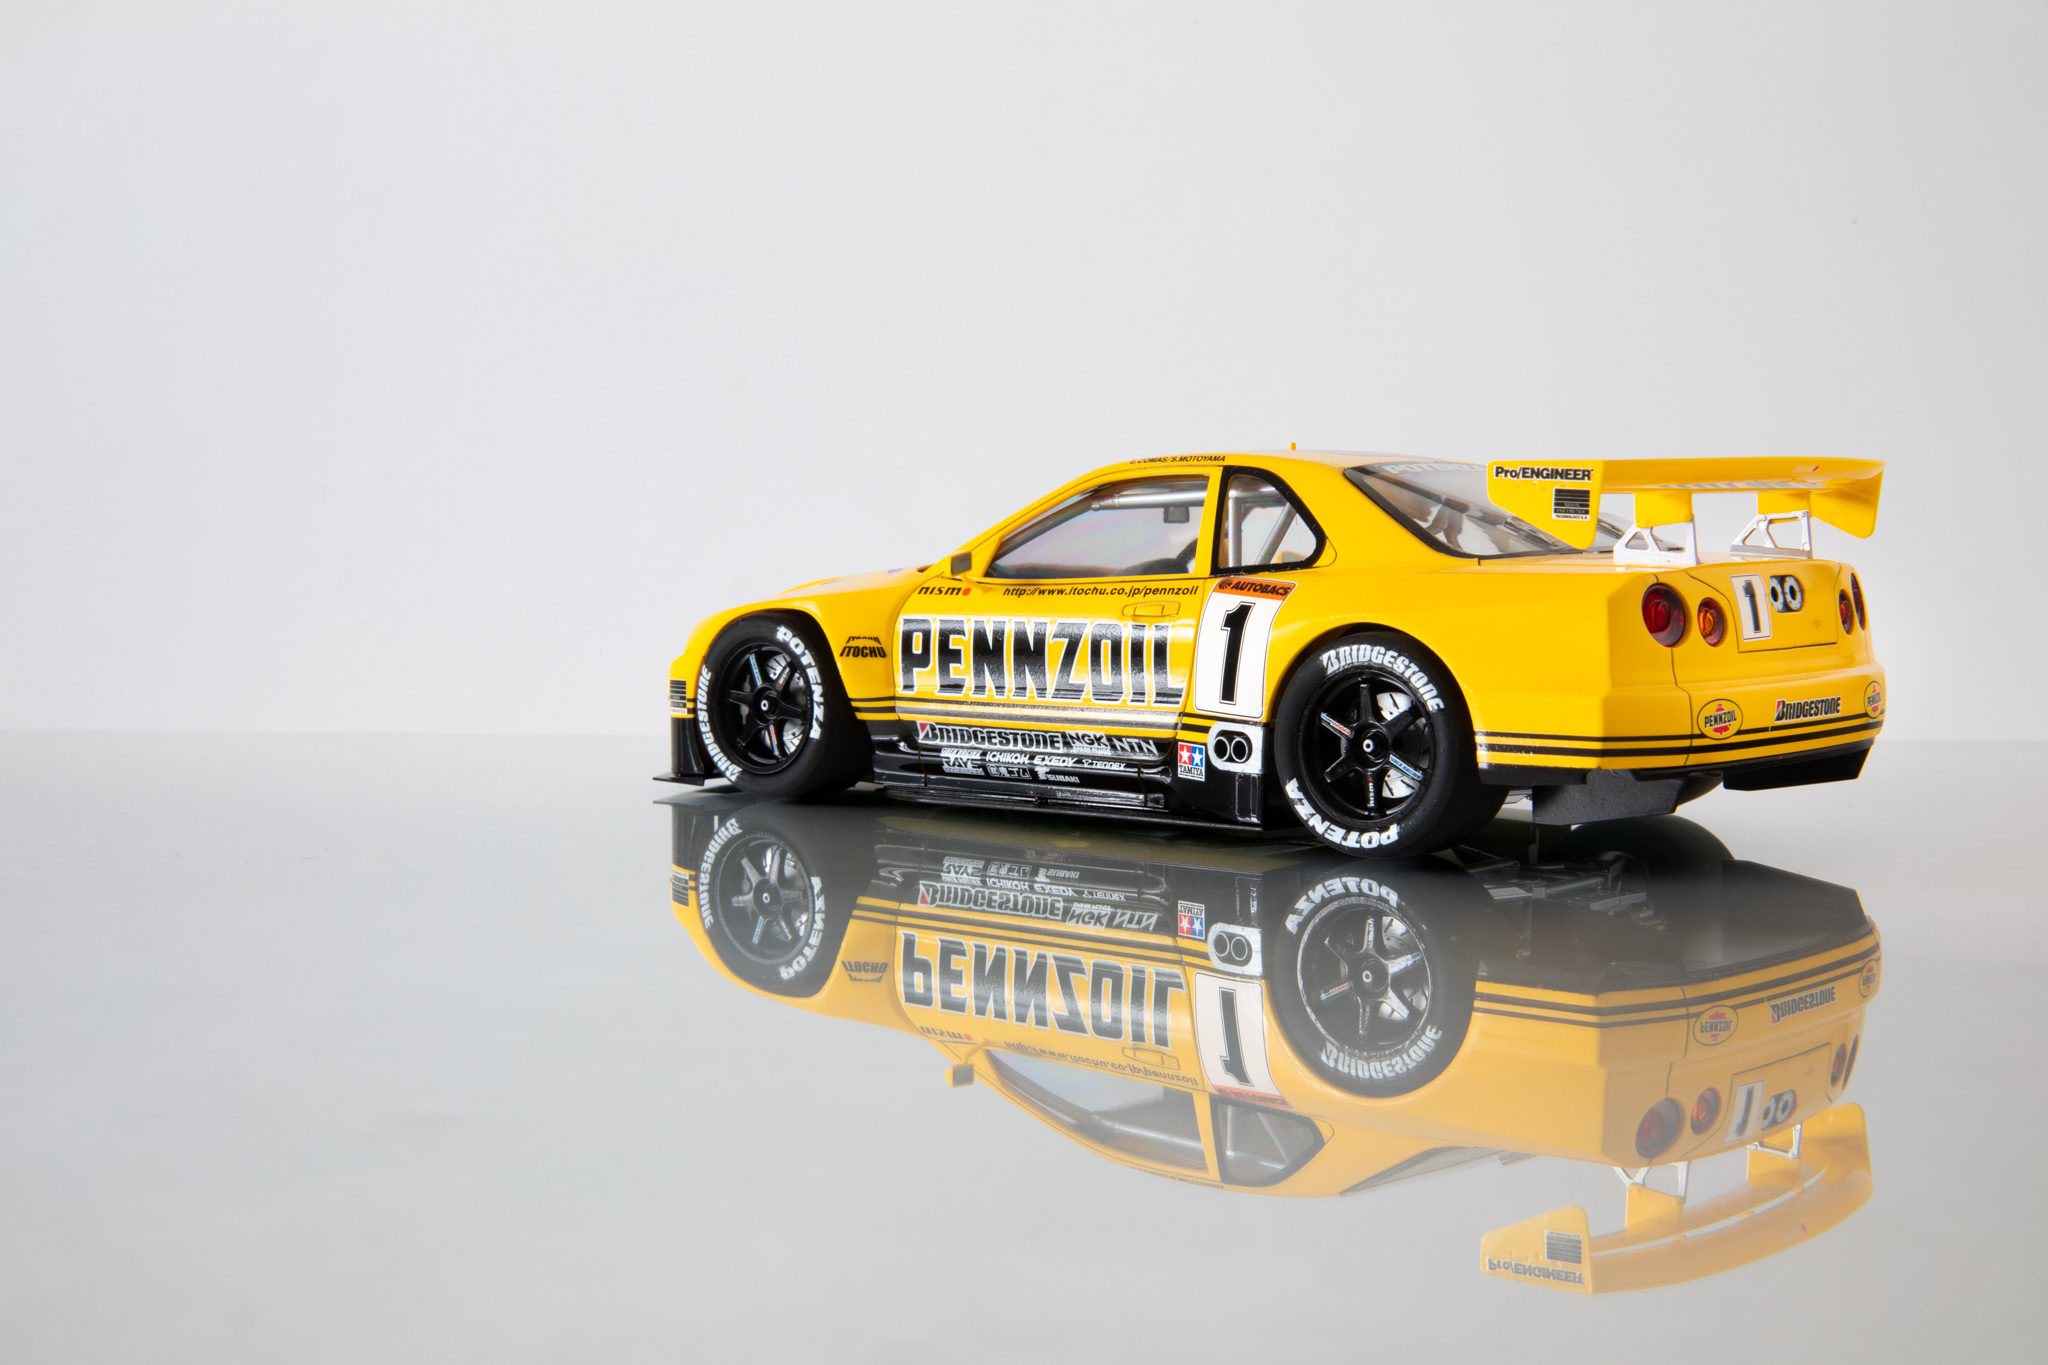
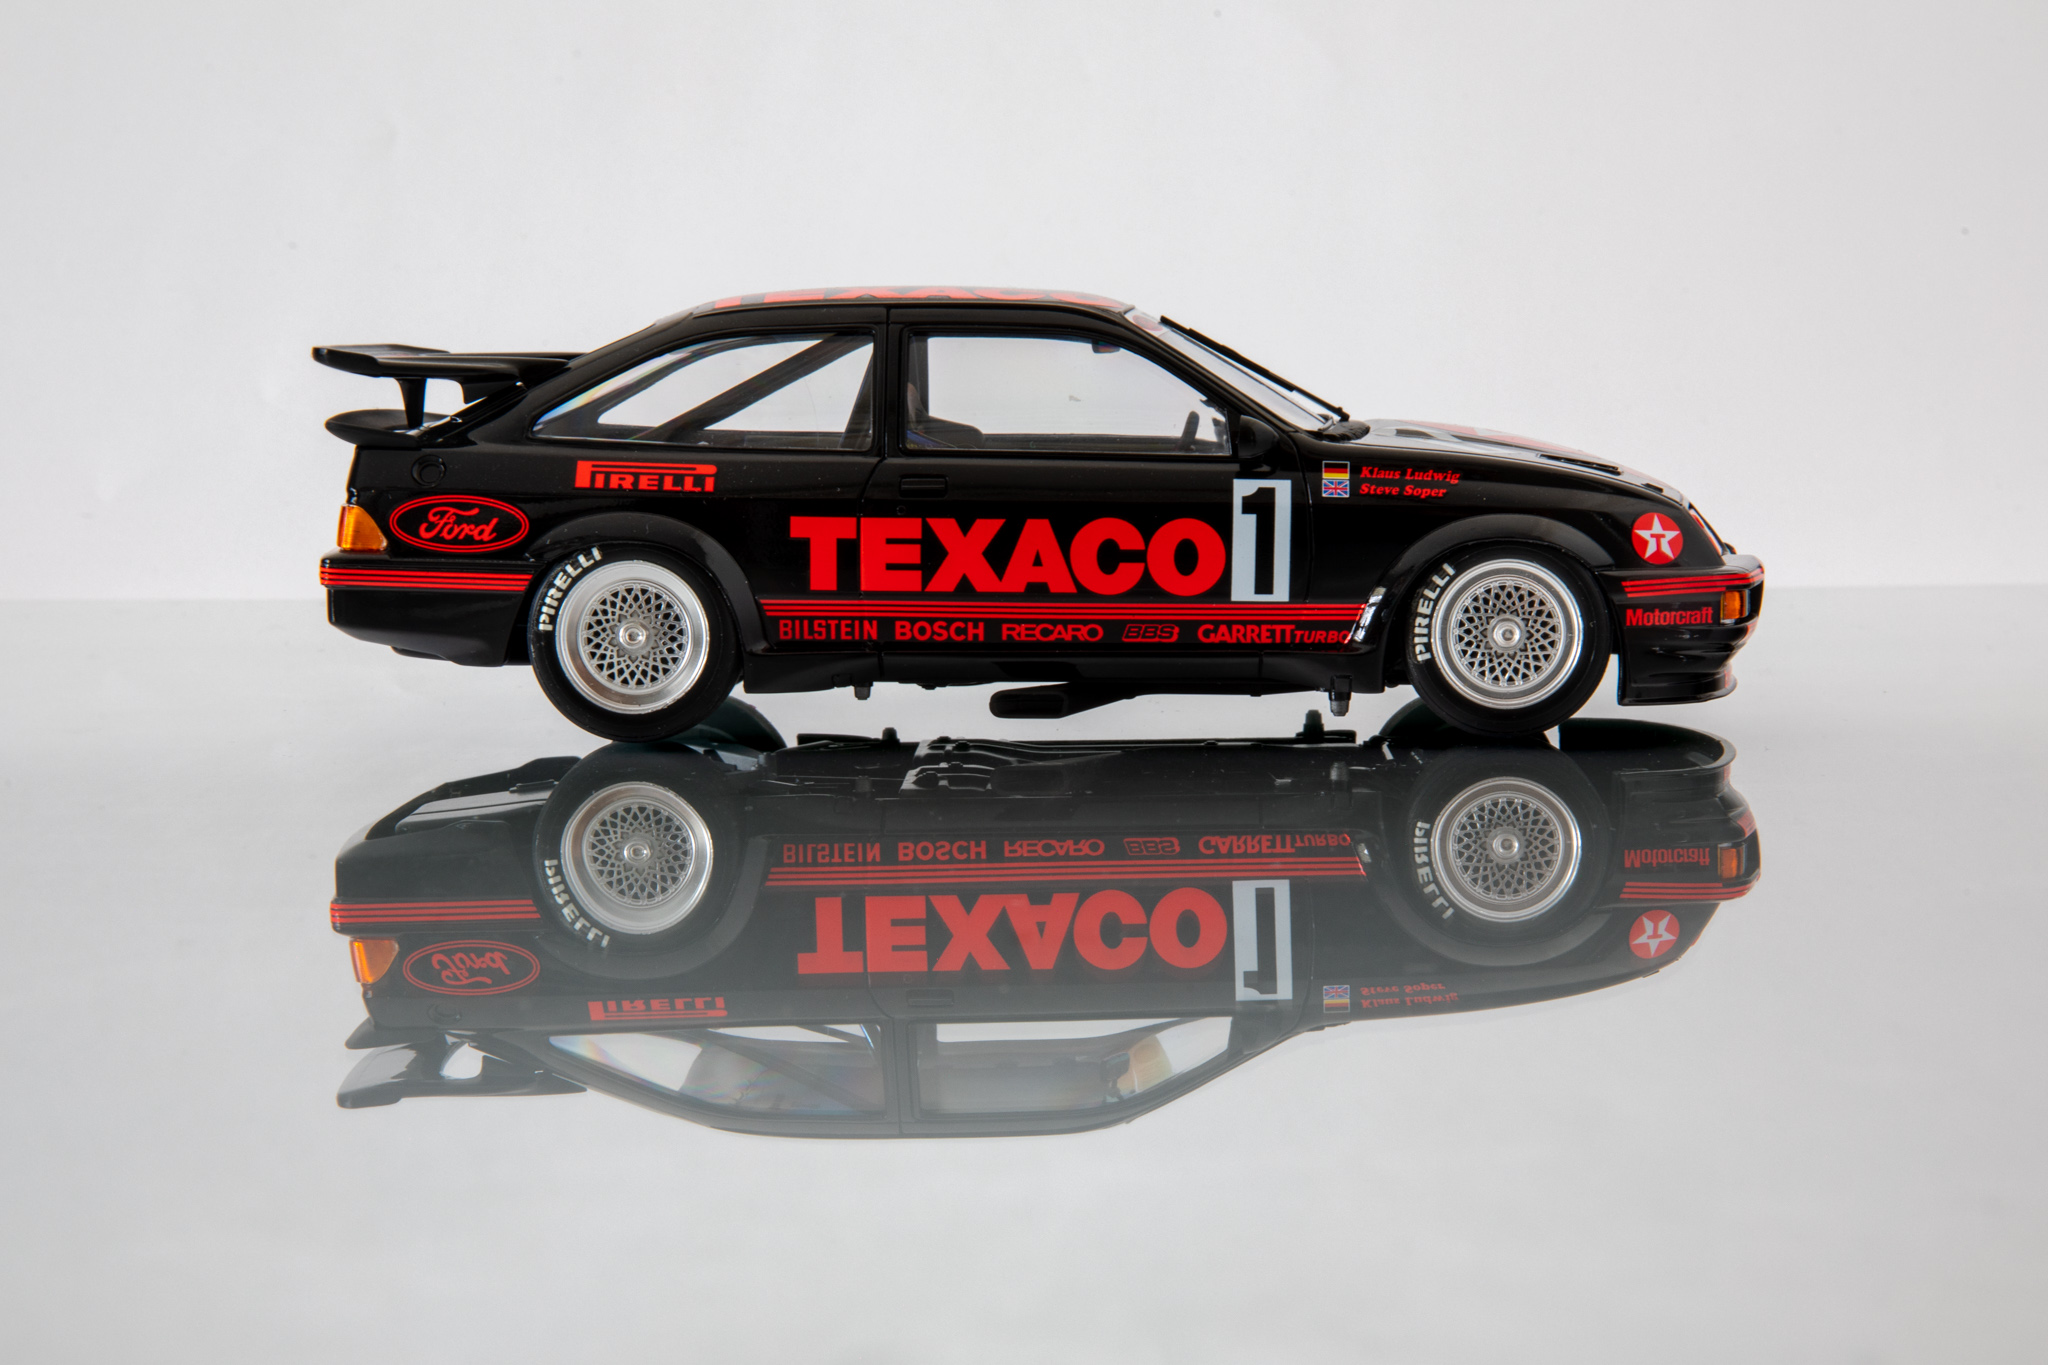
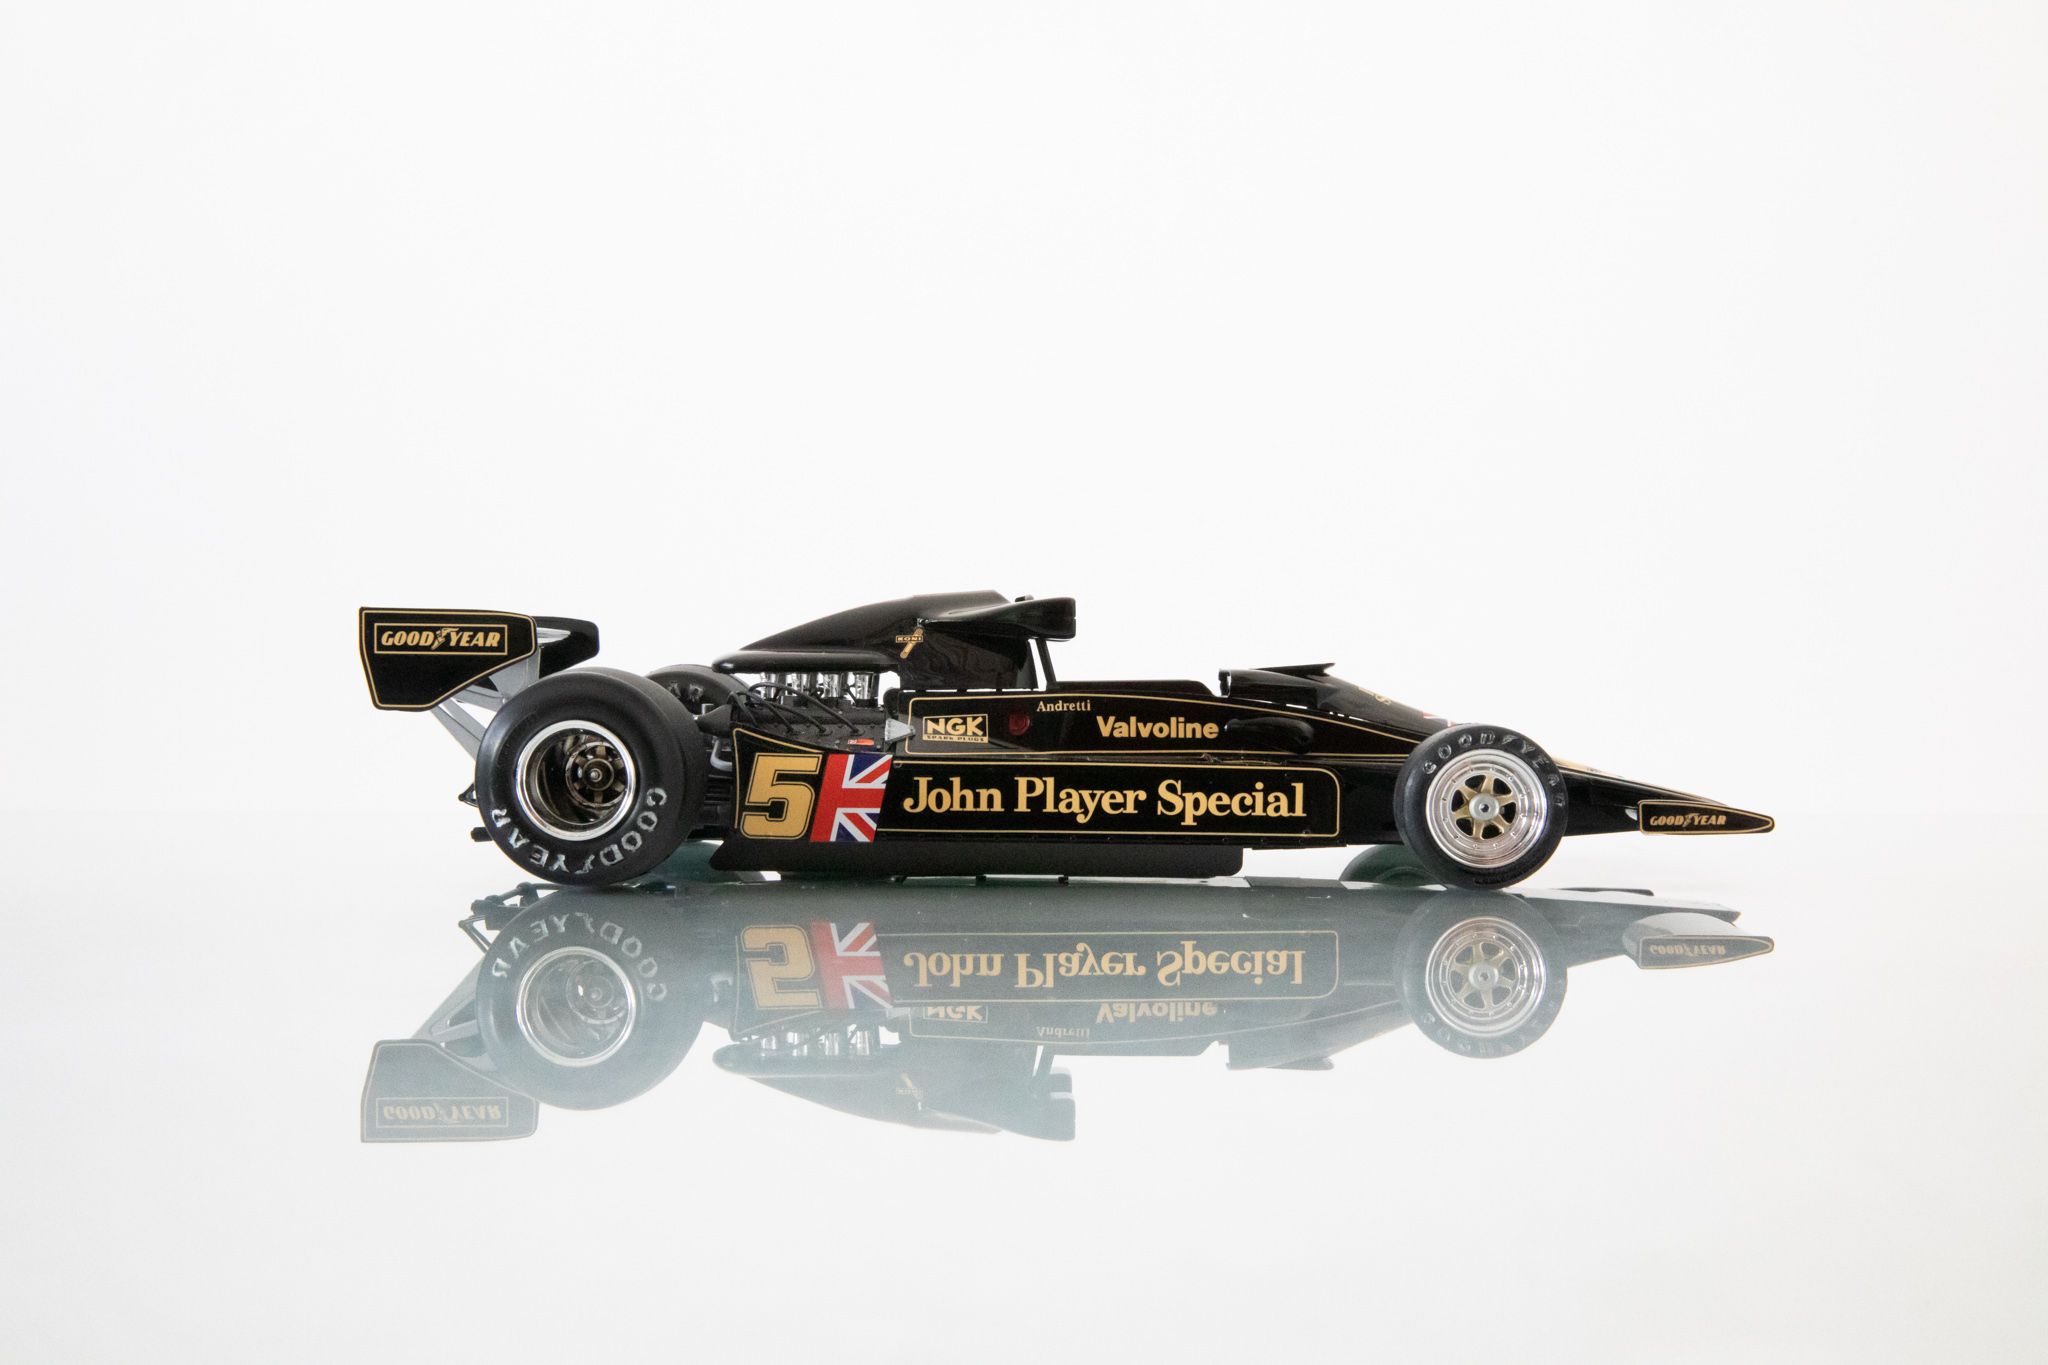
If you want to recreate this type of image all you need is a piece of clean glass. I took mine from an A3 size photo frame purchased for $10 to achieve this style.
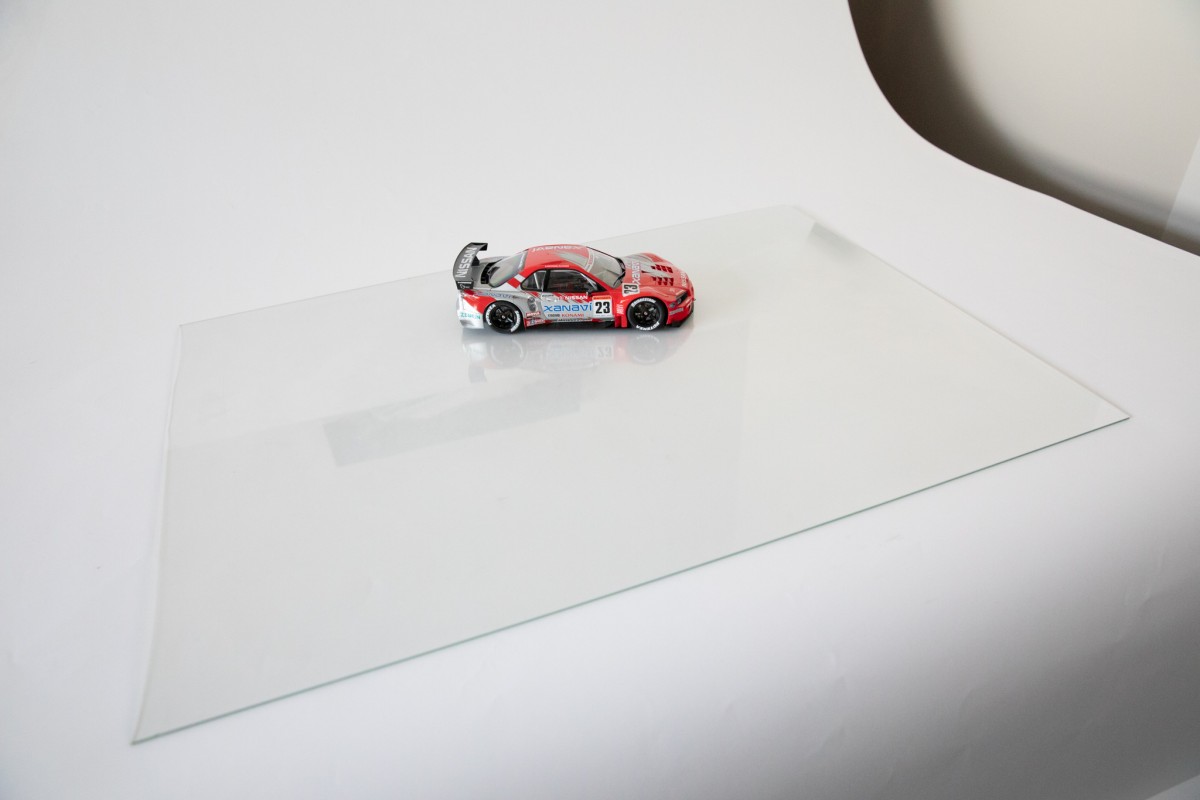
Simply place the glass on your backdrop and then at roughly eye level you will notice a beautiful reflection appear.

The brighter your subject the more visually impacting the image will appear. If your backdrop is black paper then this effect becomes particularly striking, too! Be creative, add more than one subject and experiment with light angles to put your own spin on the images you make.
Let there be (artificial) light!
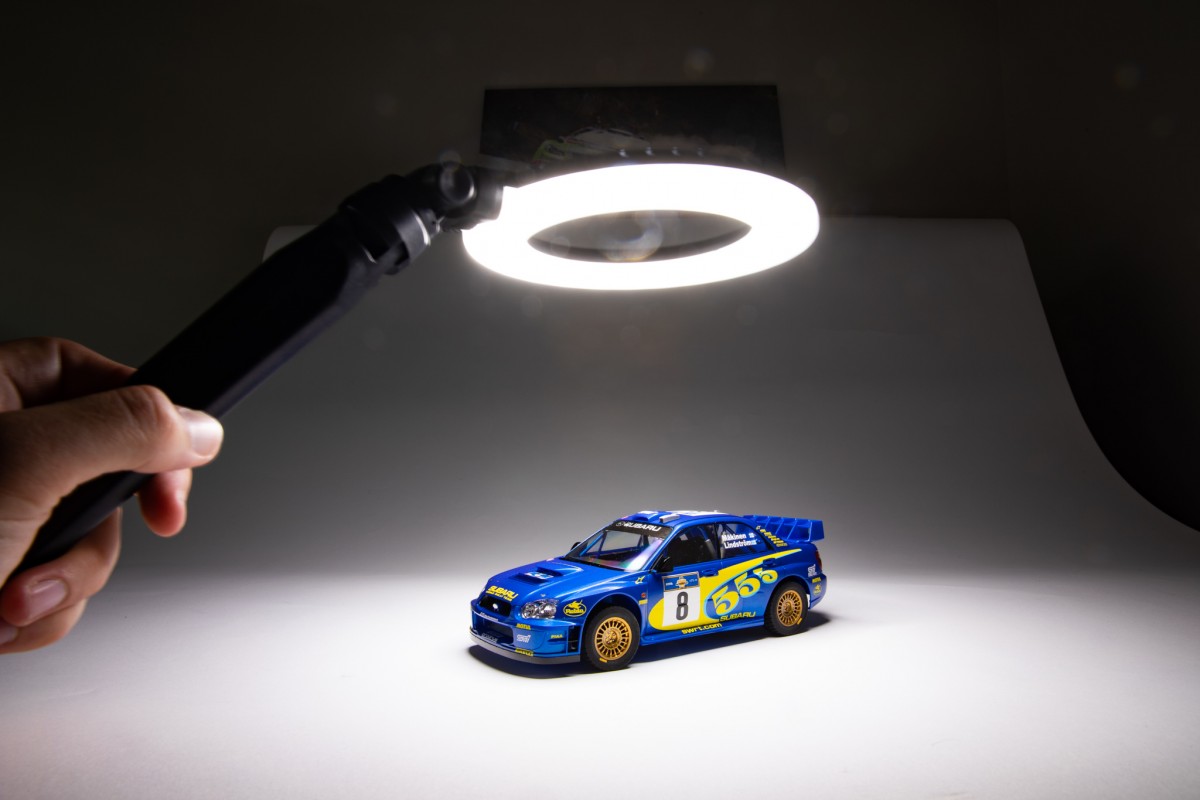
Shooting with artificial light is one of the trickiest aspects of photography as you have to deal with color temperature, shutter speeds, and plenty of other things. As a busy dad I don’t have all that much time to photograph and build during the day now so night time is my new ‘model time’.
That being said, night isn’t the best time to be taking pictures, though. I wanted a simple (and cheap) way to be able to take photos at night and came up with the following setup. I purchased 2 LED selfie ring lights from a local online shop for $13 a piece. They plug into USB power and have 3 color temperatures: warm, neutral, and cool light.
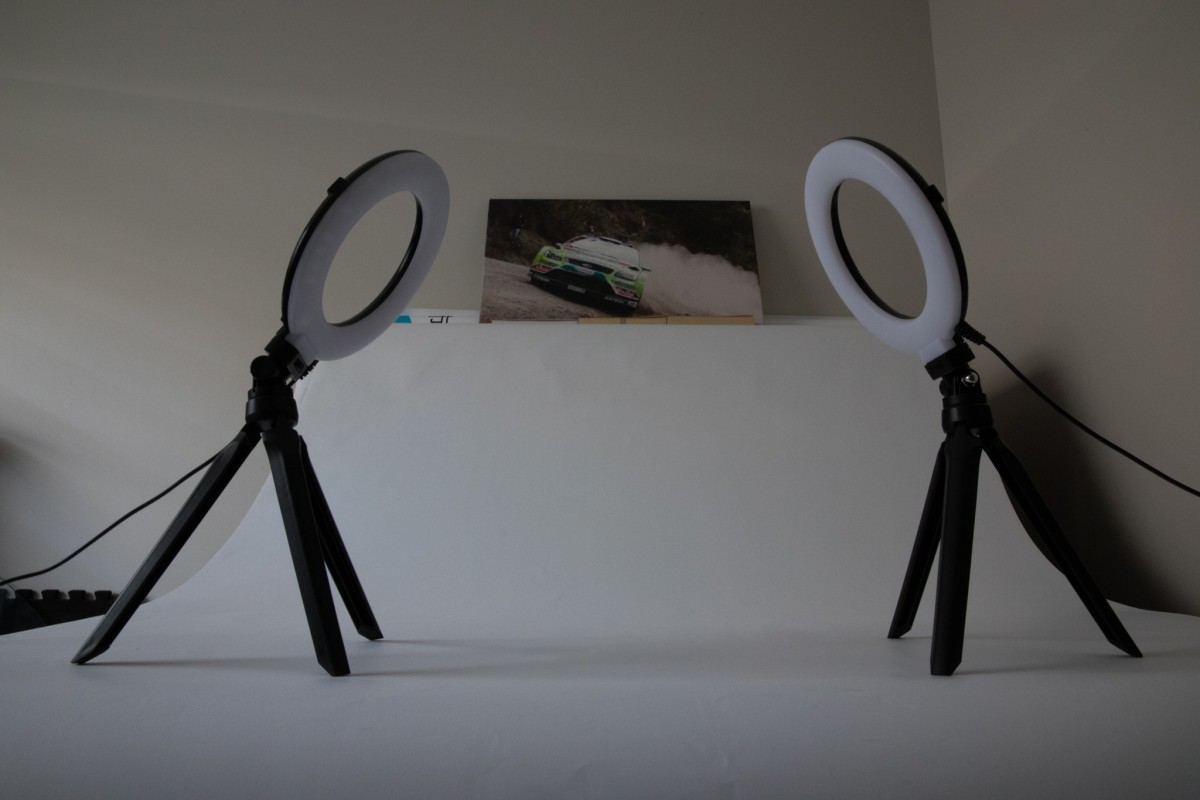
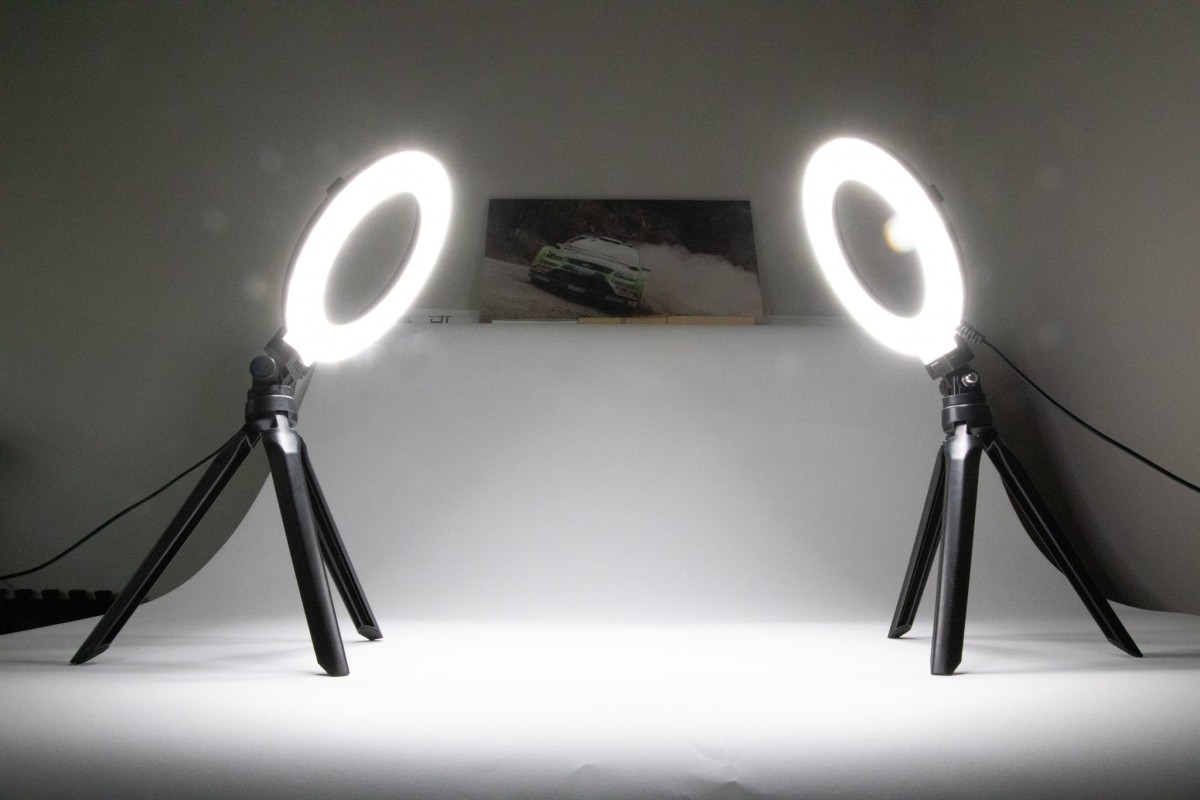
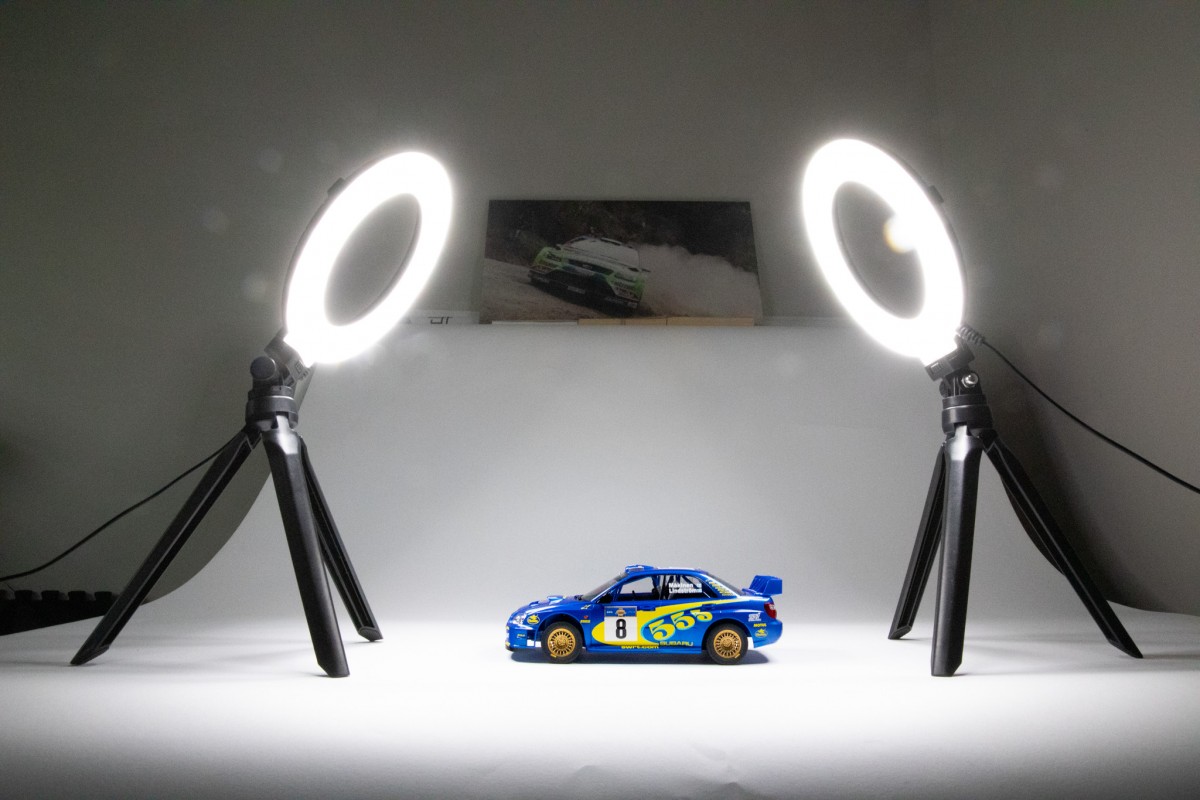
In photography terms this setup is crude but it is cheap, and for the price of the lights they actually do a really good job. They are adjustable, and you have full control of the light direction so get creative!
The biggest thing to keep in mind with photography is much like our beloved hobby it is subjective and there is no right or wrong way to go about it. Find a way that works for you, and most of all enjoy the challenge of producing fun and creative images! Hopefully this little guide has been useful and inspired you to pick up your camera!