What’s up, builders? Today I’m bringing you the 2nd installment of my HGUC Nu Gundam HWS series. In this build I’m primarily focusing on detailing, so after going over some armor trimming last time, it’s time to delve into a more complex technique. You might have seen modelers on the internet modify the underside of their kits’ front skirts. Similarly to detailing up the bottom of the feet, it’s a modification that may not be easily noticeable for viewers… but you know it’s there. With that in mind, today we’re going to walk the extra mile and make the first layer of the two we’ll need for this technique.
Starting point
As I said, hardly anyone will ever see the underside of the skirts, but there’s no harm in adding some detail. It’s always good fun. That being said, I tend to ignore these less noticeable parts when I’m not aiming for richness in detail in a build. Especially when I just want to paint something, and thus don’t do much in terms of physical modifications. This Nu HWS is not one of those builds, though. I’m doing my best to make it as detailed as possible.
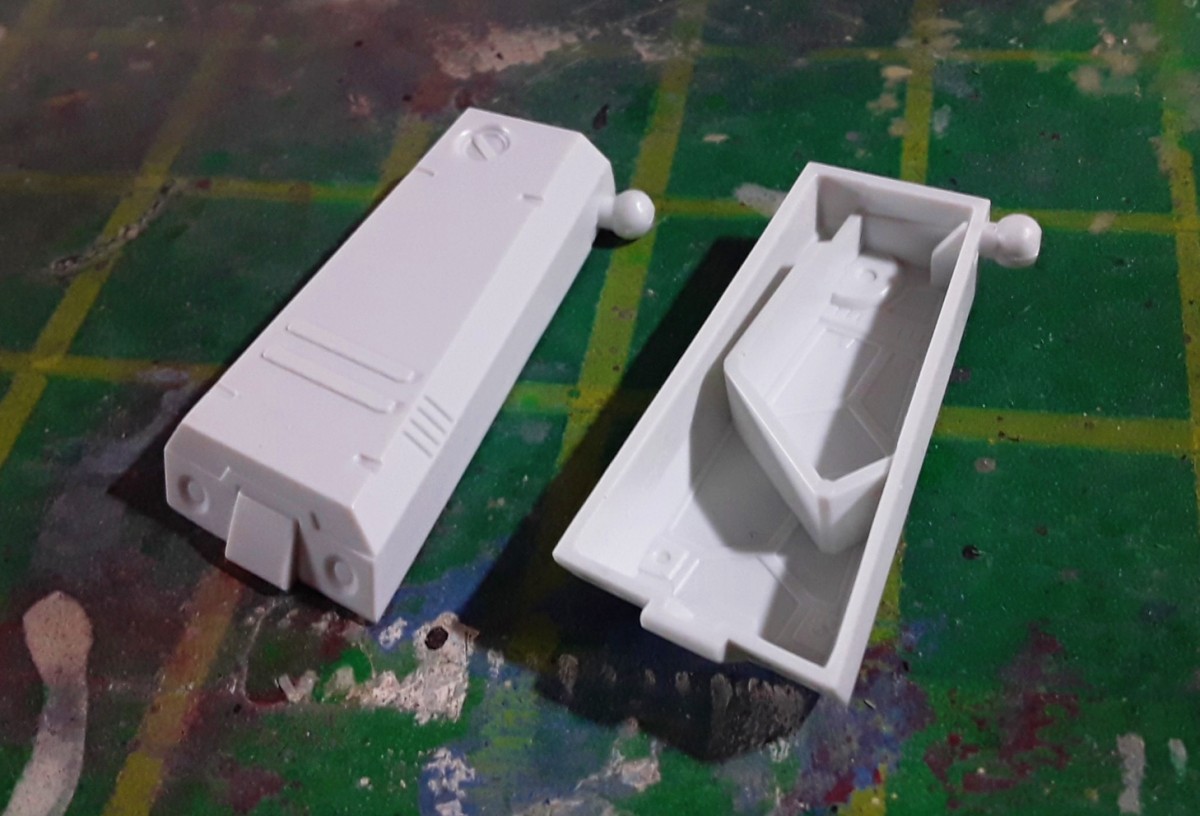
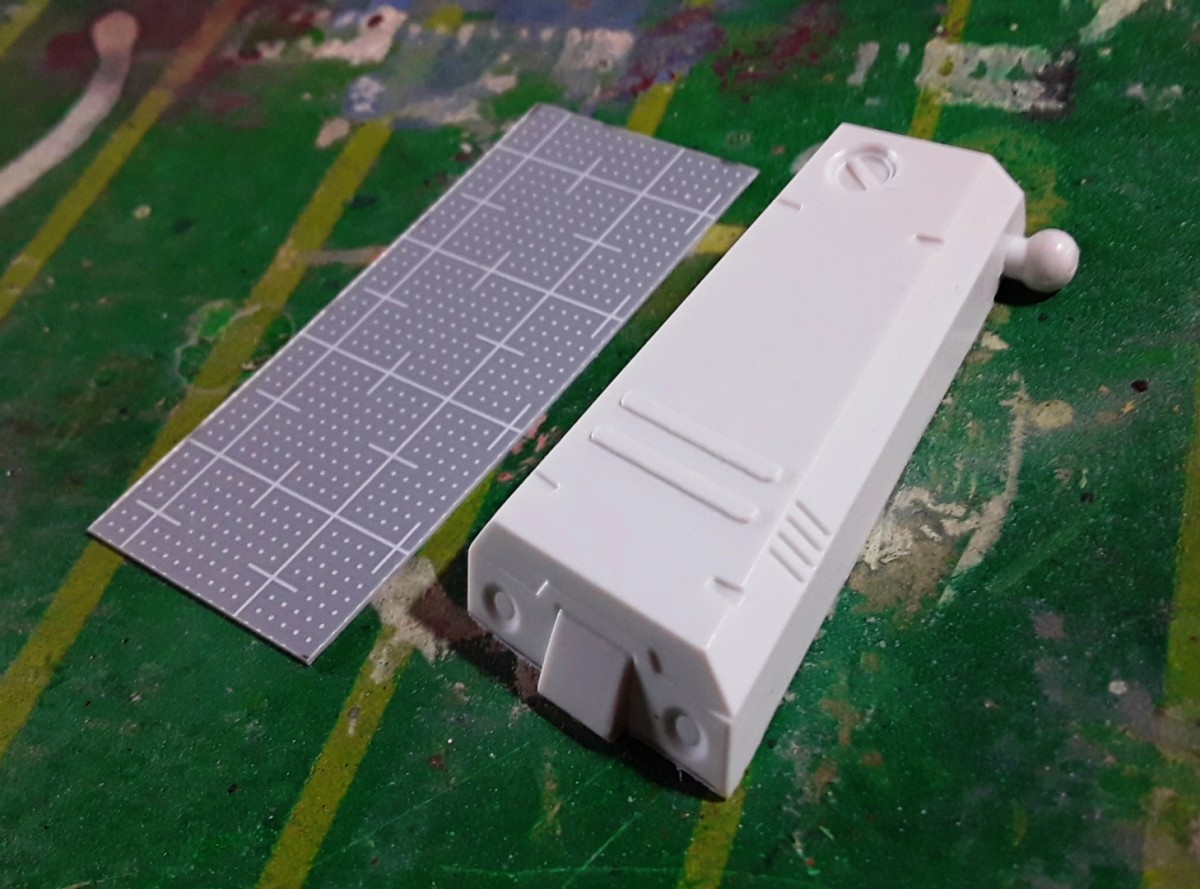
These are the front skirts straight out of the box. You can observe that they were built around the original parts from the HGUC Nu Gundam, the model kit the HWS version is based on. Besides that, the parts are hollow, and that’s not cool in my book. With this modification, we will cover them and add detail in the process.
Planning
Since we’re going to work in layers, we’ll need to do some planning. The bottom layer will be a solid piece of styrene and feature some minor detail. The top layer will be more intricate, with cuts for the bottom layer to poke through.

Then we have to come up with a pattern for the bottom layer. From the beginning I wanted to go with diagonal parallel lines, but anything that fits the usual mechanical aesthetic will look good. The next step is to create a design for the top layer; this may take some time. I drew a few on paper (pictured above), and number 2 looked the most convincing to me. Feel free to look up reference material from Gundam designs, other mecha or anything you could draw inspiration from.
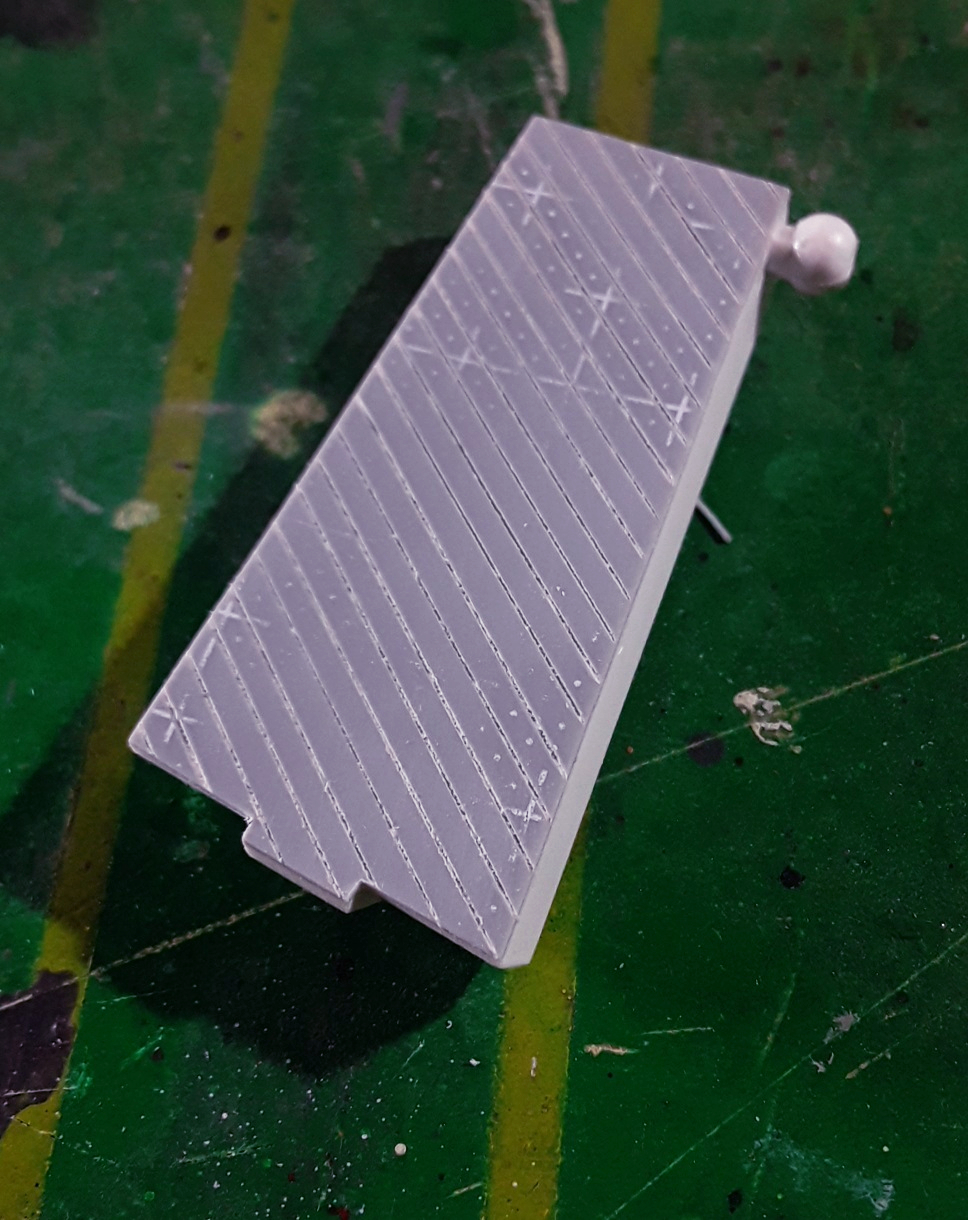
Making the bottom plate
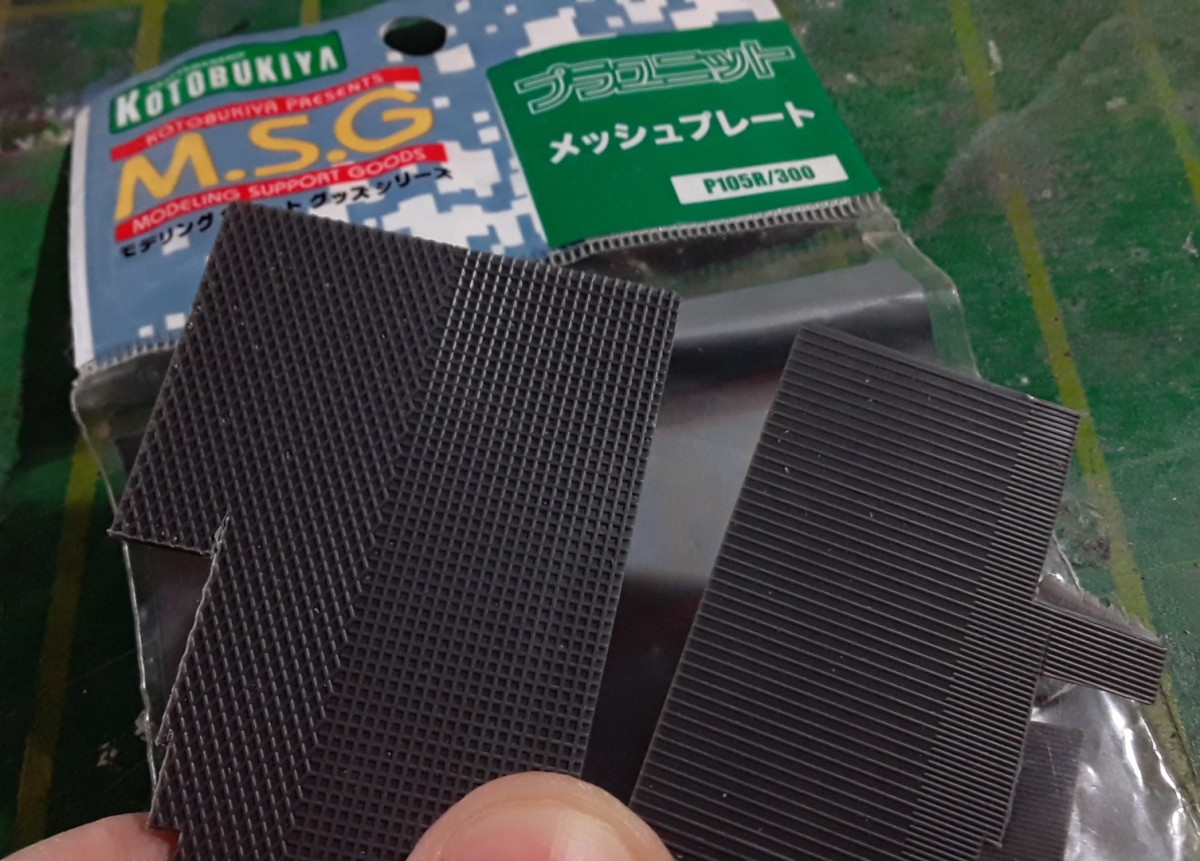
There are many ways of achieving a neat pattern for the bottom layer. One of them is by using textured plastic products such as Evergreen sheets and Kotobukiya MSG’s Mesh Plate. Alternatively, you can recycle disposable plates like the ones pictured below; I like using those to make sidewalks for larger scale vignettes. However, this time around I’m going to be scribing the lines on a piece of styrene sheet manually.
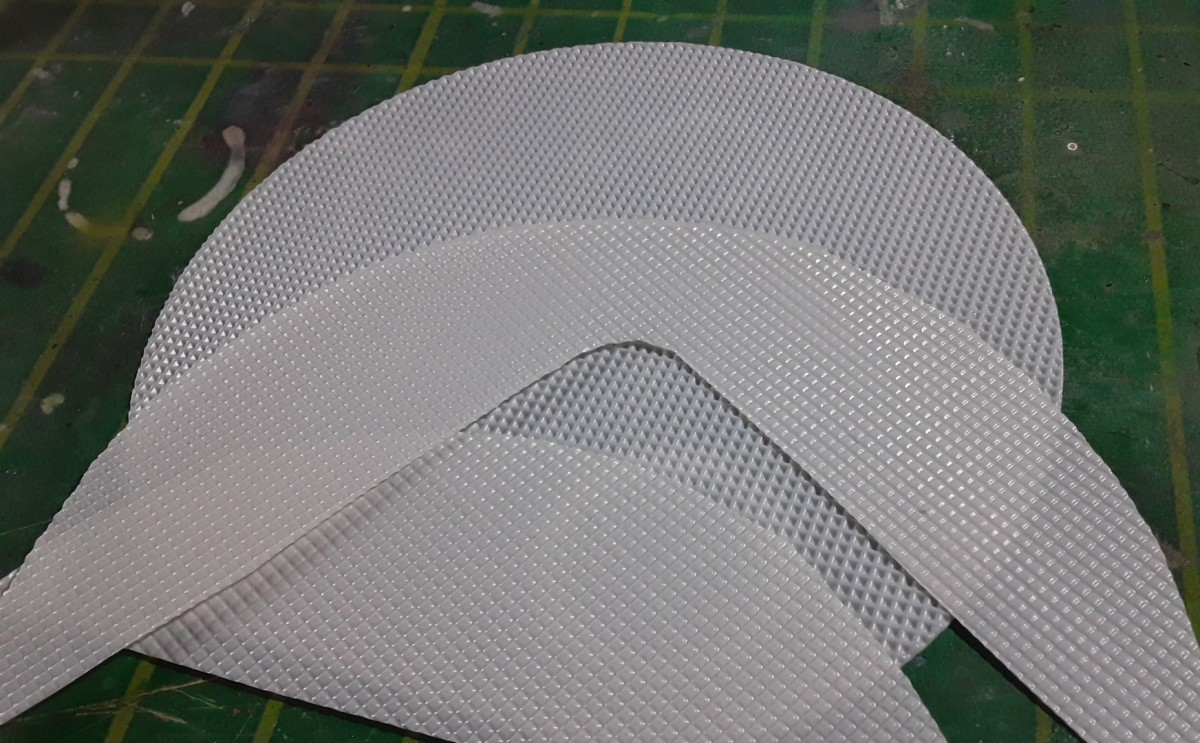

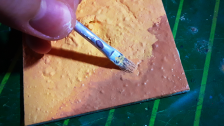
I cut out a piece that was slightly larger than the front skirt, and scribed lines at a 45º angle. The scale print on this Wave plastic plate is really helpful; it makes scribing parallel lines way easier. Also, instead of wasting guide tape for this repetitive task, I used a Hasegawa scribing template. It acts as the typical metal ruler used for scratchbuilding, except it’s thinner and therefore easier to handle.

Since we’re using a pretty thin plastic piece, it’s necessary to reinforce the underside (the side that will not be visible) with pieces of thicker styrene. I went with 1.0mm thick leftovers I had lying around on my workbench from other projects.
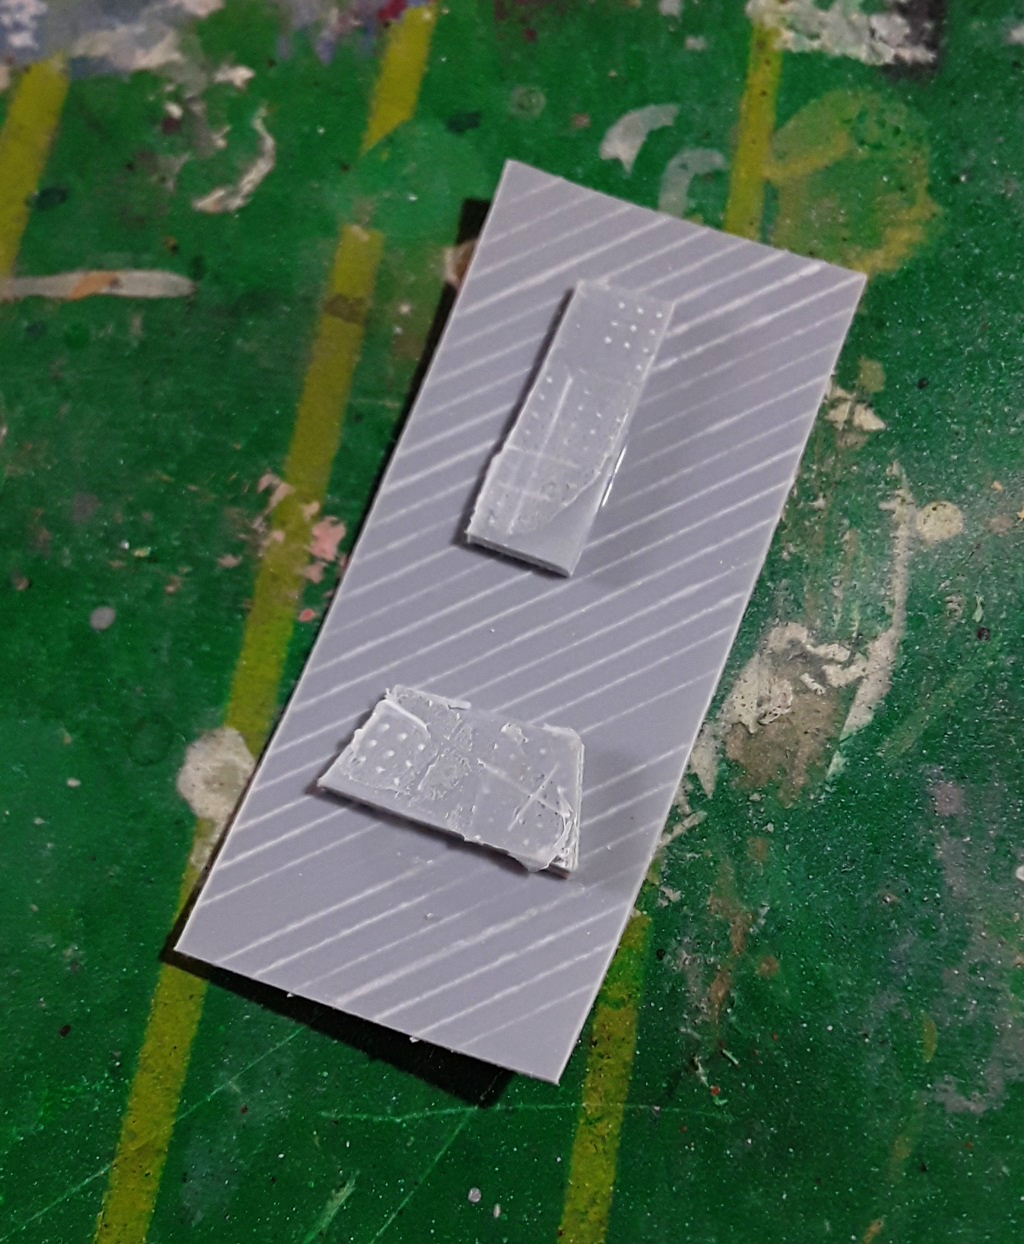
Additionally, the part has a tendency to warp due to the all the scribing done on the other side; but don’t worry. As long as you don’t scribe the lines too deep and reinforce the styrene piece as I did it should make it to the gluing stage in one piece.
Putting it together

Now that the styrene sheet piece is a little sturdier, we can glue it onto the front skirt. I used the long straight edge as a guide, to ensure the alignment and angle are good. Apply a moderate amount of plastic cement along the edges and press the parts together with your fingers. Check for any potential gaps between the two parts; the thin styrene piece may be a bit curved and that can cause minor issues.
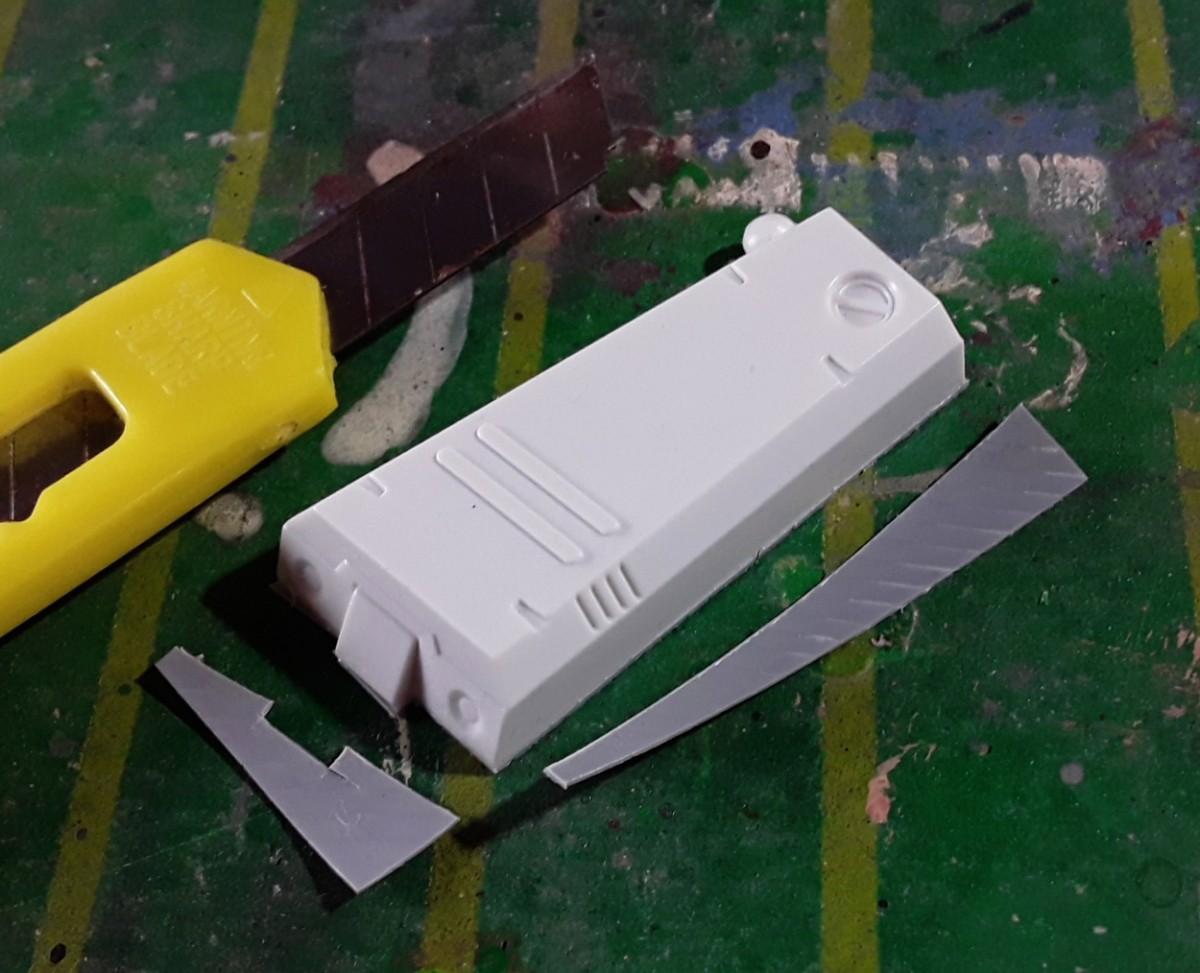
Once the glue has cured (give it a good 6-8 hours), we are ready to cut out the excess styrene. Any precise, sharp blade will work. I suggest cutting not too close to the part at first, just to get most of the material out of the way. Then, with more space to move around and see what you’re doing, go in with the knife again to cut with more accuracy. Finally, I used a flat sanding stick to tidy up the edges. A nice file can get the job done just as well.

With that, the bottom layer is complete! That part is starting to look nice but it’s not over
See you in the next tutorial, where we’ll be going over the making of the top layer. It’ll be a little trickier but certainly worth the effort.
Until then, happy modeling!