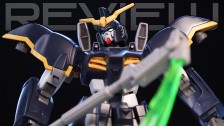
Hey everyone! Welcome to the last installment of the Galbaldy Beta series. In this post, we’ll be going over the final touches of the build, as well as something quite different. I’m going to show you how to make rain fall on our scene!
Rain effect
Preparation
Due to a funny thing called gravity, we can’t replicate rain drops that hover over the diorama, so we’re going to use clear styrene sheets. They’re see-through just like air, but obviously they’re also tangible, which allows us to work on them.
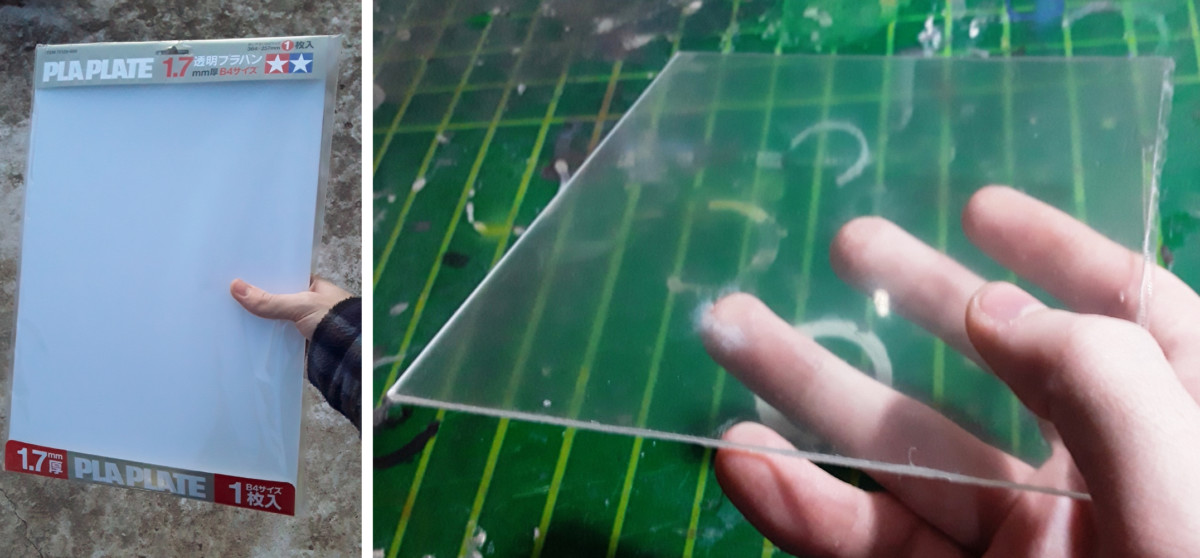
I cut to size after carefully measuring and marking. These sheets are pretty thick, so we need to be patient when cutting. I had to do a good 30-40 passes with a sharp blade before snapping the parts with my hands to separate them from the sheet. Furthermore, their transparency will make any scratch show up, so pay attention when cutting.
I cut out only two pieces, because all we need is to cover one corner.

The next step is to confirm that the pieces are the correct size. Naturally, I removed the masks we put on the base last time in order to make test-fitting easier. The plastic sheet that goes on the side fits between the edge of the small diorama base and the long strips we added in the construction process.
If you’re wondering why the clear pieces aren’t very transparent, that’s because I haven’t removed the semi-opaque film that keeps both sides from getting dusty.
Making falling raindrops

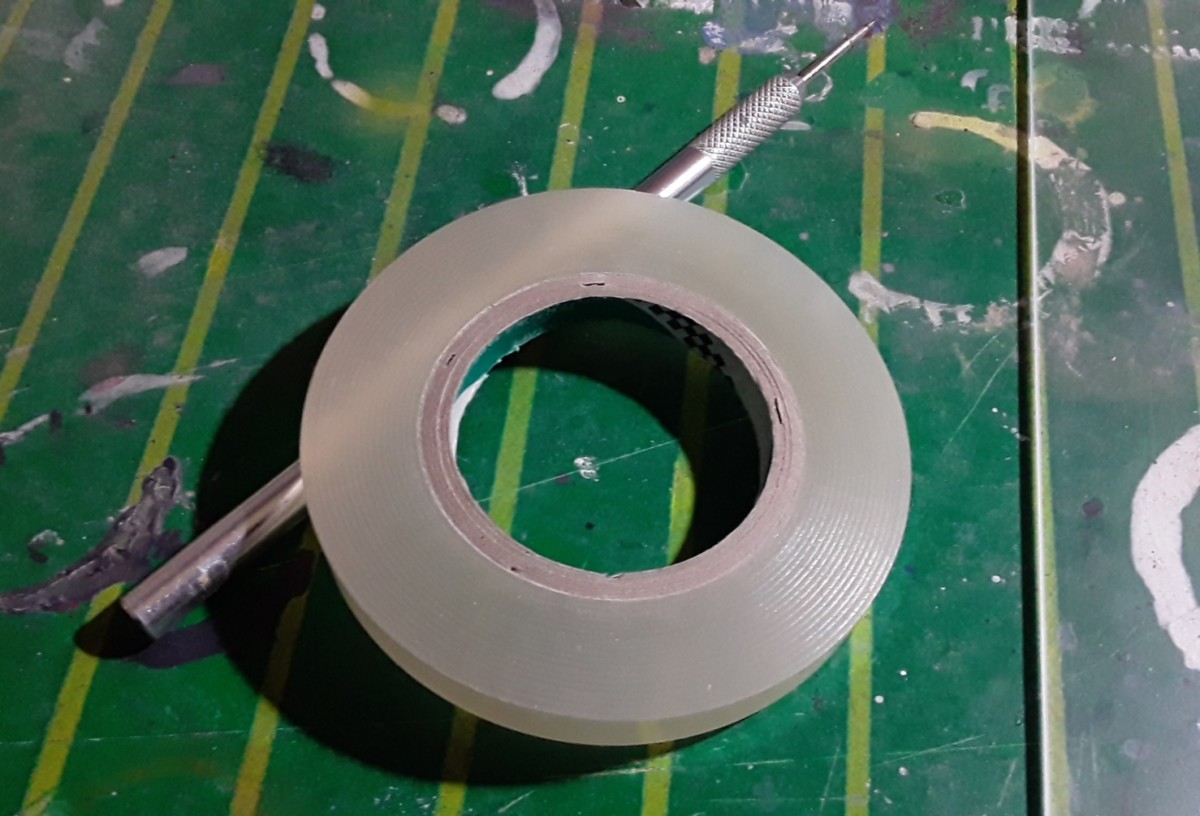
Speaking of the protective film, the first step is to peel off the side we’re going to work on. The other side of the sheet will remain protected for the time being.
Also, we’ll need the HiQ guide tape we used to scribe panel lines a while ago, as well as the carving needle.
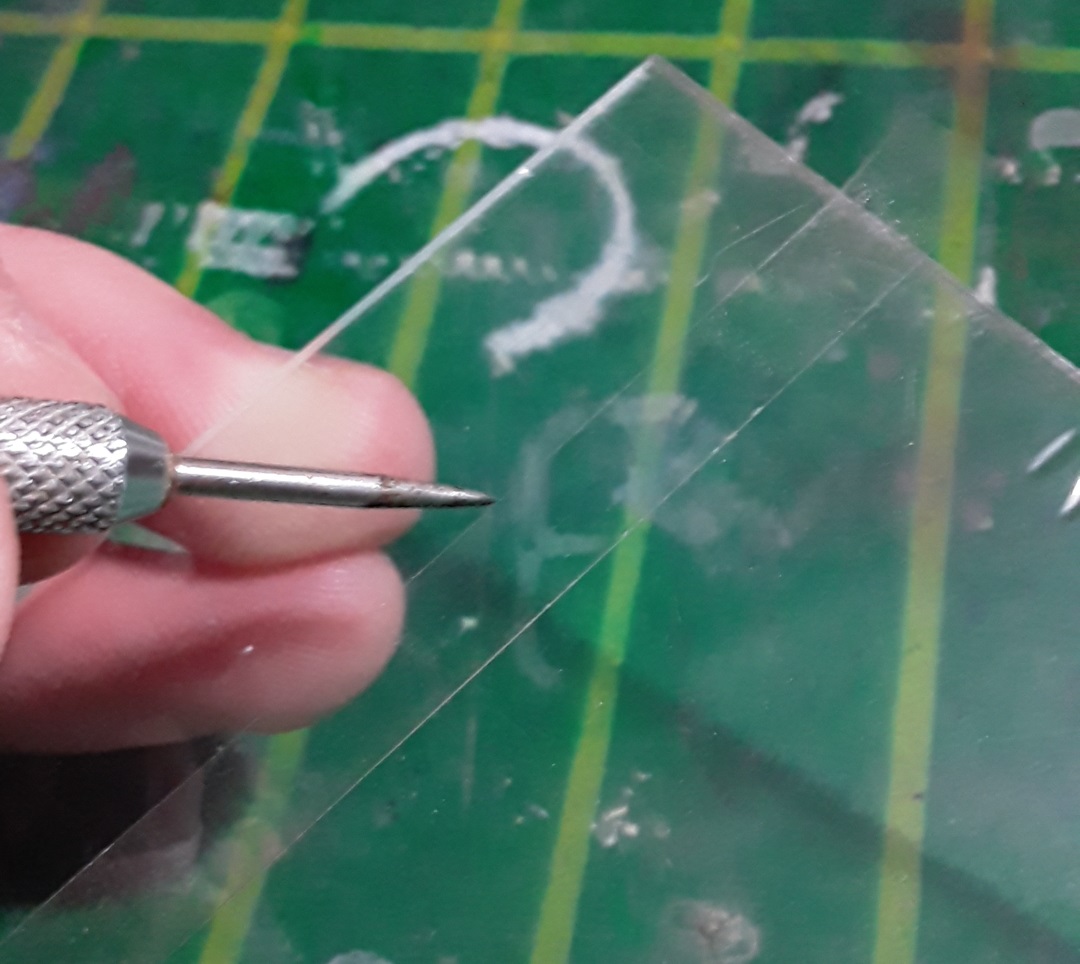
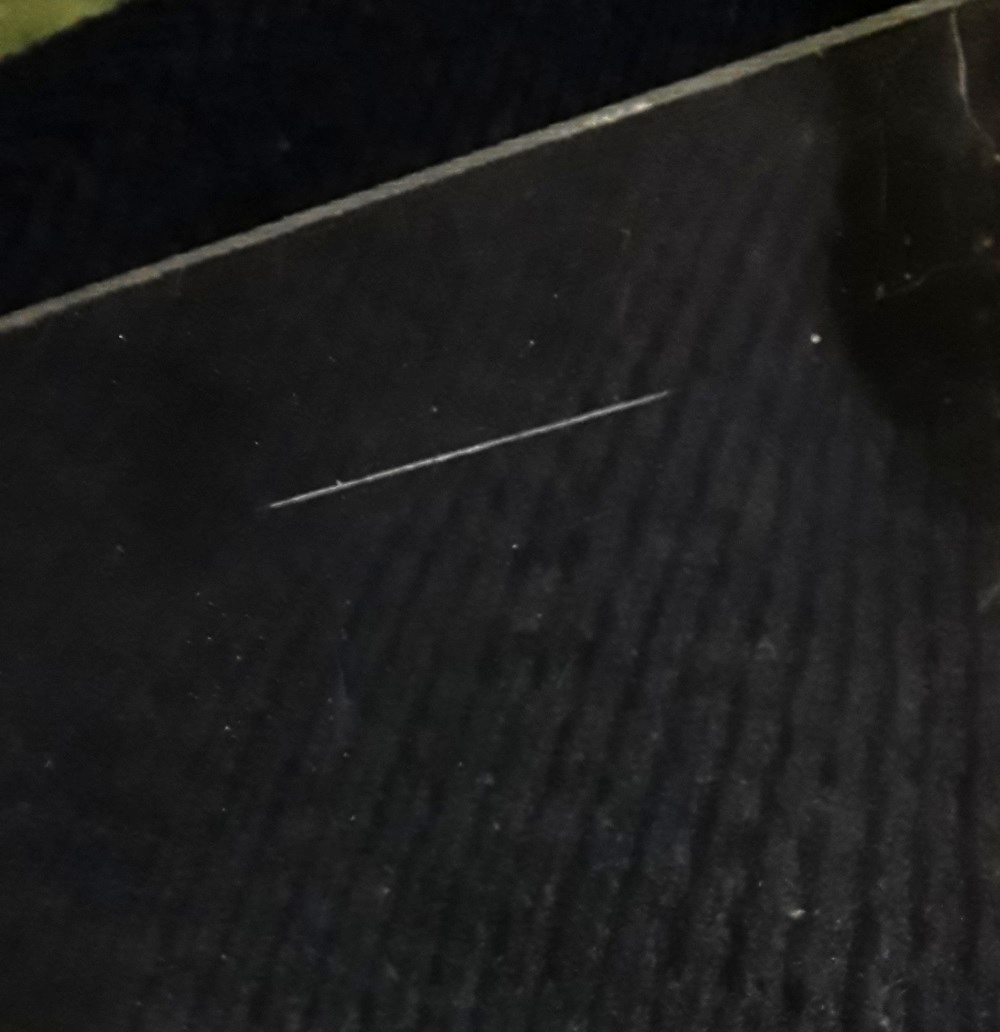
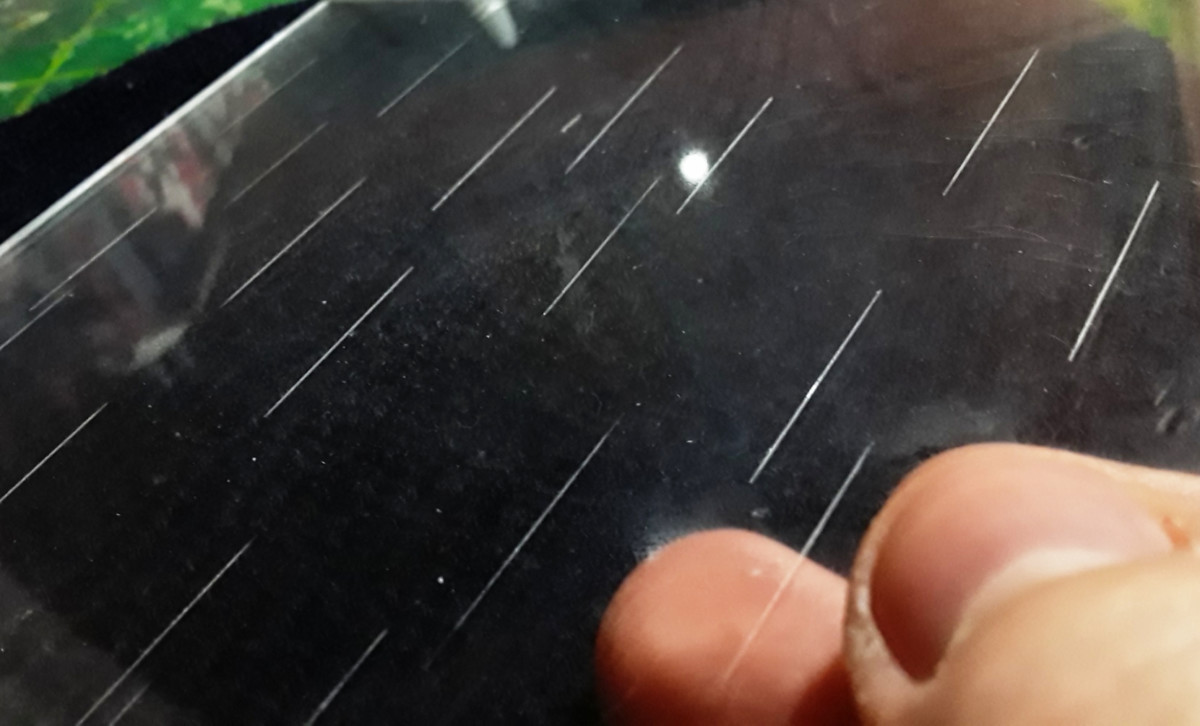
I laid down a piece of tape on the plastic sheet and did a couple of light passes with the carving needle. The result is a long, more opaque line that by itself doesn’t look very convincing; but when we add more, the effects starts to make more sense.
I tried to place the raindrops randomly and not make too many of them, mainly because there are two more steps in this process.
Still raindrops
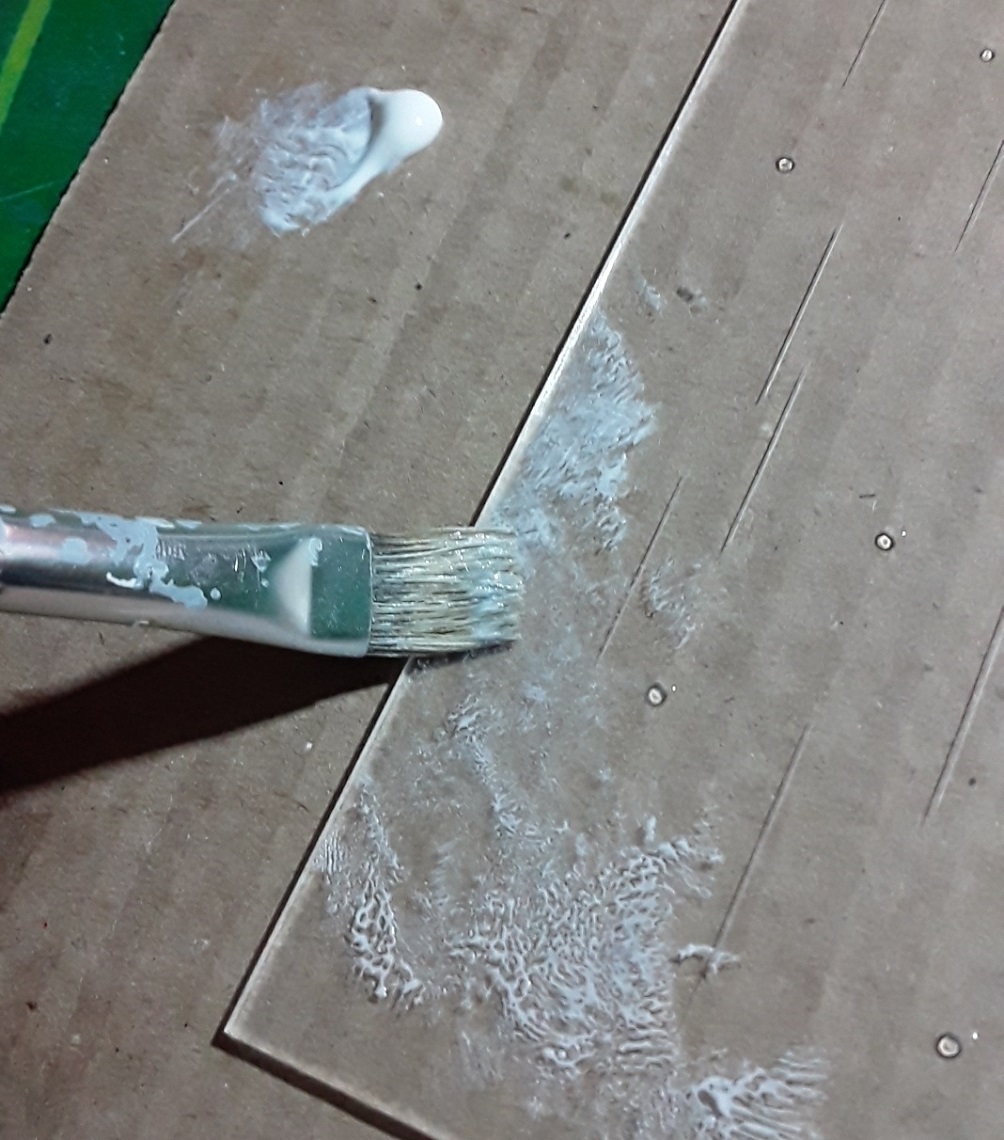
Now that our rain has some motion we can add some still raindrops. These will emulate droplets that fell on the imaginary window through which we’re obseving this scene.
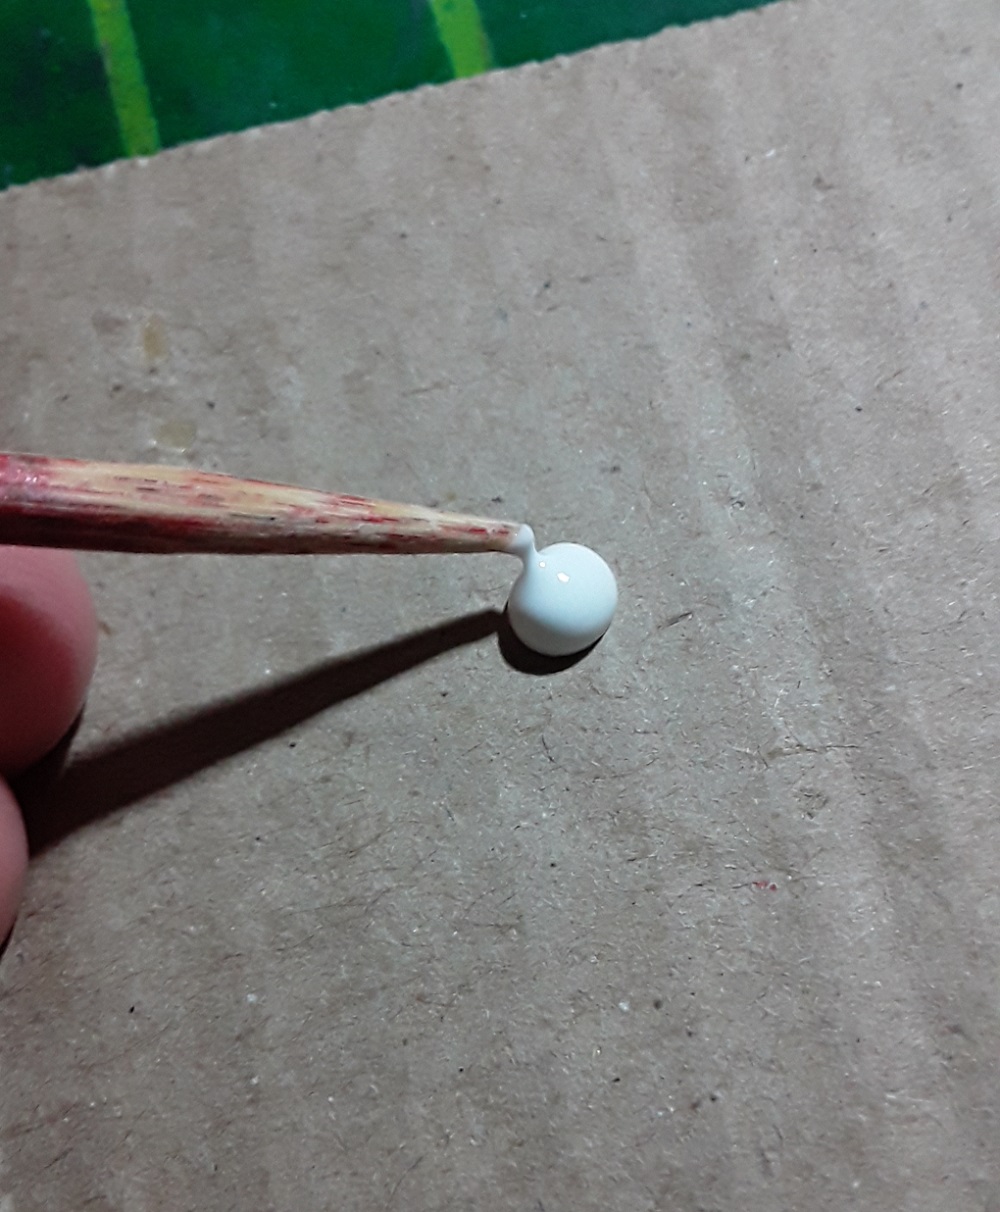
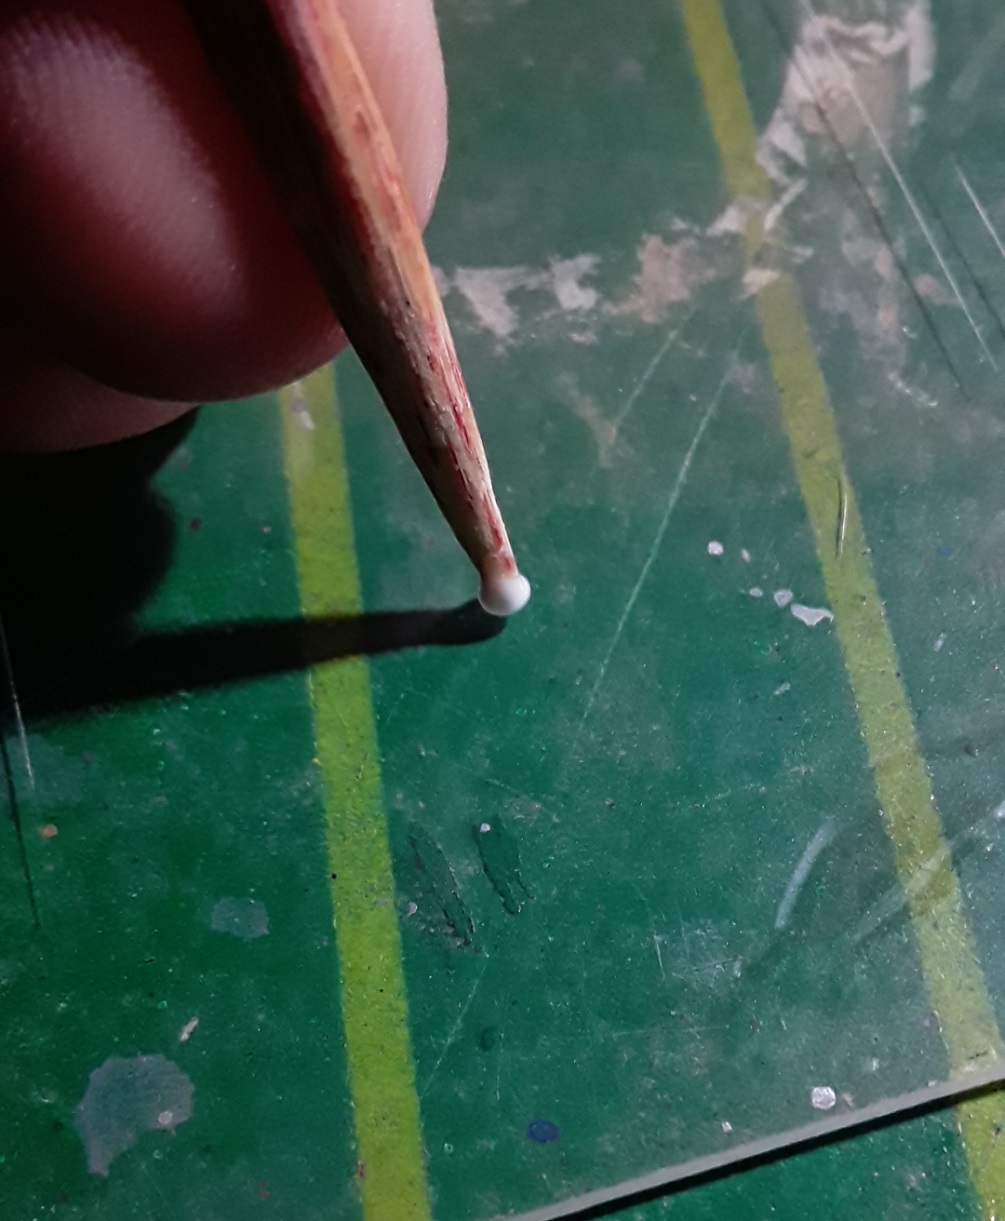
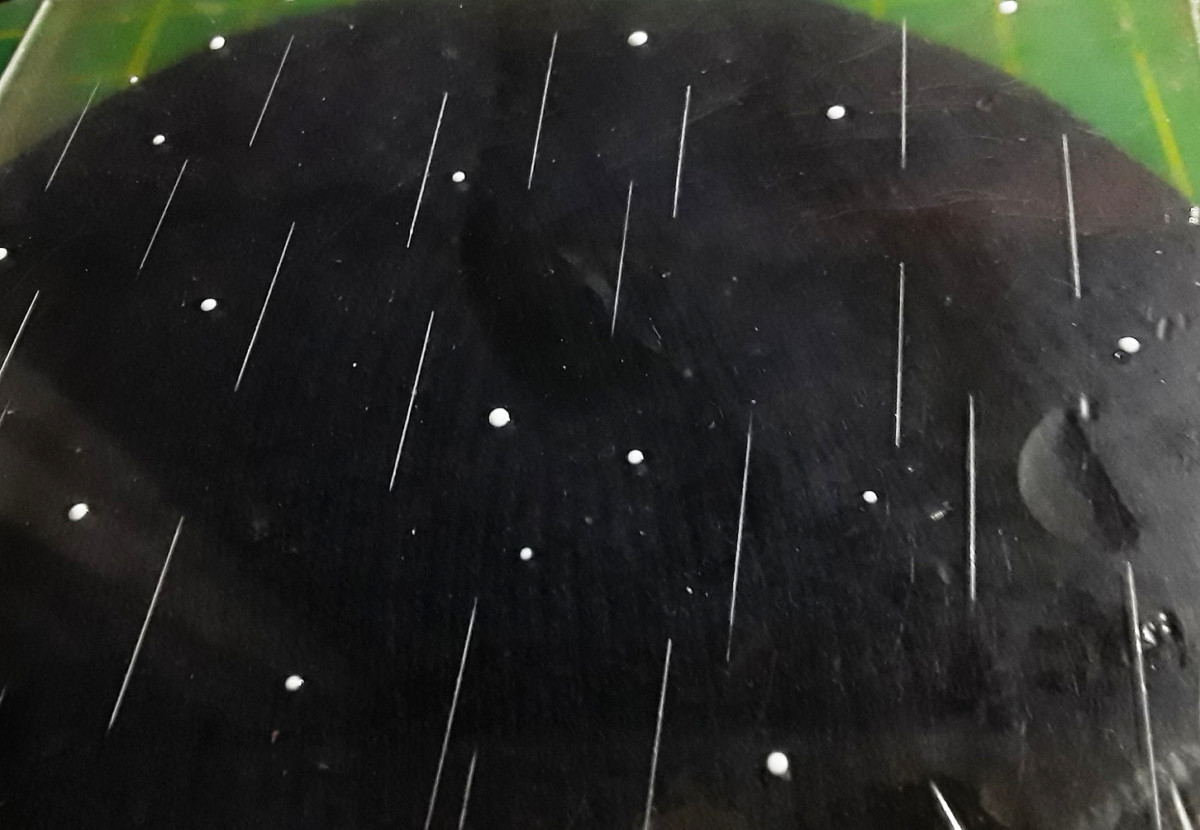
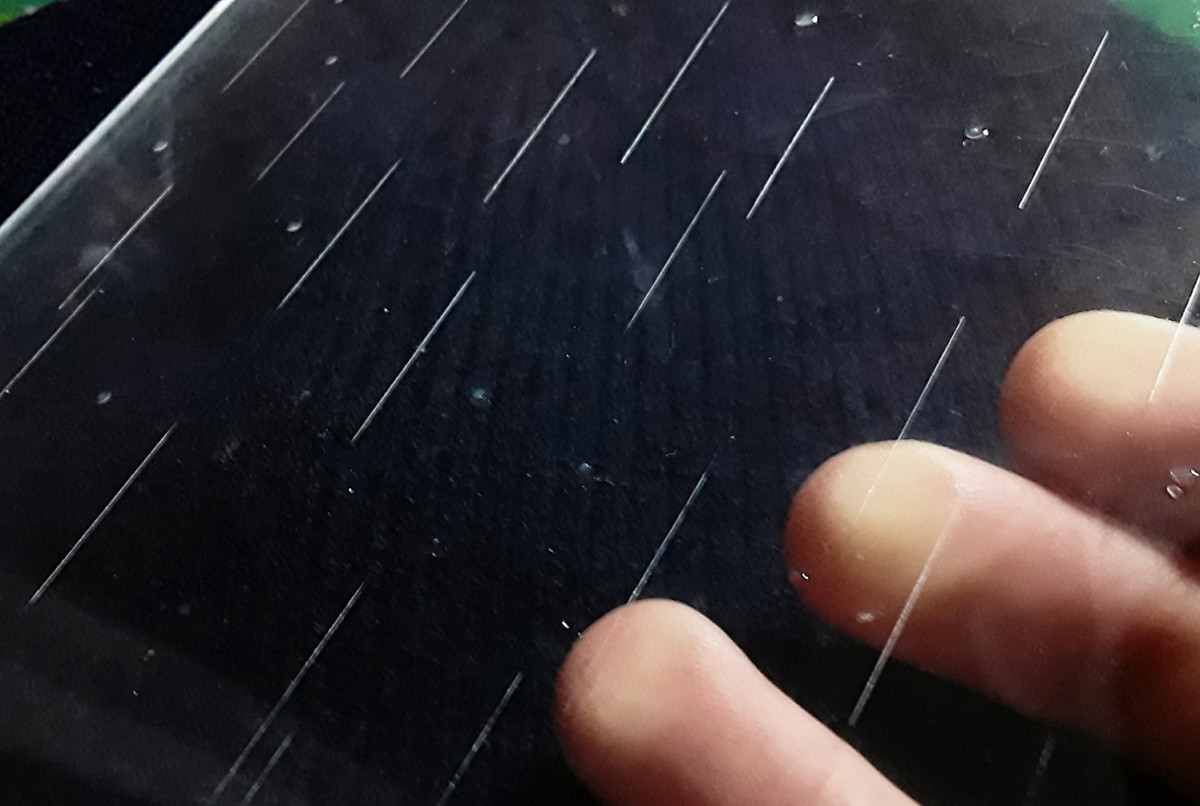
This step is far simpler than the previous one, and requires less accuracy. Just apply tiny blobs of PVA glue using a toothpick or bamboo skewer, loading different amounts to achieve a more realistic effect. Just like the falling raindrops, we want to place these randomly, so avoid having 3 aligned or equidistant dots. Other than that, feel free to play around with this technique. As you can see in the 4th picture above, the glue dries to a transparent, glossy blob that resembles a drop of water on glass.
Humid glass
Another easy effect we can apply on the transparent piece is humidity/condensation. Once again, we’re using standard PVA glue due to its glossy and see-through appearance when dry. For this step we can be a bit more unrestrained than the previous one.
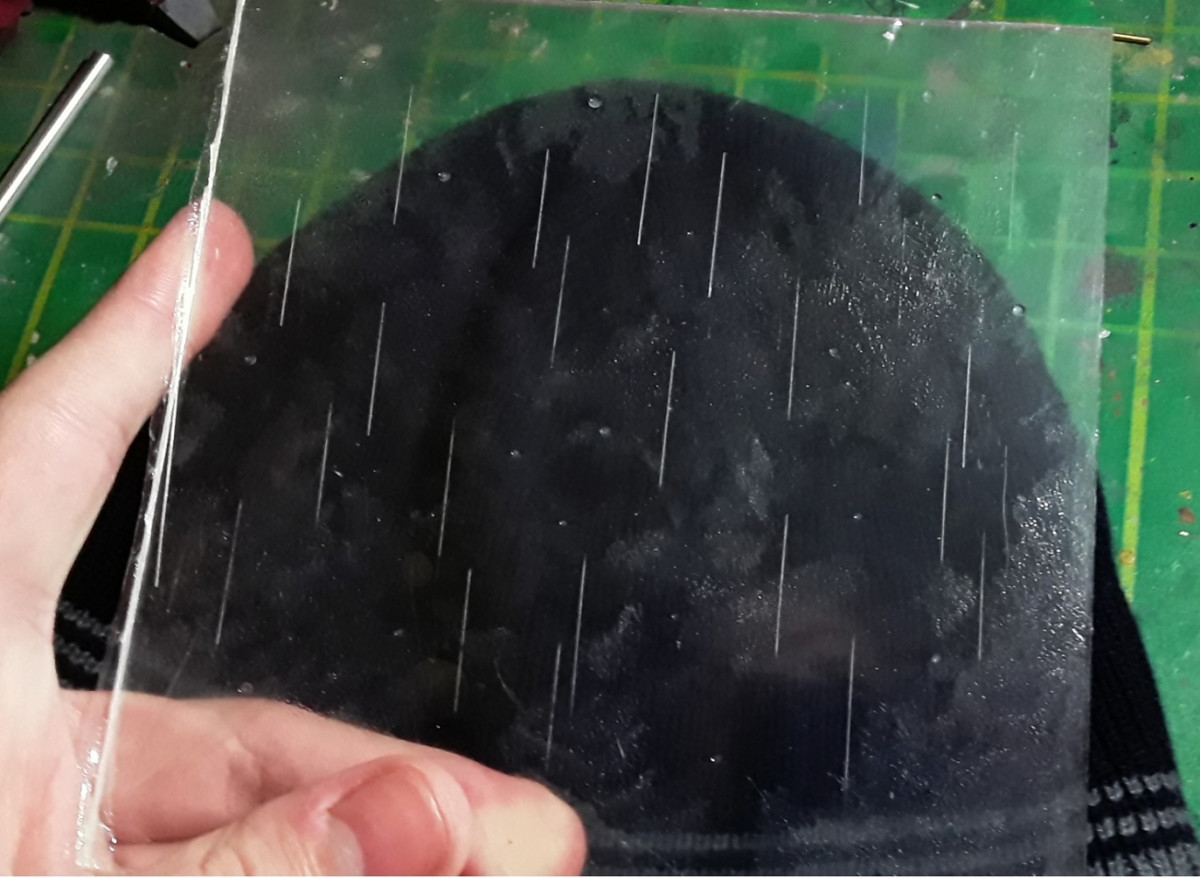
It’s as simple as stippling glue onto the piece in thin layers, leaving some areas untouched. I didn’t need to do more than two layers since I want the effect to be moderate, but you can perfectly go in with the brush 3-5 times if you’re after a more dramatic look. Just be sure to let the glue dry between coats.
Corner between the sheets
After applying the effect on the other sheet, we’ll need a corner piece we can glue the parts to. Evergreen Strip Styrene angles are perfect for this sort of job. I want the pieces to have a decent contact area, so I’m going with 6.4mm, the biggest size available.
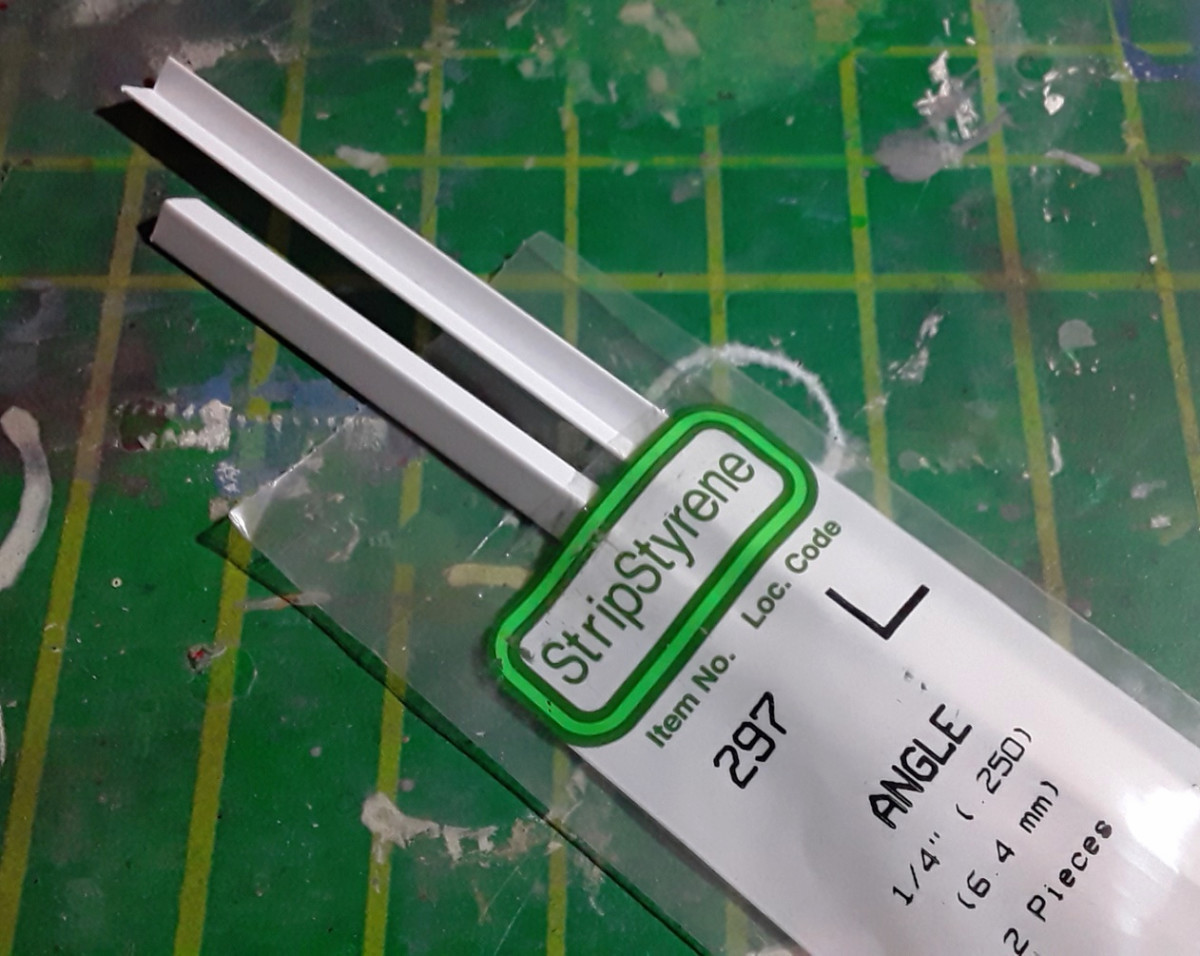
I cut out a piece that matched the size of the sheets, lightly sanded the ends and then painted it with Mr. Color #8 Silver. All that’s left now is to glue the three parts together using a box as a guide, to ensure the plates are at a 90º angle.

With this, the rain effect is finished! I could’ve made some extra rain effects directly on the base, like in Lydie Queyroi’s famous “L’orage avant la gloire” diorama. Those are relatively easy to do with PVA glue or stretched clear plastic, but they’re permanent; once we add them to the scene we can’t remove them. Throughout the entire process of building this model, my aim was to be able to display it with and without the rain effect. The technique of the two transparent sheets was the most effective way I found to achieve that. Additionally, by rotating the plates by 90 degrees, we’re able to display the rain effect from any angle we want. If we want to look at the model from behind with the effect, we can easily do that in a couple of seconds by changing the placement of the sheets.
Final touches
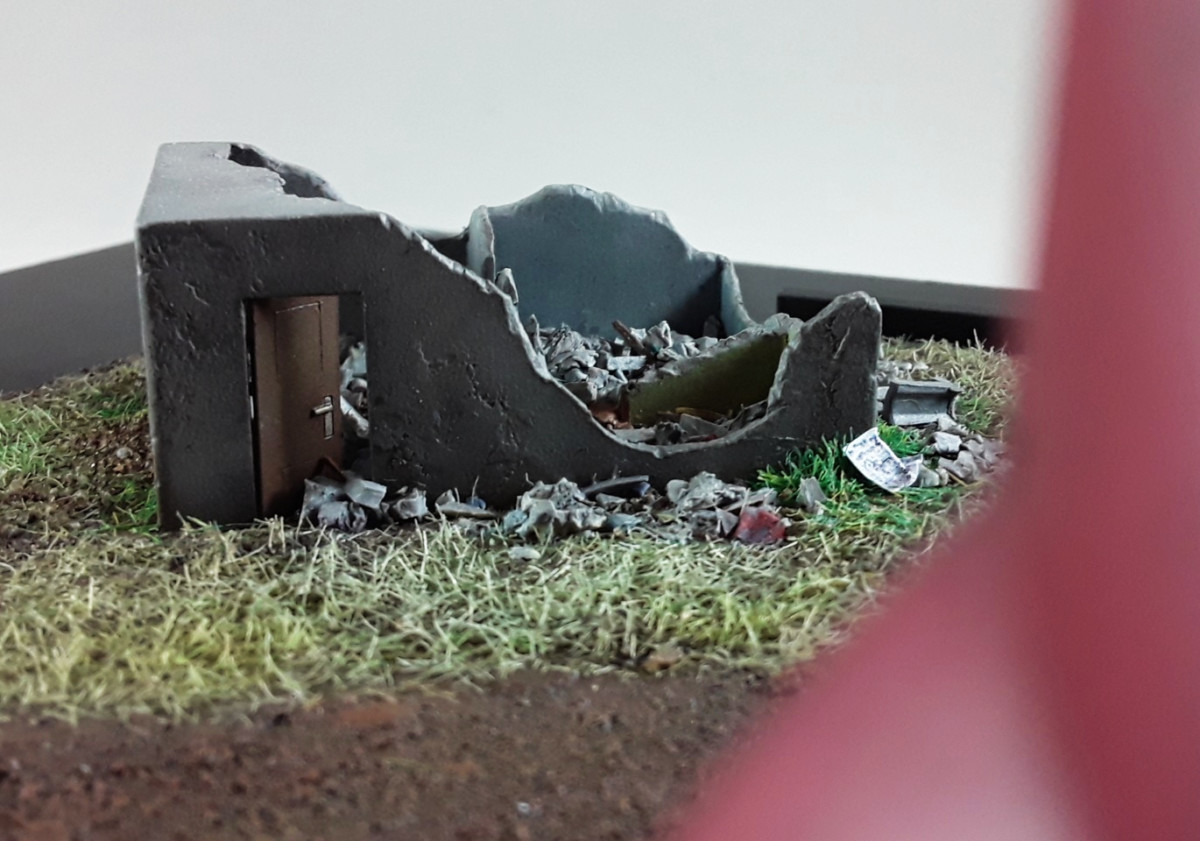
We’re almost done! To conclude the build, I added a few minor things here and there, such as a piece of brass rod to hold the Galbaldy in place. I drilled one hole on the base and one on the left foot. The pin was attached to the base, and the fit is tight enough to keep the model standing just fine without the need of repeating this step for the other foot.

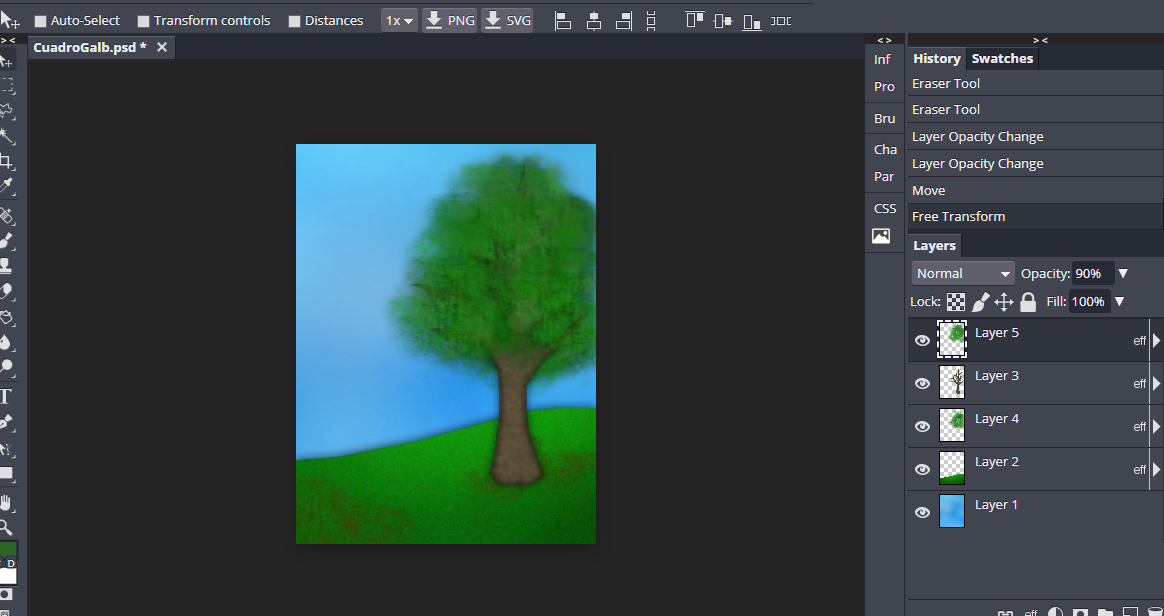
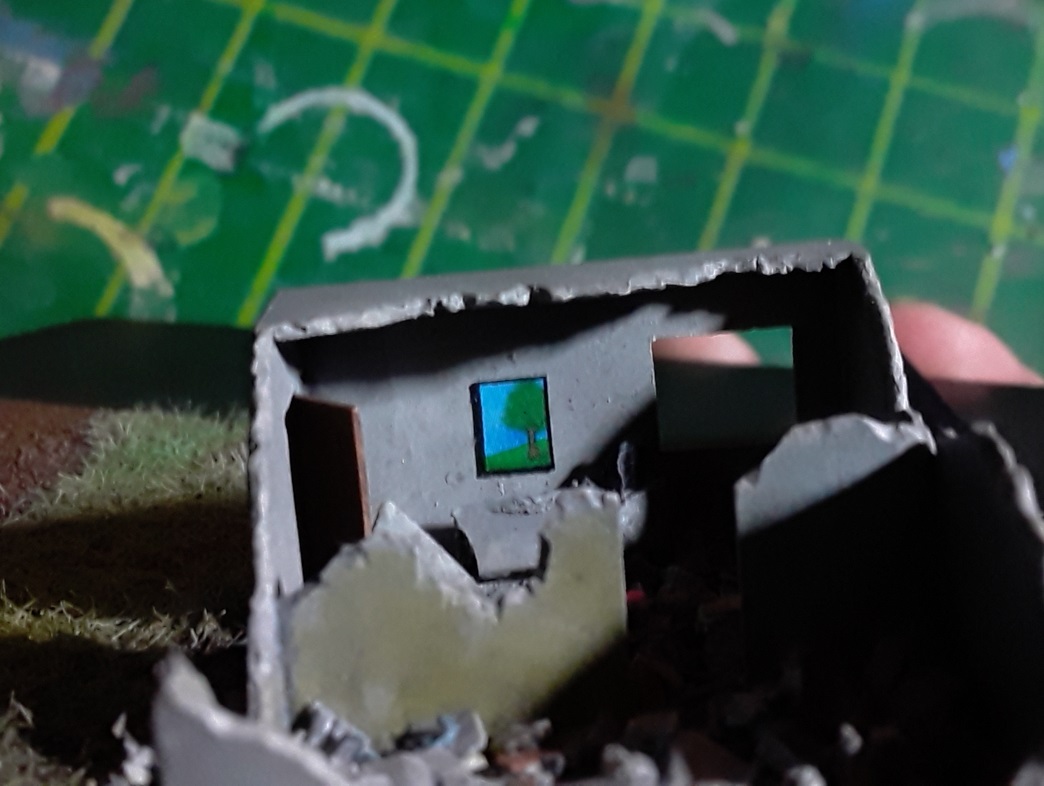
I wanted to add some extra detail to the inside of the derelict house, so I made a generic decorative painting (click here for the original file) on an online tool similar to Photoshop and had it printed in the best possible quality.
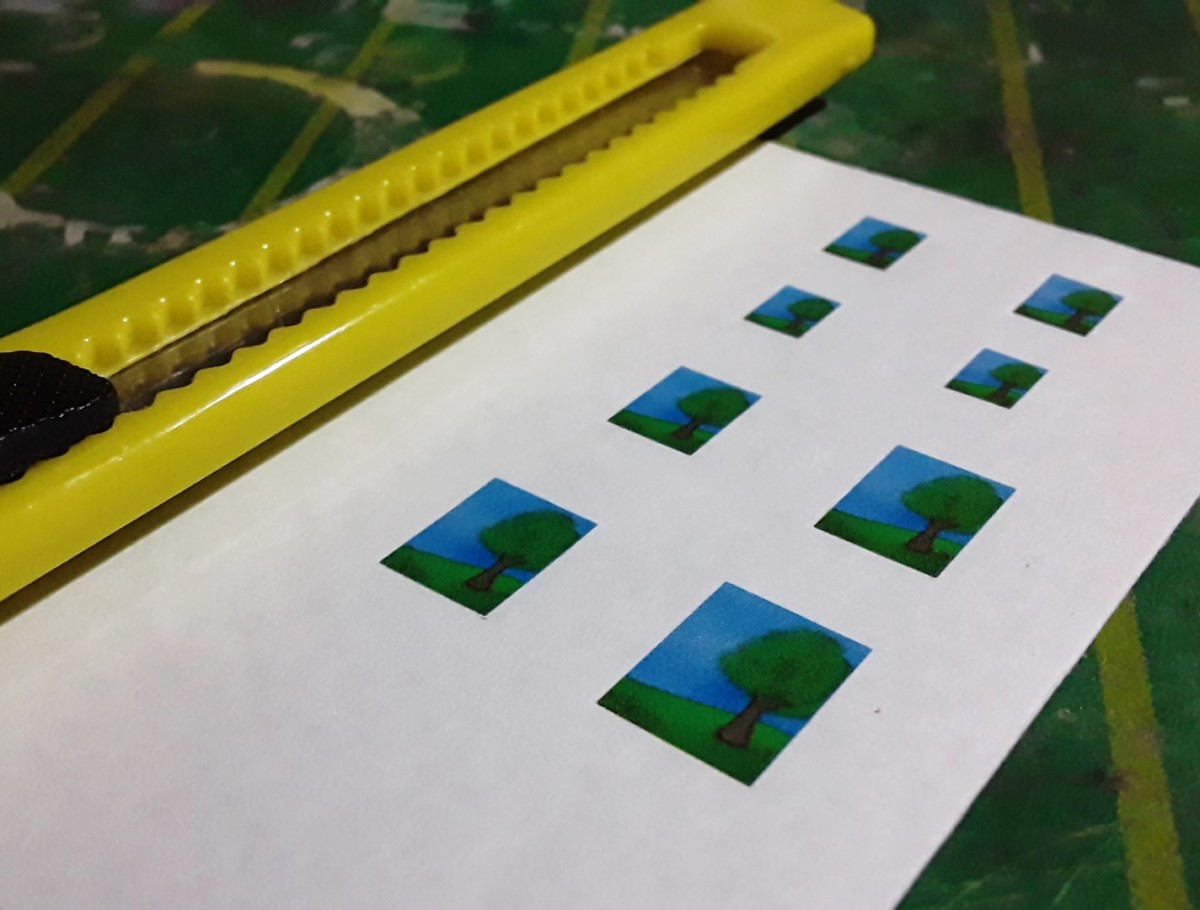
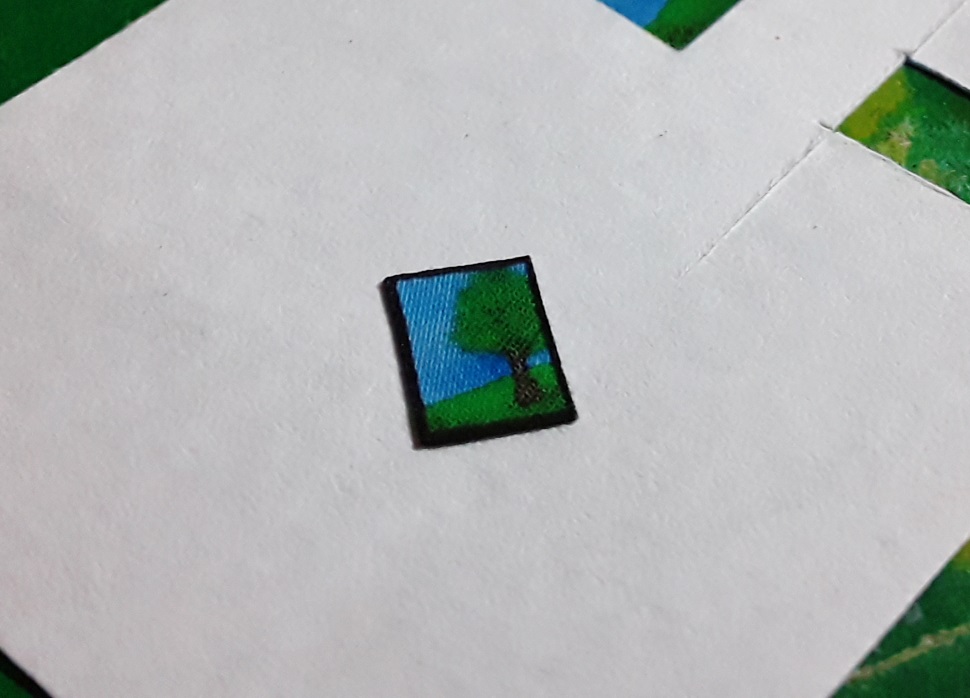
I copy-pasted it and resized a few times on the document to have different sizes to choose from. Then I went in with a black marker around the edges to emulate a frame, let the ink dry for a couple of minutes and glued it onto the wall.
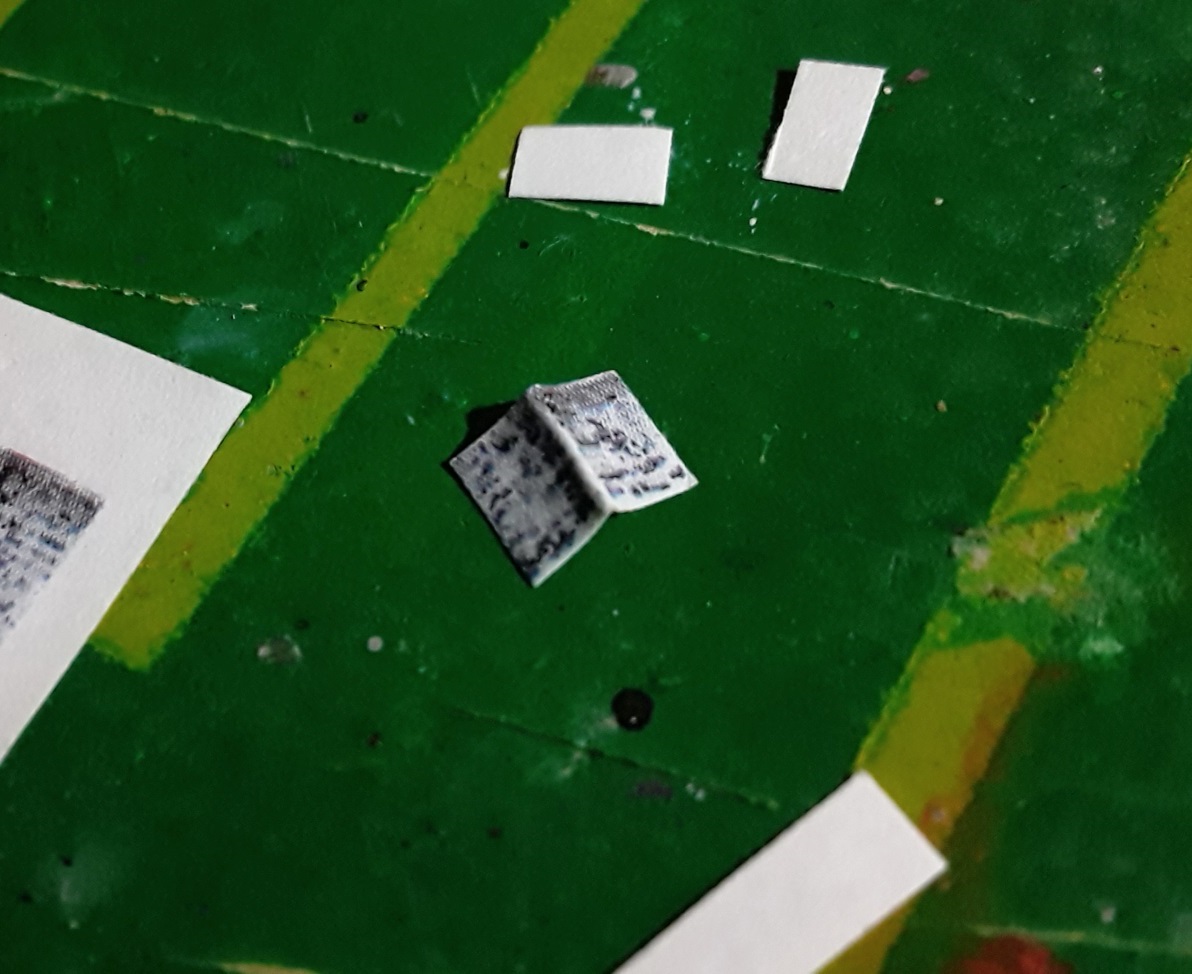
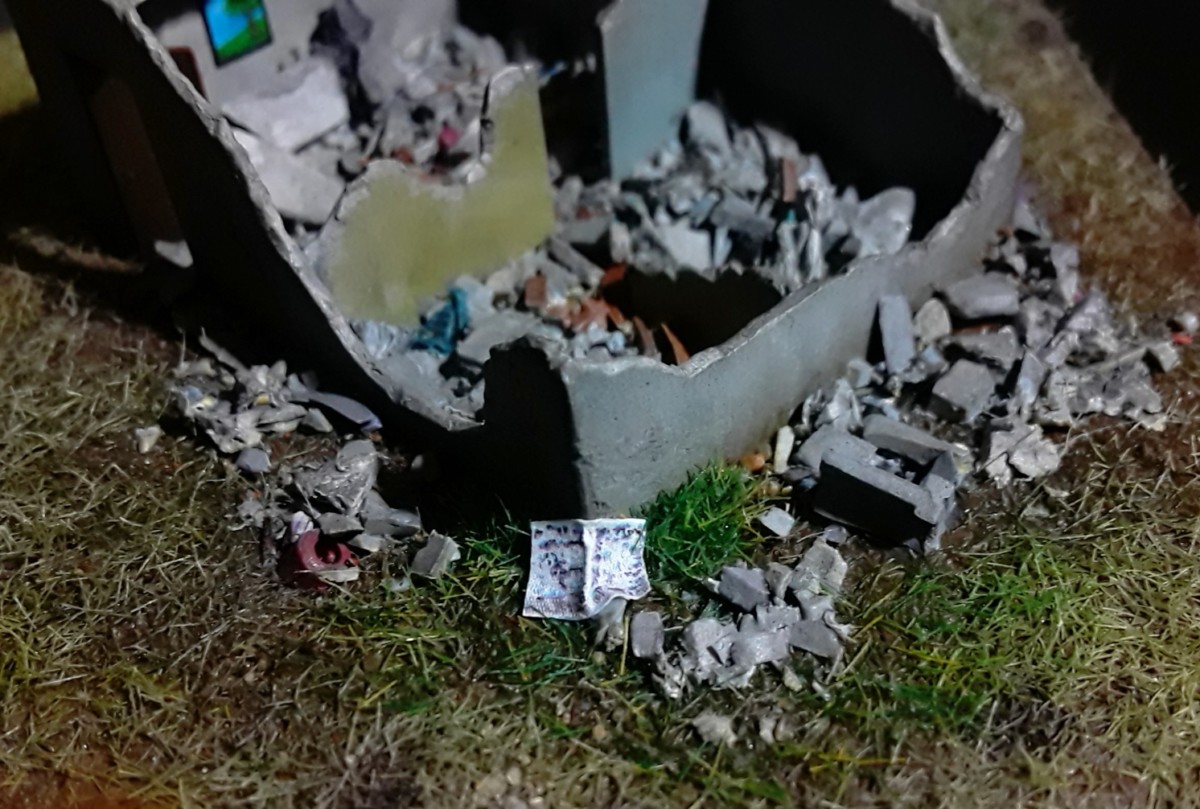
Next, I added a common element in my diorama builds: a newspaper (click here for the original file). This is just my local newspaper that I scanned, edited a little, and printed.
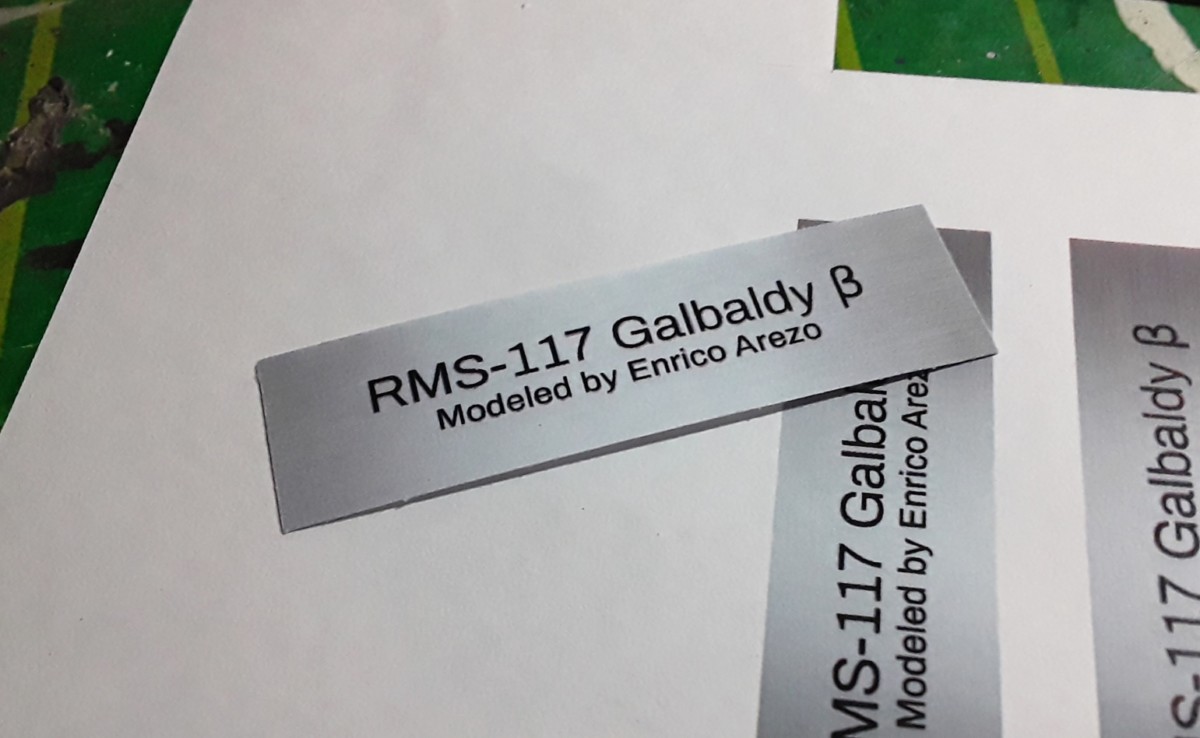
Finally, the plaque. I designed a sign with the name of the model over a sort of aluminum texture, which glued onto the little styrene plaque we painted in the last update after giving the latter a light sanding, to give the paper a rougher surface to stick to. I used glue stick because it doesn’t create volume between the plastic sheet and the print.
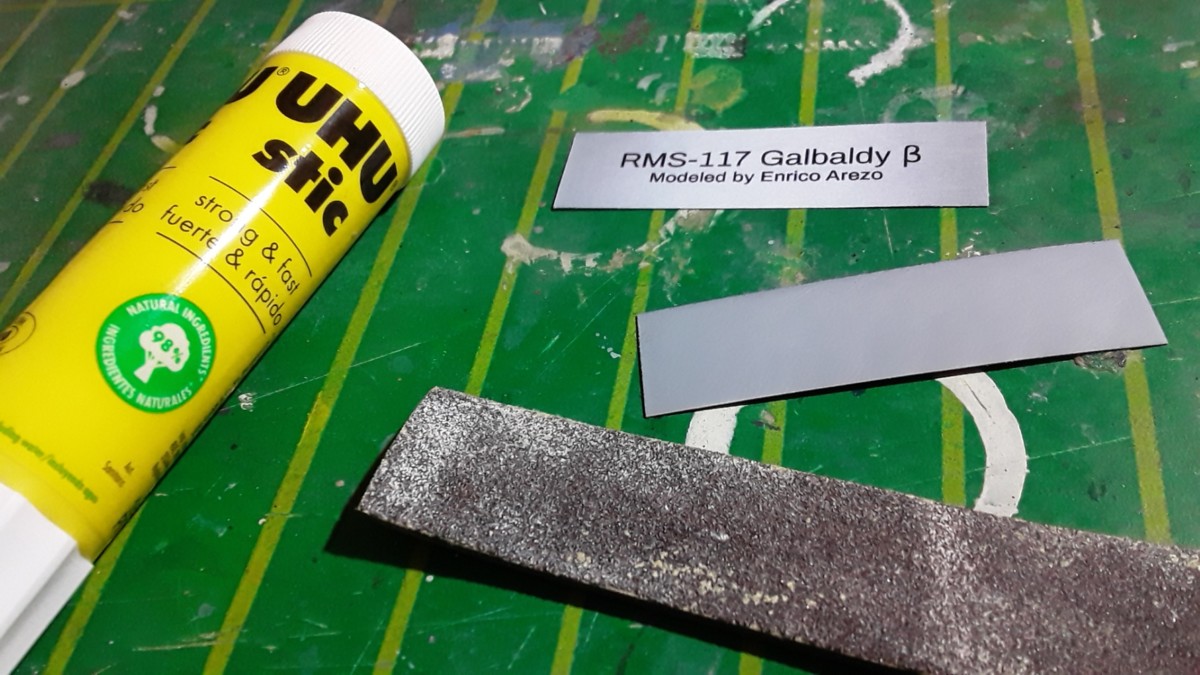
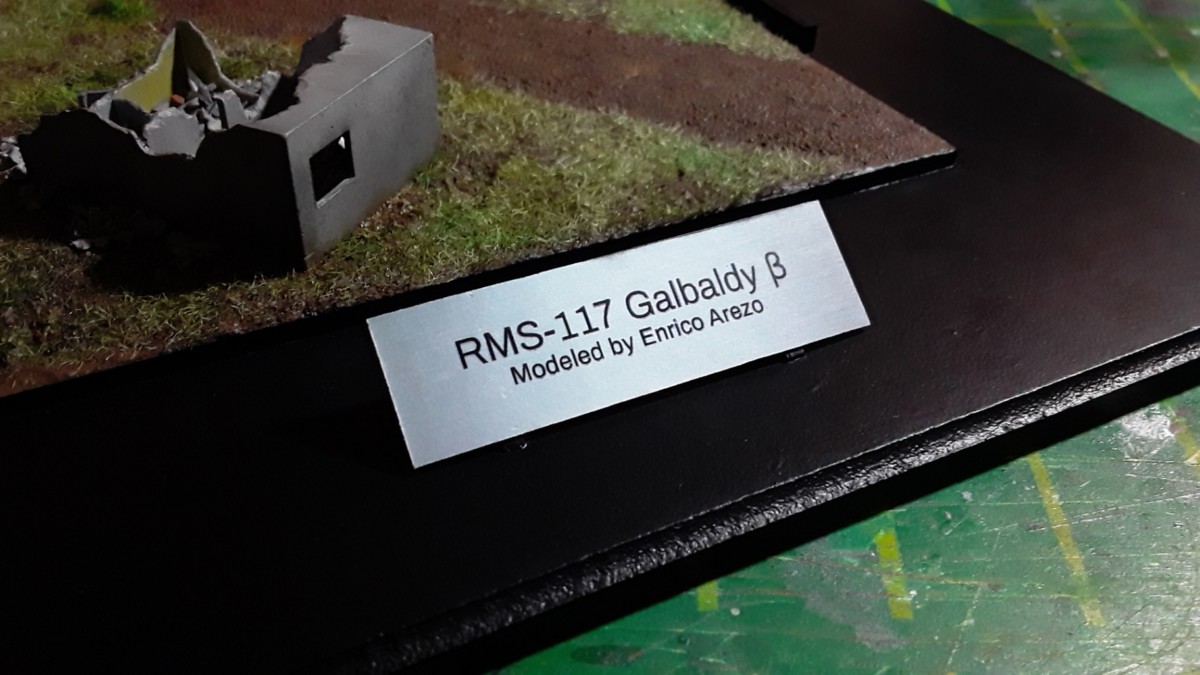
Once the glue dried, I went over the edges with a black marker so the white from the bare paper wouldn’t show. Then the last step was to glue the plaque onto the support pieces on the base; and with that, the Galbaldy Beta diorama is officially complete!
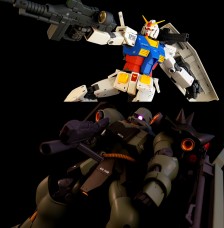
Final product
As a big fan of natural lighting in diorama pictures, my plan was to take the final pictures of this build outside. Needless to say, since we made the rain effect, I had to wait for a cloudy day. However, I waited for a while and every single day would be sunny, despite the fact that we’re in winter down here.
So at one point I decided to just try my best with artificial lighting, because otherwise I’d keep delaying the publication of this update. I’ll still take some photos outside when it’s cloudy eventually, and post them to my social media (links below); but for now, here are my shots of the Galbaldy!
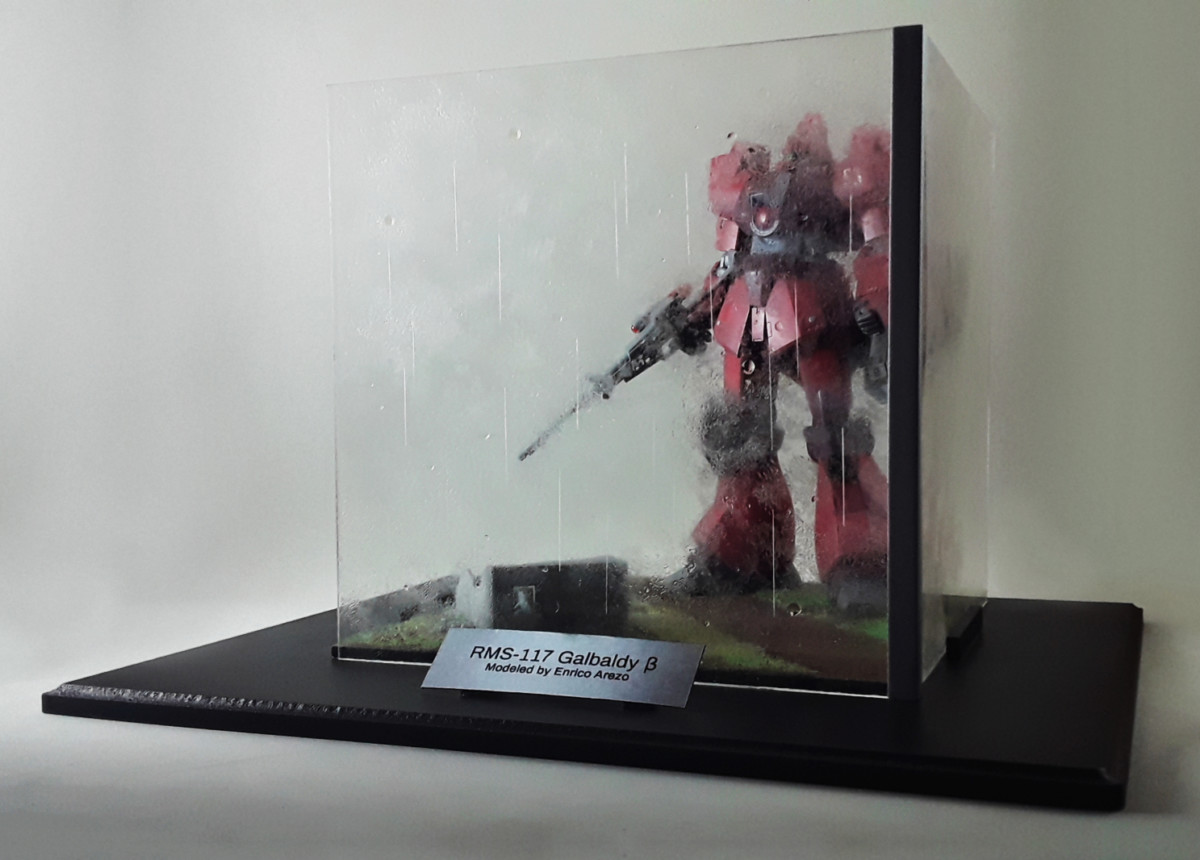

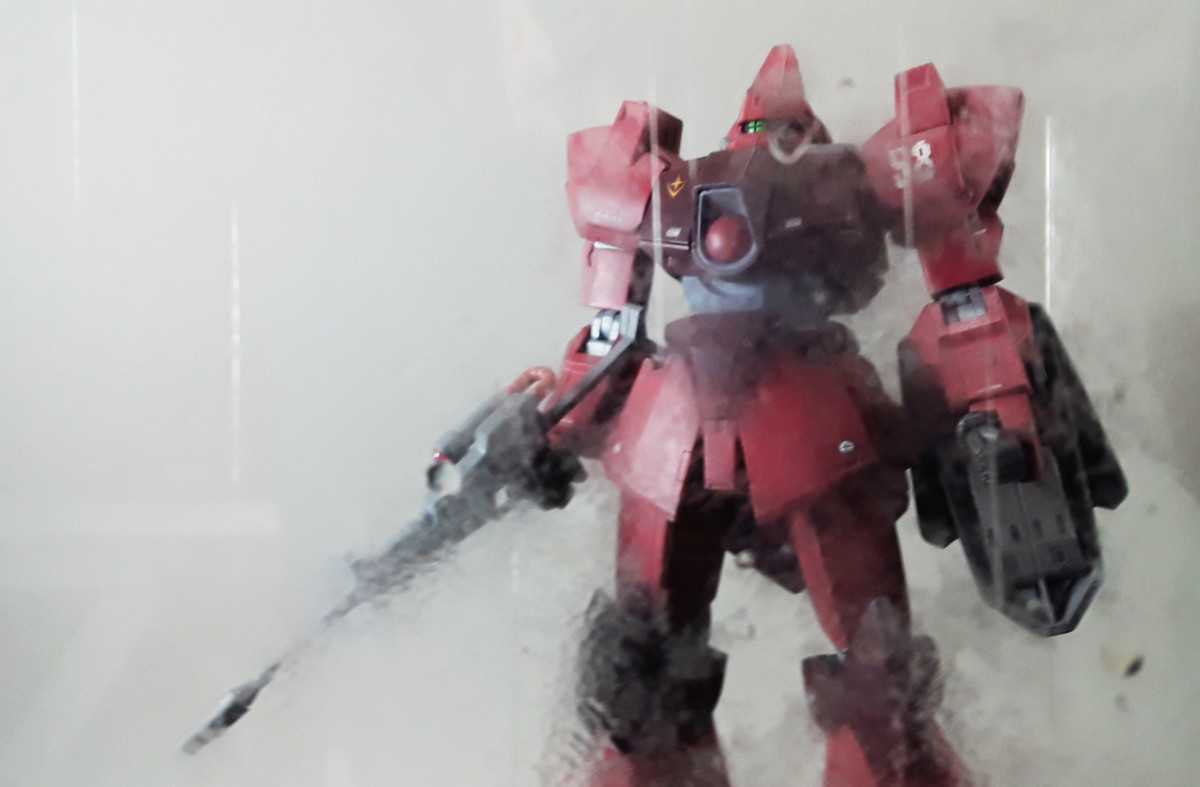
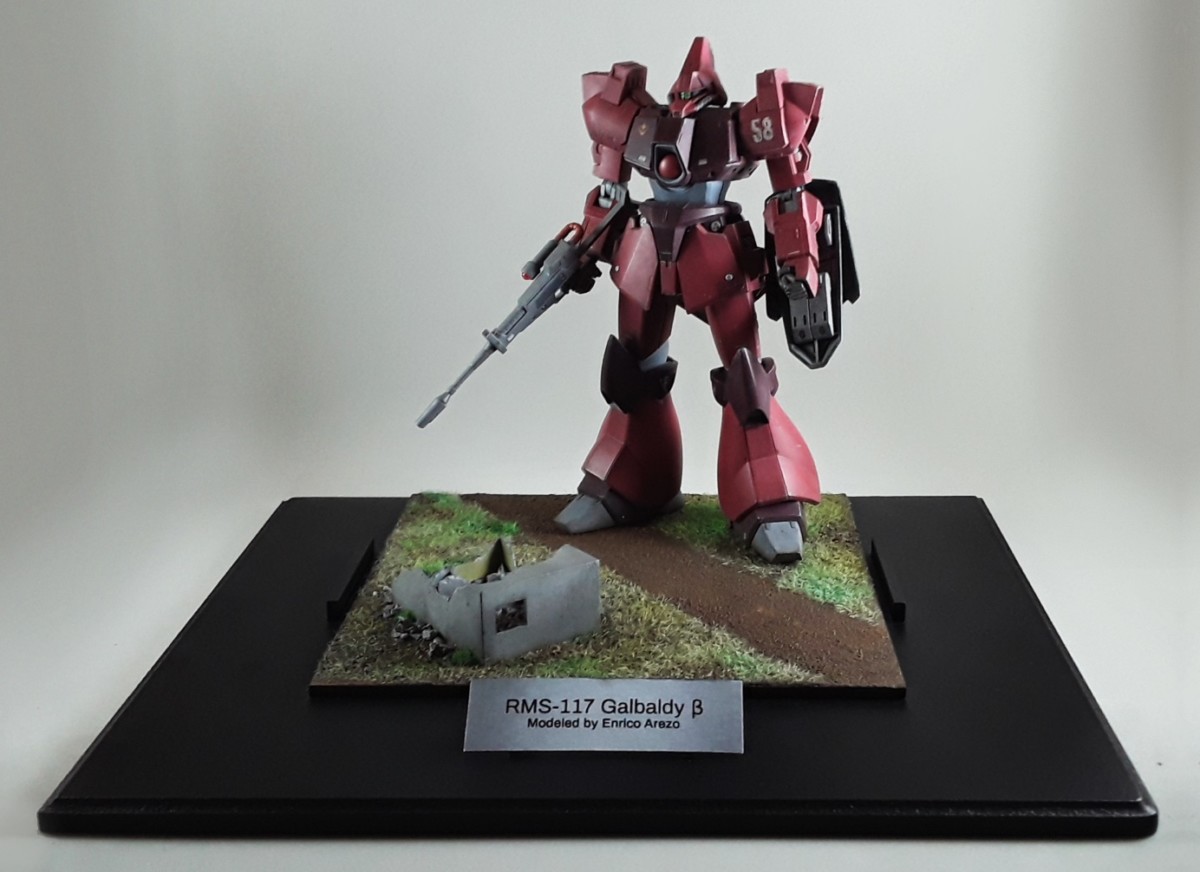
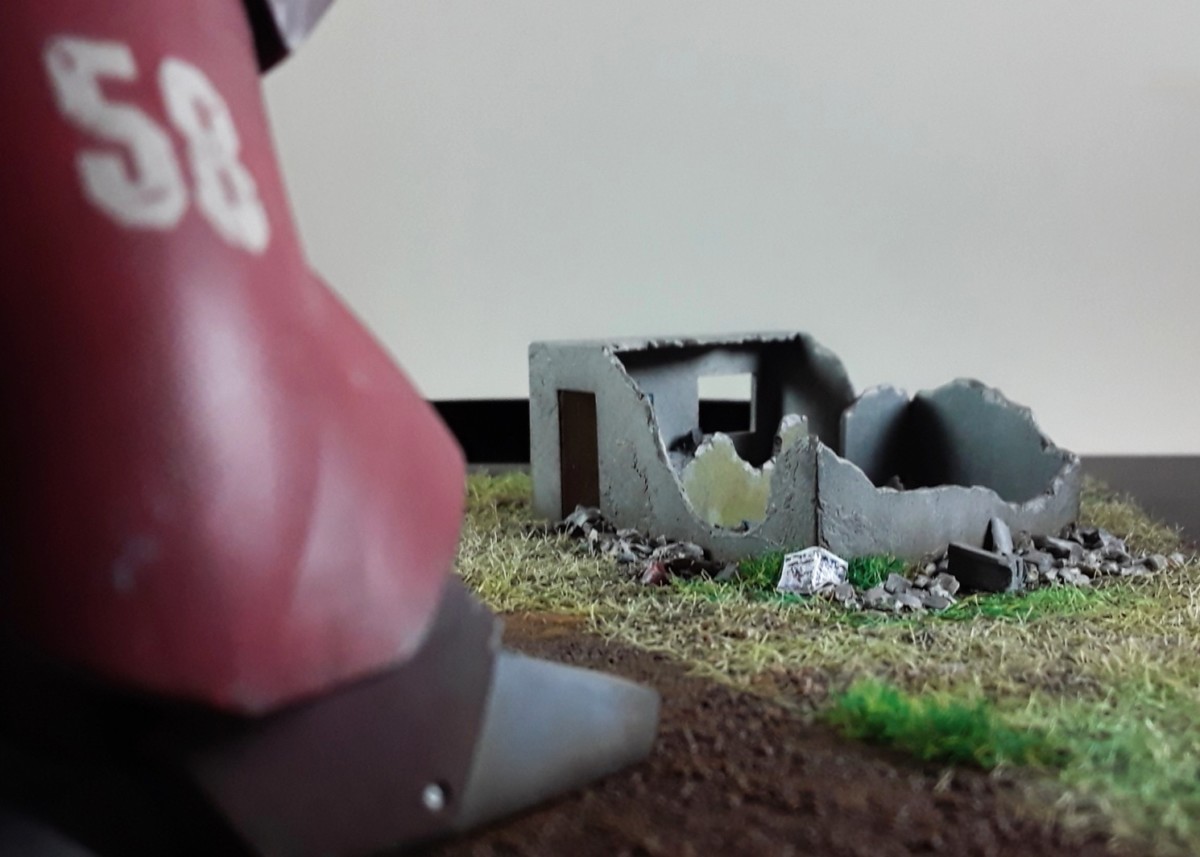
Being able to display the model with and without the rain effect is a big plus, in my opinion. We can put on the plates when we are after a dramatic effect and take them off when we want to observe all the small details like the debris and the panel lines we scribed. Personally, I prefer to look at it without the effect, but I’m pretty sure that’s because I haven’t had the chance to see it under the always awesome filtered sunlight of a cloudy day.
Anyway, that’s it for this update and this series! If you’ve been following along, thank you very much; and if you haven’t, check out the previous guides! I tried my best to show you how I build a model and diorama base from start to finish, explaining the steps in depth and documenting everything with photos. I will be starting a new build soon, where I’ll be changing my approach and focusing more on specific techniques, so we can put out content more often. Stay tuned, and until then… happy modeling!


![All Japan Model & Hobby Show 2022 [Gallery]](https://hobbylink.tv/wp-content/uploads/2022/09/Hobby-Event-1280-High-Quality-224x126.jpg)